Oreo Muffins (Oreo 小松饼)

IMG_9898

INTRODUCTION

Oreo is a trendy cookie and it seems that any recipes that have Oreo cookies will receive great attention. It is definitely one of the most successful product that Nabisco has introduced.

IMG_9874

My kids loved to eat Oreo and since I have a packet at home, I thought I might as well churn into some Oreo muffins and share with readers. Since October 2014, I has only shared one muffin recipe  it is time to create some recipes.

IMG_9880

You will be surprised that readers who excel in the preparation of chiffon and ogura cakes failed terribly in the preparation of muffins. Again, for muffins, not to over mix the batter is critical.

IMG_9886

Essentially, muffin is just a mixing of dry and wet ingredients lightly and swiftly.. Unlike other cake batters that need to mix until well combined, always remember that lumpy batter is acceptable or recommended for muffins. If you stir too much, gluten will be formed and your muffin will become kuih like structure.

IMG_9890

Preparation of muffins is fast, baking is also fast and taste is good. It is very suitable for working mothers.

IMG_9888


WHAT IS REQUIRED

Servings: 6-7 medium muffins depend on size.

IMG_9856

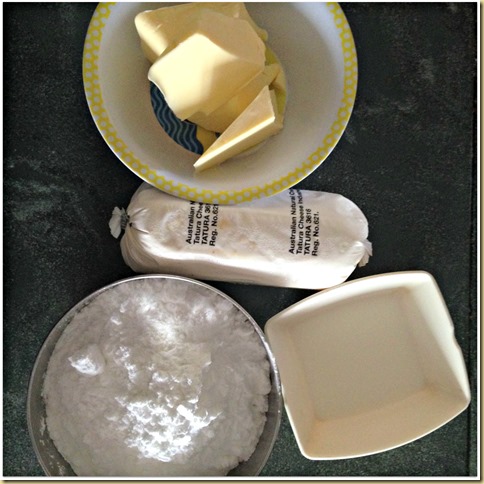
  • 125 grams of butter (melted)
  • 125 grams of brown sugar or castor sugar
  • 120 grams of self raising flour
  • 100 grams of Oreo biscuits
  • 50 grams of fresh milk
  • 2 eggs
  • 1/8 teaspoon of baking soda (optional)
  • Extra 2-3 Oreo biscuits for toppings

IMG_9882


STEPS OF PREPARATION

  • Pre-heat the oven to 180 degree Celsius.

PicMonkey Collage1

  • Melt the butter in the microwave. Add the beaten eggs and milk , stir until well combined. Set aside.

  • In a food processor, blend Oreo biscuits until fine. If you do not have a food processor, you can always put in a plastic bag and use something hard to pound it .

PicMonkey Collage2

  • In a mixing bowl, put self raising flour, baking soda, brown (or castor) sugar , stir until well mixed.Make a well in the centre.  Gradually pour the egg and butter mixture. Use a fork or tablespoon to lightly and swiftly mix the batter. Note that lumpy batter is acceptable.

  • Transfer the batter to the muffin cups filling at least 80% full. Top with additional Oreo crumble if preferred.  Bake in the pre-heated oven of 180 degree Celsius for 15-20 minutes or when a skewer inserted into the centre comes out clean. Timing will depend on size of muffin and individual oven. Muffin taste better after one night of resting.

IMG_9892


CONCLUSION

All muffin recipes are simple and straight forward and do give it a try if you are an Oreo  fan.

IMG_9894

Hope you like the post today. Cheers and have a nice day.

IMG_9876


For more recipes, you can refer to my RECIPE INDEX (updated as at 13 March 2015)  here and you can follow me at PINTEREST or visit the blog’s FACEBOOK PAGE to keep abreast of my future posts. Also follow me at INSTAGRAM or TSU, a new social network for some more personal sharing other than recipes.

food bloggers[4]

Food paradize[8]

You can also join the FOOD BLOGGERS AND FOODIES UNITED FACEBOOK GROUP and FOOD PARADISE 美食天堂 to see more recipes. I am posting my daily home cooked food in the above Facebook Group daily. I would be more than happy if you can  post in the Group for the recipes that you tried from my blog.

pinterest[4]

If you are a Pinterest user and you are interested to have more recipes, you can join or follow this Pinterest Board set up by me  where there are more than 2600 recipes worldwide and pinned by various bloggers: FOOD BLOGGERS AND FOODIES UNITED PINTEREST BOARD.

IMG_9868

Chocolate Crinkles Cookies (巧克力皱纹曲奇)

IMG_9379

INTRODUCTION

Members of Facebook Group is asking me for Christmas cookies recipe. I do have some recipes in the previous year and i thought I might also share some new recipes this year.

IMG_9371

The recipe that i have chosen is chocolate crinkle cookies. Hmmm, I do not know when this cookie become popular and it seems that in the recent months, i have seen a few posts of this cookies.

IMG_9385

The cookies look rather different from other cookies. It has a unique outlook resemble a mushroom . This was  resulted from the dough expansion during cooking. As it expands, a unique design is created.

IMG_9365

It is a dark chocolate cookies that are very chocolaty , soft and chewy in the inside and firm on the exterior. Personally, I think it is a rather presentable trendy gift to be given to friends..

IMG_9359

Preparation is very easy. The rule of soft chewy cookies is not to over bake the cookies. If you prefer crispy cookies, you will need to  extend the baking timing.

IMG_9395


WHAT IS REQUIRED

Servings : About 25-30 cookies

IMG_93391

  • 50 grams of butter, at room temperature
  • 200 grams of dark  cooking chocolate
  • 80 grams of white sugar
  • 2 eggs
  • 200 grams of self raising flour
  • 1/8 teaspoon of baking soda
  • 100 grams of icing sugar (for dusting)

IMG_9397


STEPS OF OPERATION

PicMonkey Collage1

  • Microwave the cooking chocolate for 1 minute. Set aside for cooling. You can also melt the chocolate using ban marie method.

  • In a stand mixer, cream the butter and sugar until light and fluffy. Add the melted chocolate follow by the eggs. Beat until well combined.

PicMonkey Collage2

  • Sift in the flour and baking powder, use the machine lowest speed and stir until well combined. Chill the dough in the fridge until the dough is firm enough and does not stick to your hand .

  • Pre-heat the oven to 165 degree Celsius.

PicMonkey Collage3

  • Take about 1/2 tablespoon of the dough, use hand to shape round and put it in the bowl of icing sugar. Roll it and let the dough coat as much icing sugar as possible. Transfer to the baking tray and leave adequate space for expansion. (at least 5-6 cm apart)  Bake in the pre-heated oven of 165 degree Celsius for 8-10 minutes or until the edges are slightly firm.

IMG_9383


CONCLUSION

This cookie is addictive and definitely suitable for a chocolate lover. I have already cut the sugar by 20% in this recipe and I will not recommend any further reduction. I hope this will benefit those readers who are looking for some Christmas cookies. You can easily modified this recipe by adding some red colouring and become a red velvet crinkle cookie.

IMG_9369

Hope you like the post today. Cheers and have a nice day.

IMG_9391


For more recipes, you can refer to my RECIPE INDEX (updated as at 13 March 2015)  here and you can follow me at PINTEREST or visit the blog’s FACEBOOK PAGE to keep abreast of my future posts. Also follow me at INSTAGRAM or TSU, a new social network for some more personal sharing other than recipes.

food bloggers[4]

Food paradize[8]

You can also join the FOOD BLOGGERS AND FOODIES UNITED FACEBOOK GROUP and FOOD PARADISE 美食天堂 to see more recipes. I am posting my daily home cooked food in the above Facebook Group daily. I would be more than happy if you can  post in the Group for the recipes that you tried from my blog.

pinterest[4]

If you are a Pinterest user and you are interested to have more recipes, you can join or follow this Pinterest Board set up by me  where there are more than 2600 recipes worldwide and pinned by various bloggers: FOOD BLOGGERS AND FOODIES UNITED PINTEREST BOARD.

 IMG_9367

Classic Carrot Cake With Cream Cheese Frosting (红萝卜蛋糕)

IMG_8577

INTRODUCTION

I have prepared this carrot cake twice using two different recipes..

IMG_8561

The first recipe is from the net and it has the shape but i did not like the texture and I do not think my readers will like this type of dense texture.. It was very dense possibly because golden syrup was used and it took very long hours to bake and hence the crust is rather thick. Having said that, my family members still finished all possibly because of the delicious cream cheese frosting.

IMG_8565

Two days later that is today, i have decided to design a recipe of my own based on my carrot muffin recipe. In my humble opinion, it tastes much better and is very suitable for the cake. The only thing that can be further be improve is the doom shape of the cake. That possibly is due to my smaller pan used and I have to cut off the doom to level it. The cake is fluffier and overall, it just suits my taste buds,

IMG_8773

Therefore in this post, there are two sets of images but what I am sharing is my newer and better recipe. For traditional cake, I have opt to  use traditional rugged style of decoration and I never believed that it must be decorated with carrots made from fondant icing or butter cream.. By the same logic, is it not a sponge cake needs to be decorated using eggs or chocolate cake must be decorated with pieces of chocolate? Well, it is up to reader to decide but I have used some chopped pecan nuts for the topping which in my humble opinion is elegant and goes well with the cake.

IMG_8765


WHAT IS REQUIRED

Servings: Prepare an 8” diameter cake

IMG_87291

  • 150 grams of melted butter or cooking cooking oil
  • 150 grams of carrots (shredded)
  • 150 grams of brown sugar
  • 100 grams of self raising flour
  • 100 grams of plain flour
  • 100 grams of chopped walnuts or pecan nuts
  • 50 grams of fresh milk
  • 1/2 teaspoon of baking soda
  • 1 teaspoon of mixed spice or cinnamon powder (optional)
  • 3 eggs

IMG_0924

  • 250 grams of cream cheese, at room temperature
  • 50 grams of butter, at room temperature
  • 250 grams of icing sugar
  • 2 teaspoons of milk
  • 1/2 teaspoons of lemon juice

  • Additional 1/2 cups of chopped pecan nuts or walnuts for decoration
  • Some additional mixed spices for decoration

IMG_8763


STEPS OF PREPARATION

  • Pre-heat the oven to 170 degree Celsius and lightly grease a 8” diameter round baking tin.

PicMonkey Collage1

  • Shred the carrots until fine and blend the pecan/walnuts until coarsely. Set aside.

  • In the bowl with shredded carrots, add the milk and lightly beaten eggs. Stir until well mixed. Add the brown sugar , stir until well combined.

PicMonkey Collage2

  • Sift in the dry ingredients (self raising flour, plain flour, cinnamon powder or mixed spices) into the wet ingredients bowl in three stages. Use a fork to swiftly and quickly fold it until well mixed. Transfer the batter to the lightly greased tin, level and bake in the pre-heat oven of 170 degree Celsius for about 45 minutes or when a skewer inserted comes out clean. Cool the cake completely before proceeding to the next step.

IMG_0929

  • Beat the cream cheese until light and fluffy. Add softened butter, beat until well combined. Add icing sugar follow by the milk and lemon juice. Beat for 2-3 minutes until well mixed.

PicMonkey Collage3

  • Take out the cake and cut into two equal halves. If there is a doom on the cake, slice it off if preferred. Apply generously the cream cheese frosting on top and the side of the cake. Sprinkle some additional mixed spices and chopped pecans/walnuts before serving. If the frosting is too soft, chill in the fridge for 15 minutes before application.

IMG_8567


CONCLUSION

This is a much simpler recipe that yields better taste and texture than the first recipe that I try. If you are looking for a carrot cake recipe, you may want to consider this simple recipe.

IMG_8563

Hope you like the post today. Cheers and have a nice day.

IMG_8767


For more recipes, you can refer to my RECIPE INDEX (updated as at 13 March 2015)  here and you can follow me at PINTEREST or visit the blog’s FACEBOOK PAGE to keep abreast of my future posts. Also follow me at INSTAGRAM or TSU, a new social network for some more personal sharing other than recipes.

food bloggers[4]

Food paradize[8]

You can also join the FOOD BLOGGERS AND FOODIES UNITED FACEBOOK GROUP and FOOD PARADISE 美食天堂 to see more recipes. I am posting my daily home cooked food in the above Facebook Group daily. I would be more than happy if you can  post in the Group for the recipes that you tried from my blog.

pinterest[4]

If you are a Pinterest user and you are interested to have more recipes, you can join or follow this Pinterest Board set up by me  where there are more than 2600 recipes worldwide and pinned by various bloggers: FOOD BLOGGERS AND FOODIES UNITED PINTEREST BOARD.

IMG_8575


Steamed Fruit Cake or Kek Kukus Buah (杂果蒸糕)

IMG_8167

INTRODUCTION

Being hailed from Sarawak, I have a chance to taste many Malay steamed cakes that are sinfully rich. These cake are delicious, slightly chewy and dense.

IMG_8161

If you have a chance to taste these cakes, you will definitely opt for it if there is a choice between baked and steamed cakes. These cakes are usually sold at a very high premium.. The reasons are simple, they are using very rich expensive ingredients and these cake usually take a long hours to steam to get that texture and well incorporated taste.. How long is long? It can range  from 1-2 hours to 3-4 hours of continuous steaming depending on the size of the cake.

IMG_8171

That is also the reason partially deter me from trying many delicious Malay traditional cake recipes.. Mind you, 4 hours of steaming is not a joke.. It takes lots of supervision and gas bills. But for this fruit cake, I have purposely looked for a steamed cake recipe since I already have a lot of baked recipe. The first thing that came into my mind is the Malay version or Kek Kukus buah buahan or fruit cake.

IMG_8197

Looking at the picture, one will be able to tell that the cake is very moist, almost crust less. It is dense and slightly chewy. It can be cut into very nice pieces and with a distinctive dark colour. These dark colour is specially made. Unlike western fruit cake that uses brown sugar or molasses to colour the fruit cake, the sugars are caramelized first to get the colour.

IMG_8193

Since this is a Malay recipe, very logically there is no alcohol being used. If you want , you can soak your fruit with rum or cherry wine or add a few tablespoons of rum to the the cake batter. After it is baked, spray alcohol on the cake.

IMG_8179

I must say this recipe is a keeper but the only thing that I am unsure is that it is not sweet to the my taste bud. I have reanalyse the recipe twice and I may have wrongly measure the sugar. Therefore, I will provide the original recipe and let reader try out. I especially loved the chewy texture and once you try this fruit cake, I am sure you will continue to prepare this.

IMG_8191

As discussed above, this fruit cake need 4 hours of continuous steaming for a 8”-10” tray. I do not have the patience or the kitchen gadget for the steaming. I can’t find any kitchen utensil in my house that can house an 8”-10” square pan and I will need to buy again. So what I did is to steam in a 6 inches diameter round pan. All the remaining , I put in a rectangular baking tin or 4” x 4” x 8” and i steamed bake it. Overall, it took me about 2 hours to steam this much smaller cake. and 1 hour to steam bake the other cake. Can you differentiate by look? Not really but texture wise, you will be able to tell that steamed version is much better than steamed bake. Steamed is still better than steamed baked.

IMG_8185

The round cake looked flatter and the rectangle cake seems to be fluffier. It is not true, it is my own mistake of the batter distribution. After first distribution, i found that my rectangle cake batter seems to be too little, I scoped some batter from the centre of the round tin and forget to to level it before steaming. However, for readers, you should not have this problem at all. Lastly I want to say thanks to the blogger who provided this recipe.

IMG_8163


WHAT IS REQUIRED

Recipe adapted from:  masam manis: KEK BUAH KUKUS

Servings: Prepare an 8” x 8”  cake

IMG_80961

  • 500 grams of mixed fruits
  • 350 grams of plain flour
  • 300 grams of white sugar
  • 250 grams of butter
  • 50 grams or ml of hot water
  • 3 eggs
  • 2 teaspoons of baking soda
  • 1/2 teaspoon of cream of tartar
  • 1 teaspoon of mixed spice or nutmeg powder
  • 1 teaspoon of vanilla essence

IMG_8199


STEPS OF PREPARATION

  • Lightly grease the your preferred baking tray. If you are steaming, get hold a steamer with boiling water and if steamed bake, pre-heat the oven to 160 degree Celsius.

PicMonkey Collage1

  • In a pot, put the sugar and on to medium heat. Melt the sugar until it become sugar syrup and start to turn golden brown. Add the 50 grams of hot water and stir until the sugar dissolves.

Note:

  • The colour changes from transparent sugar syrup to golden syrup can be rather fast. So, always used medium to low heat. Too brownish or golden will make you cake bitter.

  • When you add the hot water, be careful as steams will rush out and some spilling may happen. So do it carefully at low heat.

  • The main purpose of this step is to get the colour, if you prefer lighter coloured fruit cake, you can add the water faster. If you prefer darker colour, add slightly later but make sure it did not become too dark and it will become bitter.

PicMonkey Collage2

  • Melt the butter in the hot sugar syrup follow by adding the mixed fruit. Let it simmer for about 5 minutes before off the heat. Let it cool until body temperature before proceeding the next step.

  • When cooled, sift in the nutmeg powder, baking soda and plain flour, fold until it become a sticky mass. Add in the beaten eggs, stir until a smooth batter is formed.

PicMonkey Collage3

  • Transfer the cake to your preferred greased or lined baking pan. Cover the baking tin with a piece of aluminium foil.
  • For baking, place a tray of water at the lower rack of the oven, bake in the oven for about 1 hour until the cake is set and a skewer test inserts at the centre of the cake comes out clean. Timing is for your reference and very much depends on the size and height of the cake. . At 45 minutes juncture, you can open the aluminium foil and do the skewer test.

  • For steaming, steam the cake at high heat for at least 2 hours and that depends on the size and height of the cake. For a 6 inches round baking tray, it took me about 2 hours. For an 8 inches baking tray, it is expected to be at least 3-4 hours. After 2 hour juncture, you can open the aluminium foil and do the skewer test. Watch out for the water level and you may need to refill the hot water. Set aside a kettle of hot boiling water for this purpose.

  • The cake will further develop its taste after resting 1-2 days.

IMG_8181

Note:

  • If you want to incorporate alcohol to the cake, you can either add a small quantities of fruit based alcohol to the batter before steaming and subsequently SPRAY  the alcohol to the cake when it is out of the steamer.

  • For keeping, it is recommended that once cooled completely, wrapped the cake tightly with an aluminium foil to prevent water loss, put in an air tight container in a freezer.

IMG_8173


CONCLUSION

I am unsure how long the fruit cake can be kept but experience shows that alcohol cake and long steaming fruit cake can keep very well in the freezer possibly up to year if not contaminated. Passion pays off and if you have never try a steamed cake, you should give it a go.. Lastly, remember that over caramelized sugar will give you a bitter cake. On the other hand, the right colour caramelized sugar with give you a special aroma that other fruit cakes will not be able to provide you.

IMG_8177

Hope you like the post today. Cheers and have a nice day.

IMG_8183


For more recipes, you can refer to my RECIPE INDEX (updated as at 13 March 2015)  here and you can follow me at PINTEREST or visit the blog’s FACEBOOK PAGE to keep abreast of my future posts. Also follow me at INSTAGRAM or TSU, a new social network for some more personal sharing other than recipes.

food bloggers[4]

Food paradize[8]

You can also join the FOOD BLOGGERS AND FOODIES UNITED FACEBOOK GROUP and FOOD PARADISE 美食天堂 to see more recipes. I am posting my daily home cooked food in the above Facebook Group daily. I would be more than happy if you can  post in the Group for the recipes that you tried from my blog.

pinterest[4]

If you are a Pinterest user and you are interested to have more recipes, you can join or follow this Pinterest Board set up by me  where there are more than 2600 recipes worldwide and pinned by various bloggers: FOOD BLOGGERS AND FOODIES UNITED PINTEREST BOARD.

IMG_8195

Golden Fruit Cake (黄金杂果蛋糕)

IMG_5588

INTRODUCTION

While I was browsing my recipe book and this fruit cake really captured my attention.. I liked the golden colour combination for its ingredients.. To me it looks very sexy and beautiful and it will be very different from all the other type of fruit cake that I have tasted before..

IMG_5541

As contrast to the normal fruit cake, this fruit cake uses castor sugar whereas other normal fruit cake mostly uses brown sugar. Only golden, yellowish and white colour ingredients is used. Therefore, normal ingredients such as currants , red and green cherries are omitted..

IMG_5602

The preparation time is almost the same the traditional fruit cake and it is a good alternative as Christmas fruit cake.. It is a heavy cake and you can prepare now and keep until Christmas just like normal fruit cake. However, in this case, you will need to use alcohol for the cake.

IMG_5608

If you looked at the picture, there are actually two sets. For one set, the cutting was done 4 hours after the baking. The cutting was very messy and the fruits drop from the cake… I am anxious when I saw this happened.. I posted in a Facebook Group and asked for advise. There is no definite advise given but somebody mentioned that her fruit cake always did not have any problem of cutting as she always deep freeze it until Christmas.

IMG_5604

i told myself that may be deep freezing may help. I deep freeze for a night and the next morning when I cut, the fruit cake can be sliced beautifully. Honestly, I do not think there is anything wrong with the fruit cake. With such huge quantities of fruits and nuts, whoever cut it will definitely have such problems if the timing is incorrect.. What I am sharing is that if there is a tendency for the fruits to drop, do try my method of deep freezing. In fact, after deep freezing, I found that my cake are moister..

IMG_5590


WHAT IS REQUIRED

Recipe adapted from: Page 88, Golden Fruit Cake “The Essential Baking Cook Book” published by Murdoch Books in 2000

Servings: Prepare a 8” x 8” Fruit cake

IMG_56721

  • 600 grams of mixed fruits (See note below)
  • 100 grams of nuts (See note below)
  • 250 grams of butter, softened
  • 200 grams of castor sugar
  • 200 grams of plain flour
  • 50 grams of self raising flour
  • 30 grams of condensed milk
  • 1 teaspoon of grated orange rind
  • 4 eggs
  • 60 ml or grams of sweet sherry wine or orange juices

Notes

  • For the mixed fruits mixed, you can choose all the golden colour fruits such as citrus peel, raisins, glace pears, glace apricots, glace pineapples, glace orange etc.. For this illustration I have use 1/2 of raisins and 1/2 golden fruit peels. As for the nuts, you can use blanched almonds, melon seeds, macadamia  or other nuts that is golden in colour and for this illustrations, i have used cashew nuts.

  • For Christmas fruit cake and if you are preparing it now, it is suggested that you use wine instead of orange juices as wine is a preservative and it will enhance the alcoholic aroma over time.

IMG_5606


STEPS OF PREPARATION

  • Pre-heat the oven to 160 degree Celsius. Lightly greased the baking tin or line the baking tin with baking paper.

PicMonkey Collage1

  • In a bowl, put the dried fruits and nuts, add 1-2 tablespoons of flour and toss the fruit until it is evenly coated with flour.

  • Cream the butter, sugar and condensed milk until light and fluffy. Add in eggs one by one. Beat until well combined.

PicMonkey Collage2

  • Sift in 1/3 of the flours, fold lightly, add 1/3 of the orange juice or cherry wine. Fold until well mixed. Perform the same for the remaining 2/3 of flours, orange juice or sherry wine.  Add the flour coated nuts and dried fruits. Fold lightly and swiftly until well combined. Transfer to the lightly greased tin, level and bake in the pre-heated oven of 160 degree Celsius for 1 hour 45 minutes to 2 hours or when a skewer inserts into the centre of the cake comes out clean. Let the cake rest in the baking tin for 30 minutes before unmoulding for cooling in the rack. Once completely cooled, store in an air tight container in the fridge or freezer.

IMG_5532


CONCLUSION

I love this stunning looking fruit cake. It is my own self set target that I will share with reader one fruit cake one year. Do give it a try and let me know if this fruit cake capture the eyes of your guest.

IMG_5610

Hope you like the post today. Cheers and have a nice day.

IMG_5592


food bloggers[4]

Food paradize[8]

pinterest[4]

  • If you are a Pinterest user and you are interested to have more recipes, you can join or follow this Pinterest Board set up by me  where there are more than 2600 recipes worldwide and pinned by various bloggers: FOOD BLOGGERS AND FOODIES UNITED PINTEREST BOARD.

IMG_5596

Pumpkin Pie (南瓜派)

IMG_3023

INTRODUCTION

Every time around October, I will see a lot of recipe on pumpkin by Western bloggers.. One of the most common recipe will be pumpkin pie.. I have never tried this pie before but it has always in my to-do list. I can imagine the taste of the pie.. It should be creamy and yummy..

IMG_3013

When I was shopping in a supermarket a few days ago, I saw 3 kg pumpkin was sold at a very reasonable price. Unknowingly, I bought a big pumpkin home. I remembered that it was less than S$3 and i know it is very heavy, probably about 2 kgs ..Ha-ha.. Therefore I must churn out recipes using pumpkins.

IMG_3007

First thing that come to my mind is this pumpkin pie.. It is time to try out a recipe and if successful, I shall share with the readers. I searched for recipes but most are Western recipes that uses ready made canned pumpkin puree. After digesting a few recipes, I have decided to design my own recipe to suit Asian taste..

IMG_3039

Bingo, the pumpkin pie is so delicious and make me wonder why such delicious pie is not common in this part of the world. I posted this western dessert in 3 Chinese food groups – One each in Taiwan, Hong Kong and Malaysia. The response is overwhelming. The likes are escalating and members are requesting for recipes. That is also the reason why I rush out to issue the recipe today.

IMG_3025

Preparation is not difficult at all.. I have simplify the version of using food processor. Don’t worry, if you do not have food processor, you can easily do it manually or using a stand mixer or use hand rubbing method.

IMG_3021

As per Wikipedia,

“Pumpkin pie is a traditional sweet dessert, often eaten during the fall and early winter, especially for Thanksgiving and Christmas in the United States and Canada. The pumpkin is a symbol of harvest time and featured also at Halloween. The pie consists of a pumpkin-based custard, ranging in colour from orange to brown, baked in a single pie shell, rarely with a top crust. The pie is generally flavoured with cinnamon, powdered ginger, nutmeg, and cloves. Allspice is also commonly used, and can replace the clove and nutmeg as its flavour is similar to both combined. Cardamom and vanilla are also sometimes used as batter spices.” (Source: https://en.wikipedia.org/wiki/Pumpkin_pie)

IMG_3037


WHAT IS REQUIRED

Servings: About two 6 inches diameter pies

IMG_2974

Short crust pastry

  • 160 grams of plain flour
  • 100 grams of butter, chilled
  • 2 teaspoons of castor sugar
  • 1 egg yolk
  • 3 teaspoon of milk

IMG_2972

Fillings

  • 500 grams of pumpkin flesh
  • 80 grams of condensed milk
  • 30 grams of castor sugar – optional
  • 2 eggs + 1 egg white
  • 1 teaspoon of mixed spice (cinnamon+nutmeg+ginger) – optional

IMG_3017


STEPS OF PREPARATION

  • Pre-heat the oven to 180 degree Celsius.

PicMonkey Collage1

  • Put all the butter, sugar and plain flour in a food processor. Use pulse mode to blend until the flour become crumble. Add eggs and milk, blend for 1/2 minute until it forms a liable dough. Divide the dough into two portions. Put one dough on top of a piece of clingy wrap. Put another clingy wrap on top of the dough. Use a rolling pin to roll the pastry to about 2mm thick . Transfer the pastry to your baking dish, press down follow the shape of the dish. Bake in the oven for about 15 minutes. If you have baking beads, you can place on top of the pastry and take it out once the baking is done.. Set aside for cooling.

Note

  • If you do not have a food processor, you can rub the butter and sugar using finger tips, add eggs and milk, LIGHTLY knead until if forms a pliable dough.

PicMonkey Collage2

  • Steam the pumpkin until soft.

  • Transfer the pumpkin to the blender. Add eggs, sugar, condensed milk and mixed spice. Blend until fine. Fill  the baked pastry shell with the puree to about 95% full. Bake in the pre-heated oven of 180 degree Celsius for about 25 –30 minutes or until the puree is set. Cooled completely before cutting and serve at room temperature.

IMG_3015


CONCLUSION

I love this pie and my kids love them too. I hoped more readers in this region will try this recipe and let me know if it suits your taste buds. If you do not want to prepare the pastry, store bought pie cups can also be used.

IMG_3046

Hope you like the post today. Cheers and have a nice day.

IMG_3029


  • For more recipes, you can refer to my RECIPE INDEX (updated as at 13 March 2015)  here and you can follow me at 

PINTEREST or visit the blog’s FACEBOOK PAGE to keep abreast of my future posts. Also follow me at INSTAGRAM or TSU, a new social network for some more personal sharing other than recipes.

food bloggers[4]

Food paradize[8]

pinterest[4]

  • If you are a Pinterest user and you are interested to have more recipes, you can join or follow this Pinterest Board set up by me  where there are more than 2600 recipes worldwide and pinned by various bloggers: FOOD BLOGGERS AND FOODIES UNITED PINTEREST BOARD.


IMG_3035


Light Fruit Cake (轻杂果蛋糕)

IMG_2880

INTRODUCTION

I have a pack of dried fruits sitting in my shelves for a long time, by hook and by crook, I must get rid of it..

IMG_2894

Since I do not have a golden or light fruit cake recipe, I have decided to design a recipe…. What disappointed me is that I have only used on 1/3 of the fruits in my recipe… The outcome is my fruit cake have very little fruits and my kitchen still have another 160 grams of mixed fruit sitting there. What a blunder and it is best not to do any baking before I drink my morning coffee..

IMG_2856

Well there is no fault to the recipe and in fact the cake is delicious. Well, it is easy to imagine the taste, a butter cake with mixed fruits. In my case, since fruit is less, it will be more like a butter cake. Haha.

IMG_2872

Since I am still on my vegetarian diet, in this illustration, I did not use any alcohol. I used orange juice instead. Therefore, this recipe is equally applicable to Muslim readers.. If you preferred, you can substitute the orange juices with cherry wine or rum.

IMG_2898


WHAT IS REQUIRED

Servings: Prepare an 8” fruit cake

IMG_2841

  • 250 grams of butter, softened at room temperature
  • 250 grams of mixed fruits
  • 250 grams of castor sugar
  • 150 grams of self raising flour
  • 100 grams of plain four
  • 4 eggs lightly beaten
  • 50 grams or ml of fresh orange juice
  • 1 teaspoon of vanilla essence

IMG_2900


STEPS OF PREPARATION

  • Pre-heat the oven to 160 degree Celsius.

PicMonkey Collage1

  • Soaked the mixed fruits in orange juices for 15 minutes, drain, collect the orange juice and set aside.

  • Cream the butter and sugar until light and creamy. Add eggs one by one , beating thoroughly after each addition. Scrap the sides to ensure that there is none stick to the bottom and the sides.

  • Fold in the soaked fruits, flour and collected orange juices in 3 stages until well combined. Folding shall be light and fast.

  • Bake in the pre-heated oven of 160 degree Celsius for 45 minutes to 1 hour or when a skewer inserted comes out clean. Cool in the tin for 20 minutes before turnout into a wire rack. Cool completely before cutting.

IMG_2852


CONCLUSION

If you follow the recipe exactly, your outcome will be difference from what you saw in the picture. you will have more fruits in the cake.  Hope this recipe will benefit those readers who are looking for a simple, fast and easy fruit cake recipes.

IMG_2892

Hope you like the post today. Cheers and have a nice day.

IMG_2896


  • For more recipes, you can refer to my RECIPE INDEX (updated as at 13 March 2015)  here and you can follow me at 

PINTEREST or visit the blog’s FACEBOOK PAGE to keep abreast of my future posts. Also follow me at INSTAGRAM or TSU, a new social network for some more personal sharing other than recipes.

food bloggers[4]

Food paradize[8]

pinterest[4]

  • If you are a Pinterest user and you are interested to have more recipes, you can join or follow this Pinterest Board set up by me  where there are more than 2600 recipes worldwide and pinned by various bloggers: FOOD BLOGGERS AND FOODIES UNITED PINTEREST BOARD.

IMG_2862


French Pastry–Palmiers (法国蝴蝶酥)

IMG_1424

INTRODUCTION

I remembered two years ago when I started blogging, one Facebook friend asked for the recipe of Palmiers… Hmmm, when I confirmed with her that day, obviously she can’t remember it… Well, that is how I get to know this French Pastry..

IMG_1408

Then, I did not take up the challenge as I have no clue as to how puff pastry should be done. It appeared to be difficult. However, after preparing croissants and Danish pastry, I have much more confidence doing some homemade puff pastry..

IMG_1420

Come on, homemade puff pastry using pastry margarine are not difficult or messy, but homemade puff pastry using butter is, especially in this hot weather. I have decided to try out this recipe because I have some pastry margarine left in the fridge after prepared some croissants and Danish pastry weeks ago, I have to find a way to gradually get rid of this block of pastry margarine and I have selected this simple recipe.

IMG_1416

Yes, the recipe is simple, it is much simpler than croissant as you need not to proof. Don’t worry that you cannot do it. If you have no confidence, you can use ready made pastry purchased from the stores. In fact, I have  a hard time to locate a recipe to prepare Palmiers from scratch, possibly more than 80% of the recipes are using ready made puff pastry..

IMG_1410

“A palm tree (French: palmier or cœur de France) or elephant ear is a French pastry in a palm shape or a butterfly shape, sometimes called palm leaves, elephant ears, French hearts, shoe-soles, Pakistani jalebi or glasses.. Palmiers are made from puff pastry, a laminated dough similar to the dough used for croissant, but without the yeast. Puff pastry is made with alternating layers of dough and butter, rolled and folded over to create possibly hundreds of flaky layers. The puff pastry is rolled out, coated with sugar, and then the two sides are rolled up together so that they meet in the middle, making a roll that is then cut into about 1/4″ slices and baked. Usually it is rolled in sugar before baking. In the Puerto Rican version, it is topped with honey. In Mexico they are known as Orejas (ears).” (Source: https://en.wikipedia.org/wiki/Palmier)

IMG_1428


WHAT IS REQUIRED

Recipe adapted from: Homemade Puff Pastry and Palmiers | Baking Bites

Servings: About 20-25 palmiers

IMG_1385

  • 250 grams of plain flour
  • 80 grams of cake flour
  • 280 grams of cold butter or pastry margarine
  • 1 teaspoon of salt
  • 230 ml or grams of water

For Dusting

  • 1/2 cup of castor sugar
  • 1/2 tablespoon of cinnamon powder (optional)

IMG_1418


 STEPS OF PREPARATION

PicMonkey Collage1

  • Put the flour, salt and water in a mixing bowl. Use the dough hook to knead the dough until smooth which took about 10-15 minutes.  If the dough are too wet, add flour tablespoon by tablespoon. If too dry, add water tablespoon by tablespoon.

  • Transfer the dough to lightly floured surface and let it rest for 10 minutes before proceed to the next step.

  • In a lightly floured surface, use a roller pin to roll the dough in a rectangular shape .

PicMonkey Collage2

  • Spread the butter or pastry margarine on half of the rolled dough. Cover the other half on top of the half where the margarine were spread. Seal the edges and roll it as thin as possible. Fold the dough into 1/3 of the size overlapping each other. Roll thin using a rolling pin. Repeat the same procedure 3 times. The final shape shall be a square of at least 12 inches by 12 inches

PicMonkey Collage3

  • Dust the cinnamon powder and sugar on top of the puff pastry as evenly as possible. Use a rolling pin to roll once or twice such that the sugar stick to the dough. Roll up the left vertical sides toward and centre seam and perform the same for the left side. Use a knife to cut the puff pastry to about 1/2 cm – 1 cm thick. Transfer to the baking tin. Prior to the baking, use palm to likely pressed down the dough. Bake in the pre-heated oven of 210 degree Celsius for 15-20 minutes or until crispy. You may need to turn the side of the puff at the 10 minutes juncture such that the baking of both sides are even. Cool completely before store in an air tight container.

IMG_1414


CONCLUSION

If you never try this before, you should give it a try. The recipes look so complicated, but if you used store bought puff pastry, it will be as easy as ABC.

IMG_1422

Hope you like the post today. Cheers and have a nice day.

IMG_1406


food bloggers[4]

Food paradize[8]

pinterest[4]

  • If you are a Pinterest user and you are interested to have more recipes, you can join or follow this Pinterest Board set up by me  where there are more than 2600 recipes worldwide and pinned by various bloggers: FOOD BLOGGERS AND FOODIES UNITED PINTEREST BOARD.

IMG_1404

Pecan Brownies (胡桃布朗尼)

IMG_0780

INTRODUCTION

I bought a bar of chocolate from a bakery shop and by hook and by crook, I must finish this bar of chocolate as soon as possible..One of the reasons is that I myself do not really like chocolate and I also do not want kids to indulge in chocolate overloaded cuisines…

IMG_0750

I have always wanted to blog brownie but it was being hold back because I do not have baking chocolate at home.. Since i have this bar of chocolate, the first recipe that come to my mind is brownie.. a type of desserts that is pretty common in this region especially during High Tea..  It is a dessert slice, slightly crispy on the outside, gooey and dense on the inside. In addition, it is chocolaty and a rather addictive dessert. For me, brownie must be sweet and goes well with plain tea or coffee such that a piece or two is enough to satisfy one’s craving.

IMG_0752

There are many many recipes of brownies in the website. All major website and western bloggers will have a recipe of brownies.. For this type of common recipe, I usually do not search further but goes back to my favourite baking cookbook. This cookbook captures recipes of all common sweets and desserts and so far, the book has never failed me in any of the recipes..I have full trust and confidence on the book.

IMG_0764

Yes, I was not disappointed with this adventure. This is the type of brownie that I am looking for, slightly gooey and chewy on the inside and crispy on the external.  Pecan was added to provide some bit pieces in the piece of chocolate overloaded desserts.. It will goes well with ice cream but I would prefer to have it with my plain earl grey tea.

IMG_0770

The original recipe yields quite a big piece of brownie. Therefore I have decided to half the recipes and made necessary adjustment to the cooking time.  Preparation is easy peasy, no complicated equipment, no strange ingredients, just mix and bake and it yields delicious brownies..

IMG_0760


WHAT IS REQUIRED

Recipe adapted from: Page 136, Chocolate Brownies “The Essential Baking Cook Book” published by Murdoch Books in 2000

Servings: Prepare a  tray of 6” x 6” of Pecan Brownies

IMG_0721

  • 20 grams of plain flour
  • 30 grams of cocoa powder
  • 200 grams of castor sugar
  • 100 grams of chopped pecans or walnuts
  • 125 grams of good quality dark chocolate
  • 125 grams of butter, melted
  • 2 eggs

IMG_0774


STEPS OF PREPARATION

  • Pre-heat the oven to 180 degree Celsius.

  • Lightly grease a 6”x6” baking tin and line with grease proof baking paper leaving the paper hanging over on the two long sides.

PicMonkey Collage1

  • Chopped the pecan or walnuts coarsely. Set aside.

  • In a microwavable bowl , put the chocolate and butter and microwave for about 1 – 1.5 minutes. Stir until well combined. Add the beaten eggs and stir again until well mixed. If there is not microwave, you can always melt the chocolate using Bain-Marie method using water bath. This involves put a bowl over a pot of hot boiling water, stir until the chocolate and butter melts.

PicMonkey Collage2

  • In another bowl, sift the cocoa powder and plain flour. Add the sugar and the nuts. Stir until well mixed.  Pour the batter into the dry ingredients and stir until well mixed. Transfer the batter to the lined baking tin and baked in the oven for 25-30 minutes. Cool completely before lifting out using the paper and handles. Cut into relevant sizes before servings.

IMG_0762


CONCLUSION

Brownies are tasty yet they are so easy to prepare. There is no need to pay a price premium to have it in hotels or buy from bakeries. There are many types of brownies. Some are fudgier cake like structure and some and denser and gooier as in this recipe. While I cannot guarantee this is the best brownie available but it really suit my taste buds.

IMG_0768

Hope you like the post today. Cheers and have a nice day.

IMG_0758


food bloggers[4]

Food paradize[8]

pinterest[4]

  • If you are a Pinterest user and you are interested to have more recipes, you can join or follow this Pinterest Board set up by me  where there are more than 2600 recipes worldwide and pinned by various bloggers: FOOD BLOGGERS AND FOODIES UNITED PINTEREST BOARD.

IMG_0776


Rainbow Steamed Sponge Cake (彩虹椰奶鸡蛋糕)

IMG_5006

INTRODUCTION

As a blogger, it does not mean that I practically like every bake I prepared.. I have idea, I believed it can work, I tried, I think it will suit readers and I will share in my blog.

IMG_4973

Rainbow cake is something that I do not really liked to toy with. Coming from an era where cakes are very monotonous in colour, I still not really can get used to eating cake that are too colourful..

IMG_4995

I don’t eat does not mean that there is no market.. Rainbow cake is very trendy nowadays and have a huge industry.. My girl was given a free rainbow birthday cake during our celebration in a Japanese restaurant and she was so happy to see the birthday cake..

IMG_4054

This is is not my first recipe to toy with colouring, I have a post on rainbow bread issued two years ago and I have also mentioned my justification of using permitted food colouring. If you want you can refer to this post:  How I Wish This World Is As Colourful As A Rainbow–Cranberries Raisins Rainbow Loaf . It was the same pack of colouring that I bought 2 years ago….

IMG_4981

Since I want to play in colour, I will be heavy handed in the colour tone such that a bit contrast can be seen and hope that it will provide inspiration to bakers who need the recipe..

IMG_3653

While I knew that most current trendy rainbow cakes are baked, but I have decided to use steaming instead. I have many recipes to choose from but I have decided to chose this recipe which is I like the cake’s  texture and taste.. Is This Cake Have Anything To Do With Puteri Radin Mas Ayu?–Puteri Ayu, Putu Ayu, Putri Ayu (椰丝小青糕)

IMG_48521

This recipe will save bakers a lot of time. The taste will be coconut flavoured steamed sponge cake and it is OILLESS. It is spongy, aromatic and its dryness is compensated by big amount of coconut milk. If there is no coconut milk available, you can always used fresh milk to substitute.

IMG_4989


WHAT IS REQUIRED

Servings: Prepare a 5” square steamed cake

IMG_49491

  • 200 grams of coconut milk or fresh milk
  • 200 grams of self raising flour
  • 150 grams of castor sugar
  • 50 grams of condensed milk
  • 4 eggs
  • Permitted food colouring 

IMG_4987


STEPS OF PREPARATION

  • Get ready a steamer with enough water that are adequate for steaming at least 45 minutes.

  • Lightly greased the baking tin and place a piece of baking paper at the bottom of the baking tin.

PicMonkey Collage1

  • Get ready seven similar bowls and put the seven colour of rainbows. Depending on your colouring gel condition, you may need to put 1 teaspoon of water to dissolve the gel. Set aside.

  • Beat the egg until foamy, add sugar tablespoon by tablespoon until pale and volume expands. Add the condensed milk and  coconut milk gradually and beat until well combined. Sift in the flour and use a spatula to fold the flour until well mixed.

PicMonkey Collage2

  • Divide the batter equally into 7 portions and place into the respective bowl. Stir until well combined. Place the violet layer into the baking tray and steamed for 10 minutes under medium heat. Ensure that there are no water condensation in the lid. Perform the same for the remaining 6 layers in the following order: Turquoise, blue, green, yellow, orange and red. The last layer shall be red coloured and before pouring into each layer, please ensure that the previous layers has already dries up . Cool completely before cutting or proceeding to cake decoration.

IMG_4975

Note:

  • Depending on your understanding on your steamer’s heat circulation, do not use high heat to steam as it may resulted in wavy pattern and causing unevenness. In the even, the layer puffs up, use an icing smoother to press down and level the surface before pouring batter to the next layer.

  • Bang the baking tin on the table for 1-2 time to force all the air trapped in the batter.

  • To ensure even distribution of batter, you can weigh the batter and divide by 7. What I did is use a measuring cup to do the division. For each layer, it is about 1.5 cups.

IMG_4979


CONCLUSION

Whether you will prepare this cake or not, I hope the pictures will cheer up your day.If you do not like colouring, rest be assured that the beige original colour cake is as tasty as it is .If you asked me if natural colouring can be used? I will tell you it is practically not very possible unless you can get natural ingredients that are able to provide all the seven colours and in powder form.. Otherwise, your cake will have a weird taste and texture. Of course you can try by altering the ingredients quantities after taking into additional liquid added from colour extraction or using puree of fruits  but that will be  a big assignment.

IMG_4993

Hope you like the post today. Cheers and have a nice day.

IMG_5008


food bloggers[4]

Food paradize[8]

pinterest[4]

  • If you are a Pinterest user and you are interested to have more recipes, you can join or follow this Pinterest Board set up by me  where there are more than 2600 recipes worldwide and pinned by various bloggers: FOOD BLOGGERS AND FOODIES UNITED PINTEREST BOARD.

IMG_4999