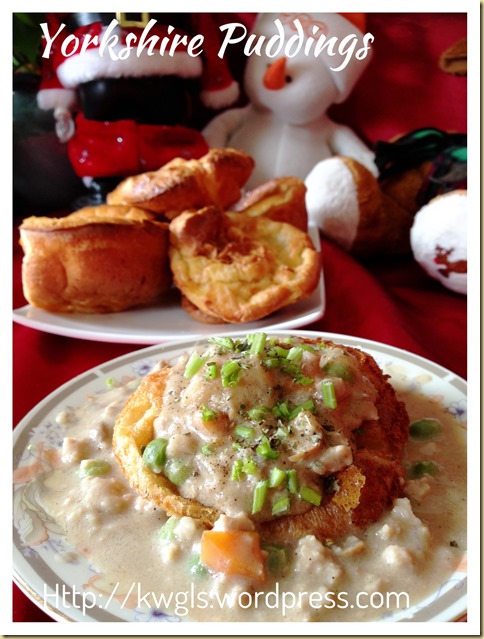
Thanksgiving and Christmas 2015 Special Compilation (2015 圣诞节特别汇编)

christmas compilation

INTRODUCTION

I promised readers that I will do a simple compilation for Christmas 2015. Here it is with about 45 recipes on  selected appetizers, main course, breads, desserts and gift ideas. Hope this will provide readers some home cooked choices and I wish to take this opportunity to wish my readers an advance Merry Christmas and a Happy New Year.


STARTERS, APPETIZERS AND SNACKS


 Baked Hassel back Potatoes With Bacon And Mozzarella Cheeses..

img_1920


Kiwi Tuna Salad 

img_8089_thumb

Devilled Eggs

img_2838_thumb

Bacon/Tuna Tortilla Cups and Pizza Snack

img_50501_thumb


BREADS AND SOUPS


Individual Panettone (意大利圣诞面包)

img_9826_thumb

Quick And Easy Yeast Free Stollen (德国圣诞面包 – 史多伦)

IMG_3744

Christmas Wreath Bread (圣诞花环面包)

IMG_9951

Santa Bread (圣诞老人面包)

IMG_3125


Cranberry Wholemeal Spoon Rolls

img_35271_thumb

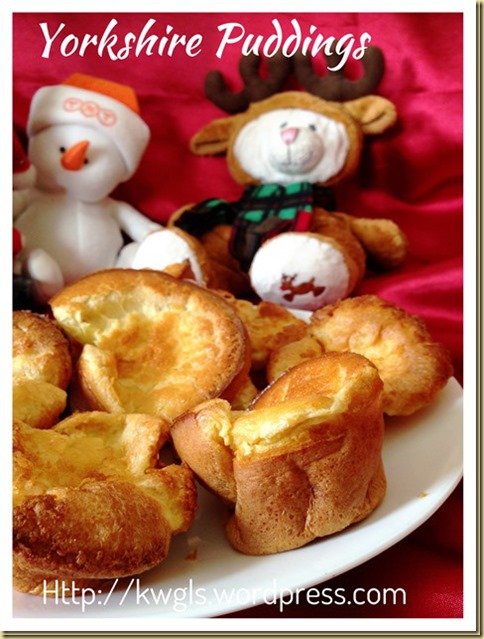
Yorkshire Puddings (约克郡布丁)

img_0598_thumb

Wholemeal Fruit Loaf

img_47161_thumb


MAIN COURSE


Tony Romas BBQ Baked Ribs Copycat (烤排骨)

img_18121_thumb

Crispy Roast Chicken

img_13961_thumb


DESSERTS

Steamed Fruit Cake or Kek Kukus Buah (杂果蒸糕)

IMG_8197

Golden Fruit Cake (黄金杂果蛋糕)

IMG_5588

Light Fruit Cake (轻杂果蛋糕)

IMG_2892


Quick and Easy Christmas Fruit Cake With Royal Icing

img_16771_thumb


Light Rummy Fruit Cake

img_42861_thumb

Boiled Christmas Fruit Cake 

img_1421

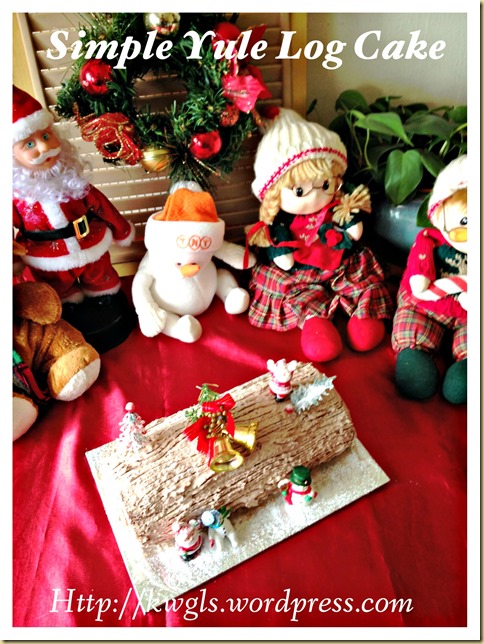
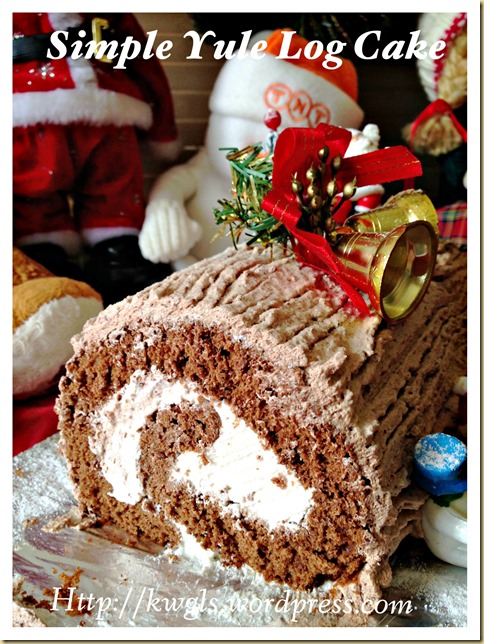
Chocolate Yule Log Cake With Coffee Cream (Bûche de Noël, 巧克力树桐蛋糕)

img_19811_thumb

Christmas croquembouche

img_1877_thumb (1)

Christmas Trifles  – Used up your balanced fruit cake making this..

img_27421_thumb

Quick And Easy Christmas Puddings With Brandy Sauce (圣诞布丁)

img_13461_thumb

Pecan Pie (胡桃派)

img_80211_thumb

Pumpkin Pie (南瓜派)

IMG_3046

Baileys Chocolate Cheese Tarts (巧克力芝士挞)

IMG_06221

Meringue Nests With Rich Chocolate Mousse Fillings (蛋白酥皮巢)

img_62911_thumb

Double Chocolate Bavarian Cream or Bavarois (双巧克力慕斯杯)

IMG_3521

Molten Chocolate Lava Cake (心太软)

img_37131_thumb

Fruit Tart

img_2278_thumb

Horlicks Lapis (好力克千层蛋糕)

img_21281_thumb

Authentic Lapis Legit (Spekkoek 印尼千层蛋糕)

IMG_6222

Baked New York Cheesecake

IMG_12291

White Chocolate Cheesecake (白巧克力免烤芝士蛋糕)

IMG_3774

Chilled Honey Cheesecake (免烤蜜糖芝士蛋糕)

IMG_23131


GIFTS AND BISCUITS


Chocolate Crinkles Cookies (巧克力皱纹曲奇)

IMG_9367

Gingerbread Man Biscuits

img_10351_thumb

Cranberry Orange Christmas Star Cookies

img_33761_thumb

Christmas Candy Cane Peppermint Shortbread (圣诞薄荷牛油饼干)

img_20621_thumb

Macadamia Russian Tea Cakes

IMG_9995

Yin Yang Chocolate Macadamia Cookies

IMG_16121

Chocolate Truffles

img_1533_thumb

Homemade Macadamia Chocolates

img_14451_thumb

Peanut Butter Balls

img_36741_thumb


Christmas Marshmallows (棉花糖)

img_48271_thumb


  • For more recipes, you can refer to my RECIPE INDEX (updated as at 26 November 2014)  here and you can follow me at PINTEREST or visit the blog’s FACEBOOK PAGE to keep abreast of my future posts.  


Collages1


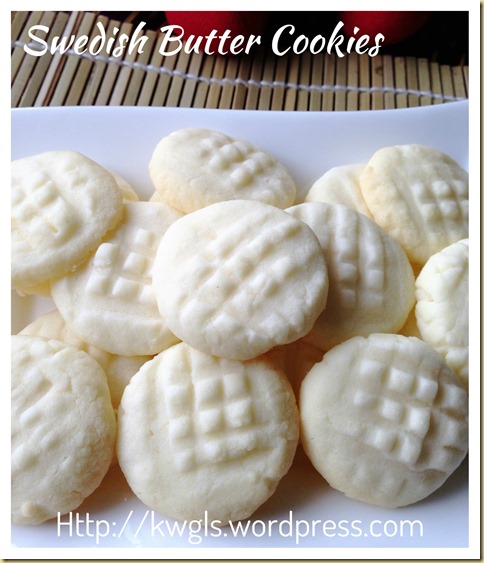
Uppåkra (Swedish Butter Potato Starch Cookies) (瑞典马铃薯粉牛油饼干)

IMG_22121

INTRODUCTION

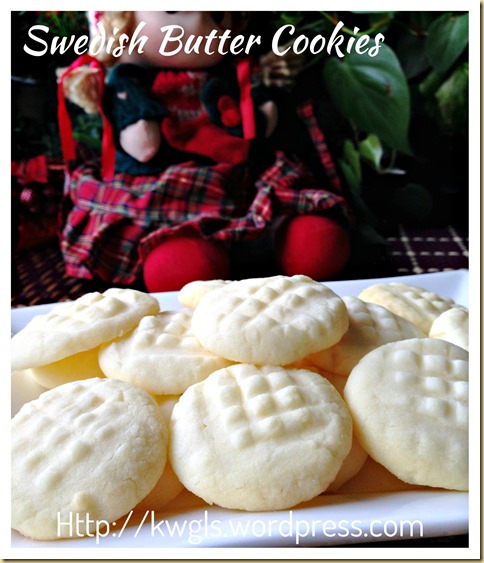
I do not have a recipe of the popular trendy so called “German” cookies because I can’t find reasonable linkage of such cookie with real authentic German cookies be in terms of look or in terms of ingredients.. I did my part to trace the source to any German recipes but in vain .. I asked around friends who have German friends and apparently German never seen this cookie before..I find it is rather odd to blog something that I am not able to be convinced.

IMG_2216

I have done many searches over a period of half year until I found a recipe named: Uppåkra (Swedish Butter Cookies with Potato Starch ). I am very happy to have at least some Western recipe that justify the use of potatoes starch.(Uppakra is a village situated at the Southernmost Sweden) . In fact, continue searches Uppakra yields a number of Western bloggers that have this recipe. For example:

IMG_22141

Reviewing the ingredients in these recipes shows rather similar ingredients to the “German?” cookies using potatoes starch, butter, sugar and flour. One recipe do use eggs at a binding agent.

IMG_22181

Further review shows that the ingredients that they used may not suit the current Asian taste buds. The sugar level are rather high and they have use castor sugar and plain flour. For Asian they have always asked for cookies that “melt in the mouth”, as such, I have modified rather materially to come to this recipes:

  • Reduction of sugar level
  • Use of top flour (cake flour) instead of plain flour
  • Use of icing sugar instead of castor sugar

IMG_22221

As for the ratio, I have decided to use back the traditional British short bread recipe ratio of 1 sugar: 2 butter : 3 flour as it is not overly sweet. The result is melt in the mouth cookies and I am happy that I have document down the justification of this recipe ..

IMG_22031


WHAT IS REQUIRED

Recipe adapted from: Potato Flour Cookies from my Swedish Grandmother

IMG_2189

  • 80 grams of butter – softened
  • 40 grams of icing sugar
  • 80 grams of potatoes starches
  • 40 grams of top flour or cake flour
  • Drops of vanilla essence (optional)

IMG_22101


STEPS OF PREPARATION

IMG_2194

  • In a standing mixer, beat the butter and icing sugar until light and pale. Add vanilla essence if desired. Sift in the potatoes starch and top flour, use the machine lowest speed to beat for 30 seconds. Transfer the dough out to a clingy wrap. 

IMG_2199

  • Wrap the dough and chill the dough for 10-20 minutes until you are able to handle it.  Divide the dough equally (about 10 grams per cookie), shape it into a ball, lightly pressed using your thumb. Use a fork to make your preferred patterns. If the dough is very sticky, dust your hand with some more potatoes starch or top flour and continue shaping. There is a possibility that you need to dust your hand with every ball you shaped.

  • Bake in the pre-heated oven of 150 degree Celsius for 12-15 minutes. Once the cookies is out from the oven, let it rest in the baking tin for 5 minutes before transferring to the cooling rack for further cooling. Once completely cooled, store in an air tight container .

IMG_22051


CONCLUSION

This is a delicious cookie. If you want beautiful shape, at 10% more flour, it will yields an easier to mould cookie. Members are asking me the difference between German cookies and this Swedish cookies. I do not wish to answer and let reader’s decide yourself. At least the name of this recipe is substantiated by some Western recipes.. If you ever try this recipe, just my sincere hope that as a respect to this traditional cookie , you named it Uppåkra Swedish Butter Cookies  Or Swedish Butter cookies for short.

IMG_22201


This recipe was included in Page 16 and Page 17 of the following E-book. 

For more Chinese New Year related cookies, snack and steamed cake recipes, you can have a copy of Easy Chinese New Year Recipes – A step by step guide” that was packed with 30 recipes, 60 pages at a reasonable convenience fee of USD3.50. The recipes covered various recipes from auspicious radish cake to nian gao to traditional kuih bangkit to trendy London almond cookies. Of course not forgetting both type of pineapple tarts. You can purchase by clicking the link above. You can either pay using Pay Pal or Credit card account. Please ensure that you have an PDF reader like Acrobat or iBooks in your mobile phone or iPad if you intended to read it in your ipad or mobile phone. Should there be any problems of purchasing, feel free to contact me at kengls@singnet.com.sg and separate arrangement can be made.

coverlow-final[5]

Hope  you like the post today. Cheers and have a nice day.

IMG_22081


  • For more recipes, you can refer to my RECIPE INDEX (updated as at 20 November 2014)  here and you can follow me at PINTEREST or visit the blog’s FACEBOOK PAGE to keep abreast of my future posts.  

IMG_22011

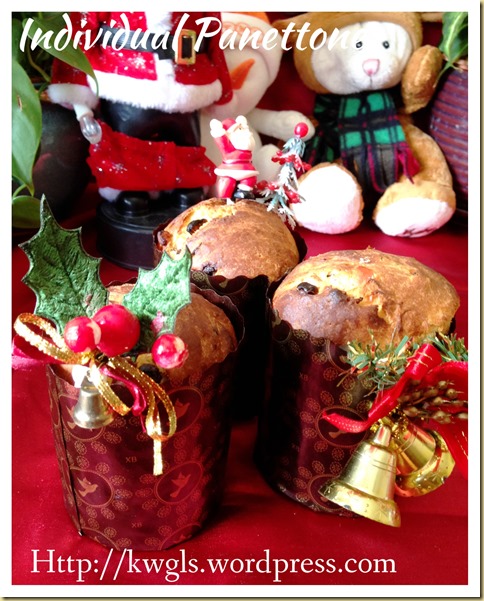
Individual Panettone (意大利圣诞面包)

IMG_9830

INTRODUCTION

Panettone will be my last recipe for Christmas 2014.. This is an Italian famous bread which had become a  common imported Christmas item in high end Singapore and Malaysia supermarkets

IMG_9826

Per Wikipedia:

“Panettone (pronounced /ˌpænəˈtni/, Italian: [panetˈtoːne]) is a type of sweet bread loaf originally from Milan (in Milanese dialect it is called paneton /paneˈtuŋ/),[1] usually prepared and enjoyed for Christmas and New Year in Italy,south eastern France, Spain, Portugal, Brazil, Peru, Malta, Germany and Switzerland, and is one of the symbols of the city of Milan. In recent years it has become a popular addition to the Christmas table in the United Kingdom. In South America, especially in Peru, Argentina, Paraguay, Uruguay, Venezuela, Colombia, Bolivia, and Chile, it is a Christmas dinner staple and in some places replaces roscón de reyes/bolo rei (King cake).

IMG_9836

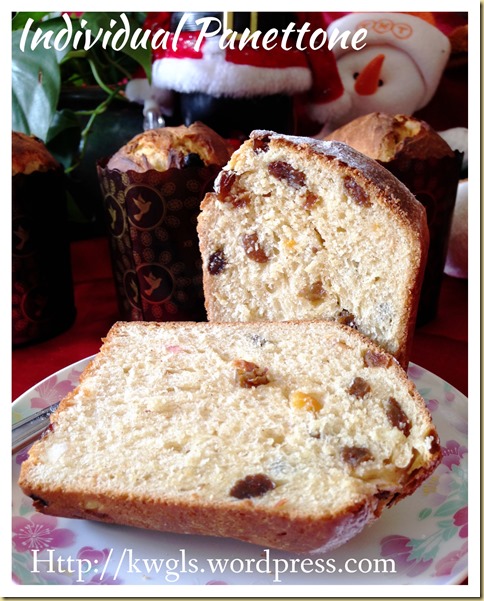
It has a cupola shape, which extends from a cylindrical base and is usually about 12–15 cm high for a panettone weighing 1 kg. Other bases may be used, such as an octagon, or a frustum with star section shape more common topandoro. It is made during a long process that involves the curing of the dough, which is acidic, similar to sourdough. The proofing process alone takes several days, giving the cake its distinctive fluffy characteristics. It contains candied orange, citron, and lemon zest, as well as raisins, which are added dry and not soaked. Many other variations are available such as plain or with chocolate. It is served in slices, vertically cut, accompanied with sweet hot beverages or a sweet wine, such as Asti or Moscato d’Asti.  (http://en.wikipedia.org/wiki/Panettone)”

IMG_9848

Looking at the definitions of Panettone above, one will know that traditional Panettone will requires long hours or even days of proofing. It is a huge but tasty and rich bread.. In fact, it is rather difficult to prepare the traditional or commercial version of Panettone if we do not have a special big mould designed for the preparation of big Panettone.

IMG_9834

Don’t worry, this recipe is the individual Panettone recipe that is easy and fast and requires no special baking equipment. It is about 12 cm tall and the taste and texture are equally awesome. For such a size, it is just nice for a small family of 3-4 and not to mention it can be prepared at a fraction of cost as compared to store purchased…The only think that you might need is to search for some tall muffin cups and I get mine rather easily in Singapore bakery. If you are not concerned about the height, feel free to use the normal muffin cups in the preparation.

IMG_9855

Remember that if you can’t finished the Panettone, keep it until Christmas is over, use these stale Panettone to make some delicious bread puddings. It is an excellent choice for bread puddings because the bread in itself is already tasty and aromatic..

IMG_9822


WHAT IS REQUIRED

Recipe adapted from: Individual Panettone,The Essential Baking Cookbook Page 266., Murdoch Books 2000

Servings: About 4 twelve cm tall Panettones

IMG_9794

  • 250 grams of bread flour
  • 125 grams of mixed fruit (can be substituted with equal quantities of dried apricots, currants and sultanas)
  • 90 grams or ml of lukewarm milk
  • 90 grams of butter – softened
  • 60 grams or ml of Marsala wine or other fruity wine such as rum, red cherry etc.
  • 60 grams of castor sugar
  • 7g of instant dried yeast
  • 2 eggs
  • 1 egg yolk
  • 1 teaspoon of vanilla essence
  • 1/2 teaspoon of aniseed or mixed spice

IMG_9840


STEPS OF PREPARATION

IMG_9799

  • In a bowl, put the mixed fruits and Marsala (or other fruit based wine) together. Let it soak for at least 1 hour.

  • In another bowl, put the yeast, one teaspoon of sugar and milk. Stir until well mixed, leave it in a warm place until the mixture is frothy and slightly increase in volume.

IMG_9804

  • Cream the butter and the remaining sugar until light and fluffy. Add egg one by one and beat until well mixed. In another mixer bowl, put the bread flour and mixed spice, make a well in the centre.

IMG_9809

  • Add in the yeast solution, the butter batter, the soaked mixed fruits and mix with a flat bladed knife until it forms a soft sticky dough. Cover with some clingy wrap and let it proved until the dough have double in size. As this is a very rich dough loaded with eggs and butter, the proofing time can be rather long (about 1.5 hours) and it also depends on the day’s temperature. In colder countries, you may want to proof the dough in the oven at 35 degree Celsius with a bowl of plain water)

PicMonkey Collage1

  • After the dough have doubled in size, transfer to a lightly floured surface, knead a few minutes until it is not sticky. If it is still very sticky, add spoon gradually (one tablespoon by tablespoon) until it did not stick to your hand. Divide into 4 portions and transfer to the 10 cm tall muffin cups for second proofing.

  • Pre-heat the oven to 200 degree Celsius. Once the dough have double in size or reach about 90% of muffin cup’s height, bake in the pre-heated oven for 30-35 minutes or when a skewer inserts into the centre of the bread comes out clean. Can be served warm or cold if preferred.

IMG_9832


CONCLUSION

Christmas is a joyous seasons where there are lots of delicious food available for choices. You may not be able to finish this bread during the dinner. You can always keep it and prepare bread puddings few days later… This is one of the simplest and fastest recipe.. Why pay more where you can easily prepared at home?

IMG_9824

Hope you like the post today. Cheers and have a nice day.

IMG_9851


  • For more recipes, you can refer to my RECIPE INDEX (updated as at 20 November 2014)  here and you can follow me at PINTEREST or visit the blog’s FACEBOOK PAGE to keep abreast of my future posts.  

IMG_9846

Nested Your Bread?Laced Your Pancake? Roti Jala (网面薄煎饼)

IMG_15901

INTRODUCTION

As per Wikipedia’s definition on Malay Cuisine, it was stated that

“Roti jala – The name is derived from the Malay word roti (“bread”) and jala (“net”). A special ladle with a five-hole perforation used to make the bread looks like a fish net. It is usually eaten as an accompaniment to a curried dish, or served as a sweet with serawa. Serawa is made from a mixture of boiled coconut milk, brown sugar and pandan leaves.”

IMG_15761

Yes, jala is net in Malay language and roti is bread in Malay language. However, in fact, it is a pancake created in a nested pattern and I was always amazed as to the way these pancakes are prepared. Some has also called it a lacy pancake.. It is a beautiful pancake to look at and a delicious pancake to eat..

IMG_15861

To be very frank, i have never eaten this special Malay cuisine before as it was not very commonly sold in the stores in Singapore.. However,  I have seen this special pancake in television shows, books and newspaper..

IMG_15701

I did not thought that I will be preparing this until I saw the special ladle sold in a Singaporean bakery. As the price is relatively cheap (less than SGD2), I have decided to buy one ladle and try out a recipe to satisfy my curiosity.

IMG_1595

Hold on to buy this special gadget for roti Jala, it is quite easy to prepare one at home. In fact, I would think that home prepared version is less messy for the preparation of the pancake since the plastic bottle is capped. Just heat up a safety pin, use the hot pin the make some holes on the cap of the plastic bottle and the apparatus to prepare lacy pancake is done.

IMG_15781

In fact, I am very happy with the pancake.. It tasted way better than what I have expected. My kids love the texture of the pancake and I love the rich coconut aroma in the pancake that goes well some home cooked curry.. I served this with curry chicken and the pancake were disappearing very fast…. In fact, it is very addictive as the almost plain pancake just blends so well with the curry gravy.

IMG_15881

If you are interested to know how to cook the curry chicken which was not included in this post, you can refer to : Simple Homemade Curry Chicken and Golden Pillow (咖喱鸡, 咖喱面包鸡)


WHAT IS REQUIRED

Recipe adapted from: Seasaltwithfood: How To Make Roti Jala

Servings: About 12-15 pieces of Roti Jala with about 15 cm diameter

IMG_1558

  • 200 grams of plain flour
  • 200 grams or ml of water
  • 200 grams or ml of coconut milk (about 1 packet)
  • 2 eggs
  • 2 tablespoon of cooking oil
  • 1/2 teaspoon of turmeric
  • Pinches of salt

IMG_15741


STEPS OF PREPARATION

IMG_1563

  • Put all the ingredients (except water and coconut milk) in the mixing bowl of stand mixer. Gradually add in water and coconut milk until the batter is well mixed with no lumps noted. You can easily use a hand whisk to do the job. Sift the batter if you saw lumps that refused to be well incorporated.

IMG_1568

  • Lightly greased a flat cooking pan (preferred non stick pan). Transfer the batter to the special cup or the plastic bottle that you have prepared. Heat up the pan using medium to high heat and drizzle the batter in a circular pattern onto the pan. When the batter is set (dries up), transfer out and fold into your desired pattern. Best served warm with curry chicken or your preferred sauce. Note that roti jala can also be a dessert to be served with thick coconut milk and palm sugar.

IMG_15821


CONCLUSION

I am definitely going to prepare this again. My roti jala may not be the most beautiful for the time being but the taste is awesome and i presumed in my next attempt, it will look much better than this batch.. Is it not practices make perfect?

IMG_15721

Hope you like the post today. Cheers and have a nice day.

IMG_15801


  • For more recipes, you can refer to my RECIPE INDEX (updated as at 20 November 2014)  here and you can follow me at PINTEREST or visit the blog’s FACEBOOK PAGE to keep abreast of my future posts.  

IMG_15841


Christmas Candy Cane Peppermint Shortbread (圣诞薄荷牛油饼干)

IMG_20621

INTRODUCTION

My Christmas recipe this year is coming to an end. I still have a Panettone recipe yet to issue and thereafter I will do a compilation to facilitate readers to locate the recipes.

IMG_20251

Cookies is common during Christmas for Western bloggers… In fact, cookies recipe are not popular throughout the year until the period of about 1 month from Thanksgiving Day to Christmas Day itself. There are cookies exchange programs and household prepared their homemade delicious cookies, nicely packed and presented it as gifts for relatives and guests. As an Asian blogger, I also want to join in the fun, prepare some uniquely Christmas cookies..

IMG_20641

This is not a new recipe. It is a very simple recipe modified from one of the top posts of this blog : One, Two, Three…….Let’s Start Making Traditional Short Bread Biscuits (英式传统牛油饼干).

However, the design is from Aunty Yochana blog’s recipe: Yochana’s Cake Delight! : Christmas Cane Cookies.. She always command my due respect as a pioneer blogger.. I like to search her blog for ideas.

IMG_20521

If I tell you shaping this is quick and easy, I think I am telling a lie … It is rather laborious.. If you have a domestic helper at home, I am sure it could be rather fast.. If your kids are on holiday, they can also chip in to help..

IMG_20501

Considering that readers may give up in the preparation, I have decided to change it to the common round shape cookies..That will really be easy and fast…

IMG_20461

There are a slight Typo error in my images. It was supposed to be Candy Cane cookies and instead of joystick cookies. I was given the wrong information that this is called a Christmas joystick, ha-ha. It is rather laborious to change all the images and therefore I have decided to leave it as it is. Pardon me for that.

IMG_20341


WHAT IS REQUIRED

Servings: Prepare about 20-30 Candy Cane Shortbread

IMG_2011

  • 150 grams of plain flour
  • 100 grams of  butter, at room temperature
  • 50 grams of icing sugar
  • 1/4 teaspoon of peppermint essence
  • Some permitted red food colouring
  • Some permitted green food colouring

IMG_20441


STEPS OF PREPARATION

  • Pre-heat the oven to 160 degree Celsius.

IMG_2016

  • Cream the butter and sugar until light and fluffy. Sift in the flour and lightly fold until well mixed. Divide into 2 equal portions. For one portion, add some permitted red colouring and for the other portion, add the peppermint essence and some permitted green colouring.

PicMonkey Collage1

  • Lightly knead until the colour is consistent. Pinch some dough of each colour and shape it into a long thin stripes. Braid the two stripes to become one . Use your hand to roll in one single direction until the design are well incorporated. Cut the stripes into about 6 cm long. Fold 2 cm of one end towards the other end resembling the letter “J”. Perform the same for all the others.

  • For the round cookies. Pinch some green dough and red batter (about 10 grams). Shape it round and use a fork to lightly press on the centre.

  • Bake in the pre-heated oven of 160 degree Celsius for about 12-15 minutes. When taken out from the oven, let it rest in the tray for about 5 minutes before transferring to a rack for cooling.

IMG_2036


CONCLUSION

Definitely a presentable gift for those who look for gift ideas. Of course packaging is of prime importance. You will be surprised that peppermint blends extremely well with the shortbread. ..

IMG_20381

Hope you like the post today. Cheers and have a nice day.

IMG_20601


  • For more recipes, you can refer to my RECIPE INDEX (updated as at 20 November 2014)  here and you can follow me at PINTEREST or visit the blog’s FACEBOOK PAGE to keep abreast of my future posts.  


IMG_20321

Preparing Your Own Log Cake? Chocolate Yule Log Cake With Coffee Cream (Bûche de Noël, 巧克力树桐蛋糕)

IMG_19791

INTRODUCTION

I never believed that I am able to prepare a log cake…It looks difficult and I took out my courage to prepare one today. Readers, rest be assured, if I can, you can..and let me share with you some points in an attempt to convince you to put your hands on to have your first log cake.

IMG_19811

However, this recipe is not designed for more experienced bakers… There are much better recipes out there requiring more ingredients and many additional steps of preparation…. I have censored off many recipes and decide to share with all one which is easy and fast and that bakers like me who are not good at frosting and cake decoration also have the courage to do so…

IMG_19751

The sponge cake is a very simple and basic recipe… The filling and the frosting are basically the same… And overall, it need less than 10 ingredients to have this log cake. The most it will cost me will be SGD 5….Saves me lots of money ..For taste, it is definitely acceptable though not the best or the finest log cakes compare to those purchased from 5 stars hotel.. However, who really cares after a big feast that were spoilt of many choices of meat dishes, snacks and desserts..
IMG_19911

If you think preparing a log cake is very difficult, you have to reconsider again.. You need not to have the softest and finest sponge cake prepared using egg separation method..In my humble opinion, the centre point of the cake will be on the overall mix between the delicious creams and the sponge cake. Therefore what you required is just a basic simple sponge cake that are reasonable soft.

IMG_19991

You don’t need to possess very good cake decoration technique or complicated baking equipment.. You need to select a frosting of your choice, spread on the cake, there is not even a need to level it because you are going to create a visual effect of tree barks… Any imperfections will be deemed to be natural defect on that piece of wood….In addition, as it “snows” heavily, you can easily covered any imperfections….Therefore, instead of paying 30-40 SGD for a log cake.. why not prepare your own?

IMG_19831

As per Wikipedia,

“A Yule log or bûche de Noël (French pronunciation: ​[byʃ də nɔɛl]) is a traditional dessert served near Christmas, especially in France, Quebec and several other francophone countries and former French colonies. It can be considered a type of sweet roulade. The traditional bûche is made from a genoise or other sponge cake, generally baked in a large, shallow Swiss roll pan, frosted, rolled to form a cylinder, and frosted again on the outside. The most common combination is a basic yellow sponge cake, frosted and filled with chocolate buttercream; however, many variations on the traditional recipe exist, possibly including chocolate cakes, ganache and espresso or otherwise-flavoured frostings and fillings.” (Source: http://en.wikipedia.org/wiki/Yule_log_%28cake%29)

IMG_19731


WHAT IS REQUIRED

Sponge cake recipe adapted from: Yummy chocolate log | BBC Good Food

Servings: a 9” log cake

IMG_1934

Sponge cakes:

  • 90 grams of self raising flour
  • 90 grams of brown sugar
  • 3 eggs
  • 3 tablespoons of cocoa powder
  • 1 teaspoon of instant coffee granules

IMG_1951

Fillings and frostings

  • 1 cup of fresh whipping cream
  • 1/2 cup of icing sugar
  • 1.5 teaspoons of instant coffee granules.
  • 50 grams of melted dark chocolate (not in picture)

IMG_19771


STEPS OF PREPARATION

  • Pre-heat the oven to 180 degree Celsius and line the a 6” x 9” Swiss roll baking tin with baking paper.

IMG_1941

  • Beat the eggs and brown sugar at high speed until volume expands to at least twice and become light and pale.  Sift in the coffee granules, cocoa powder and self raising flour. Fold lightly and quickly until it is well mixed. Transfer the batter to the lined baking tin. Lightly knock the tin on the table top three times to force out any air trapped inside. Bake in the pre-heat oven of 180 degree Celsius for 10-15 minutes or until the top is dry.

IMG_1950

  • After taking out from the oven, take out from the baking tin. Use something to level the cake if necessary.  Quickly turn the cake with the bottom of the cake facing you and placed the cake on top of the piece of baking paper dusted with icing sugar (optional to dust with icing sugar).. Tear off the first piece of baking paper. Take the width of the cake and roll the cake (like the way of rolling the Sushi) and make sure that the ending portion is facing downwards. Let it cool completely in this position. (Note that it is important that you do this as soon as the cake is out of oven and as soon as your hand can handle the heat from the cake. You can use a towel to roll together if you want. When the cake dries up, it will be difficult to roll.)

IMG_1959

  • While the cake is resting, prepare the fillings and frosting. Mix one to two tablespoons of fresh whipping cream with the instant coffee granules. Stir until dissolved. Beat the cold whipping cream until it starts to thicken and volumes starts to expand. Add icing sugar tablespoon by tablespoon, followed by the dissolved coffee cream . Beat until the cream reached a stiff peak. (Please keep an eye on the beating process and in the event that you have overbeaten the cream (whereby the fats separated and floated on some water), try adding some more cold cream and continue to whip so as to salvage the situation. Unroll the cool sponge cake and spread generously a thick layer (about 1/2 of the beaten cream) of beaten coffee cream on it.

IMG_1967

  • Carefully roll back the sponge such that it is in a log shape. For the remaining cream, add the melted chocolate (melted chocolate should be cool but yet to harden and you can melt the chocolate by microwave for 30 seconds or over the stove over a pot of hot boiling water), quickly use a spatula to fold it until well mixed. Spread generously the chocolate cream on both sides of the log ends and log trunks. Use a fork to lightly make some horizontal lines on the trunks and circular lines on the log ends.

  • Decorated your cake with your desired Christmas ornaments such as Santa Clause, pine tree, mushrooms, reindeer etc.. and dust sparingly with icing sugar resembling snowfall.  Chilled the cake if the frosting is too soft and cut into 2 cm thick pieces for servings.

Note:

  • It does not matter if your basic sponge cake is ugly as it will be fully covered with coffee cream. It also does not matter if you cream and frosting is smooth as after drawing lines with forks, it will have a natural tree bark look… I have used less chocolate in this illustration so the colour is a bit light. You final log cake should have a darker and more appealing colour.

IMG_19711


CONCLUSION

Trust me, I can do it, you can do it… If you think that it is a miracle that you can prepare a log cake, the miracle is going to happen. Remember that the beauty of a log cake is that it need not be perfect, be it your decoration or sponge cake… New bakers, do take a step to make this simple Yule chocolate log cake and impress your guests.

IMG_19931

Hope you like the post today. Cheers and have a nice day.

IMG_19871


  • For more recipes, you can refer to my RECIPE INDEX (updated as at 20 November 2014)  here and you can follow me at PINTEREST or visit the blog’s FACEBOOK PAGE to keep abreast of my future posts.  

IMG_19691

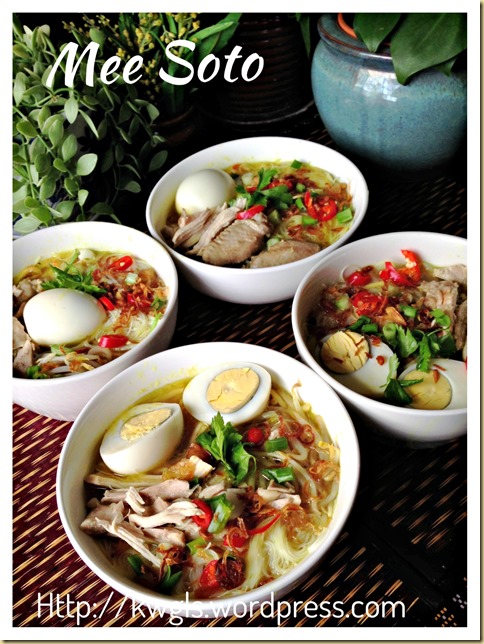
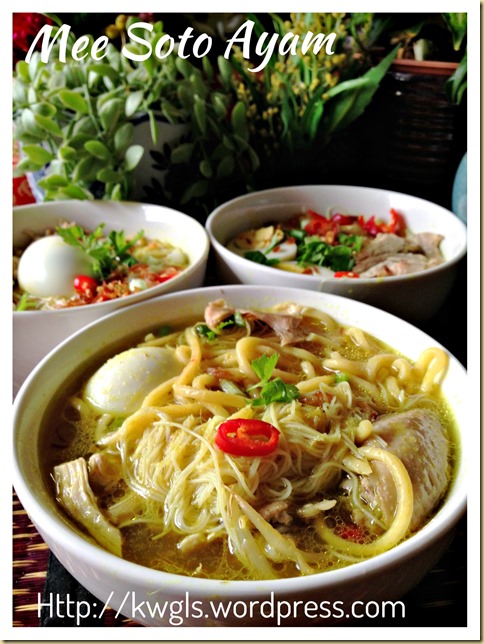
Mee Soto Ayam (马来鸡汤面)

IMG_75831

INTRODUCTION

This is a long awaited post.. I have prepared the dish on 30-9-2014 but only have a chance to issue the recipe today. Reader and Facebook group members are chasing me for this recipe and I promised them I will issue as soon as possible.

IMG_75911

At times when I am busy, it is very difficult for me to concentrate to issue a savoury post with lots of ingredients and procedures… Today is the day when I am a bit of free time, can sit down and concentrate to write the recipe for all.

IMG_75991

This is one of the Malay noodles that I occasionally ordered  when I frequented Malay stalls… Of course, I have to order Mee Soto Ayam or Chicken mee soto.. It is a turmeric and other spice based soup, slightly clear yellowish soup and served with shredded chicken (or chicken chunks) on top of a bowl of rice vermicelli or yellow noodles… Some may also have side items such as begedil to go with it. If you are interested, you can refer to this post: Deep Frying Your Potato Patties ?–Begedil (炸马铃薯饼). However, for this illustration, I did not prepare begedil to go with the mee soto.

“Soto mie, Soto mi, or Mee soto is a spicy noodle soup dish commonly found in Indonesia, Malaysia, and Singapore. Mie means noodle made of flour, salt and egg, while soto refer to Indonesian soup. In Indonesia it is called soto mie and considered as one variant of soto, while in Malaysia and Singapore it is called mee soto.

IMG_76081

There are some variations of soto mie, it can be made of beef, chicken, or offals such as kaki sapi (cartilage and tendons of cow’s leg) or tripes. People may exchange noodles for rice or rice vermicelli according to their preference. A combination of either noodle or rice vermicelli along with slices of tomato, boiled potato, hard boiled egg, cabbages, peanut, bean sprout and beef, offal or chicken meat are added. Broth is then poured over this combination. This soup is made from beef or chicken stock and some other spices. Soto mie usually add condiments such as jeruk nipis (lime juice), sambal, bawang goreng (fried shallot), vinegar, kecap manis (sweet soy sauce), and emping.

IMG_76161

In Singapore and Malaysia the most popular variant is mee soto ayam (chicken noodle soto). It is yellow wheat noodle served in chicken broth spiced with turmeric. Basically it is pretty similar with soto ayam (chicken soto) commonly served in Indonesia, with exception it is served with noodle instead of rice vermicelli.” (Source: http://en.wikipedia.org/wiki/Soto_mie)

IMG_76051


WHAT IS REQUIRED

Recipe adapted from: Mee soto ayam | The Straits Times SoShiok

Servings: 4-5 adult servings

IMG_7555

Spice Paste (Rempah)

  • 120 grams of shallots
  • 20 grams of garlic cloves
  • 10 grams of ginger
  • 1-2 lemon grass stalks
  • 7 cm long of galangal
  • 1.5 tablespoons of turmeric powder
  • 1 teaspoon of coriander powder
  • 1 teaspoon of cumin powder
  • 1 teaspoon of white pepper

IMG_7557

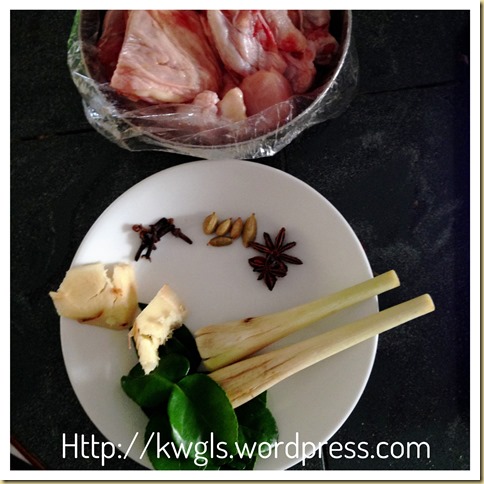
Soup

  • 1 small to medium sizes  chicken– cut into 8-10 pieces.
  • 2 litres of water
  • 4 cardamoms
  • 5 cloves
  • 2 star anises
  • 2 lemon grass bruised
  • 5 kaffir lime leaves
  • Salt to taste
  • 2 tablespoons of cooking oil
  • 1 tablespoon of light soya sauce

IMG_7576

Assembly

  • 100 grams of dried rice vermicelli – blanched
  • 400 grams of yellow noodles – blanched
  • 50 grams of bean sprout – blanched
  • 5 hard boiled eggs
  • Some deep fried shallots
  • Some chopped spring onion
  • Some chopped red chilli
  • Some chopped coriander leaves or Chinese celery
  • Shredded chicken meat (as prepared above)

IMG_76231


STEPS OF PREARATION

IMG_7564

  • In a big pot, put some water and blanched the chicken to get rid of the blood. As long as the exterior is slightly cook, off the heat and throw away the water. Slightly rinse the chicken to get rid of any blood clot. Add about 2 litres of water, lemon grass stalks, lime leaves and other spices such as cloves, cardamoms, star anises . I have put all these small items in a soup bag. Bring the water to boil. Once boiled, reduce the heat to medium, let is simmer until chicken meat is tender.

  • Dish out the chicken and set aside for later use. When the chicken is cooled, debone the chicken, throw back all the bones into the soup and you can simmer again until your rempah  or spice paste is ready.

  • If the water is getting less and less, you can add in more water. If you preferred, you can also add in chicken carcasses to get a more concentrated chicken soup base. It took me about 30 minutes to get ready the meat as I am simmering it under low to medium heat.

IMG_7567

  • In a blender, put all the rempah or spice mix ingredients in a blender (except the powdery spice). Add adequate water just to cover the herbs. Blend until fine. Set aside for later sautéing.

  • In a big pot, add 2 tablespoons of cooking oil, sauté the spice mix until fragrant and aromatic. It may take about 10 minutes or so under medium heat.

IMG_7573

  • Add the powdery spice and stir fry for another 2-3 minutes. Sift the chicken stock from another pot to this pot. Bring the soup to boil. Add seasoning (salt, light soya sauce and sugar to taste), off the heat and set aside for later assembly.

IMG_7581

  • Before assembly, you should have the following ingredients ready: blanched rice vermicelli, blanched yellow noodles, blanched bean sprouts, shredded chicken, hard boiled eggs, chopped chilli, chopped coriander or Chinese celery and deep fried shallots.

IMG_75971

  • Have a bowl, put some bean sprouts, yellow noodles and rice vermicelli. Pour soup adequate to cover the noodles. On top of the noodles, put eggs, shredded chicken meat (or chicken chunks) , begedil (if you have) and garnished with chopped chillies, chopped spring onions, Chinese celery leaves and deep fried shallots. Best served warm with sweet soya sauce or kicap manis.

IMG_75851


CONCLUSION

For this dish, list of ingredients is rather long. However, just remember a few critical spices and herbs that bring out its unique flavour. These are lime leaves, turmeric powder or fresh turmeric and galangal. Of course all the others are important but without these three, it will be not much different with other spice based noodles dishes. Do give it a try and let me know if it suits yours taste buds.

IMG_75951

Hope you like the post today. Cheers and have a nice day.

IMG_76181


  • For more recipes, you can refer to my RECIPE INDEX (updated as at 20 November 2014)  here and you can follow me at PINTEREST or visit the blog’s FACEBOOK PAGE to keep abreast of my future posts.  

IMG_75891

Crispy Crabstick Snack (酥脆蟹肉小吃)

IMG_1802

INTRODUCTION

My family members except me loves this crab sticks commonly sold in Singapore and Malaysia supermarket. It was usually sold in the frozen department and they were used to cook with vegetable dish or noodle dish…

IMG_1816

My East Malaysian relatives visited me last week and gave me a plastic bottles of these crispy crab meat that she bought from her Malay colleagues.. It was RM 3 per bottle, kids loved them and can’t have enough of them… They are fighting for the very last piece they have.. I gave it a try and promised them that I will replicate this for them..

IMG_1814

I knew that their version is the deep fried version, in fact slightly more fragrant that what I have prepared. However, I have chose to use oven baked in view of the current trend of healthier life style… I presumed air fryer will work extremely well for this snack too…

IMG_1794


WHAT IS REQUIRED

IMG_17602

  • One packet of crabsticks
  • 1/2 teaspoon of curry powder (optional)
  • Few curry leaves (fresh or dried) (optional)

IMG_1792


STEPS OF PREPARATION

  • Pre-heat the oven to 100 degree Celsius

PicMonkey Collage1

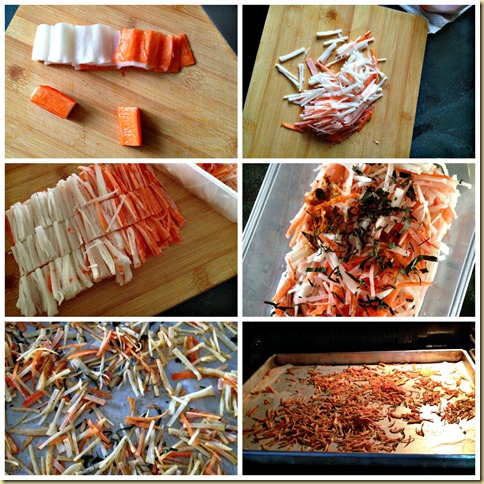
  • Cut the crab sticks into about 2 cm length..Roll it out and use a knife to slice it as thinly and as EVENLY as you can. (Uneven crabstick will make some of the crabstick become crispy but some are chewy). Put it in a plastic box, add the curry powder and add in chopped curry leaves. Close the lid of the plastic box and shake until the chopped crabstick are evenly coated with curry powder. Transfer to the baking tray as evenly as possible. Bake in the pre-heat oven of 100 degree Celsius until your desired crispiness. Occasionally, give it a stir to ensure even baking. Baking time will depend on the size of the chopped crabstick. For this illustration, it took about 30 minutes.  Store in an air tight container when cooled completely.

IMG_1820


CONCLUSION

This is a nice snack and I will endorse an occasional indulgence. It is especially good to serve to house guest during Chinese New Year or other major festivals. Remember that you can always do it using air fryer but I can assure all that deep frying using low to medium heat is the fastest and the most aromatic.. It is up to readers to decide base on your health objectives.

IMG_1798


This recipe was included in Page 45 and Page 46 of the following E-book. 

For more Chinese New Year related cookies, snack and steamed cake recipes, you can have a copy of Easy Chinese New Year Recipes – A step by step guide” that was packed with 30 recipes, 60 pages at a reasonable convenience fee of USD3.50. The recipes covered various recipes from auspicious radish cake to nian gao to traditional kuih bangkit to trendy London almond cookies. Of course not forgetting both type of pineapple tarts. You can purchase by clicking the link above. You can either pay using Pay Pal or Credit card account. Please ensure that you have an PDF reader like Acrobat or iBooks in your mobile phone or iPad if you intended to read it in your ipad or mobile phone. Should there be any problems of purchasing, feel free to contact me at kengls@singnet.com.sg and separate arrangement can be made.

coverlow-final[5]

Hope you like the post today. Cheers and have a nice day.

IMG_1804


  • For more recipes, you can refer to my RECIPE INDEX (updated as at 15 October 2014)  here and you can follow me at PINTEREST or visit the blog’s FACEBOOK PAGE to keep abreast of my future posts.  

IMG_1808


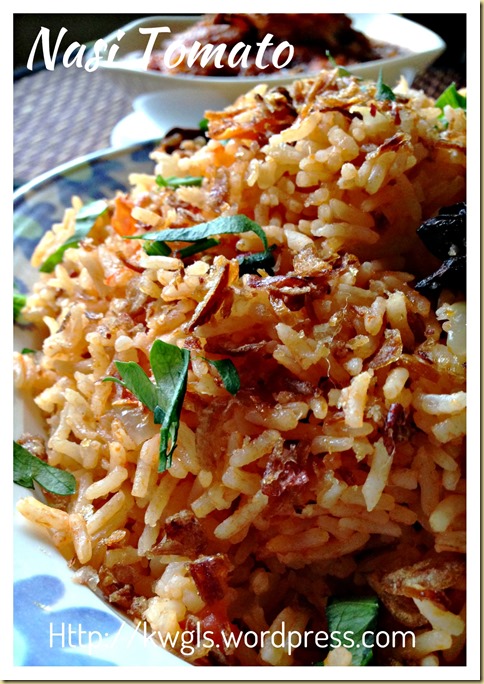
Nasi Tomato With Ayam Masak Merah (番茄饭)

IMG_16681

INTRODUCTION

Per Wikipedia on Malaysian cuisines, it was stated that Nasi tomato or tomato rice :

IMG_16741

“Nasi tomato – rice cooked with tomato sauce or paste, milk, dried spices, and a sautéed rempah base of garlic, onions, ginger. Nasi tomato is often paired with ayam masak merah.” (Source http://en.wikipedia.org/wiki/Malaysian_cuisine)”

IMG_16471

The fact that I am putting the definition of this rice at the start of the post means that it is one of our traditional cuisines that are always served by our Malay and Indian brothers. However, apparently, not many Chinese or other races or city dwellers are aware of this special rice that was usually served during kenduri (feast) or buka puasa..It is not a common daily dish but only prepared for occasions. It was especially common in 1970s and 1980s.

IMG_16551

With the current craze of Japanese style tomato rice that was going in the Chinese and English Facebook Groups, I think it is timely for me to issue this post to let readers aware of our traditional cuisine. As a blogger who constantly promote traditional cuisine, I think it is my obligation to blog this as a respect to our delicious traditional cuisines..

IMG_16571

Looking at the ingredients list, one will know that this is an aromatic rice.. with butter, milk, spices.. It was usually served with ayam masak merah literally translated as chicken cooked in red sauce. Red basically refer to tomato and chilli. It is a chicken that have a sweet tangy gravy and goes well with the rice…

IMG_16591


WHAT IS REQUIRED

IMG_1615

  • 3 cups of rice (preferred basmati rice) – wash
  • 2 cm ginger, slice in big piece
  • 2 cinnamon stick *
  • 2 cloves *
  • 2 aniseed *
  • 5 cloves of garlic, chopped
  • 1 cup of milk
  • 2 cups of plain water
  • 2 big tomato cut into small cubes
  • 1 big onion cut into small pieces
  • 2 tablespoons of tomato sauce
  • 5-6 tablespoons of tomato puree (not in picture)
  • 2 tablespoons of butter or ghee

* can be optional

IMG_1622

  • 1 medium sized chicken cut into big pieces
  • 1 can of tomato puree
  • 1/2 cup of tomato sauce
  • 2 big tablespoons of dry chilli paste (chilli bo) (can be substitute with 10 dry chilli soaked and blend with herbs below)
  • 2 big tomatoes cut into small cubes
  • 1 lemon grass
  • 3 cm long of ginger
  • 10 shallots
  • 5 cloves of garlics
  • 1 big onion
  • 3 tablespoons of cooking oil

* coconut milk can be added if desired

IMG_16721


STEPS OF PREPARATION

IMG_1677

  • In a pan, melt the butter and saute aniseed, cinnamon stick, cloves, garlic and chopped onion until fragrant. Add the chopped tomatoes  followed by the washed rice. Add the tomato puree and tomato sauce. Stir fry a few minutes until all the aroma were well incorporated. Transfer to the rice cooker. Add 1 cup of milk and 2 cups of plain water.  Add seasonings of your choice (salt to taste and sugar). Stir and cook in the rice cooker . Fluff the rice before serving and garnish with additional chopped deep fried shallots and Chinese celery.  (Note: This is on the assumption that 1 cup of rice requires 1 cup of liquid. You have to refer to your rice packaging instruction for rice cooking instruction. If you are unsure, for 3 cups of rice, use 2.5 cups of water to avoid mash rice. The tomato rice should be soft but grainy)

  • If you are want a faster way of cooking by passing the sautéing of spices as above. Put everything (including soften butter)  in the rice cooker and cooked as per rice cooker instruction. If you think that there are too many ingredients required, most are optional except : tomatoes, tomato puree or sauce, milk, butter/ghee, seasonings). This will be the fastest fuss free version without the spices.

IMG_16371

IMG_1627

  • In a blender , put shallots, onions, garlics, ginger and dry chilli (if dry chilli paste is not used). Add adequate water (about just enough to cover the ingredients) and blend until it form a fine paste. In a pot, add the cooking oil and sauté the garlic shallot paste until fragrant and aromatic.

IMG_1632

  • Add the chilli sauce, followed by tomato sauce, chopped tomatoes and tomato puree. Bring to boil. Add in the chicken and cooked until the sauce dries up. In general, do not add water to the pot unless it is overly dry. Chicken when cooked will secrete meat juices. If too watery, it will take a long time to cook the dish until the desired thickness. It took me about 30 minutes to cook until the thickness that I want. Throughout the process, periodic stirring is required to prevent burnt in the bottom. Before off the heat, add sugar and salt to taste. Let it sit in the pot for at least 15minutes to half an hour before dishing up for serving.

IMG_16611


CONLCUSION

This recipe is a rather traditional recipe that command my due respect. I hope that this will give reader another choice of the so called “tomato rice” craze, aware and proud of our very own version of nasi tomato. Please also note that our Indian brothers also have another version of tomato rice.. Do give it a try and let me know if it suit your taste bud. This is a one pot dish on its own and need no other side dishes though it was usually paired with ayam masak merah.

IMG_16761

Hope you like the post today. Cheers and have a nice day.

IMG_16701


  • For more recipes, you can refer to my RECIPE INDEX (updated as at 15 October 2014)  here and you can follow me at PINTEREST or visit the blog’s FACEBOOK PAGE to keep abreast of my future posts.  

IMG_16651

Yorkshire Puddings (约克郡布丁)

IMG_0610

INTRODUCTION

I know it is still early but keep this post and you will be able to prepare Yorkshire puddings for your Christmas feasts.

IMG_0596

What is Yorkshire pudding? Yorkshire pudding in essence is a pancake that was baked at high temperature to obtain a special tall pancake that have a cavity… It was usually served during Christmas dinner together with main dish as a substitute to bread rolls  to absorb the meat juices in the Christmas feast…

IMG_0602

However, it can also be served as as dessert to go with ice cream. A good Yorkshire pudding should be rather light and thin, slightly chewy an a good absorbent of meat or sweet sauces..

IMG_0606

Per Wikipedia:

“Yorkshire pudding is an English dish made from batter consisting of eggs, flour, and milk. The dish is usually served with roast meat and gravy and is a staple of the traditional British Sunday roast. It may also be served as a dessert.The exact origin of the Yorkshire pudding is, as yet, unknown. The first ever recorded recipe appears in a book in 1737. Yorkshire pudding is cooked by pouring a batter made from milk (or water), flour and eggs into preheated, oiled, baking pans, ramekins or muffin tins (in the case of miniature puddings). A basic formula uses 13 cup flour and 13 cup liquid per egg.” (Source: http://en.wikipedia.org/wiki/Yorkshire_pudding)

IMG_0618

This recipe was prepared based on the definition of Wikipedia above. As Christmas dinner is yet to come, I have decided to prepare some mushroom soup for the kids to go with Yorkshire pudding as lunch… They love it.. and I do love it as well..

IMG_0614


WHAT IS REQUIRED

Servings: about 6 medium size Yorkshire Puddings

IMG_0562

  • 1 cup of milk
  • 1 cup of plain flour
  • 3 eggs
  • Pinches of salt
  • Adequate cooking oil for well greasing the tin (Lard can be used but not butter due to different boiling point of the fats)

IMG_0594


STEPS OF PREPARATION

IMG_0571

  • In a whisking bowl of standing mixer, add eggs, flour, milk . Mix until well combined with no lumps noted. Chill the batter in the refrigerator until the oven is ready.

PicMonkey Collage1

  • Grease a muffin tray adequately with cooking oil . Grease the connecting part as well Put one tablespoon of oil in each muffin cup.

  • Pre-heat the oven to 220 degree Celsius together with the greased muffin tray. Once the muffin tray is ready (most likely you will see some smoke from the hot oil), take out the batter, use the mixer to beat again for 1 minutes. Take out the muffin tray and pour the batter on the hot muffin cups as full as possible. Transfer carefully to the oven, close the door and reduce the temperature to 200 degree Celsius. Bake for about 15 minutes and reduce the temperature to 180 degree Celsius. Continue baking for about 10 minutes or until the pudding puff up and turn golden brown. Off the heat, keep the oven door ajar by placing a chopstick in between the oven door and the oven. Leave it as such until the Yorkshire Pudding is cooled. The main purpose of the step is to prevent a certain drop in temperature that causes the Yorkshire pudding to deflate. Best serve warm as a side item with meat dishes.

IMG_0600


CONCLUSION

This is a nice pancake to go with meat juices. One thing that I can think off is to eat with curry chicken.. It sure is a delicious treat. Hope this post will benefit those readers who are looking for this recipe. Remember that It can be eaten with ice cream as well..

IMG_0612

Hope you like the post today. Cheers and have a nice day.

IMG_0598


  • For more recipes, you can refer to my RECIPE INDEX (updated as at 15 October 2014)  here and you can follow me at PINTEREST or visit the blog’s FACEBOOK PAGE to keep abreast of my future posts.  

IMG_0608