My Wife Is Not A Korean, But She Likes To Prepare This –Korean Kimchee

IMG_0614

INTRODUCTION

I can’t remember exactly when was the first time I ate Kimchi. But it must be very recent! What I can remember is the time when Singapore and Malaysia was flooded with Korean Drama series, possibly 10 years ago? Until now, I still refused to say that Kimchi is my favorite for its strong garlic smell. However, my wife is a Kimchi fanatic and she had learned to make Kimchi from a website which she can’t remember the source now. In addition, she had modified the recipe over her many years of preparing this. She started making Kimchi for herself, her friends, families relatives and neighbours and 2 years ago, she shared this recipe with my neighbour. As my neighbour has lot of connections in wet markets and she started preparing it and gave it to friends, other stall owners and her employees. Apparently, the recipe is good and more and more of her connections asked for her kimchee. Now, she usually make few times a year and when she made, it will be about 4-5 big Napa vegetables.. As you need to ferment the vegetables for at least 3 days and her sons can’t stand the strong garlic “aroma” all over her house, it usually ended up that the fermentation process was done in my house…

IMG_0601

For purposes of this illustration,  it was requested by me, coincided with my neighbour’s intention of preparing a batch this week and concurred by my wife to be hands on this time. The fermentation period is due today. Therefore, I will have to quickly take the pictures, issue this post before the kimchee are given away. For this batch, we have prepared 5 big plants of Napa vegetables.

IMG_0605

For my international readers, what is Kimchi? Kimchi is Korea’s national dish. It is slightly sour and spicy full of garlic aroma. Kimchi  is believed to aid in digestions, possible inhibitions of cancerous growth and rich in lactic acid bacteria, Vitamin A, B1, B2, calcium, iron and beta carotene. and therefore, it was dominated as one of the World’s Healthiest Foods by the Health Magazine.  As usual, I will refer reader to Wikipedia’s definition:

Kimchi (Korean: 김치 Korean pronunciation: [kimtɕʰi]; English pronunciation: /ˈkɪmtʃi/), also spelled kimchee or gimchi, is a traditional fermented Korean side dish made of vegetables with a variety of seasonings. It is often described as “spicy” or “sour”.  In traditional preparation Kimchi was often allowed to ferment underground in jars for months at a time. It is Korea’s national dish, and there are hundreds of varieties made with a main vegetable ingredient such as Napa cabbage, radish, scallion, or cucumber.[5] Kimchi is also a main ingredient for many Korean dishes such as kimchee stew (김치찌개; kimchee jjigae), kimchee pancake (김치부침게; kimchijeon), kimchee soup (김칫국; kimchiguk), and kimchee fried rice (김치볶음밥; kimchee bokkeumbap).”

IMG_0603


WHAT IS REQUIRED

Servings (1 large size Napa about 2 kg)

IMG_0589

  • 1 large Napa cabbage about 2 kg – Cut into halves (not in picture)
  • 1 radish about 1 kg – cut into matchstick size of 0.5cm x 0.5 cm x 4 cm (not in picture)
  • 4 stalks of spring onions chopped diagonally
  • 1 cups of chives chopped into smaller pieces
  • 2 cups of leek cut into small pieces
  • 0.5 cup of salt
  • 2 cups of chilli powder
  • 1/2 cup of fish sauce
  • 1/2 cup of minced garlic
  • 1/2 tablespoon of minced ginger
  • 1/2 cups of minced onions

IMG_0590

  • 1/2 cup of rice four
  • 1/4 cup of sugar
  • Water (adequate water to make a sticky starch)

Depending on your preference, if you like more Kimchi sauce, you can have more water to make it less sticky. This recipe is rather wet as both my wife and my neighbour loves the Kimchi paste for preparing cuisines such as fried rice, noodles and etc..

IMG_0599


STEPS OF PREPARATION

IMG_0591

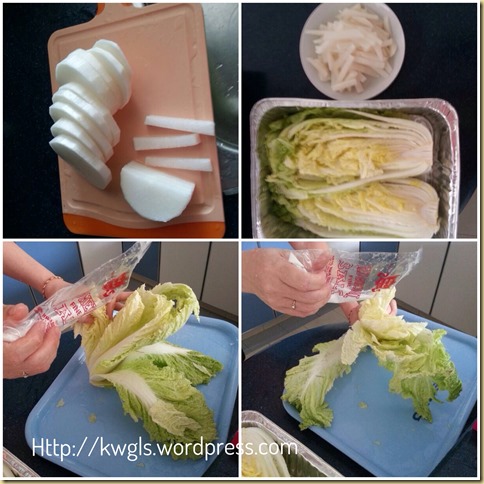
  • Cut the radish into matchstick size and the Napa cabbage into half. Marinate the cabbage and radish with salt for 2 hours. Make sure that every leaf is rubbed with the salt and ensure that the stems get more salt than the leaves. Also ensure that the Napa cabbage centre face upwards during the fermentation. After 2 hours, turn to the Napa cabbage and radishes and let it soaked in the salty vegetable juices secreted from the first 2 hours. Let it marinate for another 2 hours. After 4 hours, rinse the Napa cabbage and radishes in cold water and manually squeeze out as much water as possible. Set aside.

 IMG_0592

  • In a sauce pan, make a solution of rice flours by mixing 1/2 cups of flour with 3 cups of water. Note that this is an estimation and you can always add more water if it is too sticky. Cook under medium heat and when it starts to boil (bubbles start to emit), add in sugar and boil for another minute to let it dissolve. Set aside and let it cool. Once cool, add in fish sauce, chilli powder, minced ginger, minced garlic, minced onion and mix well.

IMG_0593

  • Add in chopped leek, spring onions, chives, marinated radishes and mix well.

IMG_0594

  • Spread the kimchee paste evenly on each Napa cabbage leaf and ensure the Napa cabbage centre is facing up. Let it ferments for at least 2 days or when the taste of the Kimchi paste become sour. After 12 hours of the first fermentation, turn the Napa cabbage and spread again the Kimchi paste into the leaves again. Do the same for every 12 hours. When the Kimchi have lots of bubble and smell sour, it is considered as done. Store in an air tight container and can keep for months (since this is a preserve vegetables). Can serve as a side dish or use for making of Korean cuisines.

 IMG_0597


CONCLUSION

Among my circle of girl friends and my wife’s friends, most of them like this, possibly because of it is spicy and sour. While I know that this may be a niche cuisine, I am sure some of the readers may be looking for this recipe. Since my wife has always been complimented for her Kimchi, I thought I might as well share this recipe with my readers. As per my wife and neighbour, they are totally satisfied this batch that they have made. Lastly, preparing Kimchi have lots of variations and error tolerances, start with this batch and for the second batch, you will know how you want to adjust the ingredients to suit your taste buds.

IMG_0611

Hope you like the post today, cheers.


For more recipes, you can refer to my RECIPE INDEX here and you can follow me at PINTEREST or visit this blog’s FACEBOOK PAGE.

group-board-picture722

If you are a Pinterest user and you are interested in have more recipes, you can join or follow this Pinterest Board set up by me  where there are more than 250 recipes worldwide and pinned by various bloggers: FOOD BLOGGERS AND FOODIES UNITED PINTEREST BOARD

Four-Seasons-JPG296222232222


For Four Seasons Blog Hop #24 where I am the Co-host, please join us for the party where you can get a lot of the family related posts. Please click the above logo to enter your post.

IMG_0609


kimchi collage

FOUR SEASONS BLOG HOP #24

Welcome to the Four Seasons Blog Hop

A party where we can celebrate the greatness that each season brings to our lives.

So Let’s Get This Party Started!!Let's Get this Party Started Share your  food creations, gardening, clever projects, tablescapes, decorations, party themes, and inspirational knowledge … Ok, you get the point.  Join us every Thursday (opens Wednesday evening at 6:00 pm). Please stay for awhile and show some love to the guests, join us in the fun and grab a button. Four Seasons Blog Button

 
We will share your posts in a variety of ways on Pinterest, Twitter, Facebook and Google Plus.  We will also have features of the week! Be sure to follow our Four Seasons Board on Pinterest!

By participating in this linky party, you agree to have your posts shared on social media and Pinterest and to receive email and Google notifications for reminders about the party. If you don’t want to receive notifications, please let us know.

FEATURED


Powered by Linky Tools

Click here to enter your link and view this Linky Tools list…

Luxurious Chocolate Cake with Chocolate Sauce–One Baking Ratio Number Adventure (12)

IMG_0347

INTRODUCTION

I have to admit that I am rather poor in cake decoration. When I prepared the chocolate sauce for the cake, the whole kitchen was in a mess. During photo taking sessions, that was another disaster.. The chocolate sauces stained my phone, my plates, my cloths …… I gave up. What a consolation statement when one of my friends told me, chocolate is supposed to be messy anyway, what is more important is the taste of the cake. For taste, I am very confident that I wouldn’t disappoint reader with this easy to do and moist chocolate cake..

IMG_0361

The cake uses 500 grams of sweeten dark chocolate (including 250 grams for making of the chocolate sauce) and I would say, it is designed for the hard-core chocolate addict.. It is extremely easy to prepare, just mix and bake and was prepared using “one number baking ratio”. In order to maintain the moisture of the cake, I have opted to use steamed bake method, meaning putting the baking tin in a pool of hot water. The steam will help to conserve the moisture of the cake. However, this step is optional. Don’t be shocked by the watery batter, it will turn out well as long as you bake it according to the prescribed time and temperature.

IMG_0414


WHAT IS REQUIRED

IMG_0311

  • 250 grams of melted butter
  • 250 grams of eggs (about 5 eggs) – lightly beaten
  • 250 grams of sweet dark cooking chocolate –melted
  • 250 grams of white castor sugar
  • 250 grams of milk
  • 250 grams of self raising flour
  • 1/8 teaspoon of baking soda (optional)

For chocolate sauce

  • 250 grams of sweet dark cooking chocolate – melted
  • 250 grams of normal cream or double cream

IMG_0399


STEPS OF PREPARATION

  • Pre-heat the oven to 180 degree Celsius. Put a baking tray and put 2-3 cups of water in the baking tray.

  • Lightly grease a 8” x 8” baking tin or line the baking tin with some baking paper.

IMG_0318

  • Melt butter in the microwave using medium to high heat (about 1 minute). Melt the chocolate in the microwave using medium heat. This will take about 2-3 minutes. However, stir the chocolate in a minute interval to ensure all the chocolates have melt.

IMG_0416

  • Put all ingredients into a machine whisking bowl and whisk until smooth. Once smooth, transfer the batter to the baking tin. In the illustration, I have put in stages for purposes of photo taking. Don’t be alarmed by the watery batter. For all recipes using one number baking ratio, the batter is usually very wet.

IMG_0327

  • In a large baking tray, put in 2 cups of water. Place the baking tin in the baking tray. Bake in the oven for 180 degree Celsius  for the first 20 minutes. Reduce the temperature to 170 degree Celsius and continue to bake for another 20-25 minutes or until a skewer inserted into the cake comes out clean.

IMG_0335

  • To prepare the chocolate sauce, put equal amount of dark chocolate with equal amount of double cream (I used normal cream) and melt in the microwave using medium heat for 3-4 minutes. In between a minute interval, stir the chocolate and cream and ensure that it is well combined. Note that you have to constantly stir the mixture, otherwise, the chocolate or the cream can be cooked rather fast. As long as the chocolate melts, you can off the microwave. Of course, you can resort to the traditional method of placing the chocolate and cream over a pan of hot boiling water and stir until it melts. In this case, make sure the water vapour should not have a chance of touching the chocolate sauce. Otherwise, the sauce will not be smooth.

IMG_0341

  • Cut the cake into halves or into 3 layers horizontally. Pour some chocolate sauce evenly on one layer, top by a new layer and follow by some chocolate sauce. Cut into the desired sizes for serving. Before serving, drizzle with additional chocolate sauce.

IMG_0374


CONCLUSION

This is my own recipe without referring to any recipe book. If you looked at the ingredients list, can you see a pattern? There is only one number –  250 grams. Hope you can give it a try! Not confidence that it will work? Okay, try making with 1 egg. Measure your egg and if your egg is 50 grams, then use 50 grams for all the other ingredients and share with me if this is the cake that you are looking for? Hope you like the post today. Cheers and have a nice day.

IMG_0382 


For more recipes, you can refer to my RECIPE INDEX here and you can follow me at PINTEREST or visit this blog’s FACEBOOK PAGE.

group-board-picture72[2]

If you are a Pinterest user and you are interested in have more recipes, you can join or follow this Pinterest Board set up by me  where there are more than 250 recipes worldwide and pinned by various bloggers: FOOD BLOGGERS AND FOODIES UNITED PINTEREST BOARD

Four-Seasons-JPG29622223222[2]

For Four Seasons Blog Hop #23 where I am the Co-host, please join us for the party where you can get a lot of the family related posts. Please click the above logo to enter your post.

IMG_0365

IMG_0405

Grilled Mushroom Meat Rolls With Korean Bibigo Sauce and Italian Oregano Cream Sauce

IMG_0165

INTRODUCTION

I have prepared this to entertain my guest during weekend. As it is my own creation, there is nothing much for me to write about this recipe. The dish is simple to prepare and requires only household mini ovens for the grilling. There are only two main ingredients, Shimeji mushrooms and sliced pork belly meat. Variations are many and if you prefer, you can always use beef rolls or change to other types of vegetables such as asparagus. I have prepared two types of sauces for the meat rolls, the Italian Oregano Cream Sauce and the Korean Barbecue Sauce. The Oregano Cream Sauce Meat Rolls are savoury whereas the Korean barbecue Sauce Meat Rolls are slightly sweet.

IMG_0155


WHAT IS REQUIRED

IMG_0128

  • 1 packet of Shimeji mushrooms
  • 1 packet of sliced pork belly meat (for steamboat purposes) about 300 grams

For Italian Oregano Cream Sauce

  • 1 tablespoon of butter (melted)*
  • Some oregano dried herbs*
  • 1–2 tablespoons of normal cream*
  • 1 tablespoon of plain flour*
  • Salt to taste*

For Korean Barbecue Sauce

  • 3 tablespoons of Korean Barbecue Sauce (Bibigo Sauce)*
  • 1 teaspoon of corn flour (mix with 5 teaspoons of cold water to form a corn starch solution)*
  • Some sesame seeds*
  • 1 teaspoon of dark soya sauce (optional)*

*Seasonings (not in picture)

IMG_0159


STEPS OF PREPARATION

IMG_0133

  • Wrap the mushrooms using the sliced pork belly meat as above.

IMG_0138

  • For Italian Oregano flavoured meat rolls, brush the meat rolls with butter, sprinkle with salt and some oregano herbs. Marinate for at least half an hour. For Korean Barbecue meat rolls, use 2 tablespoons of Korean Barbecue sauce to marinate the mushrooms meat rolls for at least half an hour.

  • Grill in the mini oven or toaster for 10 minutes. Open the mini oven, change to the other side and grill for another 10 minutes. If you are using a conventional oven, preheat the oven to 150 degree Celsius and baked for 5-10 minutes for each side. You will witness some meat juice in the baking tray as the meat rolls are grilled. Keep these meat juices for making of sauces.

IMG_0144

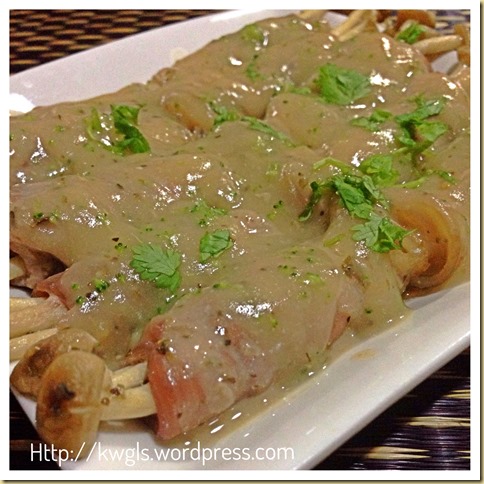
  • Italian Oregano Mushrooms Meat Rolls – In a small sauce pan, put in the meat juices from grilling of meat rolls. If there are no meat juices, just put 5 tablespoons of plain water. Add some oregano dried herbs (half a teaspoon), 1 tablespoon of cream and 1 tablespoon of plain flour. Stir until well mix and bring to boil. When the sauces boil, off the heat and drizzle on top of the meat rolls. If the sauce is too thick, just add a few tablespoons of water to dilute it. Garnish with some chopped parsley if desired.

IMG_0149

  • Korean Barbecue Mushrooms Meat Rolls – In a small sauce pan, put in the meat juices from grilling of meat rolls. If there are no meat juices, just put 5 tablespoons of plain water. Add 1 tablespoon of Korean Barbecue Sauce to the meat juice or plain water. Bring to boil. Meanwhile, add 1 teaspoon of corn flour with 5 teaspoons of water to make a starch solution. Gradually pour the starch to the boiling sauce Once the sauce boil again, off the heat and drizzle on top of the meat rolls. Sprinkle some sesame seeds on top and garnish with coriander leaves if desired.

IMG_0157


CONCLUSION

Isn’t this a simple recipe? However, it is a presentable dish and my guests loved it. Do try to make this and remember, you can always substitute the meat rolls with beef slices and mushrooms with other types of your desired vegetables such as asparagus. Hope you like the post today. Cheers and have a nice day.

IMG_0161


For more recipes, you can refer to my RECIPE INDEX here and you can follow me at PINTEREST or visit this blog’s FACEBOOK PAGE.

group-board-picture72

If you are a Pinterest user and you are interested in have more recipes, you can join or follow this Pinterest Board set up by me  where there are more than 250 recipes worldwide and pinned by various bloggers: FOOD BLOGGERS AND FOODIES UNITED PINTEREST BOARD

Four-Seasons-JPG29622223222

For Four Seasons Blog Hop #23 where I am the Co-host, please join us for the party where you can get a lot of the family related posts. Please click the above logo to enter your post.

IMG_0153

Happy Diwali 2013–Indian Coconut Candy–Coconut Barfi

Arrangement of diyas on Diwali night.

INTRODUCTION

I have to say that I am no expert in Indian sweets and delicacies though I grew up in Malaysia and Indian is one of the 3 major races in the multiracial harmonious society. Diwali or Deepavali or Divali (Festival of lights) is round the corner and Indians (pardon me if I am wrong) throughout the world will be celebrating this festival on the 3 November 2013. It is a public holiday in many countries including Singapore and Malaysia. If you want to learn more about the significance and celebration activities of this important Hindu Festivals, you can refer to Wikipedia’s explanation on Diwali.

IMG_0118

Of course, as part of a multi-racial society, I want to join the celebration by blogging some Indian cuisines. The most immediate Indian cuisine that came to my mind is a type of Indian coconut candy (COCONUT BARFI) that I loved. Frankly speaking, I did not have many chances of eating this candy because it is not easily available in Singapore or Malaysia. It could be due to my ignorance of the places that sell this candy but in my about 16 years in Singapore, I can only recall one Indian restaurant that sells this candy.  I remember when I took my very first bite of the candy many years back in Malaysia, I immediately fell in love with it. As I have very limited knowledge on this candy, I shall refer you to Wikipedia on a brief explanation of Barfi.

Barfi (burfi, burfee or borfee) is a sweet confectionery from the Indian subcontinent. Plain barfi is made with condensed milk and sugar cooked until it solidifies. The many varieties of barfi include besan barfi (made with gram flour), Kaaju Barfi (made with cashews), and Pista Barfi (made with ground pistachios).  Barfi is often flavored with fruit (such as mango or coconut) or nuts (such as cashew and pistachio) and spices such as cardamom or rose water. They are typically cut into square, diamond, or round shapes. Different types of Barfi vary in their color and texture. The confection is now served in South Asia at festivals such as Diwali, Eid, and Holi. “(Source: http://en.wikipedia.org/wiki/Barfi)

IMG_0108

I have managed to get a recipe for this Coconut Peanut Candy . However, since I do not have peanut with me, I have made some pure coconut Barfi instead. As the coconut Barfi that I bought and tried are mostly green and red, therefore, I have added some permitted food colouring to it. Due to my inexperience of moulding and colouring, the look of my coconut Barfi today look is less than satisfactory but you can just safely omit the colouring and come out with this delicious coconut Barfi. The taste of the Barfi is awesome and full of coconut aroma. The sweetness of this recipe is just right for me. In my previous purchases of this candy, it was usually too sweet for me until it hurts my teeth.  

IMG_0106


WHAT IS NEEDED

Recipe adapted from: Coconut Peanut Candy from http://karileaves.blogspot.sg

  • Lightly grease a 20cm x 20cm square baking tin with ghee

IMG_9938

  • 250 grams (1 packet) of grated white coconut
  • 400 grams (1 tin of condensed milk)
  • 1 cup of castor sugar
  • 15 grams of ghee
  • 1 tablespoon of vanilla essence
  • Red and green permitted colouring


STEPS OF PREPARATION

 IMG_9943

  • In a big non-stick sauce pan, add in sugar, grated coconut and condensed milk. Heat using medium heat until it boiled. After it boiled, turn to low heat and continue to cook until all the milk thickens. You have to constantly stir the mixture to ensure that it is not burnt. The milk will gradually thicken and be patience. In my case, it took about 30 minutes to thicken. Thicken means the milk and sugar starts to solidify and leave the sides of the pan. .Add in ghee and vanilla essence. Continue stirring and get ready for next step’s of moulding.

IMG_9951

  • Get ready 3 bowls, one each for red, green and original colour. Divide the candy equally into 3 portions put one portion in the assigned bowl.. Quickly mix the candy with colour. (Note that this step have to be fast as the candy can solidify very fast when not boiling)

IMG_9956

  • Pour all the candies into the lightly greased baking tin. Level it as much as you can into your desired thickness. Let it cool completely before cut into desired shapes.

IMG_0116


CONCLUSION

Personally, I found that the most difficult part of the entire recipe is the moulding. Possibly if you omit the colouring part, the whole process will be easier and gives you more times to mould. Melted sugar solidifies very much once it touches the air (without any heat). It is rather easy but takes time to boil the milk but the taste of the candy is worth the efforts.  I like to take this opportunity to wish all my Indian readers a HAPPY DIWALI FESTIVAL 2013 and other reader a HAPPY DIWALI HOLIDAY.

Hope you like the post today. Cheers and have a nice day.

IMG_0096


For more recipes, you can refer to my RECIPE INDEX here and you can follow me at PINTEREST or visit this blog’s FACEBOOK PAGE.

group-board-picture7

If you are a Pinterest user and you are interested in have more recipes, you can join or follow this Pinterest Board set up by me  where there are more than 250 recipes worldwide and pinned by various bloggers: FOOD BLOGGERS AND FOODIES UNITED PINTEREST BOARD

Four-Seasons-JPG2962222322

For Four Seasons Blog Hop #23 where I am the Co-host, please join us for the party where you can get a lot of the family related posts. Please click the above logo to enter your post.

IMG_0104

Healthy Vegetables Muffins (健康蔬菜小松饼 (素))

IMG_2093


UPDATED POST ON 23-11-2014

Have not prepared this for a year and in this attempt, I have transformed the muffin into a savoury muffins and reduce the olive oil used. Please refer to recipe 2 highlighted in red .

IMG_2095

If you are not a vegetarian, you can always add in cheeses and bacon or ham.

IMG_2087


IMG_0045

INTRODUCTION

My post is getting shorter and shorter because my recipe is getting easier and easier. I have a number of muffin/cupcake posts and I am not tired of creating more based on my one number baking ratio theory. The theory is to promote the use of same ratio in the baking of cakes or muffins. It is based on the basic pound cake ratio with some modifications. It is easy to practise and in essence, it is just the manipulation of 4 basic baking ingredients: fats (butter, peanut butter, cooking oil, olive oil), liquids (eggs and milk), flour (wholemeal or plain flour or even semolina flour) and sugar (brown sugar, white sugar, icing sugar and etc.). Because of using this ratio in the baking, the muffins/cupcakes are usually very moist.  If you are interested in my other muffins/cupcakes series, these are the few that you can consider:

IMG_0046

This is a healthier version of muffins. No complicated creaming of butter, folding of flours and etc. It is just a simple mix and bake muffins. In addition, to further testing the “simple” principle behind the theory, I have started with 100 grams of fats and all remaining volumes will be 100 grams. The muffin uses olive oil and the inclusion of some vegetables – mushrooms and broccoli. Is the results satisfactory? Yes, definitely yes. Not only the pattern insides the muffin looks pretty, the taste is awesome as well. 

IMG_0076


WHAT IS REQUIRED

Servings: Make 5-6 medium sized muffins

IMG_0093

  • 100 grams of self raising flour (or wholemeal flour+1/2 teaspoon of baking powder)
  • 100 grams of olive oil (or cooking oil or melted butter)
  • 100 grams of eggs (about 2 eggs)
  • 100 grams of sugars
  • Some cauliflower and mushrooms
  • 1/4 teaspoons of baking soda

IMG_2085

Recipe 2

  • 100 grams of self raising flour (or wholemeal flour+1/2 teaspoon of baking powder)
  • 50 grams of olive oil (or cooking oil or melted butter)
  • 100 grams of eggs (about 2 eggs)
  • 10 grams of sugar or any flavour enhancer that your are using now such as mushroom concentrate granules etc..
  • 20 grams of fresh milk
  • Some cauliflower and mushrooms
  • 1/4 teaspoons of baking soda
  • Pinches of salt
  • Some cheddar cheeses, bacons or hams (if preferred)


  • Please disregard ‘!!” in the picture as it is my mistake to include in the picture.

IMG_0080


STEPS OF PREPARATION

Preparation:

  • Lightly grease some muffin tins or get ready 5-6 muffin cups and put in the muffin tins.

  • Preheat the oven to 180 degree Celsius

IMG_0036

  • Shift the flour and add in the sugar. Stir until well mix. Make a well in the centre and put in eggs and olive oil. Stir lightly until it is “mix” and slight lumpy is okay for muffins. Filled up 1/3 of the muffins cup with batter, put  one small size broccoli and ensure that it is surrounded by the batter. Continue to fill until the batter is 85% full. Top with additional broccoli and mushrooms.

IMG_0041

  • Bake in the oven at 180 degree Celsius for 15 to 20 minutes or when the skewer inserted comes out clean.

IMG_0067

  • Note that the shape of your muffins will depend on the positioning of your vegetables. If you put the mushrooms too close to the muffin cups, you will have a funny shape muffins like the above picture. Of course, the taste is still awesome and edible. Try not to put big pieces of broccoli in the centre of the muffin batter as it will hinder the rise of the muffin.

IMG_0084


CONCLUSION

A simple, quick and easy recipe. It can be as healthy as you want it to be. Try to substitute the self raising flour with wholemeal flour and you can get a wholemeal broccoli mushroom muffin. Run out of breakfast tomorrow? Why not making it today as it utilizes mostly common household ingredients. In addition, it is fast and easy.

IMG_0088

Hope you like the post today. Cheers and have a nice day.

IMG_2091


(updated as at 20 November 2014)  here and you can follow me at PINTEREST or visit the blog’s FACEBOOK PAGE to keep abreast of my future posts.  

IMG_0082

Condensed Milk That Are Not Sweet? Home Made Condensed Milk

IMG_9994

INTRODUCTION

I have always taking things for granted and never ever thought of making my own version of condensed milk. Recently, I joined Pinterest and noted a pin on home made condensed milk. I read the article at the bed with great interest and the first thing I woke up in the next morning, I am all set to try making my own condensed milk.

Condensed milk is always one of the my favourite creamer. I personally find that it had its distinctive flavour. Until today, it is one of the items that is always in my kitchen shelf. I used it every morning for making my morning coffees and I liked it to use it to make desserts from ice cream (Peanut Butter Cream Cheese Ice Cream) desserts, (Tiramisu), sweets (Indian Coconut Candy, Burfy) to cheesecakes (Ferraro Rocher Ice Cream Cheese Cake)

IMG_0001

To my knowledge, there are two ways of making home made condensed milk. One is by boiling fresh milk with sugar until all the water evaporates and become a sticky creamy like condensed milk. That will need a lot of time and you need to stand by the stoves to ensure that the milk is not burnt. The second method is what I am going to illustrate today using machine whisk and ready made milk powder. Only 4 ingredients (including one optional) are needed and the making is so simple and fast. It takes less than 1/2 hours from the preparation to getting the condensed milk ready.

IMG_0013

Condensed milk drizzled on top of a saltine crackers and a cup of coffee with condensed milk


WHAT IS REQUIRED

Recipe adapted from: Homemade-Sweetened-Condensed-Milk

IMG_9963

  • 2 cups of full cream milk powder
  • 1.5 cups of sugar
  • 1 cup of hot boiling water (preferred)
  • 2 tablespoons of melted butter or ghee (optional) – to provide glossy effect and aromatic purposes.

The original recipes called for 1.5 cups of milk powder, but I found that it is a bit watery, therefore, I have increased to 2 cups of full cream milk powder.

IMG_0011

B is the homemade condensed milk and A is the store bought condense milk.


STEPS OF PREPARATION

IMG_9970

  • Heat up the water using microwave until boiling (optional – you can just use boiling water without the use of microwave. The hotter the water, the easier for the milk powder and sugar to dissolve. In a machine whisking bowl, put in the hot boiling water, add in sugar and milk powder gradually and whisk at a high speed until it is creamy and fine. Scrap the sides of the whisking bowl and add in the melted ghee or butter and continue whisking until well mix.

IMG_9975

  • Note that I have tried from 1.5 cups to 3 cups of milk powder. For this illustration, it is 2.5 cups of milk powder but I think it is too sticky, therefore, the recipe have been amended to 2 cups.  While beating, observed the consistency. If you find that it is watery, add in more milk powder. Put the condensed milk in a sterilized glass bottle. You can sterilize the glass bottle with some hot water. Let it cool completely before store in the fridge. Can keep to 1-2 weeks if clean utensils were used.

IMG_0009

Making a cup of coffee with condensed milk


CONCLUSION

This is really a very easy recipe that I should have known it earlier. There are some advantages to home making your own condensed milk . One of the advantages is the ability to adjust the sweetness. I always found that the condensed milk sold over the counter is very sweet and surprisingly this recipe is not overly sweet. Secondly, if you do not like the dairy creamer, you can try to use soya bean milk powder and come out with the non-dairy version of condensed milk.. If you are concerned about the fat content of the milk, use the low fat version of the milk powder instead. 

IMG_9998

Cost may not be the main reason as milk powder can be equally expensive. But you know what you are preparing can have an added advantage as compared to store bought condensed milk. Lastly, to be fair, if you do not like the trouble of making this, adding 2 tablespoon of milk powder plus 1.5 tablespoon of sugar to your preferred beverage will also provide the same effect!!!!

 IMG_0003

Hope you like the post today. Cheers and have a nice day.


UPDATED POST – 2 – 12- 2014

PicMonkey Collage1

Members of the Facebook Group are complaining that they have cans of condensed milk in the shelf unused and at times, they are so happy to see recipes that uses condensed milk. Personally I loved condensed milk and I like to use condensed milk for my bakes.. As such, I never have any problems with condensed milk that are unused. In fact condensed milk perform a major role of binding a cake. However, if you have problems of finishing your condensed milk, I have decided to select and share with a maximum of 15 recipes that uses condensed milk from Guaishushu blog. Many other recipes are not included because it utilizes only 1-2 tablespoons of condensed milk and inclusion of these will lead to too many recipes that need to be listed..If you still want the recipes, you can refer to the search queries: https://kwgls.wordpress.com/?s=condensed+milk 


Grapefruit Yoghurt Ice Cream

img_4079_thumb

Malaysian Beehive Cake or Honeycomb Cake (蜂窝蛋糕)

10342479_673553322715751_6093632112492853165_n_thumb

Sarawak Midnight Cake (Cake Seri kaya Sarawak, Kek Belachan, Kek Hati Parit) revisited.. (砂朥越深夜蛋糕)

img_5444_thumb

Chinese White Cakey Biscuit , Guang Su Pin or Kong Soh Peng (光酥饼,大福饼, 西樵大饼)

img_4108_thumb

Chilled Honey Cheesecake (免烤蜜糖芝士蛋糕)

img_23371_thumb

Blueberry Yoghurt Muffins (炼乳酸奶蓝梅小松饼)

img_08312_thumb

Lapis Horlicks (Horlicks Layered Cake)

img_21751_thumb

Indian Coconut Candy–Coconut Barfi

img_0104_thumb

Traditional Batik Cake or Hedgehog Cake

img_8465_thumb

Chilled Ferrero Rocher Oreo Ice Cream Cheese Cake

IMG_57421

Mandarin Orange Steamed Sponge Cake (芦柑鸡蛋糕)

img_9616_thumb

Sugar Rolls (瑞士糖卷)

img_77871_thumb

Homemade Strawberry Cheesecake Ice Cream With Cookies Swirl (草莓奶酪冰淇淋)

img_28831_thumb

Salted Egg Yolk Custard Buns or Liu Sha Bao or Nai Huang Bao (流沙包 / 奶皇包 /奶黄包)

img_0334_thumb

Cream Cheese Herbs Loaf (奶酪香料面包)

img_03881_thumb


  • For more recipes, you can refer to my RECIPE INDEX (updated as at 26 November 2014)  here and you can follow me at PINTEREST or visit the blog’s FACEBOOK PAGE to keep abreast of my future posts.  


IMG_9996

Fish Steaming–A Healthier Alternative–Cantonese and Teochew Styles of Chinese Steamed Fish

IMG_9913Teochew Style of Steamed Fish

INTRODUCTION

Chinese like to use steaming as a method of cooking, be it in daily household cooking or “baking”. In fact lots of “pastry” items were steamed rather than baked. We steamed meats, vegetables, tofu, rice or even cakes. Steamed fish is always one of the most saleable cuisines in Chinese restaurants. Instead of grilling or deep frying, we steamed the fish to preserve its texture and tastiness. Today, I am sharing the basic Chinese household ways of fish steaming.

 IMG_9919Cantonese Style of Steamed Fish

In essence, the following factors need to be considered when steaming the fish:

  • Type of fish – We don’t steam all types of fish. We only steam fishes that have less bones and fishes that do not have a strong fishy odour. As to what type of fishes are suitable, that will very much depend on experiences and most of time from family menus. Some good types of fish to steam are threadfin (Ikan kurau in Malay), cod fish, white pomfret, grouper, snapper, sea bass, tilapia, halibut or even salmon.

  • Condition of fish – If you are steaming the whole fish, the fish have to be very fresh meaning clear eyes, firm flesh and red gills.

  • Whole fish or fillet – Whole fish can be used but of course not the overly large fish, a fish of the size of a serving plate. If you have kids or guests, you may consider to steam fish fillets as it is easier to serve your guests.

  • Seasoning to get rid of the “fishy” odour – At time fish have a strong odour especially if it is not fresh or using the wrong types of fish. Therefore, in order to get rid of the fishy smell herbs and spices were used.  Herbs can include spring onions, gingers, shallots and garlics, spices such as white pepper and others strong flavour cooking ingredients such as Chinese cooking wine or sesame oil.

  • Steaming time – Generally, you will need 8-10 minutes to steam the fish over high heat. For bigger fish, plus another3 minutes. Fish is considered as cooked when the flesh is not stuck to the bone and when the eyes protruded out. It is considered as over cooked when fleshes are very dry and hard. The right timing will ensure that the fleshes are soft, silky and delicate.

  • Condiments to go with when serving steaming dish – Red cut chilli, ginger strips, minced garlics with light or dark soya sauce, or vinegar.

This post will introduce two common type of fish steaming, the Cantonese style and the Teochew style. Both Cantonese and Teochew are dialect groups of Chinese. Most of them are descendants from the coastal provinces of Fujian and Guangdong in the People’s republic of China.

IMG_9892


CHINESE STYLE OF STEAMED FISH (TEOCHEW STYLE)


Though I don’t belong to the Teochew dialect group, however, the place where my parent hailed from was next to Chaozhou (Teochew) city. Hence our home cooked food were very much influenced by the Teochew cuisines. This is my family’s recipe and we have been preparing our steamed fish in this manner for years.

IMG_9906Teochew Style of Steamed Fish

The Teochew style of steamed fish should be sour and sweeten by the meat broth. What make the steamed fish slightly sour is because of the two important cooking ingredients. One is the sour plum and and the other is the preserved mustard or so called salty vegetables. To make it even more sour, some restaurants or house chefs are adding tomatoes slices. Winter mushroom is a must and pork belly meat or even lard were used to make it tasty and aromatic. Other than this, there is nothing much to put except some herbs to get rid of the fishiness. Among the herbs or spices are gingers, shallots and white pepper. The recipe I have here is with a rather long list of ingredients, however most are optional and I will highlight the must have ingredients to make it an authentic Teochew style steamed fish.


WHAT IS REQUIRED

IMG_9865

Must have

  • 1 piece of fish fillet (I used threadfin) of about 300-500 grams
  • Few leaves of preserved mustards (cut into slices)
  • 2 winter mushrooms soaked in water (cut into slices)
  • 1 cm ginger de-skinned and cut into thin strips
  • 1 shallots de-skinned and cut into thin strips
  • 1-2 sour plums (meshed and set set aside)
  • Some white pepper
  • Some sugar (or flavour enhancer)

Optional

  • 1/2 tomatoes cut into thin slices
  • 2 tablespoons of minced meat
  • 1 teaspoon of garlic oil
  • 1 teaspoon of sesame oil
  • 2 tablespoons of water
  • Some spring onions or coriander fish for garnishing


STEPS OF PREPARATION

IMG_9870

  • In a plate suitable for steaming and serving, put a layer of ingredients (preserved mustard, tomato, sliced mushrooms, ginger, chopped shallots). Put the fish fillet on top of the ingredients, put another layer of ingredients on top of the fish until all ingredients have been used. Add sesame oil and garlic oil/shallot oil. Add in 2-3 tablespoon of water. Dust with white pepper. Steam in  a steamer using high heat for 8-10 minutes. For whole fish, if the eyes of the fish have protruded out, it means that the fish is cooked. Note that bigger whole fish may needs additional 2-3 minutes more..

IMG_9902Teochew Style of Steamed Fish


CHINESE STYLE OF STEAMED FISH (CANTONESE STYLE)

Cantonese style of steamed is easier to prepare and utilizes less ingredients. It is a bit sweet and is more common in non Teochew restaurants. It is just steaming pure fish without any other side ingredients and spices.

IMG_9887Cantonese Style of Steamed Fish

WHAT IS REQUIRED

IMG_9872

Must have

  • 1 piece of fish fillet (I used threadfin) of about 300-500 grams
  • Some spring onions (cut into very thin strips)
  • 1 cm ginger de-skinned and cut into thin strips
  • 1 shallots de-skinned and cut into thin strips
  • 1tablespoons of oyster sauce
  • 2 tablespoons of light soya sauce
  • 2 small sized rock sugar
  • 2 tablespoons of water
  • Pinches or salt


STEPS OF PREPARATION

IMG_9880

  • In a plate suitable for steaming and serving, put the fish fillet, add in light soya sauce, oyster sauce, rock sugar and 2 tablespoons of water. Steamed under high heat for 8-10 minutes.

IMG_9961

  • While you are steaming, in a small frying pan, put 2 tablespoons of oil and fried the shallot and ginger slices until fragrance. Pour the hot oil on top of the steamed fish. Garnish with spring onion strips.

IMG_9900Cantonese Style of Steamed Fish


CONCLUSION

There is a reason that I am having this post. While I know that most Asian or in particular, Chinese families know how to steam fish, but peoples from other countries may not be aware of how to steam fish. I am in a Google Plus communities and there is a post put up by the community owner and there are many questions about the steaming including whether or not fish must be steamed in whole and whether fillets are acceptable. For this simple reason, I am sharing this post about Chinese way of fish steaming. Hope it will give my international readers some ideas of how Chinese are steaming their fish.

IMG_9915Teochew Style of Steamed Fish

Steamed fish is definitely a healthier alternative to grilling and barbecuing fish. If you are new to Chinese cuisines, try method no.2 or the Cantonese style of steaming the fish. The taste are more universal, utilizing less exotic ingredients and easily acceptable to kids since it is sweet with less spices.

Hope you like the post today. Cheers and have a nice day.


For more recipes, you can refer to my RECIPE INDEX here and you can follow me at PINTEREST or visit this blog’s FACEBOOK PAGE.

pinterest3

If you are a Pinterest user and you are interested in have more recipes, you can join or follow this Pinterest Board set up by me  where there are more than 150 recipes worldwide and pinned by various bloggers: FOOD BLOGGERS AND FOODIES UNITED PINTEREST BOARD

Four-Seasons-JPG2962222

For Four Seasons Blog Hop #23 where I am the Co-host, please join us for the party where you can get a lot of the family related posts. Please click the above logo to enter your post.
 IMG_9917Teochew Style of Steamed Fish

Stay Safe This Halloween– Grilled Skeleton Marshmallows

IMG_9819

I was once a beautiful and fair lady. Somebody was jealous of my beauty and grilled me to death! Not only that, they eat my flesh!!!!!”

INTRODUCTION

This is a special post on Halloween that will be celebrated on Western countries on 31 October 2013. Being an Asian, I have never celebrated Halloween for all my past years. We do have festivals to pay respects to the death like the Chin Ming festivals. Therefore, I am rather unsure how Western countries really celebrate Halloween and what are their traditions. What I knew from watching television shows was that kids went house by house having some trick or treating activities and house owners will give them sweets or candy for their “visits”.

Being a blogger who have joined several blog hop parties, I can sense that how big Halloween is celebrated in these countries. I just want to join the fun and suddenly it come across my mind of baking some marshmallows. This post is not actually a recipe and but some baking art work that I am rather poor at and I am sure those who are interested will be able to do a much better design than me.


WHAT IS REQUIRED

  • Some round cylindrical shaped marshmallow candy
  • Some baking paper
  • Some honey for sticking

STEPS OF PREPARATION

IMG_9824

  • In a big baking tray, put a sheet of baking paper. Roughly draw the shape of the hand. Use a scissor to cut the marshmallows in the shape of finger nails.

IMG_9829

  • Put a bit of honey and stick it to baking paper following the shape of the hand. Bake in the oven at 150 degree Celsius for 15-20 minutes. When cooled, cut away the baking paper following the candy shape.

IMG_9835

  • Note the increased in size of the marshmallows as the baking progresses. The sizes of the marshmallows will reduce once it is cool. Depending on how horror you want your creations to be, your can monitor the colour of the marshmallow.


How do you serve, put it in a plate for your “guest”!

IMG_9842

If you want it to be even more scary, have some strawberry sauce!

IMG_9848

So, is this edible? Yes,  it is very nice and extremely crispy and you would not want to stop at one piece only.

IMG_9852

They eat with the papers? No, it can easily peel off from the baking paper.

IMG_9850

What if they don’t want to have the candy in my house, what shall I do? Well, just pack it, hang it in the door for them and wish them Happy Halloween and STAY SAFE!

IMG_9856

Well, this is my creation and I knew the first picture is rather scary as on of my Google Plus friends is commenting, sending shivers down her spine. For the second batch, I have tone down the horror by baking it and packaging in a  less scary manner! Hope you like the post today. Cheers and have a nice day. For more recipes, you can refer to my RECIPE INDEX here and you can follow me at PINTEREST or visit this blog’s FACEBOOK PAGE.

Four-Seasons-JPG296222

For Four Seasons Blog Hop where I am the Co-host, please join us for the party where you can get a lot of the family related posts. Please click the above logo to enter your post.

IMG_9858

Cheaper and Healthier Version Of Tiramisu To Satisfy Your Palate– Eggless Tiramisu

IMG_8921

INTRODUCTION

Authentic tiramisu will require mascarpone cheese, coffee, uncooked eggs, Khalua (or other coffee liquor),  castor sugar and sponge fingers. This Tiramisu uses no eggs, but coffee, Tia Maria, normal sponge cakes, condense milks and normal cream cheese. Hence, it is just like a poor man’s version of tiramisu because all the ingredients are cheaper.

IMG_9780

Most bakers will know that mascarpone cheese is a light and creamy cheese with a higher fat content originated from Italy. It is one of the essential ingredients in classic Italian dessert, tiramisu. It has a fat content ranging from 60% to 75% whereas normal cream cheese only have fat content of about 40% to 60%. In Singapore, a 250 gram tube of mascarpone cheese will cost about SGD 9  (SGD36 for 2 kgs) where as a 2 kgs of cream cheese will cost only about SGD18. Almost half of the price of mascarpone cheese. Besides price, it is not commonly available in developing countries like Malaysia and Indonesia. Even if there is,  you will get it by paying a high price premium in top notch supermarkets.

IMG_9765

Sponge fingers are sold in supermarkets in Singapore but not that cheap either. A pack of 12 sponge fingers can cost SGD 3-4 and making a medium size tiramisu may require up to 2 packages of sponge fingers. Of course the use of sponge fingers in authentic tiramisu have its values. It is light and can absorb lots of liquored flavoured coffee. Sponge cake is an easy cake to make at home, utilizing only eggs, sugar and flour. If one prefer not to be bake, the supermarkets in Singapore sell an 8” diameter sponge cake for only SGD 3 or at times slightly above SGD2. In developing countries, to get and to bake sponge cake is definitely easy, but if imported sponge fingers are used, they may have to buy at a speciality supermarkets.

Updated on 13 June 2014 – If you are interested to prepare your own sponge fingers like what is commercially sold in the supermarket – you can refer to this post : Kueh Bahulu (烤鸡蛋糕)

IMG_9772

Uncooked eggs is not something in my cooking or baking agenda because of my two kids. I am wary of the semolina virus and food poisoning. Don’t get me wrong, the semolina virus (or salmonella virus) is nothing to do with semolina flour used in making of sugee cake and nan khatai Indian short bread cookies, it is a type of virus present in uncooked eggs (particularly egg yolks) that can cause stomach upset and landed you to the hospital! While the traditional method of egg separation method in preparing tiramisu definitely resulted in a lighter texture, I would definitely be able to forgo such texture for the sake of my family members’ health.

IMG_9757

Therefore, it comes to my mind that I want to prepare a simple easy tiramisu alike desserts to share with all. The first thing that come to my mind is to substitute mascarpone cheese with normal cream cheese for cost and lower fat content reasons. In addition, I have opted to have an eggless version for health reasons. The third is the use of simple sponge cake to replace sponge fingers for both cost and availability reasons. The output it is definitely worth the try and I have objectively analyse in the conclusion section.

IMG_8927

In this recipe, I have decided to present my tiramisu design for a party setting  by putting it in small dessert cups. I do not like the way it was served in a big container.. I have also prepared some for my kids that uses chocolate malt drink for the sponges instead of coffee liquor. The post will have two main sections: preparing the traditional sponge cake and the post proper, tiramisu itself.

IMG_9776


CLASSIC SPONGE CAKE


This is a basic sponge cake recipe utilizing 6 eggs. It is a rather big cake. For purposes of tiramisu alone, you can adjust to prepare a smaller cake using 3 eggs. I have purposely prepare a bit more for my breakfast and for contingency purposes. If you are preparing using 3 eggs, please halve all the quantities stated in this section. You can bypass this section if you intend to buy the ready made sponge cake.

WHAT IS REQUIRED

IMG_9681

  • 6 eggs
  • 150 grams of self raising flour
  • 75 grams of plain flour
  • 220 grams of castor sugar

STEPS OF PREPARATION

Pre-preparation

  • Line an 8” inch square baking tin with baking paper or lightly grease the tin;

  • Pre-heat the oven to 180 degree Celsius.

IMG_9686

  • In a machine whisk or hand whisk, beat the eggs until thick and pale

IMG_9691

  • Shift the flour into the eggs, quickly fold it into the beaten eggs.

IMG_9698

  • Transfer to a lightly greased 8” square baking tin or baking tin lined with parchment paper, bake at 180 degree Celsius for 25 minutes.

IMG_9712


EGGLESS TIRAMISU 


Servings : about 12 medium size dessert cups

IMG_9714

  • 250 grams of cream cheese at room temperature (low fat cream cheese can be considered)
  • 100 grams of condense milk
  • 1 cup of normal whip cream

IMG_9729

  • Adequate cocoa powder for dusting (about half cup)
  • 1/2 cup of coffee liquor of your choice (Baileys, Tia Maria, Khalua, or just pure brandy or whisky) – optional if you are alcohol sensitive
  • 3 cups of strong coffee (2 tablespoon of instant coffee in 3 cups of water)
  • 3 cups of strong chocolate malt drinks (for kids version)

Others : 12 dessert cups


STEPS OF PREPARATION

Pre-preparation

  • Get ready 12 dessert cups

IMG_9719

  • In a mixing bowl, beat the cream until stiff. Transfer to a container and set aside for later use.

IMG_9724

  • Use the same mixing bowl to beat the cream cheese and condense milk. Beat until light and creamy (no lump noted).

IMG_9727

  • Fold the whipped cream to the cream cheese lightly until it is well mix. Set aside for next step’s assembling.

IMG_9734

  • Add 1 cup of coffee liquor with 3 cups of coffee.

IMG_9768

  • Add 1-2 tablespoons of coffee to the sponge cake and let the sponge cake absorb the coffee until the sponge cake is brown in colour. Add in one to two tablespoons of cream cheese followed by another layer of coffee soaked sponge cake. Top the remaining portion of the cup with another layer of cream cheese. Dust the top generously with cocoa powder. Refrigerate for at least one hour for the cream cheese is firm and flavour to develop.

  • For kids friendly version, just soak the sponges with chocolate malt drinks without caffeine and alcohol.

IMG_9763Kids friendly version of Tiramisu


CONCLUSION

The post may appear to be very long but the procedures are very simple. It is definitely a healthier alternative than the classic version for the reasons that it is eggless and utilization of lower fat content cream cheese as the alternatives.

IMG_9782Cross section of Kid’s version in a square container

In term of taste, I will say it is at least 80%-90% similar. An objective brief analysis is as follows

  • Creaminess – less creamy as compare to traditional tiramisu because of lower fat content;

  • Overall texture – More dense because no eggs were used to support the beaten cream cheese;

  • Texture of sponge – more dense because sponge cake is more compact as compare to sponge fingers.

IMG_9778Cross section of dessert cup tiramisu for purpose of picture taking

Overall verdict: I wouldn’t hesitate to serve my guest this version for the reasons of healthier, less costly and easily available ingredients. The enjoyment forgone is minimal, in my humble opinion.

IMG_9739


Updated post on 13 June 2013

While I am craving for some Tiramisu, i have decided my homemade sponge “fingers” to substitute the sponge cake as mentioned in the post. The taste is equally good or not better than the commercial sponge fingers. If you are interested to make your own sponge fingers, you can refer to this post: Kueh Bahulu (烤鸡蛋糕)

IMG_8923

IMG_8914


IMG_8930

IMG_8919


  • For more recipes, you can refer to my RECIPE INDEX (updated as at 21 March 2014)  here and you can follow me at PINTEREST or visit the blog’s FACEBOOK PAGE to keep abreast of my future posts.  
IMG_8917