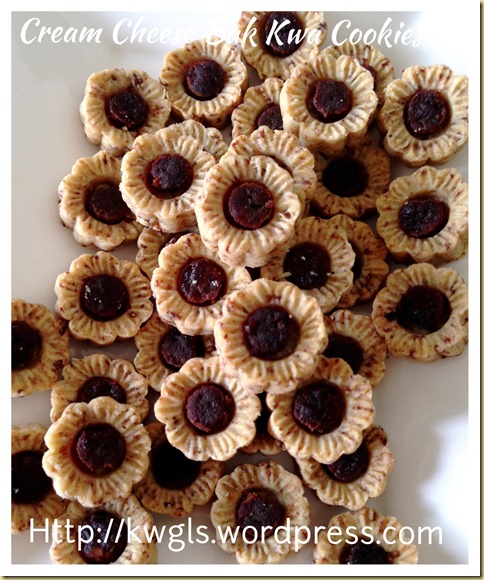
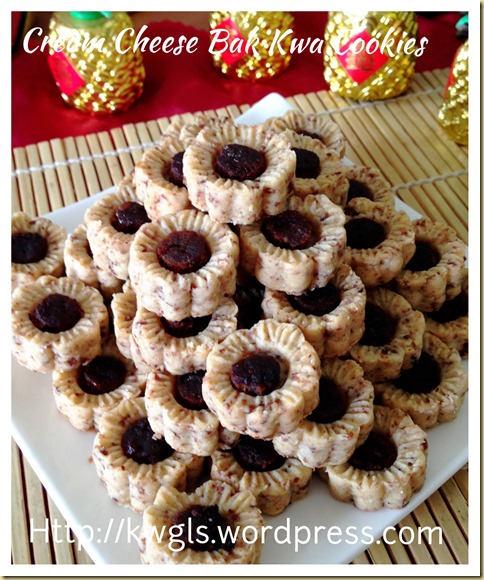
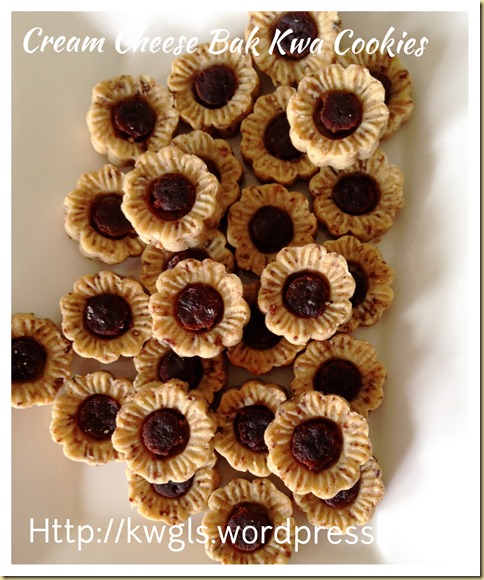
Cream Cheese Bak Kwa Savoury Cookies (肉干咸香饼干)

IMG_6851

INTRODUCTION

Bak Kwa or pork jerky is definitely not new.. It appeared at least 2-3 years ago especially among the English speaking Facebook Group and blogs. Therefore, this exotic cookie’s concept is not mine but the recipe is developed by me.

IMG_6855

It is rather funny if I go and buy the expensive bak kwa just to prepare this cookie. Since i am preparing some homemade bak kwa the day before, I have decided to use the bak kwa for my cookies. I regretted to have eaten all the trimmings during the day of preparation. Otherwise , this preparation will be an ideal way to get rid of such trimmings.

IMG_6687

If you are interested in the preparation of home made bak kwa, you can refer to this post: I Have No Patience And I Prepared My Instant Bak Kwa–Instant Chinese Pork Jerky

IMG_6859

For this recipe, cream cheese is added to soften the dough, I believed a slightly sandy cookies is great for this cookie as opposed to the hard crispy type. In addition, the slight cream cheese flavour do blend well with the other ingredients in the cookies. Since meat is used, I have opt to make it a savoury cookie. I find that savoury cookies always stand out in a tray of sweet cookies. Other savoury cookies include cheesy gold bar, shrimp floss cookies and etc. However, if you prefer a sweet cookie, you can easily substitute the seasoning with a small quantity of salt.

IMG_6849

As for the design, It is up to individual. In the internet, such cookies can be in a form of round shape, square shape or even cut out shape. I do not have many moulds and I just used a small mould used for pineapple tarts. Instead of putting pineapple jam in the centre, I placed a piece of bak kwa in the centre.

IMG_6823


WHAT IS REQUIRED

Servings: About 50-60 small cookies depends on size

IMG_6754

  • 200 grams of plain flour
  • 80 grams of butter
  • 60 grams of cream cheese
  • 75 grams of bak kwa (pork jerky)
  • Pinches of salt*
  • 1/2 tablespoon of cooking wine (optional)*
  • 1/4 teaspoon of chicken stock powder *
  • 1/8 teaspoon of five spice powder*
  • Additional 150 grams of bak kwa for decoration (optional)

If you prefer a sweet cookie, omit items mark (*) and replaced with 50 grams of castor sugar.

IMG_6861


STEPS OF PREPARATION

  • Pre-heat the oven to 170 degree Celsius.

IMG_6759

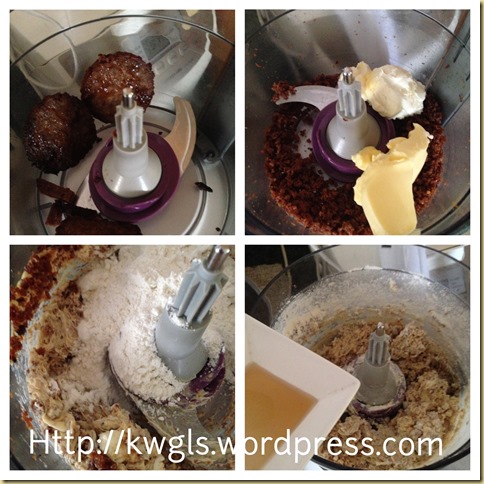
  • In a food processor, blend the pork jerky until small bits. Add the cream cheese and butter, blend until well combine. Add the flour, follow by the seasonings and wine. Blend until it form a pliable dough.

IMG_7008

  • Transfer the dough out on a light floured surface or clingy wrap. Roll it flat. Use your preferred mould to mould the dough. If you are using pineapple tarts mould, use some thing to cut the bak kwa into a round shape (I used piping nozzles). Place a piece of the bak kwa at the centre of the dough. Bake in the pre-heated oven of 170 degree Celsius for about 12-15 minutes. Let the cookies rest in the tray for 5 minutes before transfer to a wire rack for complete cooling.

IMG_6837


CONCLUSION

Remember to save the trimmings of your home made bak kwa for this cookies. If you like it sweet, just forget about the normal seasonings and substitute with 50 grams of sugar. The cookies are supposed to have a five spice fragrant, sandy with some bak kwa bits to bite with.

IMG_6839

For more Chinese New Year related cookies, snack and steamed cake recipes, you can have a copy of Easy Chinese New Year Recipes – A step by step guide” that was packed with 30 recipes, 60 pages at a reasonable convenience fee of USD3.50. The recipes covered various recipes from auspicious radish cake to nian gao to traditional kuih bangkit to trendy London almond cookies. Of course not forgetting both type of pineapple tarts. You can purchase by clicking the link above. You can either pay using Pay Pal or Credit card account. Please ensure that you have an PDF reader like Acrobat or iBooks in your mobile phone or iPad if you intended to read it in your ipad or mobile phone. Should there be any problems of purchasing, feel free to contact me at kengls@singnet.com.sg and separate arrangement can be made.

coverlow-final5722[2]

Hope you like the post today. Cheers and have a nice day.

IMG_6841


I’m submitting this post to Best Recipes for Everyone Jan & Feb 2015 Event Theme: My Homemade Cookies organized by Fion of XuanHom’s Mom and co-hosted by Victoria Bakes


Best_Recipes


IMG_6821

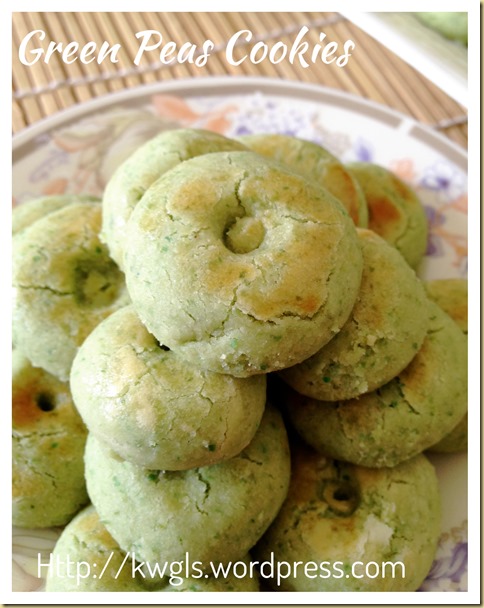
Green Peas Cookies (青豆饼)

IMG_6373


INTRODUCTION

I am sorry that the post have delayed for quite a while as I was busy preparing some other cookies.. Chinese New Year is a period where cookies were served to guests and I found that there are just too many cookies being sold in the market.

IMG_6383

I have a bad habit of stopping by cookies store whenever I passed by. I will browse through the cookies sold and found the recipes that  I have yet to issue a post. In fact, I found that there are just too many cookies that I have never blogged even though my E-book already has more or less 25 recipes.

IMG_6381

One of them is this green peas cookie. I remembered many years ago when I first saw it in Singapore, I bought  one bottle and gave it to my brother as gift. He loves it but I have forgotten until I read it in  Facebook Group recently. I told myself I must give it a try..

IMG_6402

In this illustration, I have grind my own green peas. I have used the coated green peas which is not really advisable. If reader can get the non-coated green peas, it will be easier. If you can get hold of  ready processed green peas flour, this recipe will be a very busy recipe..

IMG_6392


WHAT IS REQURIED

Servings: About 60 cookies depend on size

IMG_6356

  • 200 grams of green pea (preferably without coating) or green pea powder
  • 150 grams of plain flour
  • 150 grams of peanut oil or other cooking oil
  • 130 grams of icing sugar
  • 50 grams of corn starch or potatoes starch
  • 1 egg yolk for egg washing

IMG_6394


STEPS OF PRPARATION

  • Pre-heat the oven to 170 degree Celsius.

IMG_6361

  • In a food processor, blend the green peas until as fine as you can. Sift the blended green peas powder to a bowl of icing sugar, corn starch and plain flour.

IMG_6366

  • Transfer the flour mixture back to the food processor, add the cooking oil or peanut oil gradually, blend until it forms a pliable dough. Transfer out to a lightly floured surface. Roll out flat and use some cutters to cut into smaller pieces. Gather the sides and perform the same until all the dough are divided.

IMG_6371

  • Take a portion, shape round and slightly press down using your finger. Egg wash the cookies using beaten egg yolk. Use some utensils (chopstick, satay stick etc.)  to create your desired pattern. Bake in the pre-heated oven of 170 degree Celsius for about 15-20 minutes or until your desired colour tone. Your cookies will be rather fragile when hot. Let it rest in the baking tray for 5-10 minutes before transfer to a rack for complete cooling. Once completely cooled, store in an air tight of container.

Note:

  • Colour of the cookies will depend on the green peas you used. Some are very green whereas some are lighter. If prefer, you can buy the ready processed green pea powder in the bakery shop.

IMG_6398


CONCLUSION

This cookie is rather easy to prepare if you use ready processed green pea powder.  Remember that if you are able to find green peas without coating, please use that… It is melt in the mouth if handling are light and baking time is correct. Over baking of this cookie will make it hard.

IMG_6400

For more Chinese New Year related cookies, snack and steamed cake recipes, you can have a copy of Easy Chinese New Year Recipes – A step by step guide” that was packed with 30 recipes, 60 pages at a reasonable convenience fee of USD3.50. The recipes covered various recipes from auspicious radish cake to nian gao to traditional kuih bangkit to trendy London almond cookies. Of course not forgetting both type of pineapple tarts. You can purchase by clicking the link above. You can either pay using Pay Pal or Credit card account. Please ensure that you have an PDF reader like Acrobat or iBooks in your mobile phone or iPad if you intended to read it in your ipad or mobile phone. Should there be any problems of purchasing, feel free to contact me at kengls@singnet.com.sg and separate arrangement can be made.

coverlow-final5722

Hope you like the post today. Cheers and have a nice day.

IMG_6379


I’m submitting this post to Best Recipes for Everyone Jan & Feb 2015 Event Theme: My Homemade Cookies organized by Fion of XuanHom’s Mom and co-hosted by Victoria Bakes


Best_Recipes


IMG_6375

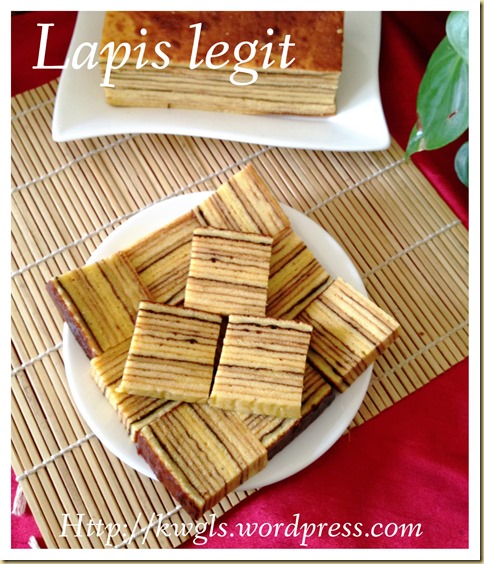
Authentic Lapis Legit (Spekkoek 印尼千层蛋糕)

IMG_6236

INTRODUCTION

I am very disappointed with my authentic version of the Lapis legit because the color tone for each layer are not even.. Sorry for being not humble to say that I know I can do much better than this as baking lapis is nothing new to me. I have to tell all readers frankly that some layers are slightly burnt. and those layer with a very dark lines are those that are burnt..However, I knew the exact reasons and if you follow this recipe closely, your lapis will definitely look much better than the one in this post.

IMG_6189

I prepared this lapis with a spoilt oven. My oven fan mode and temperature control were out of order but can still be functioned.. I made a gamble to bake this expensive cake by investing 500 grams of butter and 30 egg yolks.  I lost as with the same grilling temperature of 180 degree Celsius, some of them refused to brown after 5 minutes but some were burnt at 3 minutes. I have to adjust the temperature up and down, keeping a really close eye for the entire bake…Hmmm, as the date of issuing this report, this problem have been solved because I have ordered a new oven for the Chinese New Year. Ha-ha

IMG_6212

The reason that I proceed to issue this post is because I do not foresee I will be preparing this cake in the very near future… Well, it is a very delicious cake but it is just too taxing for my body with the rich ingredients.. So, shall the readers bake this cake? Sure, why not? Bake and give it as Chinese New Year gift and it is definitely a presentable gift.

IMG_6202

If you ask me whether preparing lapis is difficult or not? I will say NO if your oven is normal.. Is it very time consuming? I have baked numerous times and I do have a way to enjoy the process. However, it did not  apply to this bake because of the fluctuating oven temperature and I have to monitor closely every layer..

Being a poor blogger without any helper, I need to clean the kitchen and cooking utensil myself after every bake. For the first 1-2 layers, I will generally monitor the progress. from the third layer onwards, I will start dishing and cleaning the kitchen. By the time the cake is done, my kitchen is cleaned too. How long does it take? Possibly 20 layers times 5 minutes = 1 hour and 40 minutes..

IMG_6224

If you think that it is time consuming, why not bake 2 cakes at one go.. or even 4 cakes (top 2 and bottom 2). But you have to rotate the baking tin systematically and it basically means that your oven door is always open which is okay since what you need is basically top grilled heat to brown the layer.

IMG_6218

Why lapis need so much butter and egg yolk? The answer is very obvious, it is a cake that requires high temperature to bake with long baking hours, the cake will be dry if you use whole egg or less butter..Egg yolks and butter do make the cake “moister”.

IMG_6226

Per Wikipedia:

“Spekkoek (spekuk in Indonesian), also more popularly called (kue) lapis legit in Indonesia, is a Dutch-Indonesian layered cake. It was developed during colonial times in the Dutch East Indies and may have been based on Dutch cake recipes using local ingredients. The firm-textured cake is the Indo (Dutch-Indonesian) version of baumkuchen, but without a chocolate or sugar shell. It contains a mix of spices, such as cardamom, cinnamon, clove, mace and anise. The cake is very rich – a 20 cm × 20 cm (7.9 in × 7.9 in) cake can contain up to thirty egg yolks, 500 grams (18 oz) of butter, and 400 grams (14 oz) of sugar. In Indonesia, the cake is popularly known as (kue) lapis legit, literally “delicious layers (cake)”, because it consists of many thin layers of cake. As a good lapis legit has more than 18 layers, baking it is a very labour-intensive process requiring much patience. Each layer is made by pouring a small amount of batter from a cup into the baking tin, which is then put into an oven until the layer has turned golden from the heat. The tin is then removed from the oven and the process repeated to build up the remaining layers.Dutch ovens with a charcoal fire on top of the lid are said to produce the best results, while electric ovens are superior to gas ovens as cakes bake much faster in the former.”

IMG_6222


WHAT IS REQUIRED

Recipe modified from: All About Lapis Legit – Recipe & Tips on the Indonesian …

Servings: Prepare a 20cm x 20 cm cake

IMG_6155

  • 500 grams of butter at room temperature
  • 100 grams of condensed milk
  • 200 grams of icing sugar
  • 120 grams of cake flour
  • 30 egg yolks
  • 1.5 tablespoons of kueh rempah or mixed spice
  • Additional 100 grams of melted butter for layering (optional)

IMG_6220


STEPS OF PREPARATION

  • Pre-heat the oven to 180 degree Celsius.

IMG_6162

IMG_6168

  • Beat the butter, condensed milk and icing sugar until light and fluffy. Sift in the cake flour and mixed spice. Use the standing mixer’s lowest available speed to mix for 1 minute or until well mixed.

IMG_6175

  • In another mixer, beat the egg yolks until ribbon stage which took about 10-15 minutes. Ribbon stage means that the beaten eggs will drip slowly rather than very liquid. Add the beaten egg yolks gradually to the batter and use the lowest speed to mix until well combine. If the mixer mixing are not thorough, use a spatula to manually mix the batter,

IMG_6180

  • Pre-heat the tin in the preheated oven of 180 degree Celsius for 2-3 minutes. Once done, TURN THE OVEN TO TOP GRILLING MODE. Place about 1/2 cup of the batter to the baking tin. Put it back to the oven for about 15 seconds to let the heat melt the batter, swirl around the tin to make a thin layer.

IMG_6186

  • Bake in the oven for about 5 minutes or until the top part starts to brown. Once it browns, put another 1/2 cup of the batter to the baking tin, repeat the same process. If there are bubbles noted, use a toothpick to break it and use a icing smoother to lightly press the layer. Repeat the same for all the layers until all the batters are used. For the last layer, reduce the temperature for 160 degree Celsius and bake for 15 minutes. Keep an eye on each layer to ensure browning are even.

  • For moister cake, you can brush the melted layer on each layer. However, I have by passed this step and come out with equally moist cake.

IMG_6204


CONCLUSION

Pardon me for the poor layering but I am happy that this cake have 26 layers that meets the Wikipedia’s definition of kuih lapis. Lapis is not difficult to prepare if your oven temperature is operating normally. After seeing the ingredients, it is up to readers to decide whether to proceed to bake the lapis. What I can say is that it is a nice and delicious cake but everything have to be eaten in moderation.  If you have a yearly ritual of buying lapis for Chinese New Year, this recipe will save you some money and what you get is this delicious cake plus sense of achievement.

IMG_6228

For more Chinese New Year related cookies, snack and steamed cake recipes, you can have a copy of Easy Chinese New Year Recipes – A step by step guide” that was packed with 30 recipes, 60 pages at a reasonable convenience fee of USD3.50. The recipes covered various recipes from auspicious radish cake to nian gao to traditional kuih bangkit to trendy London almond cookies. Of course not forgetting both type of pineapple tarts. You can purchase by clicking the link above. You can either pay using Pay Pal or Credit card account. Please ensure that you have an PDF reader like Acrobat or iBooks in your mobile phone or iPad if you intended to read it in your ipad or mobile phone. Should there be any problems of purchasing, feel free to contact me at kengls@singnet.com.sg and separate arrangement can be made.

coverlow-final572

Hope you like the post today. Cheers and have a nice day.

IMG_6198


I’m submitting this post to Best Recipes for Everyone Jan & Feb 2015 Event Theme: My Homemade Cookies organized by Fion of XuanHom’s Mom and co-hosted by Victoria Bakes


Best_Recipes


IMG_6232


Snow White Mini Popiah Rolls

IMG_5975

INTRODUCTION

I have seen these cookies year’s ago but I do not know the name of the cookie. In fact, I have a hard time to get the right name for this cookie and until now, I am still puzzling. As such I have decided to name this cookie as “Snow White Popiah Mini Rolls” since it was dusted with sugar powder.

IMG_5961

This is a Chinese New Year goody without any history or background to write.. It is extremely simple with only two ingredients. You can either deep fried in hot oil, oven baked or air fried.

IMG_5967

For the sake of recent health trends, I have decided to select oven baked  method and the taste will not be compromised much .

IMG_5957


WHAT IS REQUIRED

IMG_5942

  • Some spring roll pastry
  • Some beaten eggs for sealing .
  • Some icing sugar for dusting

IMG_5971


STEPS OF PREPARATION

  • Pre-heat the oven to 150 degree Celsius.

IMG_5949

  • Brush the spring roll pastry generously with beaten eggs. If you want some egg fragrance, use whole egg and the colour will be darker. If you want it to be very white, you can use 100% egg white.

  • Put a satay stick at the corner of one end and gradually roll up as tight as possible. Take out the satay stick and start rolling the next piece. once all the pieces are done, use a scissor to cut into 3 cm length in your desired pattern. Bake in the pre-heated oven of 150 degree Celsius for 15-20 minutes or until crispy. Give it a quite stir in every 5 minutes to ensure even browning. (Note: If preferred, you can deep fry in a pot of hot oil using medium heat until your desired colour tone).

  • When out of the oven, place these rolls in a bowl of icing sugar and coat it as evenly as possible. Let it cool completely before storing in an air tight container.

IMG_5969


CONCLUSION

This is a simple recipe and hope all will like it. It is definitely a healthier recipe compare to the deep frying version.

IMG_5965

For more Chinese New Year related cookies, snack and steamed cake recipes, you can have a copy of Easy Chinese New Year Recipes – A step by step guide” that was packed with 30 recipes, 60 pages at a reasonable convenience fee of USD3.50. The recipes covered various recipes from auspicious radish cake to nian gao to traditional kuih bangkit to trendy London almond cookies. Of course not forgetting both type of pineapple tarts. You can purchase by clicking the link above. You can either pay using Pay Pal or Credit card account. Please ensure that you have an PDF reader like Acrobat or iBooks in your mobile phone or iPad if you intended to read it in your ipad or mobile phone. Should there be any problems of purchasing, feel free to contact me at kengls@singnet.com.sg and separate arrangement can be made.

coverlow-final[5][7]

Hope you like the post today. Cheers and have a nice day.

IMG_5963


I’m submitting this post to Best Recipes for Everyone Jan & Feb 2015 Event Theme: My Homemade Cookies organized by Fion of XuanHom’s Mom and co-hosted by Victoria Bakes


Best_Recipes


IMG_5973

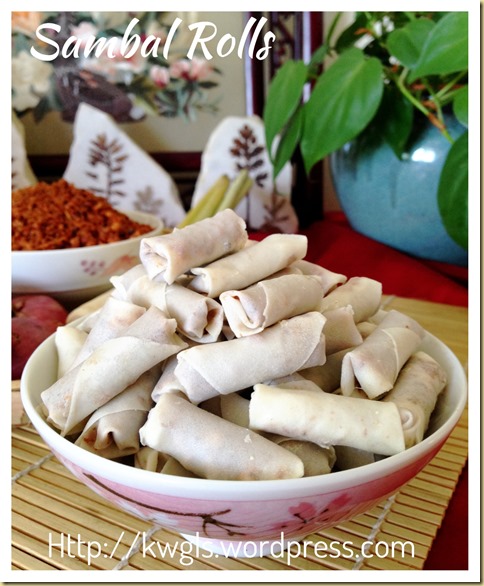
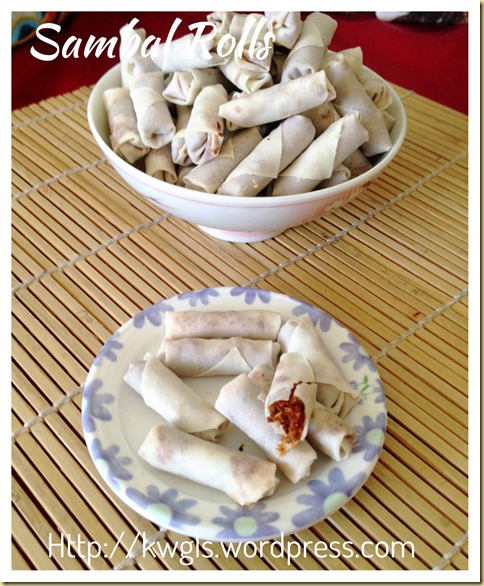
Shrimp Floss Rolls aka Sambal Udang Kering Mini Rolls (虾米卷)

IMG_5690

INTRODUCTION

This Chinese New Year goodies is not something new, I remembered that I have helped my families before when I was a kid..

IMG_5698

It is an easy job but laborious.. What make your cookies stand out as compared to other households will be the neatness of the cookies that you have prepared with love. As I have rather large fingers, I do have difficulty in wrapping these mini rolls.. Pardon me for the fat and rather ugly wrapped rolls. For those who slimmer fingers, it should be much better.

IMG_5732

I do not know who started to blend this Chinese style of pastry with the Malay style of condiments. What I can conclude is that it is definitely a good fusion. The slightly salty, aromatic and spicy shrimp floss was wrapped by the Chinese spring roll skin. After deep frying, the skin will become very crispy..It definitely provide an alternative to the house guest in a tray of sweet buttery cookies.

IMG_5708

As contrast to other recipes in the internet, this recipe uses oven bake. It is fast and you do not need to deal with the messiness in the kitchen resulting from oil deep frying. Taste wise will not be compromised much though definitely oil fried items will be tastier than oven baked or air fried.

IMG_5718

As for the sambal udang kering, you can refer to the post here: Sambal Udang Kering–Dry Shrimps Spiced Condiments (辣椒虾米松)

IMG_5740


WHAT IS REQUIRED

Servings : About 4o mini spring rolls.

IMG_5681

IMG_5696


STEPS OF PREPARATION

  • Pre-heat the oven to 160 degree Celsius . You are advise to pre-heat towards the end of the wrapping as these wrapping can be rather time consuming.

IMG_5797

  • Cut each sheet of spring roll pastry into 4 equal squares. Line up as in the picture.. Spread the flour paste on the edges of the square. Put a small quantity of shrimp floss on the centre, fold both sides inwards and followed by the sides nearer to you. Roll up quickly..Ensure that the edges stick to the pastry. Otherwise, use more flour paste to seal places that start to loosen. For best result, do not have too much shrimp floss as it will make the rolls hard.

  • Bake in the pre-heated oven of 160 degree Celsius for about 10-15 minutes or until your desired colour tone. I prefer my rolls to be whiter and therefore I have effectively baked for about 12 minutes only. Seal in an air tight container when completely cool. (Note: You can also deep fry the rolls using medium heat until golden brown. )

IMG_5734


CONCLUSION

Oven baked version is very much healthier. In addition, as the recipe for the shrimp floss uses very limited amount of oil, the snack is not as oily as what is commercially sold. Do give it a try and let me know whether or not this suit your taste buds.

IMG_5736

For more Chinese New Year related cookies, snack and steamed cake recipes, you can have a copy of Easy Chinese New Year Recipes – A step by step guide” that was packed with 30 recipes, 60 pages at a reasonable convenience fee of USD3.50. The recipes covered various recipes from auspicious radish cake to nian gao to traditional kuih bangkit to trendy London almond cookies. Of course not forgetting both type of pineapple tarts. You can purchase by clicking the link above. You can either pay using Pay Pal or Credit card account. Please ensure that you have an PDF reader like Acrobat or iBooks in your mobile phone or iPad if you intended to read it in your ipad or mobile phone. Should there be any problems of purchasing, feel free to contact me at kengls@singnet.com.sg and separate arrangement can be made.

coverlow-final[5][7]

Hope you like the post today. Cheers and have a nice day.

IMG_5692


I’m submitting this post to Best Recipes for Everyone Jan & Feb 2015 Event Theme: My Homemade Cookies organized by Fion of XuanHom’s Mom and co-hosted by Victoria Bakes


Best_Recipes


IMG_5712

Cherry Blossom Stained Glass Cookies (樱花玻璃曲奇)

IMG_5848

INTRODUCTION

Stained glass cookie is a rather trendy bake in Asia in recent years ..The cookie is also named as “Cathedral or church window “ cookies. It  is a cookie that have a candy in the centre resembling the tinted glass windows in some old European buildings.

IMG_5852

Many people have baked this as last year’s Christmas cookies…. However, I have decided to push back this recipe to Chinese New Year as I believed it is a perfect cookie for this auspicious Chinese festival.

IMG_5865

I purposely choose one design that shaped like flowers.. Since it is spring festival, flowers will blossom signifying a new year has arrived. After consultation with members of some Facebook Groups, I have decided to name this as Cherry blossom cookies since I already have a plum blossom cookies recipe.

IMG_5867

Unlike other recipes in the net, this recipe is very simple.. no difficult ingredients and what you need are just 4 main ingredients: flour, sugar, butter and some hard candy. No complicated and specialized mould is required. I use my pineapple tarts mould and do an additional step of cutting of the centre. It was pretty easy actually.

IMG_5854

For the hard candy, it can be of any type, any brand, and any colour. For purpose of Chinese New Year, I am quite insistent that the colour has to be red… I did not go until the extent of searching in the supermarket to look for the candy that I wanted. I just went to the neighbourhood provision shop, asking for red hard candy.

IMG_5838

Apparently, hard candy seems to have “lose out” to soft candy. I can’t get any one and I eventually bought the Strepsil cherry flavour for this illustration. However, i am rather confident that you can get it in larger supermarkets with Fox brands or others.

IMG_5832


WHAT IS REQUIRED

Servings: about 30 cookies depending on size of the mould

IMG_5807

  • 90 grams of plain flour
  • 60 grams of butter at room temperature
  • 30 grams of icing sugar
  • Some hard candy of your choice

IMG_5873


STEPS OF PREPARATION

  • Pre-heat the oven to 160 degree Celsius.

IMG_5813

  • Cream the butter and icing sugar until light and fluffy. Add in the flour, stir until well mixed. Transfer the dough out to a lightly floured surface. Roll the dough into about 5 mm thickness.

IMG_5821

  • Use your preferred mould to mould the dough. Cut off the centre of the flower (I have use a simple piping nozzle).  Bake in the preheated oven of 160 degree Celsius for 10 minutes.

IMG_5826

  • While the cookies are baking, use something to break the hard candy. When the cookies are ready, take out, put a small amount of hard candies in the cavity at the centre of the cookies. Send back to the oven and bake for another 10 minutes. Let the cookies cooled completely in the baking tray before removing it and store in an air tight container.

IMG_5871


CONCLUSION

This cookie is definitely not a difficult cookie to prepare. It is rather easy and do not ask me where I get my mould.. In fact, any pineapple tarts mould will be able to give you a beautiful design. I got mine in a neighbourhood shop and have been with me for many years.  Do play around with the colour and patterns of your mould ..

IMG_5846

For more Chinese New Year related cookies, snack and steamed cake recipes, you can have a copy of Easy Chinese New Year Recipes – A step by step guide” that was packed with 30 recipes, 60 pages at a reasonable convenience fee of USD3.50. The recipes covered various recipes from auspicious radish cake to nian gao to traditional kuih bangkit to trendy London almond cookies. Of course not forgetting both type of pineapple tarts. You can purchase by clicking the link above. You can either pay using Pay Pal or Credit card account. Please ensure that you have an PDF reader like Acrobat or iBooks in your mobile phone or iPad if you intended to read it in your ipad or mobile phone. Should there be any problems of purchasing, feel free to contact me at kengls@singnet.com.sg and separate arrangement can be made.

coverlow-final[5]

Hope you like the post today. Cheers and have a nice day.

IMG_5842


IMG_5834

I’m submitting this post to Best Recipes for Everyone Jan & Feb 2015 Event Theme: My Homemade Cookies organized by Fion of XuanHom’s Mom and co-hosted by Victoria Bakes


Best_Recipes

Sambal Udang Kering–Dry Shrimps Spiced Condiments (辣椒虾米松)

IMG_5724

INTRODUCTION

My late parents were born in China and settled in Sarawak.. Therefore, none of them qualified to be a Peranakan. In fact, my late mum even have a difficulty to communicate in simple Malay as there are very few Malay households in our area of residence.

IMG_5718

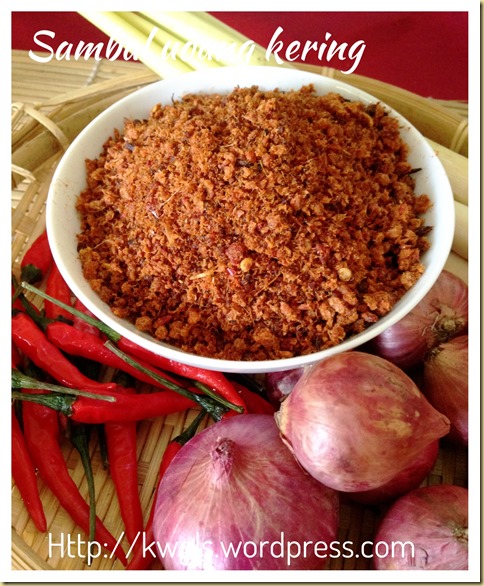
However, I have prepared these sambal udang kering or dry shrimps condiment since I was very young. I remembered that I have helped my mother pounding the dry shrimps using pastel and mortar. Lemon grass, shallots and chilli are the three main ingredients..

IMG_5746

We used to eat these with some white porridges or with raw cucumber. At times, dry shrimps was not used, instead , deep fried lard cubes was used and it yield the same  flavour without the fishiness.

IMG_5714

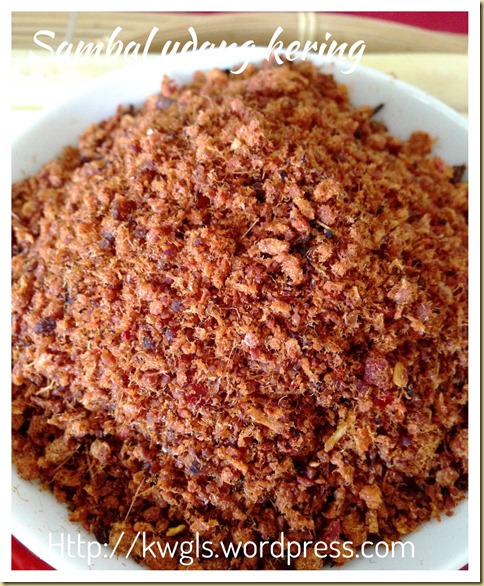
For these sambal udang kering, I did not refer to any recipe. It is the estimated measurement on my head but properly weighing done for the sake of issuing this recipe. It is a totally flexible recipe, a bit more or less will not rendered your sambal udang kering not eatable… And you can very easily tailor to your taste buds.

IMG_5728

However, what I am sharing is not what my late parents used to do. Steps were simplified and I have used very minimum amount of cooking oil in the recipe since most families already have non stick pans and food processor in their house. Taste wise will not be compromised much at all.

IMG_5692

I purposely prepared these sambal udang kering in a rather dry manner for the purpose of preparing my Chinese New Year cookies – Sambal udang kering rolls.  It will be issued in the next post.

IMG_5751


WHAT IS REQUIRED

IMG_5794

  • 250 grams of dried shrimps- soaked until soft
  • 2 sticks of lemon grass
  • 5 shallots
  • 15 dried chillis – soaked and drained
  • 1-2 tablespoons of peanut oil (or other cooking oil)
  • 1 cm cube of belachan (shrimp paste) or 1 tablespoon of belachan powder (optional)
  • Sugar to taste

IMG_5748


STEPS OF PREPARATION

IMG_5795

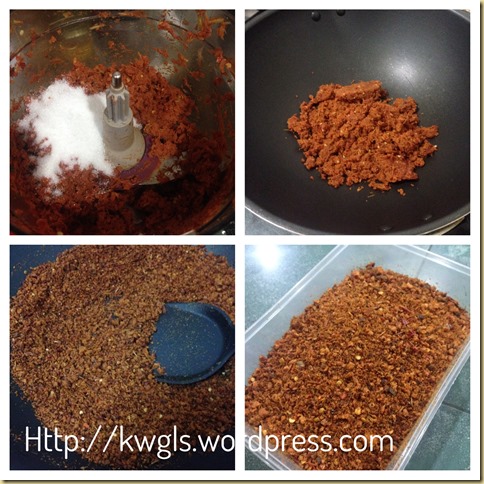
  • Soak the dry shrimps until soft. Drain and set aside. Put the shallots, chilli and lemon grass., dry shrimps, belachan or belachan powder and blend as fine as possible.

IMG_5796

  • Add the sugar and oil, blend until the overall mixture is fine.. Transfer the blended mixture to a non stick pan. Stir fry under “MEDIUM “ heat until the mixture dries up and the mixture become aromatic. Constant stirring is required. It took me about 15 minutes to stir fry until my desired texture which is dry but not floury.

IMG_5726


CONCLUSION

This condiment was prepared with the intention of baking some mini popiah sambal udang rolls to be served during Chinese New Year. Do stay tune for the next post on this mini spring rolls.

coverlow-final

For more Chinese New Year related cookies, snack and steamed cake recipes, you can have a copy of Easy Chinese New Year Recipes – A step by step guide” that was packed with 30 recipes, 60 pages at a reasonable convenience fee of USD3.50. The recipes covered from auspicious radish cake to nian gao to traditional kuih bangkit to trendy London almond cookies. You can purchase by clicking the link above. You can either pay using Pay Pal or Credit card account. Please ensure that you have an PDF reader like Acrobat or iBooks in your mobile phone if you intended to read it in your ipad or mobile phone.

IMG_5722

Hope you like the post here. Cheers and have a nice day.

IMG_5732


IMG_5730

Nian Gao Puff (酥脆烘年糕)

IMG_5566

INTRODUCTION

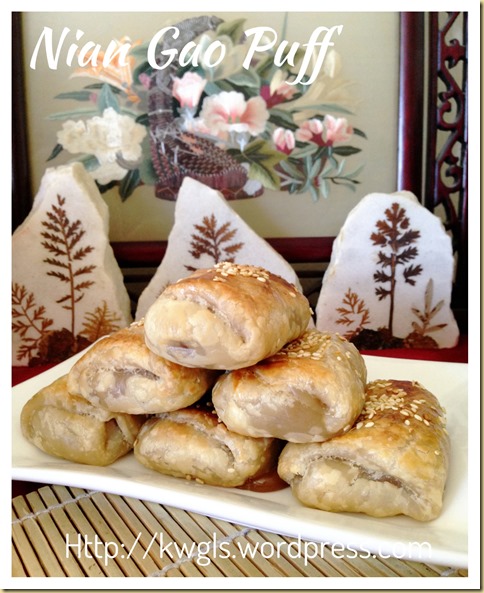
Last year I did not issue this post but friends are requesting for recipes. It is not a recipe actually, it is just a way to serve nian gao or Chinese glutinous rice cake and I have to say that this is not my invention, it is a trend especially among the English speaking members of Facebook Group for the past few years.

IMG_5570

In recent years, nian gao wrapped in commercial puff pastry had become very popular after Chinese New Year. Prior to this trend, most families will deep fry the nian gao or re-steamed it and served it with shredded coconut.

IMG_5125

I have decided to prepare this because I wanted to try out my homemade nian gao that I have prepared about a week ago. Overall conclusion is that the nian gao with gula melaka definitely taste as good as the traditional nian gao. If you are interested in homemade nian gao, you can refer to this post: Baked or Steamed,You Decide Yourself–Glutinous Rice Cake, Nian Gao (年糕)

IMG_64961

For this illustration, i have used commercial puff pastry. However, if you are game enough to have some homemade puff pastry, you can refer to my croissant posts : Home Made Croissants (家居自制牛角包) It is the same type of puff pastry that were sold by the supermarkets.

IMG_5572

As my in built oven broke down and waiting for repair , I have resorted to the use of oven toaster with no temperature control. As such, the pictures are not as appealing as it should be because there are some signs of under baking. Do not worry, any puff pastry will come with a baking instruction, do follow the packaging instruction and it will be fine.  Should i re-prepare again, I will have another session of photo taking.

IMG_5562


WHAT IS REQUIRED

IMG_5584

  • A few sheets of store bought puff pastry
  • Some nian gao
  • Some sesame seeds
  • One egg yolk for egg washing

IMG_5582


STEPS OF PREPARATION

  • Pre-heat the oven to 200 degree Celsius or as per packaging instructions.

IMG_5585

  • Lay some nian gao on top of the puff pastry. Wrap it in your desired pattern and seal the edges. Egg washed the pastry, sprinkled with sesame seeds and bake in the pre-heat oven of 200 degree Celsius for 20-25 minutes (or according to the packaging instructions).

IMG_5564

Note:

  • I am using freshly homemade nian gao, as such it is slightly softer than commercially sold. If your nian gao turns hard, it will have a much better shape than those illustrated here.

  • For egg washing, crack one egg yolk with one tablespoons of water, mixed well, sift and brushed.

  • You can have put your desired nuts be it macadamia, walnuts, peanuts etc. to the nian gao before wrapping to provide some crunchy to the nian gao puff.

  • Nian gao, when baked will expand. Do not wrap it overly tight. You can also use a scissor to cut some holes on top of the puff pastry prior to the baking.

  • For oven toaster, I have baked for about 20 minutes without temperature control. Therefore, some parts looked slightly under cooked.

IMG_5580


CONCLUSION

This way of serving is extremely easy. Whether or not it is healthier as compared to deep frying is up to individual to decide. .. Once you baked any commercial puff pastry, you will know the answer.. Haha. Possibly the healthiest way of serving the nian gao is to re-steam the nian gao and served with shredded coconut.

IMG_5578

Hope you like the post today. Cheers and have a nice day.

IMG_5568


IMG_5574

I’m submitting this post to Best Recipes for Everyone Jan & Feb 2015 Event Theme: My Homemade Cookies organized by Fion of XuanHom’s Mom and co-hosted by Victoria Bakes


Best_Recipes


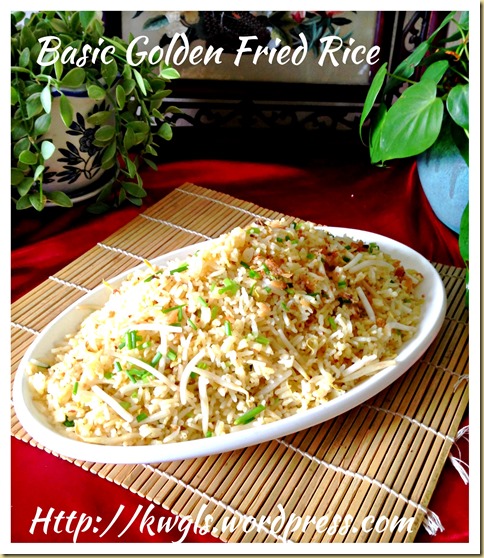
Basic Golden Fried Rice (黄金炒饭)

IMG_52921

INTRODUCTION

Every time when I posted my fried rice, members of Facebook Groups and friends will ask why my rice is grainy and evenly coated with eggs and that reminded them of the famous Chenfuji fried rice in Singapore. This Singapore restaurant is famous for its crab meat egg coated fried rice and that prompted me wanted to share my fried rice techniques with readers.

IMG_53081

Fried rice is not difficult at all but there are some simple pointers of stir  frying rice and I hoped that via these simple pointers, readers can come out with his or her favourable version of fried rice. The pictures below depicts the difference between golden fried rice and white rice.

IMG_53131 

Fried rice is very common among Asians since rice is a staple food. I  believed that it is so common that most will not expect Wiki has a write up on this . However, Wikipedia do have a write up on fried rice. As per Wikipedia:

IMG_52981

“Fried rice is a dish of steamed rice stir-fried in a wok, often mixed with other ingredients, such as eggs, vegetables, and meat. It is sometimes served as the penultimate dish in Chinese banquets, just before dessert. As a homemade dish, fried rice is typically made with leftover ingredients (including vegetables, meat) from other dishes, leading to countless variations.Many popular varieties of fried rice have their own specific list of ingredients. In Asia, the more famous varieties include Yangzhou and Fujian fried rice. Elsewhere, most restaurants catering to vegetarian or Muslim clientele have invented their own varieties of fried rice including egg fried rice and the Indonesian spicy nasi goreng (fried rice).(Source: http://en.wikipedia.org/wiki/Fried_rice)

IMG_75791

For this illustration, in order to illustrate the effect of egg coated fried rice, I have selected simple ingredients using salted fish, bean sprouts and eggs as the main ingredients. Of course you can choose any ingredients that you liked..

IMG_53211


WHAT IS REQUIRED

Servings: About 4-5 adults

 IMG_5280

  • 3 cups of cooked rice
  • 3 eggs
  • 3 tablespoons of cooking oil
  • Some bean sprouts (optional)
  • 1 tablespoon of minced garlic
  • 1 tablespoon of cooked salted fish (optional)
  • 1 tablespoon of chopped spring onion
  • Pinches of salt
  • Dashes of white pepper
  • Sugar or seasonings to taste

IMG_75771


STEPS OF PREPARATION

IMG_5285

  • Crack the eggs to the cooled rice. Add salt, dashes of pepper and other seasonings. Use hand to stir the rice until the rice are coated with raw eggs as evenly as possible.

  • In a big frying pan, add the oil, sauté the garlic until fragrant and golden brown, add in the salted fish and stir fry for an additional one minute.

IMG_5290

  • Add in the rice, stir fry until the eggs dries up. If desired, add more seasonings. Add in the chopped spring onion and bean sprouts, stir fry for another 2-3 minutes and dish up. Best to serve warm .

Notes

  • Usually for one cup of rice, one egg and one tablespoon of oil is used.

  • If you want very yellowish colour egg coated fried rice, you have to use all egg yolks (about 50 grams of egg yolks for one cup of rice)

  • Overnight rice is ideal but freshly cooked rice is acceptable. However, the rice have to be cooled completely.

  • If your rice grains requires say 1 cup of water for 1 cup of rice, reduce the water by 10 per cent to 0.9 cup of water for one cup of rice. This is to avoid the rice from becoming too soggy for stir frying.

  • Throughout the whole process of stir frying, high heat shall be used.

IMG_53171


CONCLUSION

Some members of Facebook Group have tried this method of frying rice and are very pleased with the results. I hope these pointers will help new house chefs.  Feel free to add in anything that you like such as sausages, barbecue pork, prawns and etc.. Of course, with crab meat, it will transform the common fried rice into a very presentable dish..

IMG_52961

Hope you like the post today. Cheers and have a nice day.

IMG_53191


IMG_75851


Chocolate Coated Almond Shortbread Cookies aka London Almond Cookies (伦敦杏仁饼)

IMG_5197

INTRODUCTION

Last year when I issued my Chinese New Year recipes, readers are asking me for London Almond Cookies recipe. This year, I will share with all this recipe of mine ..

IMG_5213

As I really can’t trace the how the place London was associated with the cookie, I find that it is rather funny and amusing to use the name, as such, I will name the recipe as Almond Shortbread Cookies… However, feel free to change it to London Almond Cookies if you feel that is more convenience for your purpose.

IMG_5211

Preparation is not difficult but taste is rather good. Whether sweet or not will depend on your cooking chocolate. I have toned down the sugar level in the cookie so as to compensate the sweetness of the chocolate.

IMG_5223

There is nothing much to write about the cookie  and it is really en easy bake… Shaping is not that difficult as it will be coated with melted chocolate should there be any imperfections. Pardon me for my less than smooth coating as I have used much less chocolate that what I have indicated in the recipe for the illustration.

IMG_5233


WHAT IS REQUIRED

Servings: About 30 cookies

IMG_9323

  • 150 grams of top flour or plain flour
  • 75 grams of butter
  • 40 grams of icing or castor sugar
  • 1 egg

IMG_5262

  • 150 grams of semi sweet cooking chocolate
  • 30 toasted whole almonds
  • Some sprinkles (or chopped nuts)

IMG_5217


 STEPS OF PREPARATION

  • Pre-heat the oven to 150 degree Celsius (You can preheat the oven towards the end of your preparation as the preparation can be rather time consuming).

IMG_9330

  • Cream butter and sugar until light and fluffy. Gradually add in the beaten eggs. Sift in the flour and stir until well mixed.

IMG_5260

  • Pinch some dough (about 10 grams), shape round, wrap an almond in the centre. Shape it oval and bake in the pre-heated oven of 150 degree Celsius for 8-10 minutes or when the bottom turn slightly brownish. Cool completely before the next step.

IMG_5261

  • Melt the chocolate in a microwave oven for about 1-2 minutes (you can also melt the chocolate over the stove via baine marie, i.e. placing a bowl on top of a  pot of hot boiling water). Dip the baked cookies in the melted chocolate and coat the entire cookie as smooth as possible. Transfer the cookies to paper cups, dust with some coloured sprinkles (or chopped nuts) and let it set at the room temperature. Once set, store in an air tight container.

IMG_5207


CONCLUSION

A rather simple cookies which is well liked by all races. Feel free to call whatever name you like but I shall call this as Almond shortbread cookies.

IMG_5221

Hope you like the post today. Cheers and have a nice day.

IMG_5231


IMG_5199