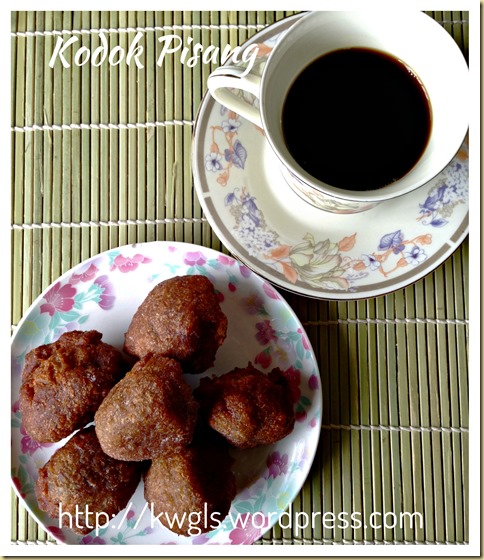
Mashed Banana Fritters–Jemput Jemput Pisang, Kuih Kodok, Kuih Cekodok, Kuih Cokodok (炸香蕉球)

IMG_75221

INTRODUCTION

Many readers missed our traditional cuisines but most new house chefs did not know how to prepare it. Pardon me to say that most traditional recipes are simple and fast and easy to prepare but with awesome taste..

IMG_75281

It was left out probably due to change in taste buds over the years, more health conscious newer generation and pampered with too many choices.

IMG_75381

Jemput Jemput Pisang or Cokodok or Cekodok Pisang or Kodok Pisang is a type of Malay traditional mashed banana fritters that was commonly sold in the stores together with banana and other fritters.. I love this slightly sweet fritters that goes well with a cup of coffee or tea..

IMG_75191

Per Wikipedia:

“Cokodok (alternate spelling: Cekodok), also called Kuih Kodok or Cucur or Jemput-jemput, is a traditional Malaysian fritter snack that is made with flour and banana, and is fried. It is usually round in shape and tends to vary in size. There are many varieties of this snack, some substituting the banana with anchovies, prawns, onion or maize.’”  (Source: http://en.wikipedia.org/wiki/Cokodok)

IMG_75341

The preparation can be as simple as you want it to be, just bananas and flour. However, there are many other ingredients that can be added to enhance the taste and texture.

IMG_75441

Today, I am sharing a version that have shredded coconuts and palm sugar.. In addition, I have added rice flour to make it stay crispier for a longer period of time.

IMG_75401


WHAT IS REQUIRED

Servings: About 20 small size kuih kodok of about 2 cm diameter

IMG_7497

  • 250 grams of ripe bananas
  • 100 grams of grated coconut
  • 100 grams of plain flour
  • 50 grams of rice flour (can be substitute with plain flour)
  • 50 grams of brown sugar or palm sugar
  • 1/4 teaspoons of baking soda
  • Adequate oil of deep frying

IMG_75321


STEPS OF PREPARATION

IMG_7502

  • In a big mixing bowl, mash the banana until puree form. Add the grated coconut and palm or brown sugar. Stir until well mixed. Sift the plain flour, baking soda and rice flour. Stir until well combined.

IMG_7507

  • In a pot, heat up adequate cooking oil. Drop a tablespoon of the batter into the hot oil carefully. Deep fried the mash banana fritters under medium heat until golden brown. Drained and served as a snack or breakfast items.

IMG_75171


CONCLUSION

An easy and simple traditional snack for all to try out.. Adding the rice flour will make the mashed banana fritters exterior a bit crispier and using palm sugar and shredded coconut have enhanced both the texture and taste of this traditional snack.

IMG_75361

Hope you like the post today. Cheers and have a nice day.

IMG_75151


  • For more recipes, you can refer to my RECIPE INDEX (updated as at 28 July 2014)  here and you can follow me at PINTEREST or visit the blog’s FACEBOOK PAGE to keep abreast of my future posts.  

IMG_75241

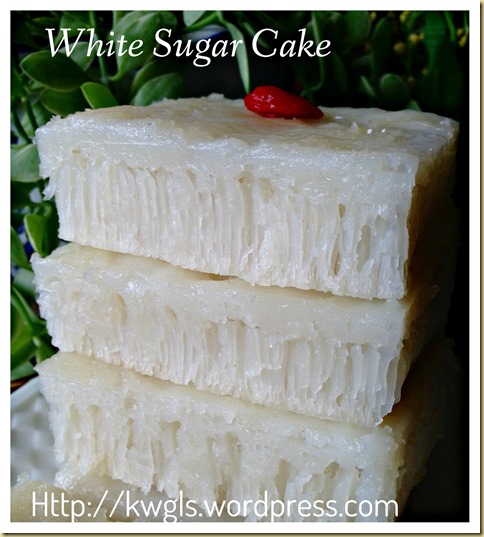
The Third Honeycomb Structure Asian Cake– White Sugar Sponge Cake or Pak Thong Ko (白糖糕)

IMG_74951

INTRODUCTION

Regarding Asian cake of beehive or honeycomb structure, I have recipes for Malaysian Beehive Cake – Kek Sarang Semut..and

IMG_59661

And also Indonesia’s famous Honeycomb Cake  – Bingka Ambon.

IMG_05241

And today is the third cake in this category called Chinese Yeasted White Sugar Sponge Cake..(白糖糕)。It is a rather common breakfast item in Singapore and Malaysia.

IMG_74611

In my humble opinion, all these three cakes are interrelated though the type of flour (tapioca flour vs. plain flour vs. rice flour), method of preparation (steaming vs. oven baked vs. stove baked)  and leavening agent (yeast vs. baking soda vs. baking powder) differ rather significantly but the result of the cake are all airy and spongy. 

IMG_74811

There is a big possibility that they are interrelated resulted from localization of ingredients availability.  I have quite a detail comparison in this post – My Childhood Cake–Bee Hive Cake/Malaysian Honey Comb Cake or Kueh Sarang Semut (蜂巢蛋糕) and you may want to take a look to see the similarities and differences between these 3 cakes.

IMG_74591

This must be one of the simplest and fastest  recipes that I have came across that required only about 2 hours to get ready the steamed cake. There are many recipes available and some required fermentation over days or proofing of at least 8 hours etc.… Because of its short period of preparation, I have decided to select this recipe and give it a try.

IMG_74931

The batter of the cake is very watery and that shocked me . I am very doubtful about the success of this preparation until the cake was out of the steamer. It is such a relief to see the cake is springy with airy holes. The recipe worked rather wonderfully. It provide a very springy cake like those sold outside. However, I am unsure why the airy holes in between the cakes are rather small as compared to the commercially sold or  the picture as posted  in the original recipe. I am equally puzzled. Taste wise, it is acceptable though I have hope that it have a stronger yeast flavour.

IMG_74831

Looking at the ingredients, one will know that this is a rather healthy cake for breakfast. There is no oil (except greasing of baking tin)  in the cake. The sugar content can be adjusted downward to suit your taste buds though I do not think that the cake is sweet as compared to store bought.

IMG_74691

Per Wikipedia:

“White sugar cake sponge (also called white cake sugar and white pastry sugar) is a type of Chinese pastry. It is one of the most common pastries in Hong Kong.  It is made from rice flour, white sugar, water, and a leavening agent.While it is called a “cake”, it is not served as a circular round cake. It is usually purchased as an individual square piece or a mini triangle. The cake is white in color. The consistency is spongy and soft. The taste is sweet, and sometimes has a slightly sour taste due to fermentation of the batter prior to cooking. Like most Chinese cakes, it is steamed, giving it a moist, soft, and fluffy texture, as opposed to a dry and firm one. If left exposed to the air, it hardens quickly. It is usually kept under some cover to preserve moistness. It is typically served hot, because when it is cold it is not as soft and moist. The batter is either poured over a bowl in a steamer, a Chinese steamer cloth or aluminium foil. If made from brown rice flour and brown sugar it is called a brown sugar sponge cake.”

IMG_74531


WHAT IS REQUIRED

Recipe adapted from: Pak Tong Kueh – Page 14 娘惹糕 by Ricky Ng Published by Seashore Publishing  Sdn. Bhd. 2012

Servings: Prepare three 9 inches diameter round baking tray of white sugar cake (about 2 cm thickness)

IMG_7428

Yeast Starter

  • 100 grams of plain flour
  • 100 grams of lukewarm water
  • 10 grams of instant yeast

IMG_7425

Syrup portion

  • 400 grams of castor sugar
  • 600 grams of water
  • Pinches of salt

Rice flour batter

  • 400 grams of rice flour
  • 400 grams of water

Others

  • A teaspoon of alkaline water (optional)

IMG_74651


STEPS OF PREPARATION

  • Grease a 9 inches diameter baking tray and get ready a steamer with adequate water capable of at least steam 30 minutes per session.

IMG_7431

  • For yeast starter, in a bowl, stir instant yeast, plain flour and lukewarm water until well mixed. Set aside for 15- 20 minutes.

  • For syrup preparation, in a pot, put sugar, water and salt. Heat over low heat until the castor sugar dissolves.

PicMonkey Collage1

  • In a bowl, put the rice flour and water (the rice flour batter portion), stir until it form a thick batter. Add the syrup to the thick batter, stir until well mix and set aside and cool until it warm to touch. Add the yeast starter, stir until well mix and let it proof for at least 1.5 hours. 

  • After 1.5 hours, add the alkaline water, stir until well mixed. Transfer 1/3 of  the batter to the greased baking tin and steam in the steamer at high heat for at least 25 minutes or until a skewer inserted comes out clean. Take out the steamed cake and perform the same for the remaining 2/3 of the batter in 2 sessions.  (Note that the original recipe called for single steaming and I am not confident it will work at every kitchen since it will become very thick and difficult to get cooked unless the heat of the steamer are very powerful. If you are confident, you can follow the original recipe of steaming once only).

IMG_74631


CONCLUSION

This is considered as a successful cake as it is spongy and with airy holes. The only thing that is lacking possibly is the flavour of wine yeast that were used by commercial stores. If you like the palm sugar version, you can try substituting the white castor sugar with palm sugar.

IMG_74751

Hope you like the post today. Cheers and have a nice day.

IMG_74771


  • For more recipes, you can refer to my RECIPE INDEX (updated as at 28 July 2014)  here and you can follow me at PINTEREST or visit the blog’s FACEBOOK PAGE to keep abreast of my future posts.  

IMG_74551

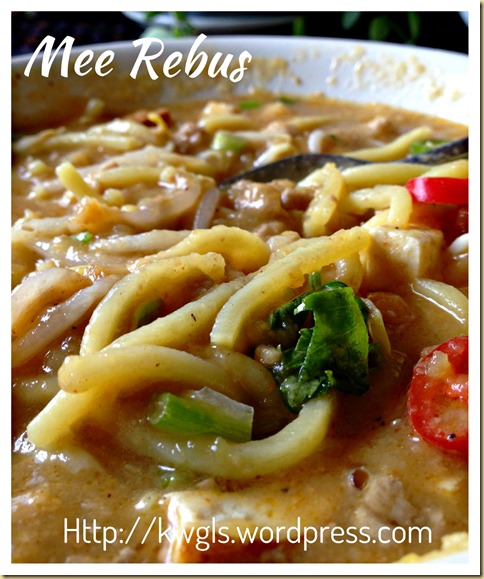
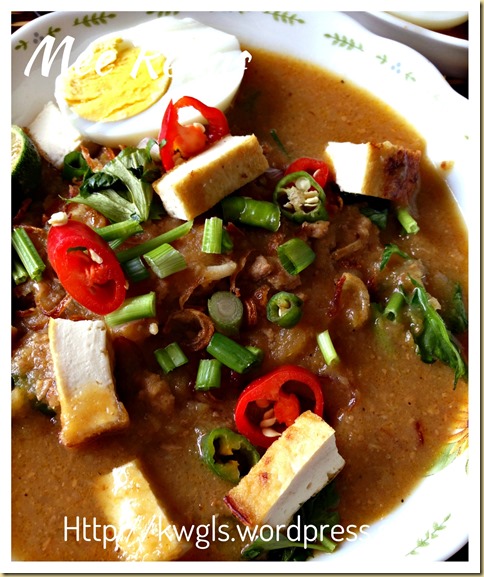
Noodles In Sweet Potatoes Gravy–Mee Rebus (马来卤面)

IMG_72971

INTRODUCTION

To be very frank, mee rebus is not something that I am very familiar even though it is rather common in Singapore and Malaysia..One of the prime reasons is that it was usually prepared with beef broth.

IMG_72901

I am rather sensitive to beef and usually after I took a spoon or two of the mee gravy, I will know whether or not it is prepared using beef. If it is prepared using beef, I will give the entire bowl to my wife. Having said that, that one or two spoons of noodles gravy did gave me a good impression of the comfort noodle dish well liked by many Malaysians and Singaporeans.

IMG_73101

Today, I have decided to prepare Mee Rebus as my lunch using my own meat stock.. After reading through many recipes, I was rather confused and almost gave up in view of the huge number of ingredients required for the preparation. Some have prawns, some  don’t. Some have beef and some are vegetarian. Some use lime leaves, bay leaves etc. and most are none. Some used castor sugar and some used palm sugar. Some used sweet potatoes as a thickener and some used potatoes  to thicken the gravy.. Whose is authentic and how I wish that there are certain patent and guidelines for the preparation of Mee Rebus issued by the relevant authority to guide new chefs like us in the preparation.. However, it is also understood that traditional cuisines will have as many recipes as the number of grandmothers in the village and everyone will claim that theirs is the best..

IMG_73521

Some called it Mee rebus, others called it Mie Celor, Mee Jawa, Mee Bandong …and I am unsure whether or not these are the same.. However, they do have a common characteristic, a yellow egg noodle dish with thick gravy usually prepared using meat or seafood broth.. It is usually garnished by Chinese celery, bean curd, green chilli and hard boiled eggs. 

IMG_73161

Being pampered with so many recipe choices…I have decided to choose a recipe that have the ingredients closest to Wikipedia’s definition. As per Wikipedia,

“Mi rebus or Mee rebus (Malaysian and Singaporean spelling), (literally boiled noodles in English) is a noodle dish popular in Indonesia,Malaysia, and Singapore. The dish is made of yellow egg noodles, which are also used in Hokkien mee, with a spicy slightly sweet curry-like gravy. The gravy is made from sweet potatoes, curry powder, water, salted soybeans, dried shrimps, and peanuts. The dish is garnished with a hard boiled egg, calamansi limes, spring onions, Chinese celery, green chillies, fried firm tofu (tau kwa), fried shallots and bean sprouts. Some eateries serve it with beef, though rarely found in hawker centres, or add dark soy sauce to the noodles when served. The dish also goes well with satay. In certain area, due to the local situation, a similar variety of this Mi Rebus is called Mee Jawa, Mi Jawa or Bakmi Jawa, although this is a popular misnomer, since Javanese bakmi Jawa is different from Mi Rebus. A dish similar to Mi Rebus in Indonesia is called Mie Celor, and it is popular in Palembang.” (Source: http://en.wikipedia.org/wiki/Mi_rebus)

IMG_73021


WHAT IS REQUIRED

Recipe adapted from: Noodles in Sweet Potato Gravy ( Mee Rebus )

Servings: About 6 Adult servings

IMG_7266

Gravy

  • 500 grams of sweet potatoes (boil and mash)
  • 300 grams of beef or other preferred meat (boil and cut into small pieces)
  • 2 lemon grass (cut and bruise)
  • 4 tablespoons of meat curry powder
  • 3 cups of meat stock
  • 3 tablespoons of oil of stir frying
  • 1 tablespoons of palm sugar

*To be blended with 1/2 cup of water

  • 30 grams of baby shrimps (soaked in water) *
  • 1 big onion or 10 small shallots *
  • 10 cloves of garlic*
  • 3 cm long galangal*
  • 3 cm long of ginger*
  • 2 tablespoons of fermented soya beans or taucheo*

For Assembly

IMG_7278

  • 400 grams of yellow egg noodles (blanched)
  • 200 grams of bean sprout (blanched)
  • 6 hard boiled eggs (cut into half)
  • 1 piece of firm bean curd (pan fried until slightly golden brown and cut into small pieces)
  • 2 red chillies (cut into small pieces)
  • 2 green chillies (cut into small pieces)
  • 3 tablespoons of deep fried shallots
  • 2 stalks of Chinese celery (cut into small pieces)
  • 2 stalks of spring onion (cut into small pieces)
  • 6 calamansi or lime (cut into half)

IMG_73381


STEPS OF PREPARATION

IMG_7263

  • Steam the sweet potatoes until soft and use a fork to mash until puree form. Set aside for later use.

  • Boil the meat until cooked. Keep the meat broth. Either manually cut until small pieces or use a food processor to blend until small chunks.

IMG_7271

  • Put all the ingredients mark “*” in a blender, put half cup of water, blend until as fine as possible.

  • In a bit pot, put 3 tablespoons of cooking oil, pour the rempah to the pot follow by meat curry powder and bruised lemon grass stalks.

IMG_7276

  • Sauté the rempah using medium heat until aromatic, oil separates from the rempah and fragrance permeates the house. It will take about 15 minutes. From the 3 cups of meat broth (you can use plain water plus beef or chicken seasoning cubes and do not forget the earlier meat broth from the cooking of the meat), add about 2 cups of the meat broth to the rempah. Stir until well mix. Add the mashed sweet potatoes followed by meat chunks and palm sugar. Stir until well mixed. Add the remaining one cup of meat broth to the gravy until your desired consistency.  Bring the gravy to boil and set aside for later assembly. (Adding meat broth gradually will give you a chance to control the consistency. If too much water is added, it is rather hard to salvage the situation)

IMG_7284

  • For assembly, put some beansprouts and yellow egg noodles in the bowl. Put adequate gravy to cover the beansprouts and yellow egg noodles. Sprinkle on top of the gravy some red chilli, green chilli, firm bean curd slices, some eggs, deep fried shallots, spring onions, Chinese celery and calamansi or small lime. The noodle is best served warm.

IMG_73061


CONCLUSION

Though the preparation is slightly more laborious but the noodle dish really worth every single effort put in. Do not ask me the difference between  this Mee Rebus and Mee Jawa commonly found in East Malaysia and Indonesia or Mee Rebus Penang style or Mee Rebus Johor style or Mee Celor in Palembang, Sumatra. I am equally confused but what I knew is food history are all intertwined and it is common to have slight  differences due to localization of ingredients and none shall claim his or hers as authentic.  Do give it a try and let me know if it suit your taste buds.

IMG_72951

Hope you like the post today. Cheers and have a nice day.

IMG_73121


  • For more recipes, you can refer to my RECIPE INDEX (updated as at 28 July 2014)  here and you can follow me at PINTEREST or visit the blog’s FACEBOOK PAGE to keep abreast of my future posts.  

IMG_73001

Kuih Bingka Ubi–Baked Tapioca or Cassava Cake (烤木薯糕)

IMG_71501

INTRODUCTION

Tapioca or cassava is a tropical root and I believed most Singaporean and Malaysians are very familiar with this root. In fact, I grew up with this familiar childhood root.

IMG_71231

When I was young, my parents planted some tapioca at the sides of our house. When she felt like preparing tapioca cake, she would asked my elder brothers dug out the roots, de-skinned and used a traditional grater to grate the tapioca….As grating tapioca was rather tedious and in the  1970’s when there were stores selling grated coconut for the preparation of coconut milk., she brought the de-skinned tapioca all the way to the grated coconut seller and asked for his favour to grate for her….Not many years later, coconut milk seller also started to sell grated tapioca as a side item…..

IMG_71541

Therefore, tapioca cake is not something new to me.. I saw my late mum prepared this all the time. Just like most other traditional recipes, there were no formal record of the quantities used..However, I can remember clearly the consistency of the batter before the batter was steamed. The baked version was not common until the availability of household ovens many years later. However, there were still those who baked the cake using charcoal ovens.

IMG_71381

If you are interested to have the steamed version of tapioca cake, you can refer to this post: My Mum’s Tapioca Cake–Steamed Tapioca Cake Or Kuih Ubi Kayu (木薯蒸糕)

IMG_26061

In my humble opinion, this is a rather simple cake to prepare. You just need to mix and bake. However, it takes a rather long time to bake the cake depending on the size of your baking tin and some observation is needed to assess whether it is done.

IMG_71621

Many Facebook Group members were surprised to see that the tapioca cake is smooth.. Yes it is smooth and fine because I used a blender to blend it finer and ensure even mixing. If you manually grate or using store bought grated tapioca, the texture will be slightly coarser and there are possible signs of uneven mixing. Not to discourage readers who do not have the blender and food processor, taste of course will still be the same.

IMG_71561

The texture of this cake is definitely not hard and as you can see later the watery batter in the illustration picture. That is the type of consistency that I remembered when I saw my late mum prepared it. Unlike other recipes, I did not let the grated cassava drip until dry or squeeze out all the juices before baking. In my humble opinion, this is not necessary and I have never prepared any tapioca that is bitter.

IMG_71681

As for the colour of the cake, if you are using yellow coloured tapioca, the colour will be naturally yellow. For white coloured tapioca as in this illustration, the baked cake can be rather pale and some recipe call for the use of yellow colouring. However, I have added custard powder for colouring, flavouring and enhancing the binding of the cake.

IMG_71521


WHAT IS REQUIRED

Servings: Prepare an 7 “ square baking tray of tapioca cake

IMG_7102

  • 1 kg or tapioca
  • 220 grams of castor sugar
  • 200 grams or ml of coconut milk
  • 100 grams of fresh milk
  • 60 grams of melted butter
  • 3 eggs
  • 2 tablespoons of custard powder
  • Drops of vanilla (optional)

Note that in this illustration, I have used a 6’ square baking tin, though it is tall but it need at least 20 minutes extra to bake the entire cake.

IMG_71601


STEPS OF PREPARATION

  • Pre-heat the oven to 180 degree Celsius.

  • Line a 7’’ baking tray with baking paper or grease the tray well with cooking oil.

IMG_7107

  • Cut the tapioca in small chunks. In a food processor, blend the tapioca until as fine as you can. Transfer the blended tapioca to a blender, add all the other ingredients (eggs, custard powder, sugar, coconut milk, milk, melted butter, vanilla essence) and blend until as fine as possible.

PicMonkey Collage1

  • Transfer the batter to the lined or greased baking tin. Baked in the pre-heated oven of 180 degree Celsius for 45minutes to 1 hour or until a skewer inserted into the centre of cake comes out clean. Note that the centre of the cake is rather difficult to bake, you have to insert the skewer a few times and at a few places. The timing of baking will depend on individual oven and the size of your baking tray. The bigger the size of the baking tin, the thinner the cake, the faster is the baking time.

IMG_71271

  • COOL COMPLETELY  before slicing.  It will take about at least 3-4 hours before you can slice the cake nicely with a greased sharp knife. It is best to let it rest overnight before slicing. After slicing, if you cannot finish eating the cake within the day, store in the refrigerator and re-bake the cake at 100 degree Celsius until the cake is warm before serving.

IMG_71661


CONCLUSION

Is it not a simple cake to prepare as I have only 2 illustration pictures to share? Using a blender have the advantage of preparing a cake of finer texture. But if you do not have a food processor or blender, you can always buy ready grated tapioca sold in the stores or use manual grating like what my late mum did…

IMG_71581

If you are satisfied with the texture of this cake, in your next attempt, feel free to explore more by adding a bit more coconut milk, cheese, eggs etc.. or possibly you would like a cheesy cassava cake.

IMG_08821

Hope you like the post today. Cheers and have a nice day.

IMG_71481


  • For more recipes, you can refer to my RECIPE INDEX (updated as at 28 July 2014)  here and you can follow me at PINTEREST or visit the blog’s FACEBOOK PAGE to keep abreast of my future posts.  

IMG_71441

Baby Cereal Muffins (小孩麦片小松饼)

IMG_69761

INTRODUCTION

I eagerly wanted to keep my promise of giving readers 10 choices of muffins in my new muffins series and this is the 10th and the last muffin.. Not until a few months later, I will design some new muffins.

IMG_70051

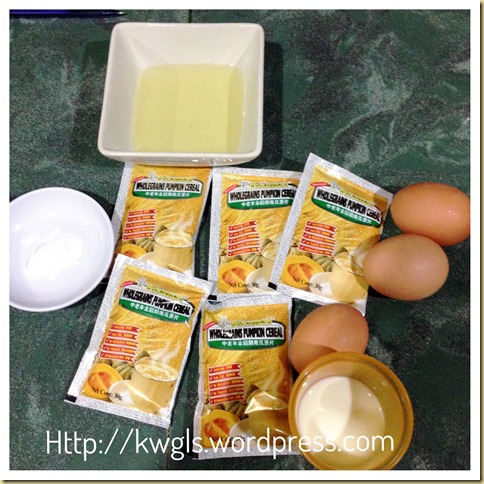
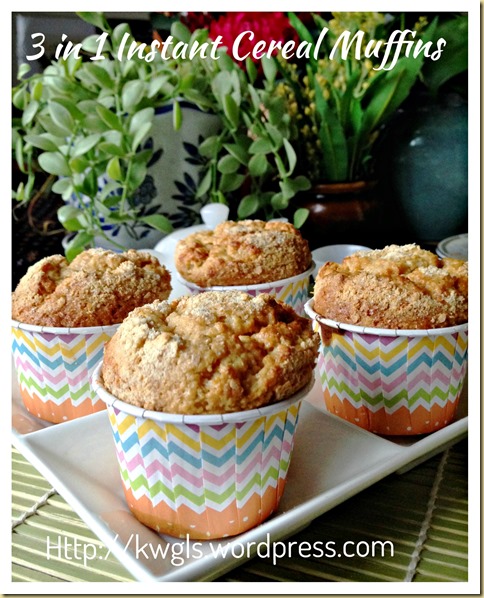
This is a rather special muffin without the use of flour but baby cereals. In this illustration, I have use instant 3 in 1 cereals that have milk and sugar. However, you can always use the normal baby cereal and add sugar to suit your taste buds.

IMG_69841

Cereal is a good moisture retainer and this muffin is moist and spongy. After it is out of the oven, it is slightly crispy but as time passed, it will become very moist.. This is especially so after 8 hours of preparation. The muffins have a rather strong baby cereal aroma and those who like the baby cereal should give it a try.

IMG_69921


WHAT IS REQUIRED

Servings: Prepared about 10 small muffins or 5 medium size muffins

IMG_6962

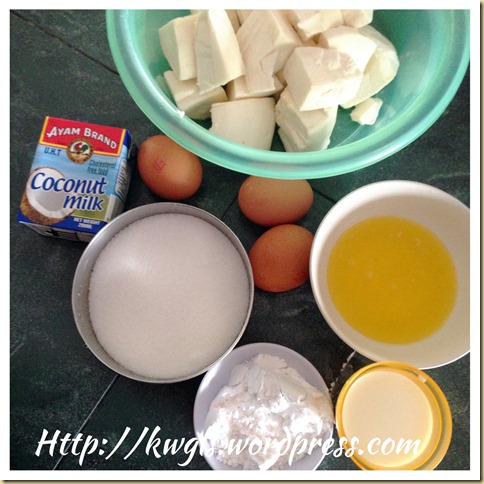
  • 180 grams of 3-1 instant cereal or normal baby cereal
  • 60 grams of cooking oil or melted butter
  • 50 grams fresh milk
  • 3 tablespoons of condensed milk (not in picture)
  • 1 teaspoon of baking powder
  • 3 eggs

* If you are not using 3-1 instant baby cereal and use normal baby cereal, you should substitute with:

  • 180 grams of normal baby cereal
  • 100 grams of castor sugar
  • 3 tablespoons of milk powder

IMG_70091


STEPS OF PREPARATION

  • Pre-heat the oven to 180 degree Celsius

IMG_6970

  • In a mixing  bowl, put all the wet ingredients (eggs, cooking oil or melted butter, milk and condensed milk), stir until well mixed. Put the 3-1 instant cereal or baby cereal + sugar + milk powder and sift  the baking powder onto the bowl. Use a spoon to stir until well combined.  Transfer the batter to the muffin cups. Fill the cup to 3/4 cup full and dust with additional cereal if desired. Bake in the pre-heated oven of 180 degree Celsius for about 15 minutes for small muffin cups or (25 minutes for big muffin cups) or when a skewer inserted into the centre of the muffins comes out clean.
IMG_69961


CONCLUSION

Because the muffin have no flour, it is not as compact as normal muffins. The look of the muffin may not be that beautiful but the taste and texture of the muffin are awesome. Do give it a try.

IMG_69901

In the next few days, I will do a compilation of all the muffins in both new and old series of muffins. Hope you like the post today. Cheers and have a nice day.

IMG_69801


  • For more recipes, you can refer to my RECIPE INDEX (updated as at 28 July 2014)  here and you can follow me at PINTEREST or visit the blog’s FACEBOOK PAGE to keep abreast of my future posts.  

IMG_70031

Game To Prepare Luncheon Meat With A Slightly Different Taste?–Homemade Luncheon Meat (自制午餐肉)

IMG_70431

INTRODUCTION

Looking at the number of “Likes” in the Facebook Food Groups that I posted, I have to make it clear that I am not the first one who dig out the recipe and tried on it… In fact many bloggers have blogged about this homemade luncheon meat with almost similar ingredients including quantities of the ingredients. Obviously, it all came from the same source. What surprised me is that most of them did not indicate the source of the recipe which I think is rather unfair to the first person who shared the recipe….

IMG_70331

Being a Chinese educated person, it is very logical for me to search for Chinese recipes since it is a well known canned food manufactured in People’s Republic of China. I searched the Chinese recipes in the internet and found this recipe: 自製午餐肉【健康無添加】Homemade Luncheon Meat. Looking at the pictures and detail instructions, I decided to give it a go this morning since I have all the ingredients at home.

IMG_70291

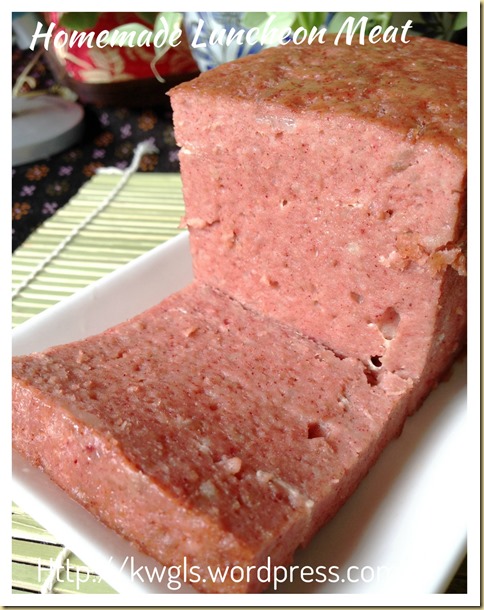
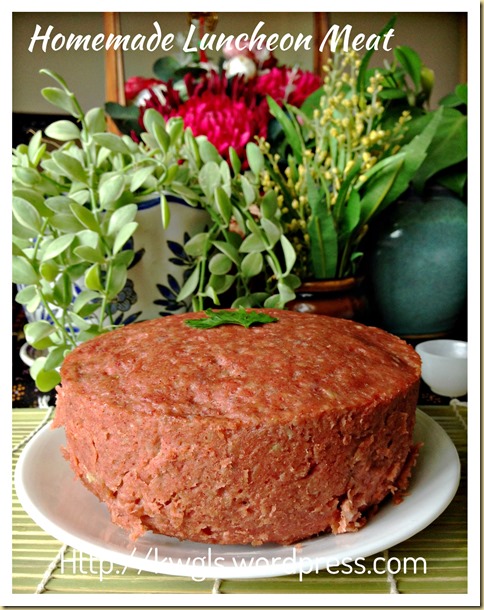
I am rather happy with this trial. The meat texture resembles those purchased from the stores. But the taste is slightly different.. Out of my curiosity, I rushed to the convenience store and got hold of a can of my favourite luncheon meat and analyse the ingredients. It was written that the ingredients are: Pork, water, corn starch, vegetable protein (contain soya bean and wheat), salt, pentasodium triphosphate, MSG, spices, sodium D-isoacorbate, sugar, sodium nitrite

IMG_7070

Hmmm,  a lot of jargons and many seems to be preservatives and food additives especially those with the name started with a mineral (as in the Periodic Table) in front… Some of these were used in food industry to facilitate a faster cure and retaining the pink colouring in the processed meat..

IMG_70651

Pardon me for my limited knowledge, what surprised me is the vegetable protein which I presumed is soya bean related products. As per Wikipedia – “ Textured or texturized vegetable protein (TVP), also known as textured soy protein (TSP), soy meat, or soya chunks is a defatted soy flour product, a by-product of extracting soybean oil. It is often used as a meat analogue or meat extender. It is quick to cook, with a protein content equal to that of meat.” (Source: http://en.wikipedia.org/wiki/Textured_vegetable_protein).

IMG_70591

Looking at the ingredients I opened the can, cut one piece, smell the canned luncheon meat and compared with mine… there is a rather familiar fragrance resembling the soya bean protein, mianjin (面筋) or mock meat that are commonly used in vegetarian cooking.  Could that be the culprit? I cannot assure you that  this is one of the ingredients that create the difference in taste but broad categories “spices” definitely contribute to part of the differences…And one will never know their spice mix as it is their trade secrets….

IMG_70491

I am sorry that I have no answer to what constitute the differences in taste..Looking at the detail ingredients list, I will definitely go for homemade since the texture and taste suits my taste buds. In my next attempt, it is likely that I will add some mock chicken to the minced meat.

IMG_70511


WHAT IS REQUIRED

Recipe adapted from: 自製午餐肉【健康無添加】Homemade Luncheon Meat

Servings: About 2 cans of commercial luncheon meat with about 397 grams each

IMG_7011

  • 600 grams of minced lean pork – semi frozen (半冷冻肉碎)
  • 30 grams of potato or corn starches (玉米或太白粉)
  • 30 grams of plain flour (普通面粉)
  • 2 egg whites (蛋白)
  • 2 tablespoons of light soya sauce (生抽)
  • 1 tablespoon of castor sugar (细砂糖)
  • 1 tablespoon of sesame oil (麻油)
  • 1 tablespoon of freshly squeezed ginger sauce (姜汁)
  • 1 tablespoon of Chinese cooking wine (烹饪酒)
  • 2 teaspoons of red yeast rice powder (optional) (红曲粉)
  • 1 teaspoon of 5 spice powder (五香粉)
  • 1 teaspoon of white pepper (胡椒粉)
  • 1/2 teaspoon of salt (盐巴)

As this is a savoury recipe, seasonings are for your reference, few free to add a bit more or less such that it will suit your taste buds.

IMG_70351


STEPS OF PREPARATION

  • Lightly grease a container or bowl suitable for steaming and get ready a steamer with adequate hot boiling water to steam for at least 45 minutes.

IMG_7016

  • In a food processor, blend the semi frozen minced meat as fine as possible. Add in all the seasonings, egg whites and various starches and flours. Blend until it forms a sticky mass. The stickier it is, the more spongy will be your cooked luncheon meat. Transfer a few tablespoons of minced meat to a greased bowl or container. Pressed it as tight as possible.  Continue doing this until all the minced meat are in the bowl.  The purpose of this step to make the meat as compact as possible and avoid air trapped in between the sticky meat mass.

  • Semi frozen minced meat is used to facilitate the blending. Store bought minced meat is too coarse for the preparation unless you ask the butcher to mince  at least 4-5 times and I doubt they will do it for customers as their machines will become very sticky. 

IMG_7021

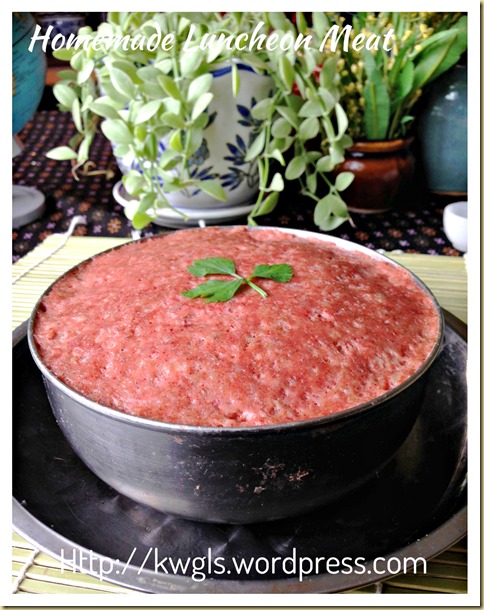
  • If your container have a lid, use the lid to cover the bowl. Otherwise, wrap the whole bowl  (including bottom) with some aluminium foil as tight as possible. When the meat is cooked, it will expand and if there is nothing to suppress the expansion, your texture will be altered since the meat will be pushed upwards and creating holes in between the meat. To counter ensure, put a plate on top of the bowl and place something heavy on top of the plate.

IMG_70391

  • In a steamer filled with hot boiling water, steam the luncheon meat at medium heat for at least 35-45 minutes.  Once done, throw away the aluminium foil and slice only when completely cooled.

IMG_70271


CONCLUSION

I have no regret of preparing these luncheon meat today. In my next attempt, I will add some mock chicken to reconfirm my suspicion.  When I show it to my girl after I have cut in pieces, she immediately recognised that it is luncheon meat. Asked her to try and she concurred that it is nice and texture is very similar to the canned luncheon meat that I  bought.. How about you? Are you willing to give this a try even though the taste is not exactly the same ?

IMG_70411

Hope you like the post today. Cheers and have a nice day.

IMG_70551


  • For more recipes, you can refer to my RECIPE INDEX (updated as at 28 July 2014)  here and you can follow me at PINTEREST or visit the blog’s FACEBOOK PAGE to keep abreast of my future posts.  

IMG_70611

Pumpkin Cream Cheese Muffins (金瓜奶酪小松饼)

IMG_69171

INTRODUCTION

My new muffin series is going to finish soon. I promised readers that I will design 8-10 muffins over a period of 3 months. This is the 9th muffins in the new series.

IMG_69211

Preparing muffins is definitely not difficult. Mixing wet ingredients to a bowl of dry ingredients. However, looking at some of the readers who tried my muffins, some are successful and some are not. Looking at their muffins, I can roughly  know that they have over mixed the batter.

IMG_69371

If muffin batters are over mixed, one of the characteristics will be chewy and dense muffins due to the formation of gluten in the flour.  While preparing ogura cake, chiffon cake or even butter cake, we need to ensure that the ingredients are well mixed. But for muffins, lumpy batter is preferred as it will incorporate more air to the muffins making it fluffier and ability to rise higher..

IMG_69451

Possibly because of the more complicated cake baking techniques as mentioned above, I presumed some readers will have a tendency to mix the batter until smooth and not even a single lump of white powdery flour is seen. That is not desirable.

IMG_69131

Do not use spatula to mix the muffin batter as unknowingly, one will have the tendency to “mash” the lump until smooth. Use a fork or small spoon to mix the batter and traditionally, recipe book called for the use of a knife to mix the muffin batter. That will give some indications that how light and fast mixing muffins batters should be.

IMG_69331

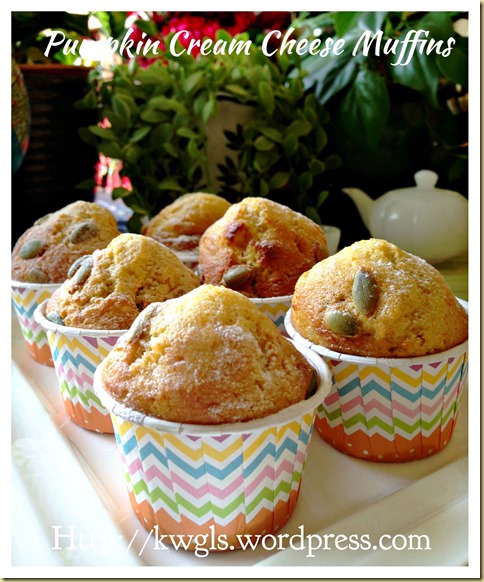
This is a pumpkin cream cheese muffin. Some mixed spice or cinnamon powder was added to flavour the muffins. Pumpkin seeds were added to provide something to bite in the muffins.

IMG_69031

How is the texture of this muffin? It is fluffy and moist. Both pumpkins and cream cheese have the ability to retain moisture in  the muffins and this is especially obvious a few hours after it was prepared… Personally, I loved the muffins very much and my boy is willing to take some to the school as a recess snack.

IMG_69151


WHAT IS REQUIRED

Servings: Prepared about 16 small muffins or 8 medium size muffins

IMG_6885

  • 200 grams of self raising flour
  • 150 grams of pumpkins (steamed)
  • 150 grams of castor sugar
  • 100 grams of cream cheese
  • 80 grams of melted butter or cooking oil (not in picture)
  • 80 grams of pumpkin seeds
  • 50 grams of fresh milk
  • 3 eggs
  • 1 teaspoon of mixed spice or cinnamon powder (optional)
  • 1/2 teaspoon of baking soda

IMG_69501


STEPS OF PREPARATION

  • Pre-heat the oven to 180 degree Celsius.

IMG_6890

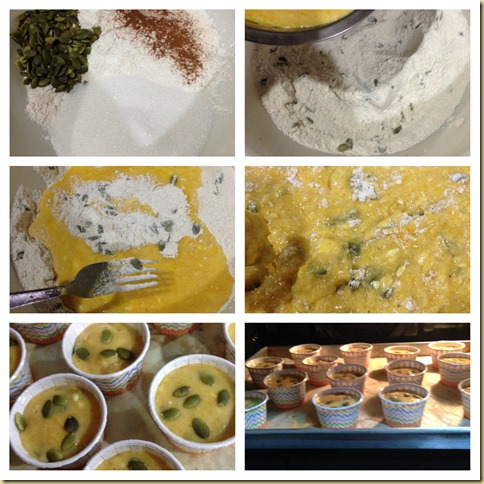
  • In a mixing bowl, mash the hot pumpkin and cream cheese until it form a puree. Add the eggs, followed by melted butter and milk. Stir until well combined. Set aside for later use.

IMG_6898

  • In another big mixing bowl, put all the other dry ingredients (sugar, flour, pumpkin seed, mixed spice, baking soda). Stir until well mixed. Make a well in the centre, pour the wet ingredients to the dry ingredients. Use a fork or knife to quickly and swiftly mix the batter. LUMPY BATTER IS ACCETPABLE.  (Note that in the last picture, there are some whitish flour in the batter. It is okay and you should left it there and proceed to the next step).

  • Transfer the batter to the muffin cups with about 3/4 full and top with additional pumpkin seeds if desired. Bake in the pre-heated oven of 180 degree Celsius for 15-20 minutes for small muffins or 20-25 minutes for bigger muffins or until a skewer inserted into the centre of the muffin comes out clean. The time of baking will depends on the size of your muffins, do keep an eye on the muffins.

IMG_69231


CONCLUSION

Again, all muffins preparation shall be simple and fast. As long as you remember not to over mix the batter and fill the cup with 3/4 cup full, you should get a very nicely shape muffin. Do give this a go and are you ready to design your own muffins ?

IMG_69461

Hope you like the post today. Cheers and have a nice day.

IMG_69191


  • For more recipes, you can refer to my RECIPE INDEX (updated as at 28 July 2014)  here and you can follow me at PINTEREST or visit the blog’s FACEBOOK PAGE to keep abreast of my future posts.  

IMG_69291

Home Made Croissants (家居自制牛角包)

IMG_64961

INTRODUCTION

I think I need not to further elaborate the French famous pastry – croissant as it is rather common in Singapore and Malaysia. However, it is good to understand what is a croissant as per  Wikipedia:

IMG_64981

“A croissant (/krəˈsɒnt/ or /ˈkrwʌsɒŋ/; French pronunciation: [kʁwa.sɑ̃]  is a buttery, flaky, viennoiserie pastry named for its well-known crescent shape. Croissants and other viennoiserie are made of a layered yeast-leavened dough. The dough is layered with butter, rolled and folded several times in succession, then rolled into a sheet, in a technique called laminating. The process results in a layered, flaky texture, similar to a puff pastry.” (Source: http://en.wikipedia.org/wiki/Croissant)

IMG_64801

Though the above definition of croissant called for the use of butter in laminating the dough, it is definitely not an easy task in hot weather like Singapore and Malaysia. Butter melts very fast unless you are preparing it in an air-condition room..

IMG_6844

Therefore, for purposes of this illustration, I have opted to use pastry margarine purchased from bakery supplies shop. These are vegetable shortening usually used for the preparation of puff pastry including croissant. The margarine will not melt in normal room temperature and hence make you preparation much easier..

IMG_64681

Some readers may be concerned about the use of margarine or vegetable shortening in the preparation. But is it not most ready puff pastry are prepared from pastry margarine?

IMG_64861

The choice will be up to readers to decide, you can either use butter or pastry margarine but just keep in mind that butter may result in a messy attempt and you will need to chill it for every laminating you did.

IMG_6817

I have prepared these croissants from the frozen  BASIC BREAD DOUGH RECIPE. It is a flexible dough that can be used for many type of buns including croissant.  Besides croissants, I have also used it to prepared some chicken floss puffs.

IMG_64941

IMG_64741


WHAT IS REQUIRED

Servings : Prepare about 10 medium  size croissants

IMG_4424

  • 300 grams of frozen dough (Please refer here for the BASIC BREAD DOUGH RECIPE) = picture is for use of basic bread dough
  • 120 grams of pastry margarine or butter (not in picture)
  • one yolk plus one tablespoon of water for egg washing (not in picture)

IMG_64621


STEPS OF PREPARATION

IMG_6434

  • Either use the freshly prepared bread dough by following the recipe HERE or the frozen bread dough. Cut 300 grams of frozen bread dough in small chunks to facilitate defrosting. Once it is soft to touch, on a lightly floured work surface, gather the dough together and use a roller pin to roll the dough in a rectangular shape . Spread the butter or pastry margarine on half of the rolled dough.

IMG_6440

  • Cover the other half on top of the half where the margarine were spread. Seal the edges and roll it as thin as possible. Fold the dough into 1/3 of the size overlapping each other. Roll thin using a rolling pin.

PicMonkey Collage1

  • Repeat the same procedure 3 times. For the last time, roll the dough into about 64 cm x 45 cm.

IMG_6449

  • Cut the dough into triangle with base 9 cm wide and height of 19 cm.  Use a knife to slightly cut a small opening of 2 cm at centre of the base. Use both hand, take the inner side of the cut opening, roll the dough outwards and towards the top part of the triangle.

IMG_6458

  • Seal both pointed ends  and let it proof until double in size.

  • Pre-heat the oven to 200 degree Celsius.

  • Once the size is doubled, egg wash the croissants (one egg yolk with one tablespoon of water)  and bake in the pre-heated oven of 200 degree Celsius for 11-12 minutes .

IMG_6759

  • To make chicken floss puffs, cut the dough into 8 cm x 16 cm rectangular shape. Put some chicken floss or other desired fillings on one side dough. Fold the other side of the dough and use a fork to seal the sides. Egg wash as per above, sprinkle with black sesame seeds and bake at the pre-heated oven of 200 degree Celsius for 10-12 minutes or until the desired colour tone.

IMG_6825


CONCLUSION

I sincerely hope that my explanation is clear enough. This recipe started from the frozen dough, however, you can always use fresh dough too. If you are concerned the use of pastry margarine, you can always used butter but mind you, it will be a tedious attempt as the butter can melt very fast. If you opt to use ready made pastry, check the ingredients and see if it is made with butter or pastry margarine. If it is made with pastry margarine, why not prepare at home at a fraction of cost?

IMG_64781

Hope you like the post today. Cheers and have a nice day.

IMG_64921


  • For more recipes, you can refer to my RECIPE INDEX (updated as at 28 July 2014)  here and you can follow me at PINTEREST or visit the blog’s FACEBOOK PAGE to keep abreast of my future posts.  


IMG_64661

A Simple Sweet Indulgence–Meringue Nests With Rich Chocolate Mousse Fillings (蛋白酥皮巢)

IMG_62911

INTRODUCTION

I prepared this special dessert for our wedding anniversaries… A rather easy to prepare dessert with great taste..

IMG_63191

I have decided to prepare this because of its simple ingredients and ability to prepare it in small batches… It is rather fast and fuss free..

IMG_63051

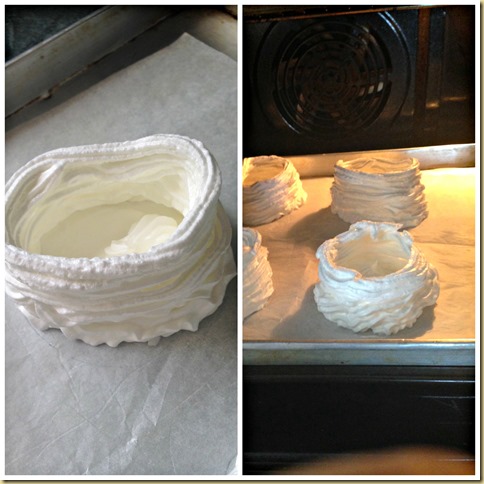
The word meringue suggested that it is prepared from whipped egg whites and sugar, bake at a rather low temperature until crispy and I have selected to use chocolate mousse for its fillings.

When I posted the picture in Facebook Group, many members thought that it is pavlova, another meringue based dessert. Pavlova are much bigger and the the centre is not empty like meringue nest. The word nest suggests that it has a nest like structure, empty in the centre.. If you are interested to read more about pavlova, you can refer to this post: Is Pavlova Originated From Australia, Russia or New Zealand?–Strawberry and Blueberry Pavlova

IMG_63291

IMG_63251


WHAT IS REQUIRED

Servings: About 4 meringue nests

IMG_6258

  • 2 egg whites
  • 125 grams of castor sugar

IMG_6272

  • 250 grams or ml of whipping cream
  • 60 grams of castor sugar
  • 60 grams of dark chocolate
  • Some fresh fruits for garnishing

IMG_63171

IMG_63031


STEPS OF PREPARATION

  • Pre-heat the oven to 150 degree Celsius

IMG_6263

  • In a baking tray. have a piece of baking/parchment paper. Mark the baking paper with four  10 cm circles. Set aside for later use.

  • In a mixing bowl, add egg white and beat until soft peak form. Add in castor sugar spoon by spoon and continue to beat until the egg white is thick and glossy. Do not over beat the egg whites.

IMG_6268

  • Spread one tablespoon of meringue evenly over the circle as the base of the nest (with about 5 mm thickness) . Put the remaining meringue on a piping bag fitted with a 1 cm star nozzle. Pipe the meringue on the edge of the meringue circles to make the nest .

PicMonkey Collage1B

  • Bake the meringue for 30-35 minutes or until lightly golden. Off the heat and let the oven to cool completely inside the oven. Once cooled, remove the meringue from the tray and store in an air tight container.

Preparation of Rich Chocolate Mousse

IMG_6280

  • Heat the dark chocolate in a microwave oven for about 30 –45 seconds until it melts.  If you do not have a microwave oven, heat the chocolate over a bowl of hot water and stir until it melts. Set aside for later use.

  • Whipped the cream and castor sugar until soft peak form.

IMG_6285

  • Transfer 1/3 (one third) of the cream to the melted chocolate.  Stir until well combined. Transfer the chocolate mixture to the remaining 2/3 (two third) of cream, use a spatula to fold until well combined. Cover and chilled for 1-2 hours until the mousse is firm.  Once firmed, scoop some chocolate mousse onto the meringue nests and garnished with fresh fruits. Serve immediately to ensure crispiness of the the meringue.

IMG_63371

IMG_62871


CONCLUSION

This is a simple but presentable dessert with awesome taste. Possibly you will like to prepare it for some special occasion? Do not be overly concerned about the sweetness of the meringue and the mousse. Both can be adjusted downwards slightly to your liking. However, for meringue, please take note the lower the sugar content, the more difficult to achieve firm peak form. Therefore, the shape may be slightly compromised since it is softer and more difficult to stand on its own. But I believe this should not be a deterrence to those who are seeking to a low sugar diet.

IMG_63231

Hope you like the post today. Cheers and have a nice day.

IMG_63131


  • For more recipes, you can refer to my RECIPE INDEX (updated as at 28 July 2014)  here and you can follow me at PINTEREST or visit the blog’s FACEBOOK PAGE to keep abreast of my future posts.  

IMG_62891

Lacto Ovo Vegetarian Dishes Photo Sharing 2014

PicMonkey Collage2

INTRODUCTION

There is not really any detail recipe in this post but some photo sharing for the benefits of my vegetarian readers. I just ended my yearly month long vegetarian diet two days ago and I promised some Facebook Group members that I will do a compilation from my daily posting. Hopefully, they can get inspired them some vegetarian cooking.

My vegetarian diet is lacto ovo-vegetarian (蛋奶素), meaning, I can take chicken eggs and dairy products like milk, cheese and butter.. I do use mock meat but it is not a must.. Usually, I will used fresh vegetables in the cooking. The only challenge I have is I cannot use garlic and shallot to sauté my vegetable. Other than these two vegetables, spring onion, leek and chives also cannot be taken ..

The following are what I have cooked in the last month excluding vegetarian cakes and etc. that I have prepared.

PicMonkey Collage5


ONE POT DISH

Baked rice – For non-vegetarian version: please refer to What? Baked Your Rice? Yes, Try Carbonara Cheesy Bacon Baked Rice

IMG_6351

Eight Treasure Porridge  – Recipe: Auspicious Day With Auspicious Porridge–Eight Treasure Porridge (八宝粥)

IMG_3806

White Gourd Braised Rice – Non Vegetarian Recipe: White Gourd Braised Rice (白莆焖饭)

IMG_3833

Oyster Sauce Soupy Noodles

IMG_3821

Vegetarian Pizza – Dough Recipe: Basic Bread Dough Recipe And Plum Blossom Sausage Buns (梅花香肠面包; Filling recipe: Vegetarian Pizza Is Just As Tasty ! Simple And Basic Vegetarian Pizza Preparation

IMG_4451

Vegetarian Tom Yam Noodles : Non Vegetarian Recipe: Bachelor’s Tomyam Noodles–Quick And Nice…

IMG_4035

Singapore Style Economy Vegetarian Fried Bee Hoon

IMG_4732

Vegetarian Sarawak Kolo Noodles – Non Vegetarian Recipe: A Noodle Dish That Chinese Sarawakian Would Not Be Able To Let Go… Sarawak Kolo Mee

IMG_5346

Vegetarian Burger – This is my own creation and the patties were made from potatoes, taukwa and some minced mock chicken to enhance the texture. It was then pan fried until hard and drizzle with teriyaki sauce.

IMG_5515

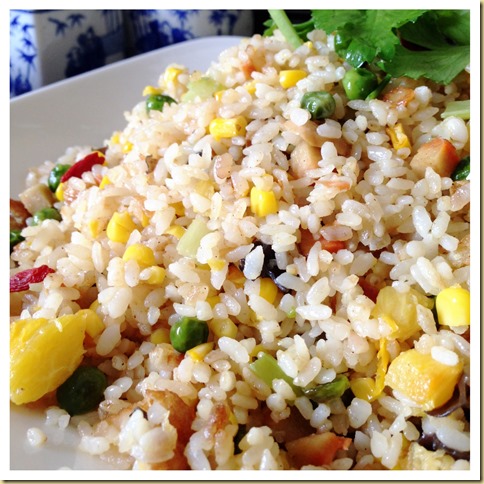
Vegetarian Fried Rice – Anything goes and one of the most common dish that I ordered at Tze Char store when no vegetarian stores was found at the eating place.

IMG_5254

Vegetarian style of fried Ningbo Niangao : Recipe: This Glutinous Rice Cake Is Entirely Different From Store Bought … Ningbo Niangao, Shanghai Niangao or Bai Guo Gan (宁波年糕,上海年糕,白果干)

IMG_5941

Sarawak style beansprout noodles stir fried in a vegetarian noodles. Just 3 ingredients – Bean sprouts, yellow noodles and gula apong or gula melaka. Non vegetarian version can sauté with garlic first.

IMG_5789


SOUP AND OTHER DISHES


Xiao Bai Cai stir fried with dried bean curd and tomato

IMG_3456

Vegetarian Chap Chye . Recipe: It Is Not Difficult To Prepare This Mixed Vegetable Stew–Chap Chye (杂菜)

IMG_3541

Braised Mustard Green With Tamarind Peel And Dried Chilli

IMG_3641

Dried Bean Curd (Taukwa) Stir Fried With Green Chilli and Bird Eye Chilli

IMG_3696

Vegetarian Curry

IMG_3905

Braised Bitter Gourd With Fermented Soya BeansRecipe: 苦瓜焖芥菜(Braised Bitter Gourd With Chinese Mustard)

IMG_4157

Stir Fried Bean Curd Sheets With Celery Stripes

IMG_4216

Celery Egg Omelette – Recipe : Celery Omelette (西芹蛋饼)

IMG_4222

Broccoli With Vegetarian Oyster Sauce

IMG_4347

Chinese Water Spinach Stir Fried With Fermented Soya Beans

IMG_4623

Mock Kidney Stir Fried With Ginger Stripes

IMG_4629

Hairy Gourd Stir Fried With Bean Curd Puffs and Glass Noodles – Non Vegetarian Recipe: Hairy Gourd Fried With Minced Meat and Glass Noodles (毛瓜肉碎炒冬粉)

IMG_5599

French Beans Stir Fried With Black Olive Vegetables

IMG_6069

Napa Cabbage Stir Braised With Egg Sauce

IMG_6142

Vegetarian Sweet and Sour Soup

IMG_5901

Vegetarian Bergedil – Recipe not issued yet

IMG_5527

Vegetarian Jicama Steamed Buns – Recipe: Another Simpler Healthier Breakfast Item–Chinese Style Vegetarian Steamed Buns (素菜包)

IMG_5068

Chinese Yam Cake  – Non Vegetarian Recipe: Chinese Steamed Yam And Pumpkin Cake (芋头金瓜糕)

IMG_5186

Chinese Peach Steamed Buns With Red Bean Paste 

IMG_5205


CONCLUSION

The list above definitely is not complete especially the various bakes that I have throughout this one month. I sincerely hope that this will provide inspiration to vegetarian home chefs looking for idea of what to cook. What is the dish that captured your attention?

PicMonkey Collage4

Hope you like the post today. Cheers and have a nice day.

PicMonkey Collage3


  • For more recipes, you can refer to my RECIPE INDEX (updated as at 28 July 2014)  here and you can follow me at PINTEREST or visit the blog’s FACEBOOK PAGE to keep abreast of my future posts.  


PicMonkey Collage1