Four Seasons Blog Hop #48 (1 May 2014)


clip_image001

Welcome to the Four Seasons Blog Hop

A party where we can celebrate the greatness that each season brings to our lives.

To be interested in the changing seasons is a happier state of mind than to be hopelessly in love with spring. – George Santayana

Thank you to everyone who shared their wonderful creations last week and to all of you who are joining us new this week! 

clip_image003
Before we get started, our wonderful Co-Host, Betty Taylor, is taking a summer sabbatical. We wish Betty a fabulous summer and hope to see her back this fall. 

We would LOVE to have one or more of YOU TO JOIN US as a CO-HOST! Let us know if you are interested at tlsplanners@hotmail.com or message us at Google +


REMINDER: If you are linking a party you host or co-host you can do so in the “More Parties to Enjoy Section” at the bottom of the post!!!!!!!!!

Meet Our Hosts:

So Let’s Get This Party Started!!

Share your  food creations, gardening, clever projects, tablescapes, decorations, party themes, and inspirational knowledge … Ok, you get the point.  Join us every Thursday (opens Wednesday evening at 6:00 pm). Please stay for awhile and show some love to the guests, join us in the fun and grab a button.

clip_image005

We will share your posts in a variety of ways on Pinterest, Twitter, Facebook and Google Plus.  We will also have features of the week! Be sure to follow our Four Seasons Board on Pinterest!

By participating in this linky party, you agree to have your posts shared on social media and Pinterest and to receive email and Google notifications for reminders about the party. If you don’t want to receive notifications, please let us know.


FEATURED BLOGGER 

clip_image006

This week we are featuring a blogger who always has awesome recipes and other posts!  Please stop by and check out her blog and say hi while you’re there. Meet Denise who is a  “. . . Louisiana girl, a licensed interior designer and I share my home with a very cute female pug. I love my family and friends. Most of all I love to cook for them. Soup Spice Everything Nice is a blog with recipes, family recipes(mostly cajun), soup recipes, spice blends, interior design, and other nice things.” Soup Spice Everything Nice


FEATURED POSTS

clip_image008


clip_image010

 Please link up your post HERE  or clicking on the Icon above.

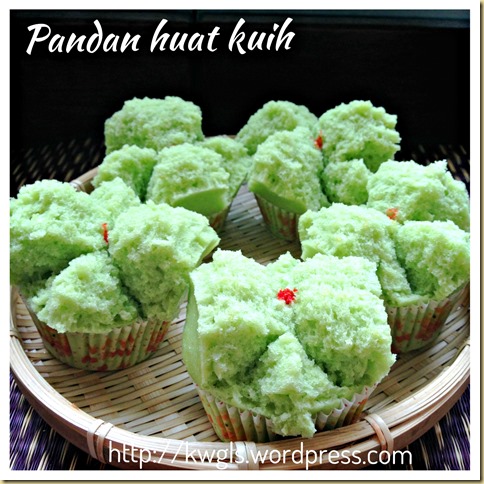
An Auspicious Steamed Cake To Celebrate My Blog Anniversary–Pandan Huat Kuih (香兰发糕)

IMG_51151

INTRODUCTION

Today is an auspicious day for the blog. It is the day It the anniversary of this blog.

IMG_51131

In fact this is not the exact day but it should be very near to 30-4-2013. I started my blog using a Tumblr account. Even until today, the blog is still there but I did not really update the post there. Instead, whatever I posted in WordPress (https://kwgls.wordpress.com), a summary will be send to my Tumblr blog (http://kwgls.tumblr.com/)

IMG_51111

Around this time last year, I have decided to shift all by my blog entries from Tumblr to WordPress and  the transfer process have messed up my date of entries.  Therefore, I have chosen today to be my blog anniversary. The actual date should not be 7 days more than this date.

IMG_51011

I have no intention to celebrate this special day, no giveaways and etc. Instead, I have prepared a type of  “huat Kuih” or “Fa Gow” to commemorate this day. Why Huat Kuih or Fa Gow? Actually, for the last blogging year, my first post of Huat Kuih prepared using rice flour have attracted a lot of readerships… and I will share my top 20 posts of my last blogging year in a day of two.

IMG_51211

As contrasted to the Huat Kuih post that I issued last year, this Huat Kuih is prepared using wheat flour and not rice flour. There are many versions of huat kuih in the internet and I thought it might be good for me to try a Huat Kuih prepared using normal flour. When I goggled for the recipe, I stumbled  across this simple recipe  : 香味扑鼻的班兰小发糕. I looked at the picture and it really attracted me.  So I have decided to prepare this today hopefully it will bring some luck to me in my second year of blogging.

IMG_51031

I am very pleased with this cake. It is definitely edible. It had eggs and butter in the ingredients and it is a very fragrant cake. However, for religion praying purposes, you will have to decide whether it fits your praying criteria since eggs and butter were used. If you would like to read more about the history of Huat Kuih, you can refer to my first post.

IMG_5131


WHAT IS REQUIRED

Recipe adapted from: 香味扑鼻的班兰小发糕.

Servings: Prepare 6 Huat Kuihs

IMG_5063

  • 250 grams of self raising flour (自发面粉)
  • 150 grams of castor sugar (白砂糖)
  • 1 teaspoon of double acting baking powder or baking powder (双重发粉或发粉)
  • 1 egg (鸡蛋)
  • 200 grams of plain water (白水)
  • 50 grams of melted butter (牛油)
  • 6 pieces of pandan leaves (香兰叶)

IMG_51091


STEPS OF PREPARATION

  • Get ready a steamer with water capable of steaming the Kuih for at least 20 minutes.

IMG_5068

  • Blend the pandan leaves with the water. Sieve the pandan juice to a pan. Pour in the sugar. Heat the pandan juice and sugar until all the sugar have dissolved. There is no need to bring the juices to boiling point. As long as the sugar have dissolved, off the heat and set aside the pandan syrup for later use.

PicMonkey Collage1

  • Heat up the butter in a microwave for about 30 seconds. When cool, add in the eggs and stir lightly until well combined. Set aside..
  • In another big mixing bowl, sift the self raising flour and double acting baking powder. Make a well in the centre. Add the Pandan juice followed by the egg butter mixture. Use a hand mixer and whisk until well mixed.

IMG_5077

  • Transfer it to some cupcake cups and fill the cups with the batter until at least 95% full. Steam in the steamer for 15-20 minutes or until a skewer inserted in the centre come out clean. It is best that the cupcakes cups be pre-steamed before filling of the batter. You shall use high heat in the entire process of steaming. Best served hot as a snack .

IMG_51271


CONCLUSION

I am very happy as the cakes turns out very well, “laughing” happily in the steamer. Not only that the cakes are pretty, the cakes are extremely tasty. It is a blend of pandan, egg and buttery aroma. In addition, it is soft and fluffy. Hopefully, this will mark an auspicious start for the second year of blogging career. 

IMG_50881

Hope you like the post today. Cheers and have a nice day.

IMG_51051


For more recipes, you can refer to my RECIPE INDEX (updated as at 21 March 2014)  here and you can follow me at PINTEREST or visit this blog’s FACEBOOK PAGE .  

group-board-picture72222222222222222[1]

If you are a Pinterest user and you are interested to have more recipes, you can join or follow this Pinterest Board set up by me  where there are more than 1800 recipes worldwide and pinned by various bloggers: FOOD BLOGGERS AND FOODIES UNITED PINTEREST BOARD.

You can also join the Food Bloggers and Foodies United Group Facebook Group to see more recipes. Currently there are about 4500 members sharing various food photos . I would be more than happy if you can  post in Groups for the recipes that you tried from Guaishushu’s blog.

IMG_51291


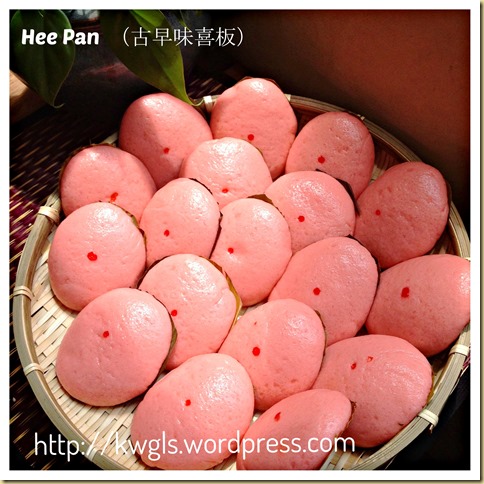
A Chinese Steamed Cake That I Am Not Familiar With–Hee Pan or Xi Ban (古早味喜板)

IMG_50281

INTRODUCTION

I was rather confused about this Chinese steamed rice cake called Hee Pan or Xi Ban that was doubted as a traditional celebration cake for Hakka descendants. However, two of my sister in laws and my wife’s auntie who are Hakka’s have never heard of this special cake. In addition, none of my Hakka friends in Singapore have heard of it either. Apparently, it is not common among the Hakka’s in Singapore and East Malaysia. I was subsequently told that this is also called Ki Ka Ku steamed buns or 3K steamed buns. However, I have never heard of such name before I issued the post and neither do I know the Chinese name of Ki Ka Ku..

IMG_50321

But it is a very popular night market snack in West Malaysia. When I posted a few photos in a West Malaysian Facebook Group, it was very well received and members are requesting for recipes.

IMG_50361

Unlike my other post, I have very little to share about the background of this popular West Malaysian snack as there are very limited written literature on this. What I understand is this a type of traditional Hakka  steamed rice cake usually prepared during important ceremony and festivals such as marriage and birthday celebrations.

IMG_50471

The cake are supposed to be springy or chewy, sweet and yeast flavoured. This is expected as the main ingredients are wheat flour, sugar and glutinous rice flour. Personally, I like it very much. My girl have requested a piece after she had her lunch and she concurred with me that it is a nice  special type of “bread” as she put it.

IMG_50531

While I know there are many variants of this Hee Pan recipe that uses sweet potatoes, pumpkins or pandan, but I purposely chose one that is of original flavour and as traditional as possible. I stumbled across this recipe from Stepwongkitchen.blogspot.sg. After I read the ingredients, I have decided to give it a try.

IMG_50511


WHAT IS REQUIRED

Recipe adapted from: 喜板 Stepwongkitchen.blogspot.sg

Servings: about 15 Hee Pans

IMG_4969

Dough

  • 150 grams of glutinous rice flour (糯米粉)
  • 150 grams of plain flour (普通面粉)
  • 100 grams of castor sugar (细砂糖)
  • 1/2 packet or about 6 grams of Instant Yeast (即时酵母)
  • 25 grams of corn oil (玉米油)
  • 150 grams of lukewarm warm water (温水)
  • Few drops of permitted red colouring (optional) (红色色素-可免)

Others

  • About 15 pieces of lightly greased banana leaves of 7cm x 7 cm (香蕉叶)
  • A steamer with water capable of steaming at least 15 minutes under high heat.

IMG_50241


STEPS OF PREPARATION

 IMG_4975

  • Put all dough ingredients in a whisking bowl. Add the water and use a tablespoon to lightly stir in until a dough is form. Transfer to a stand mixer and knead under medium speed until the dough is smooth (about 10 minutes)。 Note that unlike bread making, this process is to ensure all ingredients are well mixed and not to ensure that gluten structure is formed.  Alternatively, you can use hand to knead until the dough is smooth which is also rather fast as this is glutinous rice flour. Once done, divide the dough into 15 equal portions of about 30 – 40 grams each.

IMG_4984

  • Take a portion of the dough, shape it into a ball, place on top of a piece of banana leave and press it until it is about 1 cm thick. Perform the same for the remaining 14 portions. Put in the steamer tray and let it proof until double in size which may take about 45 minutes to one hour. In the process of proofing, cover it with some clingy wrap or a piece of wet tower.

  • When the dough double in size and become smooth, get ready the steamer. Bring the water to boil under high heat and transfer the steamer tray to the steamer. Steam for 12-15 minutes. After 15 minutes, off the heat, and let it rest in the steamer for 5 minutes before taking the Hee Pan out of the steamer. Cool in a wire rack or place the hot Hee Pan in a piece of newspaper. The purpose is to let the newspaper  absorbs the water under the Hee Pan due to condensation. Best served hot as a snack item or breakfast item when hot.

IMG_50341


CONCLUSION

I have purposely choose this recipe because of its simple ingredient. I would considered that this is a successful steamed cake as the surface are smooth, it is not wet in the bottom, it is chewy but not sticky… If you are looking for a traditional recipe, may be this is for you.

IMG_50571

Hope you like the post today. Cheers and have a nice day.

IMG_50381


For more recipes, you can refer to my RECIPE INDEX (updated as at 21 March 2014)  here and you can follow me at PINTEREST or visit this blog’s FACEBOOK PAGE .  

group-board-picture72222222222222222[1]

If you are a Pinterest user and you are interested to have more recipes, you can join or follow this Pinterest Board set up by me  where there are more than 1800 recipes worldwide and pinned by various bloggers: FOOD BLOGGERS AND FOODIES UNITED PINTEREST BOARD.

You can also join the Food Bloggers and Foodies United Group Facebook Group to see more recipes. Currently there are about 4500 members sharing various food photos . I would be more than happy if you can  post in Groups for the recipes that you tried from Guaishushu’s blog.

IMG_50301

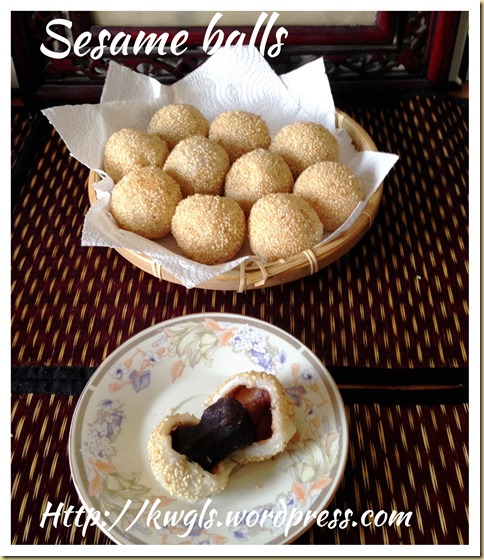
My Ugly Sesame Balls–Sesame Balls or Jian Dui or Kuih Bom (煎堆,芝麻球)

IMG_4054

IMG_49331

INTRODUCTION

Updated post on 24-August 2014, please scroll towards the end for the updated post.

Despite the ugly look of my Jiandui or sesame ball, I have decided to issue the report as I know the reasons of the saggy skin. Among the reasons that I have identified are:

IMG_49041

  • The use of baking soda in the original recipe and subsequent confirmation with friends and other recipes  that baking soda or baking powder were not necessary in the recipe;
  • The ratio of dough to filling are too low, meaning the dough skin become too thin and when heated, it expands too fast and result in the brokerage;
  • Possibly the heat used for deep frying is too high.

IMG_48961

Because of this, in this post, the recipe will be adjusted to exclude baking soda or baking powder, using low to medium heat instead of high heat for deep frying and increase the dough to filling ratio from the initial of 1:1 to the revised 1:5:1.Based on these adjustments, I honestly believed the recipe is definitely a doable recipe since it was not much different fro any other recipes in the internet.

IMG_49431

Having said that, the ugly sesame balls were delicious as the skin were very thin and with lots of fillings inside. I have prepared two types of fillings for the sesame balls. One is the ready made red bean paste that can easily be purchased from the bakery shop and another is homemade peanut fillings.

IMG_4052

As per Wikipedia:

“Jian dui is a type of fried Chinese pastry made from glutinous rice flour. The pastry is coated with sesame seeds on the outside and is crisp and chewy. Inside the pastry is a large hollow, caused by the expansion of the dough. The hollow of the pastry is filled with a filling usually consisting of lotus paste (蓮蓉), or alternatively sweet black bean paste (hei dousha, 黑豆沙), or less commonly red bean paste (hong dousha, 紅豆沙)”. (Source: http://en.wikipedia.org/wiki/Jin_deui)

IMG_49371


WHAT IS REQUIRED

Servings: About 15 sesame balls

 IMG_4876

Dough

  • 250 grams of glutinous rice flour
  • 50 grams of castor sugar
  • 80 grams of hot boiling water
  • 50 grams of fresh milk (optional can be substitute with water)
  • 2 tablespoons of cooking oil
  • 1/2 tablespoon of wheat starch
  • 1/8 teaspoon of baking soda (decided to drop the use of baking soda)

Fillings

  • 200 grams of grounded peanuts
  • 10 grams of sesame seeds
  • 80 grams of sugar
  • 1 tablespoon of cooking oil
  • 1 tablespoon of plain flour
  • 3o grams of water

OR

  • 300 grams of ready made red bean paste.

Coating

  • About 50 grams of roasted sesame seeds.

The dough to filling ratio have been adjusted to approximately 1.5:1, meaning a thicker skin such that it will not break when deep frying.

IMG_4060


STEPS OF PREPARATION

IMG_4873

  • In a bowl, place the the grounded peanuts, sesame seeds, flour, sugar, cooking oil and water. Use a spoon to stir until well mixed. Divide the dough into 15 portions and make it into a ball and press it as tight as possible. If it is too dry, gradually add in additional water until a pliable dough is formed. If you are using the red bean paste, divide into 15 equal portions and shape it into a ball.

IMG_4881

  • In another bowl, place the sifted glutinous rice flour, cooking oil, sugar  and wheat starch. Make a well in the centre, pour in the boiling hot water. Use a spoon and stir it until a paste is form, add in the milk and knead until a pliable smooth dough is formed. Divide it into 15 equal portions.

IMG_4886

  • Take one portion of the dough, shape in round, flatten it. Put a filling ball on top of the dough.. Seal the edges and shape in round. Pat the glutinous rice ball with some water on hand, roll in a plate or bowl of roasted sesame seeds until the ball is fully coated with sesame seeds. Perform the same for all the remaining 14 portions. Set aside for later deep frying.

IMG_4892

  • Heat up a pot of hot oil. Use a chopstick to test the readiness of the oil temperature for deep frying. The oil is considered as ready when a chopstick inserts into the oil, bubbles start to emit. Reduce the heat to medium or low. Put the ball carefully in the oil using a spoon. Deep fry for 3-4 minutes until the balls starts to float and the outer layer becomes golden brown. Best served when it is warm as a snack.

IMG_4046


CONCLUSION

Though my sesame balls are ugly, however, taste is awesome because the skin is very thin. However, after adjustment of the original recipe, it is unlikely that your sesame balls will break as seen in this post. Pardon me for the poor pictures in the post.

IMG_49061

Hope you like the post today. Cheers and have a nice day.

IMG_4044


UPDATED POST ON : 24 AUGUST 2014

IMG_4050

I have told readers that I have suspected that the sesame balls broke because of the use of baking soda, too high temperature used for the deep frying of the balls and too high the filling to dough ratio. Today, I have decided to testify what I have written earlier. There is no changes to the recipe and the following amendments in the steps of preparation are as follows:

IMG_4048

  • Omit the use of baking soda (already mentioned above)
  • Use medium heat to deep fry the sesame balls
  • My dough to filling ratio have change from about 1:1 to 1:0.7 meaning, 25 grams of filling with 35 grams of dough.

IMG_4056

The balls did not break and I am happy with the outcome.  All the above changes have been properly reflected in the recipe above.


IMG_49391


  • For more recipes, you can refer to my RECIPE INDEX (updated as at 28 July 2014)  here and you can follow me at PINTEREST or visit the blog’s FACEBOOK PAGE to keep abreast of my future posts.  

IMG_4062


Pumpkin Scones (南瓜司康饼)

IMG_45111

INTRODUCTION

I have always love scones for its simplicity in the ingredients used and awesome taste.

IMG_45371

I like to have my scones to go with a big chunk of cold butter,some strawberry jam and occasionally some whipped cream. While I was browsing my recipe book, I found this variation of scones –  pumpkin scones. Since I have all the ingredients with me at home, I have decided to prepare these scone for breakfast.

IMG_45431

With the addition of the pumpkins, I found that the texture of the scones are much softer and slightly different from the traditional basic scones which are harder and slightly more floury.

IMG_45171

I presumed this  softer texture was due to the incorporation of more moistures as a result of adding pumpkin to the scones. In fact, I like this new texture, softer, moister and slightly chewy. It definitely goes well with a cup of coffee and had been my breakfast for two days. Even after two days, It was still as soft as it is.

IMG_45411

I get this recipe from another old cookbook – “The Essential Baking Cookbook” published by Murdoch Books in 2000, one of my favourite cookbook that have been with me for more than 10 years. 

IMG_45491


WHAT IS REQUIRED

Recipe adapted from: Page 27 Pumpkin Scones – “The Essential Baking Cookbook” published by Murdoch Books in 2000

Servings: Prepare 12 pumpkin scones

IMG_4485

  • 30 grams of cold unsalted butter, cut into cubes
  • 250 grams of self raising flour
  • 2 tablespoons of brown sugar
  • 1 teaspoon of baking powder
  • 1/2 teaspoon of ground nutmeg
  • 250 grams of pumpkin, skinned and cut into cubes
  • 125 grams of milk
  • Pinches  of salt

Others

  • 5 cm diameter round cutter.

IMG_45191


STEPS OF PREPARATION

  • Preheat the oven to 220 degree Celsius and lightly greased a baking tray or line the baking tray with some baking paper.

IMG_4491

  • Steamed the pumpkin under high heat until soft (about 10-12 minutes). Use a fork to mash the pumpkin until fine and add the milk, stir until well mix.  Cool and set aside for later use.

IMG_4496

  • In  a big mixing bowl, add all the other ingredients except pumpkin and milk. Use hand to rub the butter and flour until some crumble is formed. Make a well in the centre, add in the pumpkin and milk mixture. Either use a flat blade knife or a spoon, mix the dough until it comes together in clumps.

IMG_4501

  • Transfer the dough to a floured surface and lightly knead for 1-2 minutes. If it is too sticky, add more flour until you can handle it. The handling have to be light. Use a rolling pin to roll the dough flat with about 2 cm thickness. Cut the dough using a 5cm diameter round cutter and transfer to the baking tray. Gather the sides of the remaining dough and perform the same until all the dough have finished.  Milk wash the dough lightly and bake in the oven for 12-15 minutes or until well risen and the top turns golden brown. Best served warm with butter, jam or some clotted cream.

IMG_45151


CONCLUSION

This is a variant from the traditional scone. In fact, I like the softer texture. I can easily have one without any butter and jam. The addition of pumpkin help the dough to retain moistures and hence a softer texture. Do give it a try and I am sure you will like it.

IMG_45061

Hope you like the post today. Cheers and have a nice day.

IMG_45291


For more recipes, you can refer to my RECIPE INDEX (updated as at 21 March 2014)  here and you can follow me at PINTEREST or visit this blog’s FACEBOOK PAGE .  

group-board-picture72222222222222222

If you are a Pinterest user and you are interested to have more recipes, you can join or follow this Pinterest Board set up by me  where there are more than 1800 recipes worldwide and pinned by various bloggers: FOOD BLOGGERS AND FOODIES UNITED PINTEREST BOARD.

You can also join the Food Bloggers and Foodies United Group Facebook Group to see more recipes. Currently there are about 4500 members sharing various food photos . I would be more than happy if you can  post in Groups for the recipes that you tried from Guaishushu’s blog.

IMG_45231

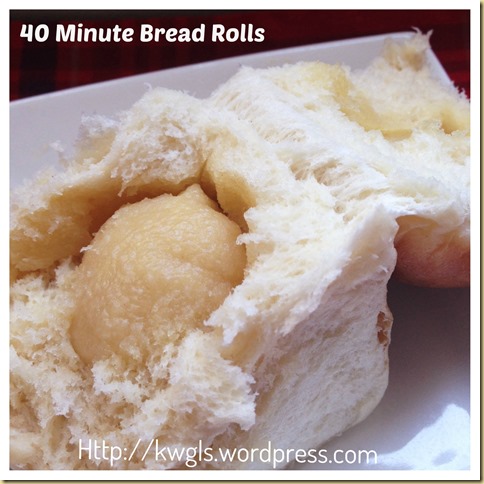
“40 Minutes Bread Roll” with Sarawak Butter Bun’s Filling (四十分钟快速面包和特有牛油馅)

IMG_44361

INTRODUCTION

I am rather lazy and impatience when it come to bread making and I am looking for a simple quick and fast recipe. I have been eyeing on this 40 minutes bread rolls recipes from Ms Diana Gale of Domestic Goddess Wannabe. She issued the post less than a month ago at 7 April 2014 and within the last two weeks, English Facebook Groups members in Singapore were trying out her recipes and posts from this recipe have flooded Facebook Group’s walls. Well, I have decided to give it a try since most bakers have concurred that it is an easy and soft bread.. It met my objective of looking for a lazy and fast bread recipe…….

IMG_44401

In fact, I have been craving for my Sarawak butter buns, a unique dinner buns with a special butter filling it. I have not had it for almost half a year. Ask any Sarawakian overseas, most will tell you that they missed these buns. This special bun comes with a rich and aromatic butter flavoured filling. Taking a bite resembles having a piece of bread spreads with butter and sugar.. History of this unique bun have yet to be traced and this will be my second post on this fillings. If you wish, you can refer to my earlier post : Homesick Buns? Yes, I am homesick of Sarawak Style Butter Buns.. In this post, the bread dough is another recipe prepared using Tangzhong.

IMG_44441

I love the buns. It is soft and fluffy but though simple, care and observation still need to be carried out by the baker. The more time you knead, the gluten structure have build up, the softer and fluffier it will be. Longer time of proofing also helps. Therefore, if you are not really rushing for time, do give the dough sometime to proof …I believed a 50 minutes or 60 minutes bread though is also acceptable to me since this is a simple, single proofing bread.

IMG_44561

I did not exactly time the bake but I knew it is definitely less than an hour because I started at 1.35 pm and finished off at about 2:30pm.

IMG_44501

There are no major changes to the original recipe but I like my recipe to round up to the nearest number of cups or grams. Therefore, in the event there are any discrepancies, that should be the main reason.

IMG_45511

Since this is a quite bread, I have by passed the step of yeast testing and put everything inside the whisking bowl and start the kneading.

IMG_44601


WHAT IS REQUIRED

Recipe adapted from: 40 minutes bread rolls recipe from Domestic Goddess Wannabe

Servings: about 9 dinner rolls of about 100 grams each. (advisable to make into 18 dinner rolls of about 50 grams each)

IMG_4397

Bread dough

  • 3 1/2 cups of bread flour (面粉)
  • 1 cup of warm water (温水)
  • 1/3 cup of corn oil (玉米油)
  • 1/4 cup of castor sugar (细砂糖)
  • Pinches of salt (optional) (少许盐巴)
  • 1 egg (鸡蛋)
  • 1 packet of instant yeast –11 grams (即发酵母)

IMG_4399

Butter Fillings

  • 150 grams of butter (牛油)
  • 150 grams of castor sugar (细砂糖)
  • 180 grams of plain flour (普通面粉)

IMG_44521


STEPS OF PREPARATION

  • Lightly grease a square baking tin of 8 inches by 8 inches or get ready some cupcake cups.

Preparing the butter filling

 IMG_4404

  • Melt the butter in the microwavable bowl (1 minute). Alternatively, you can also melt it over the smallest heat directly under the fire. Add the sugar to the hot melted butter, stirred until dissolved. Add in the sifted flour gradually and used a spoon to stir until well mixed.  Let the flour mixture cooled down and let it rest for at least 5-10 minutes (note that the flour need sometime to absorb the liquid and don’t worry if it is too watery. After 5 minutes, the flour will also expand and you can see a slight increase in volume. Once cool, shaped it into 9 small balls of about 50 g each. Set aside for later use.

Preparing the bread dough

IMG_4409

  • Put all the ingredients for bread dough in a whisking bowl. Use a spoon to lightly stir it. Beat using a dough hook at medium to high speed until it becomes smooth which took about 10 minutes.

IMG_4414

  • When the dough is smooth, weigh the dough and divide equally into your desired number of buns. (Note that in this illustration, the buns are rather big and more difficult to bake, you can always make it into a smaller bun. For this illustration, I have prepared 9 buns of 100 grams each. Suggestion is to divide into 18 buns with 50 grams of dough each and fillings of about 25 grams)

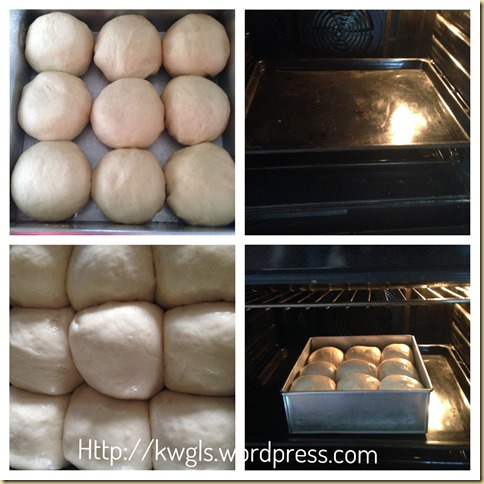
  • Take a dough, shape round, flatten lightly and put a butter filling on top of the dough. Seal the sides and placed in an 8” x ‘’8” lightly greased square baking tin with the sealing sides facing the bottom. Do the same for all the remaining dough. (Note that you can always placed your dough in a cupcake cups instead of squeezing all in the baking tin as in the illustration. It will speed up the baking time too).
IMG_4420

  • Once shaping done, cover the dough with a piece of cloth or tangy wrap to prevent lose of moisture. At this stage, preheat the oven to 220 Degree Celsius. The proving time will be the the time the oven heat up from room temperature to 220 degree Celsius and  will take about 10-15 minutes or slightly more.

  • Once the oven reached 220 degree Celsius, egg wash the buns and bake the buns in the oven for 12-15 minutes or until golden brown and bread aroma penetrates the house. For egg washing, beat one additional eggs and mixed with 2 tablespoons of water, sifted the egg mixture and brush the egg mixture on top of the dough.

  • The timing is for reference and it very much depends on the size of the buns. The smaller it is, the easier it is to get baked. The bigger the buns or loaf, longer time is needed. If your bread turns out hard or dense on the next day, chances are your bread is under baked. It will not be obvious when you take out from the oven but it will be obvious when it cooled down.

IMG_44381


CONCLUSION

Frankly speaking, I did not really time the entire process. But I can be sure that it took me less than an hour to get this bread done. While this is a simple recipe but care and observation still need to be exercised. All timings are for references. It is best to take a few minutes more to knead the dough until smooth and as for baking time, it will very much depend on how you shape and position your buns. I have to be frank that the buns position in this illustration is more difficult to bake as it is a huge mass of bread. Therefore,  I have taken extra care when baking my buns. Do make it a smaller bun with a small fillings if preferred.

IMG_44581

Do give this simple recipe a try and lastly, thanks to Ms Diana Gale for this wonderful recipe of hers. You can refer the original recipe here.

IMG_44421


For more recipes, you can refer to my RECIPE INDEX (updated as at 21 March 2014)  here and you can follow me at PINTEREST or visit this blog’s FACEBOOK PAGE .  

group-board-picture72222222222222222[1][2]

If you are a Pinterest user and you are interested to have more recipes, you can join or follow this Pinterest Board set up by me  where there are more than 1800 recipes worldwide and pinned by various bloggers: FOOD BLOGGERS AND FOODIES UNITED PINTEREST BOARD. You can also join the Food Bloggers and Foodies United Group Facebook Group to see more recipes. Currently there are about 4500 members sharing various food photos .

IMG_44341

Four Seasons Blog Hop #47 (24 April 2014)

Welcome to the Four Seasons Blog Hop

A party where we can celebrate the greatness that each season brings to our lives.
To be interested in the changing seasons is a happier state of mind than to be hopelessly in love with spring.
Thank you to everyone who shared their wonderful creations last week and to all of you who are joining us new this week!

So Let’s Get This Party Started!! Share your  food creations, gardening, clever projects, tablescapes, decorations, party themes, and inspirational knowledge … Ok, you get the point.  Join us every Thursday (opens Wednesday evening at 6:00 pm). Please stay for awhile and show some love to the guests, join us in the fun and grab a button. Four Seasons Blog Button

We will share your posts in a variety of ways on Pinterest, Twitter, Facebook and Google Plus.  We will also have features of the week! Be sure to follow our Four Seasons Board on Pinterest!

By participating in this linky party, you agree to have your posts shared on social media and Pinterest and to receive email and Google notifications for reminders about the party. If you don’t want to receive notifications, please let us know.

Featured Blogger

This week we are featuring a blogger who we always look forward to what she has been cooking or baking each week! Her recipes are always scrumptious and she hosts  Please stop by and check tout her blog and say hi while you’re there. Meet Lydia who “over the last couple years I’ve become intrigued with the semi-vegetarian style of eating popularly known as “flexitarian.”  My reasons are mostly health based, but I have plenty of concerns about the prevalence of processed foods in our diet, and the impact feeding people cheaply and efficiently has on our environment.  I’m finding that as I become more intentional in what we’re eating, the flexitarian style is spilling over into everyday life.”

FEATURED POSTS

PLEASE CLICK THE ICON ABOVE TO ENTER THE LINK PARTY

Have You Ever Try Biscotti? – Pistachio and Almond Biscotti (开心果及杏仁饼干)

IMG_4350

INTRODUCTION

This is another type of classic biscuit that was sold in the famous chain coffee cafe such as Starbucks. It is a crispy type of biscuits and preparation is definitely not difficult at all.

IMG_4357

I get this recipe from another old cookbook – “The Essential Baking Cookbook” published by Murdoch Books in 2000. This is a simple recipe and in fact most of the traditional recipe are simple. Both ingredients and method are rather simple too..

IMG_4361

It is called biscotti because it is twice baked. The dough is baked until cooked, sliced into small pieces and re baked again until it become crunchy. It is usually served with some hot beverages.

IMG_4372

As per Wikipedia:

“Biscotti (/bɪˈskɒti/; Italian pronunciation: [bisˈkɔtti]; English: twice cooked), also known as cantuccini (English: coffee bread), are twice-baked cookies (or biscuits) originating in the Italian city of Prato. The biscuits are oblong-shaped almond biscuits, made dry and crunchy through cutting the loaf of dough while still hot and fresh from baking in the oven.  “Biscotti” is the plural form of biscotto. The word originates from the medieval Latin word biscoctus, meaning “twice-cooked/baked.” It defined oven baked goods that were baked twice, so they were very dry and could be stored for long periods of time. Pliny the Elder boasted that such goods would be edible for centuries.Such non-perishable food was particularly useful during journeys and wars, and twice baked breads were a staple food of the Roman Legions.” (Source: http://en.wikipedia.org/wiki/Biscotti)

IMG_4353


WHAT IS REQUIRED

Recipe adapted from: Page 114 Biscotti – “The Essential Baking Cookbook” published by Murdoch Books in 2000

IMG_4303

  • 2 cups of self raising flour
  • 1 cup of caster sugar
  • 50 grams of almond
  • 50 grams of pistachios
  • 2 eggs and 1 egg yolk for dough
  • 1 egg for egg washing

Optional

  • 1 teaspoon of vanilla essence
  • 1 teaspoon of grated orange rind

IMG_4346


STEPS OF PREPARATION

  • Preheat the oven to 180 degree Celsius.

IMG_4308

  • In a big mixing bowl, put the sifted self raising flour and castor sugar. Make a well in the centre. Add 2 eggs and 1 egg yolk to the well. Used a tablespoon to stir until well combined. Add in the almonds and pistachios. Use hand to knead in a lightly floured surface for 2-3 minutes. If the dough is too stiff, sprinkle a little water on top of the dough.

IMG_4313

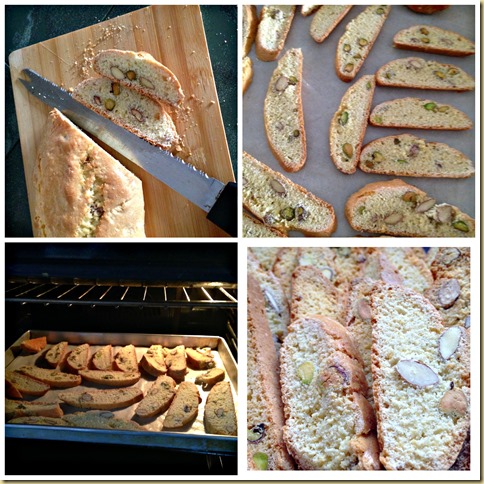
  • Divide the dough into two equal portions. For each portion, shape it about 25cm long x 8 cm wide (or 10 inches x 3 inches). Slightly flatten the dough and leave adequate space for the dough to expand when baked.  Beat the remaining one egg and egg wash the dough. Bake in the oven at 180 degree Celsius for 35 minutes. After 35 minutes, remove from oven and let it cool. Meanwhile reduce the oven temperature to 150 degree Celsius.

PicMonkey Collage1

  • When the biscotti have cooled slightly, use a serrated knife to cut the log into 4mm thickness. Place the cut biscotti on the baking tray with the flat side down.Bake in the oven at 150 degree Celsius for another 8 minutes or until crunchy and dry. Cool in a wire rack and store in an air tight container for up to a week of two. Best served with some breakfast beverages.

IMG_4355


CONCLUSION

It is not a difficult bake and I like the crunchiness of biscuits and the nuts. There is no fix and fast rule of the types of nuts used, possibly you want to consider some chocolate biscotti with macadamia nuts?  With this recipe, I believed you will not need to buy the biscotti from Starbucks any more! Ha-ha.

IMG_4374

Hope you like this simple post a day. Cheers and have a nice day.

IMG_4364


For more recipes, you can refer to my RECIPE INDEX (updated as at 21 March 2014)  here and you can follow me at PINTEREST or visit this blog’s FACEBOOK PAGE .  

group-board-picture72222222222222222[1][2]

If you are a Pinterest user and you are interested to have more recipes, you can join or follow this Pinterest Board set up by me  where there are more than 1800 recipes worldwide and pinned by various bloggers: FOOD BLOGGERS AND FOODIES UNITED PINTEREST BOARD.

You can also join the Food Bloggers and Foodies United Group Facebook Group to see more recipes. Currently there are about 4500 members sharing various food photos . I would be more than happy if you can  post in Groups for the recipes that you tried from Guaishushu’s blog.

IMG_4359

Bread In A Stick?–Italian Breadsticks (意大利面包条)

IMG_42341

INTRODUCTION

I am glancing through my old recipe book and happy to find this Italian breadstick recipe. It was from a cookbook “Muffins And Quick Bread” by Linda Fraser and published by Anness Publishing in 1995. I have decided to give it a try because it appeared to be a simple bake.

IMG_42581

In fact, it is a simple bake, fast and taste is awesome. I especially like the part of the recipe that there were not much proofing need to be done and ingredients were simple with only 3 ingredients. Baking time is short and with limited steps.

IMG_42741

I started preparing the breadstick at 12:00 noon and I get it ready by 1:30 pm, just nice for my girl to try after she is backed from her school.

IMG_42461

As per Wikipedia:

Breadsticks (grissini, dipping sticks) are generally pencil-sized sticks of crisp, dry bread originating in Turin and the surrounding area in Italy. They are originally thought to have been created in the 14th century; although according to a local tradition, they were invented by a baker in Lanzo Torinese (northern Italy) in 1679. Breadsticks may be offered at the table in restaurants as an appetizer, in some instances or regions they may be a type that is larger than pencil-sized. (Sourcehttp://en.wikipedia.org/wiki/Breadstick)

IMG_42891


WHAT IS REQUIRED

Recipe adapted from:  Italian Breadsticks Page 74 ”Muffins And Quick Bread” by Linda Fraser

IMG_4214

  • 200 grams of plain flour
  • Pinches of salt
  • Pinches of sugar
  • 120 grams of warm water
  • 3 grams of instant yeast
  • Some sesame seeds (optional)
  • Some Italian dry herbs (optional)

IMG_42841


STEPS OF PREPARATION

IMG_4219

  • Put all ingredients in a whisking bowl, add water and use a spoon to lightly mix it until it become a paste. Use a dough hook at medium speed to knead the dough until the dough leaves the side of the bowl and become elastic and smooth. It will took about 15-20 minutes. Transfer out and lightly knead in a floured surface for 1-2 minutes.

IMG_4226


  • From the dough, tear a small lump (about size of walnut) and roll it lightly between the hands into a small sausage shape. Place the dough on a flat surface without any flour and roll using the spread out fingers of both hands, moving forwards and backwards to lengthen and thin the dough to about 1 cm thick. Dust with Italian dry herbs or sesame seeds if desirable. Transfer the thinned dough to a lightly greased baking tray. Arrange neatly and leave space of about 1 finger wide for expansion. Repeat the same for the remaining dough.

IMG_42781

  • Leave the dough to proof until the oven is ready. While the dough is proofing (about 10-15 minutes), pre-heat the oven to 200 degree Celsius. Once the oven is ready,  bake the dough for about 8 minutes for a side. Turn the sticks over and bake for another 6-7 minutes.  Cooled and can be served with dips if desired. For this illustration, I have served with Italian Mariana sauce. A good breadstick are supposed to be crispy when served. If crispiness were lose, bake in the oven again for 10 minutes at about about 100 degree Celsius.

IMG_42521


CONCLUSION

A simple post with simple ingredients, simple preparation steps but with awesome taste. You can just have it plain or if preferred served with dips such as cream cheese dips, tomato based Mariana dressings or sour cream.  Hope you like the post today.

IMG_42861

Cheers and have a nice day.

IMG_42361


For more recipes, you can refer to my RECIPE INDEX (updated as at 21 March 2014)  here and you can follow me at PINTEREST or visit this blog’s FACEBOOK PAGE .  

group-board-picture72222222222222222[1]

If you are a Pinterest user and you are interested to have more recipes, you can join or follow this Pinterest Board set up by me  where there are more than 1800 recipes worldwide and pinned by various bloggers: FOOD BLOGGERS AND FOODIES UNITED PINTEREST BOARD. You can also join the Food Bloggers and Foodies United Group Facebook Group to see more recipes. Currently there are about 4500 members sharing various food photos .

IMG_42401


Transforming Rice Into Burgers?–Teriyaki Rice Burgers (米汉堡)

IMG_40631

INTRODUCTION

My wife bought back almost 20 rice burgers when she visited her friends in Taiwan last month. She tasted the rice burgers and she is so happy with the burger that she wanted us and her sisters to try these teriyaki rice burgers.. Each of us in my own family was rationed to have 1 each for adult and 2 for the kids. It is not from the famous worldwide chain of restaurant but rather a local Taiwan fast food chain. When i took my first bite, immediately I fell in love with it.

IMG_40321

Rice burger is nothing new to me. I remembered that I have tasted such burger when I stationed in Shanghai a decade ago but can’t really  recall about the taste. I do know that Singapore MOS Burger have such product but I have never try it.

IMG_40281

Looking at my kids fighting for the burgers, I have decided to try to replicate what I have eaten. I believed it is not difficult to replicate as it was a familiar taste. On Friday,  we headed to the supermarket to buy some Calrose or pearl rice, some pork belly slices meant for steamboat purposes and with the Japanese condiments available in my kitchen mostly bought from Daiso Singapore, I prepared these rice burger for dinners. The entire family enjoyed it very much and each of us have 2 rice burgers for that meal. We finished  all the 3 cups of Calrose rice..

IMG_40571

Do not think that preparation is difficult. It is not. It is extremely easy. I would described it as a one pot dish, if I may use such a term. It took me about 1.5 hours to prepare the meals and that include the designing, cooking and assembly the dish.. For most, the dish can be ready in 30-45 minutes..

IMG_40651


WHAT IS REQUIRED

Servings: Make about 8 rice burgers

IMG_3984

  • 3 cups of Calrose rice (珍珠米)
  • 3 tablespoons of Japanese rice vinegar (komezu 米酢 ) – optional (日式米醋)
  • 1/2 cups of glutinous rice (糯米)

IMG_3988

  • 250 grams of pork belly slices for steamboat (五花肉片)
  • 3 tablespoons of teriyaki sauce (照烧汁/日式红烧酱)
  • 2 tablespoons of mirin 味醂 – (日式米酒)
  • 2 tablespoons of Japanese light soya sauce (Usukuchi) – (日式生抽)
  • 2 medium size onion, sliced in long strips (大葱)
  • 1 tablespoons of sugar (白糖)
  • Some white or black sesame seeds or a mixture of both (黑或白芝麻)

  • 1 metal frame for frying egg for burger (简单煎蛋金属框架)

IMG_40261


STEPS OF PREPARATION

IMG_4009

  • Wash the rice and cook the glutinous rice, Calrose or pearl rice IN ACCORDANCE WITH YOUR RICE PACAKAGING INSTRUCTION. For this illustration, I was required to use 1 cup of rice with 1.25 cups of water. Therefore, I have used 3.75 cups of water for the rice. But it varies with age and brands of the rice. Note that long grain rice are not ideal as it is not sticky enough. If you do not have this short grain rice, you can use some long grain rice with some glutinous rice in the ratio of 4 cups of normal rice with 1 cup of glutinous rice).

  • Once cooked, drizzle the rice vinegar (optional) on top of the cooked rice when it is hot. Put some sesame seeds (about 1 cup of rice with 1 tablespoon of sesame seed). Fluff the rice and put in the rice cooker if your pork slices are not ready. If your teriyaki pork slices are ready, put it under a fan to cool. But use a towel to cover the rice to prevent the rice from losing its moisture.

IMG_3993

  • In a pot with 2 tablespoons of cooking oil, sauté onion until fragrant. add the sliced pork belly meat, stir fry until well mix. Add the teriyaki sauce and Japanese light soya sauce, stir fry until well mix.

IMG_3999

  • Add the Mirin  and about 1/2 cup of water and bring to boil. Once boiled, lower down the heat to let it simmer until the meat is soft and the sauce dries up. Add sugar for taste and a touch of glaze. Sprinkle with about 2 tablespoon of sesame seeds and transfer out for cooling and later assembly. You may want to take out some of the meat and taste if it suits your taste buds. Add additional seasonings if necessary.

IMG_40471

PicMonkey Collage1

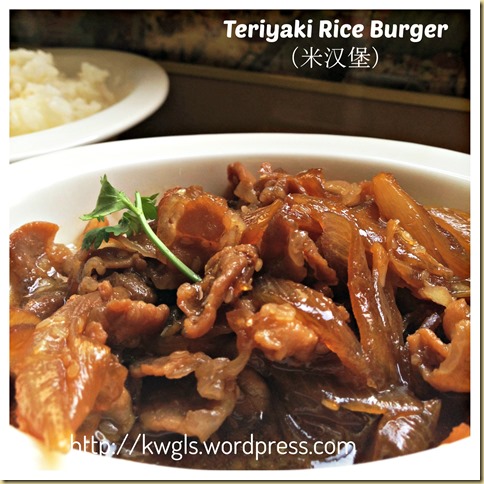
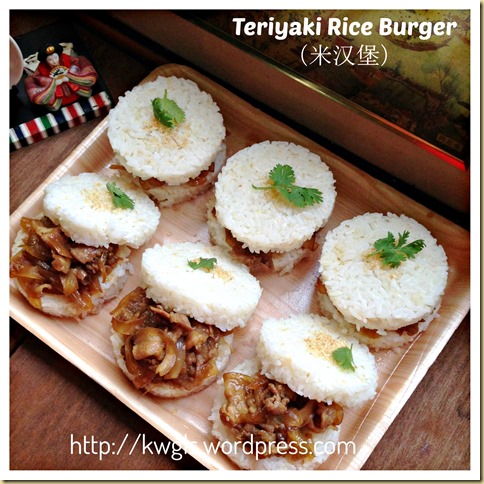
  • Take some warm rice and place it on top of  something round and pressed it down firmly. For this illustration, I have used a metal frame designed for the making fried eggs for burgers. Take the rice burger out carefully, place in the serving plate. Put 1-2 tablespoons of teriyaki meat slices on top of a side of rice burger and drizzle with some sauce. Cover with another side of a burger. Sprinkle with additional sesame seeds if desired. Best served warm as a snack or a one pot dish.

IMG_40451


CONCLUSION

Is it difficult? No, it is not. If you can’t get hold of the metal frame, use anything. Roll the rice out into your desired thickness. Use a cup to press down to get hold of the shape. Firmness is required.  You can also get these Japanese condiments easily and at a reasonable price at Daiso chain stores worldwide. In addition, you can also substitute with sukiyaki beef slices if you preferred.

IMG_40241

My family especially like the teriyaki pork belly slices and we concurred that it is at least 90% like those Taiwanese rice burger that I have eaten before. Pardon me for not being humble.. Do give it a try .

IMG_40381

Hope you like the post today. Cheers and have a nice day.

IMG_40491


For more recipes, you can refer to my RECIPE INDEX (updated as at 21 March 2014)  here and you can follow me at PINTEREST or visit this blog’s FACEBOOK PAGE .  

group-board-picture72222222222222222[1]


If you are a Pinterest user and you are interested to have more recipes, you can join or follow this Pinterest Board set up by me  where there are more than 1800 recipes worldwide and pinned by various bloggers: FOOD BLOGGERS AND FOODIES UNITED PINTEREST BOARD. You can also join the Food Bloggers and Foodies United Group Facebook Group to see more recipes. Currently there are about 4500 members sharing various food photos .

IMG_40671