INTRODUCTION
Agar Agar is a Malay word for red algae, apparently it has been accepted as an English word. It is hard for a lay man like me to explain agar agar, so as usual, I will quote Wikipedia’s explanation of agar agar for reader’s understanding.
Per Wikipedia:
“The word “agar” comes from agar-agar, the Malay name for red algae (Gigartina, Gracilaria) from which the jelly is produced. It is also known as kanten, China grass, Japanese isinglass, Ceylon moss or Jaffna moss.
Agar-agar is a natural vegetable gelatin counterpart. White and semi-translucent, it is sold in packages as washed and dried strips or in powdered form. It can be used to make jellies, puddings, and custards. For making jelly, it is boiled in water until the solids dissolve. Sweetener, flavouring, colouring, fruit or vegetables are then added and the liquid is poured into moulds to be served as desserts and vegetable aspics, or incorporated with other desserts, such as a jelly layer in a cake. “ (Source: http://en.wikipedia.org/wiki/Agar)
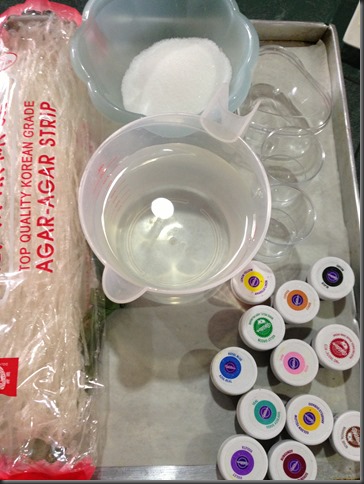
Agar agar is one type of traditional dessert commonly found in Singapore and Malaysia. It is easy to prepare and is a common item being served during Chinese New Year and other festivals. To make it requires no complicated kitchen utensils, just need to boil and mould. Traditionally, households used dried agar agar as shown in this illustration as the raw ingredient. However, in recent years, most households have started to use agar agar powder instead of dried agar agar.
Traditionally, due to the lack of weighing scales, sophisticated kitchen utensils and written recipes, housewives usually prepare agar agar based on words of mouth using common kitchen items such as cups as the unit of measurement.
I was told that previously, the recipe is 1 cup of soaked agar agar will requires 1 cup of sugar and 1 cup of water. I liked this type of simple ratio recipe, however, when I tried out, it just turned out to be extremely sweet and tough.
Well, that type of recipe may not be acceptable nowadays since we have so many resources available. In olden days, the challenge to make a good agar agar is to get hold of the correct ratio of water to agar agar. The end product shall be slightly chewy and not to soft like the current jelly. In order to achieve such texture, housewives some times dried their agar agar under the sun. They believed that the less water content in the agar agar, the better it is. In fact, some house hold cut it into one bite size, dried it under the sun until it is very chewy, store in a container and eat it as a snacks or sweets!
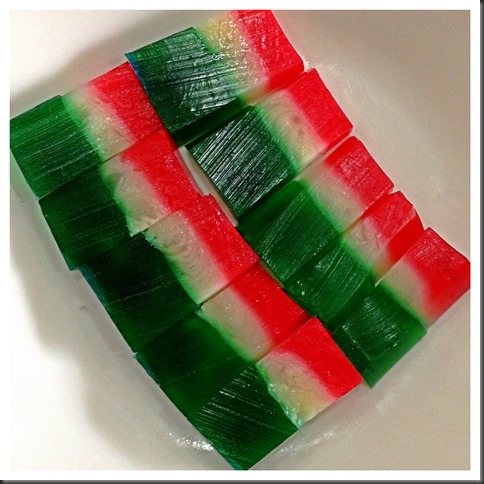
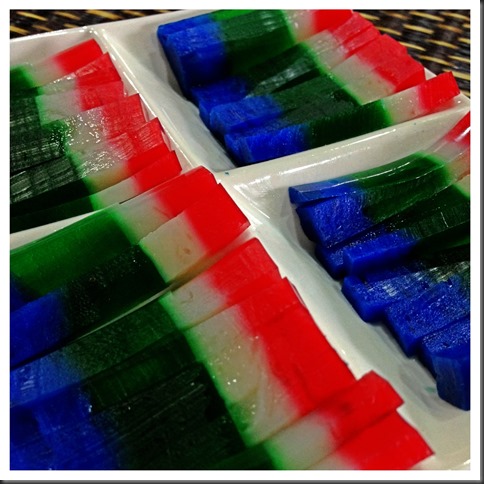
In recent years. preparation of agar agar is not entirely based on texture since all ingredients can be measure rather accurately. It is rather easy but the challenge had shifted to the colour combination and moulding. If you have the relevant mould, you can create your own design based on your creativities. One of the most trendy agar agar moulding will be agar agar moon cake where the agar agar were mould into a moon cake shape. Inside the agar agar moon cake, there is a yellow colour balls resembling the egg yolk.
Again that is deal with planning, making and moulding. It can be rather stressful if there are no prior planning on the colour selection and mould selection. Of course, it can be as simple as just a single colour one flat piece of agar agar. The taste will definitely be the same but of course it is less impressive to your guest.
This illustration will only provide you with the simplest layered agar agar procedures. You can chose your own colour and shape of your mould. I have use some heart shape mould and the colour is purely selected for this illustration only. At home, we will not go until this extent and usually have one to two colours plus 2-3 layers of agar agars.
NATURAL COLOUR SELECTION
There are a lot of natural colour available and you can totally throw away the artificial colouring, if you wish. Suggested colours are:
-
White and milky – condense milk, coconut milk, fresh milk
-
Chocolate – instant coffee paste, chocolate paste or powder
-
Red colour – red colour dragon fruits paste
-
Yellow – mango paste
-
Green – pandanus paste
-
Violet or blue – pea flowers
-
Purple –black currant drink
-
Red – strawberry paste
-
Dots in the agar agar – dragon fruits
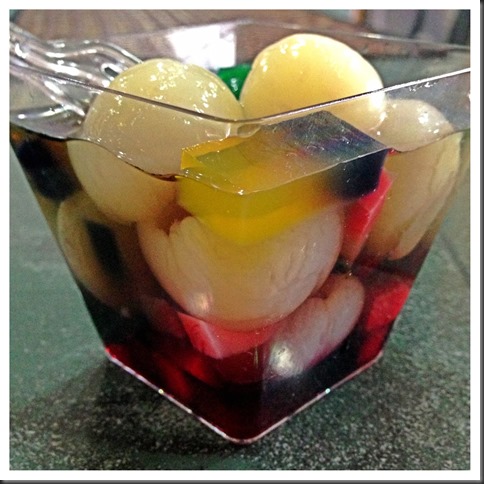
Besides the above colours, many varieties of cut fruits can also be included. For example, yam cubes with coconut milk is a good combination. Coffee with milk is another welcoming combination to make into agar agar. Canned Longan or lychee with black currant flavoured agar agar is also a presentable dessert. All this is very much depend on reader’s creativities to prepare one that is acceptable to the guest or family members.
WHAT IS REQUIRED
I have intentionally left out the quantities as it is best that you follow the instruction on the the package of agar agar that you bought. Be it dried agar agar strips as shown above or agar agar powders, they will have detail instructions on the quantity of water required. It is best that you follow these instruction as every brands of agar agar will requires different liquid to reach the desired textures.
-
1 package of agar agar strip (about 38g)
-
Some water (refer package)
-
Some sugar (refer package)
-
Some permitted food colouring of your choice or the type of natural colouring ingredients as mentioned above.
-
Some moulds of your preference
-
Few leaves of Pandanus leaves – bundled (optional)
STEPS OF PREPARATION
-
Wash the dried agar agar by soaking in clean water for 1-2 minutes.
-
In a pot, put in the water as stated in the package and add dried agar agar. Use medium heat to bring the water to boil. Continue stirring until all the agar agar are dissolved.
-
Add in the required sugar into the agar agar solution and stirred until dissolve. Turn the heat to the minimal. You just need the heat to prevent the agar agar from solidifying while you do the layering. Alternatively, you can put your agar agar in a big basin of hot water.
-
Take out some container of your choice, add in your preferred colouring and pour into the mould.
-
Once done, put it in the freezer or chiller or under the fan and once it is set on the top, you can pour the second layer. How long will it take will depends on your room temperature, the concentration of your agar agar and the types of you container. For my today’s illustration, it is rather fast because the container is very small and my agar agar is quite concentrated.
-
Repeat the same for different layers until all the agar agar were used up.
-
Put in the fridge for another 10-15 minutes.
-
Remove from the mould, cut into your desired size and shape and put in your preferred serving plate.
-
Best served cold as a dessert.
CONCLUSIONS
This is extremely simple. It is best that you based on what is stated in the package label to prepare the agar agar. Different brands will have different instructions.
Though this illustration is using traditional dried agar agar, you can use agar agar powder instead. The price for both dried agar agar and agar agar powder is rather economical and in my humble opinion, it is still a good choice of snacks or desserts. Variations are many and you have full flexibility to choose your desired flavour, colour and moulding. You guest will surely be impressed by your creativities.
Try this traditional Asian dessert and I am sure you wouldn’t regret preparing it. Hope you like the post today. Have a nice day and cheers.


