Auspicious Day With Auspicious Porridge–Eight Treasure Porridge (八宝粥)

IMG_6607

INTRODUCTION

It is such an auspicious day that I am writing this post. I swear it is not pre-planned. Today is Mid Autumn Festival aka Moon Cake Festival, it is a festival that is celebrated by all Chinese worldwide. As request by one of the Google communities, I have written a brief write up on Mid Autumn Festivals HERE which you may want to have some casual reading.

IMG_6599

The cuisine that I am going to post today is a vegetarian dish called 8 treasure porridge (八宝粥). There are so many versions of this one pot dish in the internet but the recipe that I am going to share is from my kind neighbour. She liked to cook this porridge and after I tried it for the very first time, immediately I fell in love with it. Since then, I had liked to cook this dish in important festivals such as Chinese New Year Day where the whole family were supposed to be on vegetarian diet for one day.

I have cooked this yesterday not because of the festival, but because I craved for the porridge since I am still on my vegetarian diet. I gave two boxes of the porridge to my daughter’s schoolmates mother, she immediately asked for the recipe when she reached home. She commented that the taste of the porridge was totally different from what she had tasted in the vegetarian stalls.

IMG_6594

I did not know where my neighbour get the recipe but I found that there are certain ingredients that we used were not found in other 8 treasure porridges sold by the vegetarian stores. Both the ingredients were mock meat acceptable to all vegetarians and without these two ingredients, the taste will definitely be different.

As this was our dinner last night, I did not have much chances to take pictures and the poor lighting make the picture a bit disappointed. But trust me, this is a very different 8 treasure porridge and it is definitely good for casual dining or a presentable dish in important Buddhist religious occasions.

IMG_6605


WHAT IS REQUIRED

Though the name is 8 treasure porridge, however, we tend to have more than 8 ingredients and I do not think all my ingredients are in the picture.  I should have used 11-12 ingredients here. Most of the ingredients are nuts and a few ingredients and some mock meat.

IMG_65571

  • 1 cup of uncooked rice – not in picture (白米)

  • 1 cup of jujube (红枣)

  • 1 cup of peanuts (花生)- soaked

  • 1 cup of cashew nuts (腰豆)

  • 1 cup of lotus seeds (莲子)- soaked

  • 1 cup of gingko nuts  (白果)- soaked

  • 1 cup of red carrots (cut into cubes) (红萝卜)

  • 1 cup of dried mushrooms (soaked and cut into cubes) – not in picture (冬菇)

  • 1 cup of mock duck (must have) – (素鸭)

  • 1 small packet of “fat Choy” or “black moss” (发菜)

  • 1 packet of about 2 sheets of mock goose (素鹅)(must have)

  • 6-8 cups of plain water (if not adequate, you can add in water later)

IMG_6543 Mock Duck

IMG_6556 Mock Goose

Please do not ask me why they were called mock duck or mock goose, frankly, I do not know. While the shape is difference, the taste is nothing like duck of goose. Both are made of wheat gluten, oil, soya sauce, sugar, salt and packed with proteins. They do have their distinct flavour but I can’t describe exactly what is the flavour. They can generally found in Chinese grocery stores that sell vegetarian supplies. These two items are the two most important ingredients in this porridge and without it, the taste will be different.

 IMG_6561 “Fat Choy” or “ Black Moss”

This a type of moss now commercially cultivated in the Gobi dessert and Chinese Government do place a restriction in harvesting the moss. The meaning of having these mosses signifies prosperous since the syllables in Chinese name is the same of both “Fat Choy” and “Black Moss”. I hereby quote what Wikipedia had explained about this moss.

“Fat Choy (Nostoc flagelliforme), also known as faat Choy, fa cai, black moss, hair moss or hair weed is a terrestrial cyanobacterium (a type of photosyntheticbacteria) that is used as a vegetable in Chinese cuisine. When dried, the product has the appearance of black hair. For that reason, its name in Chinese means “hair vegetable.” When soaked, this vegetable has a very soft texture which is like very fine vermicelli.” (Source:  http://en.wikipedia.org/wiki/Fat_choy)

IMG_6584


STEPS OF PREPARATION

Preparing all other ingredients

  • Clean all ingredients (except mock duck and mock goose) and you may want to soak the peanuts and lotus seeds (if you buy the dry type). Cut into almost the same size as the peanuts and set aside for the later use.


Frying the mock goose

IMG_6644

  • In a frying pan, have some cooking oil under high heat, fry the mock goose until crispy. When cooled, cut into thumb size pieces and set aside for the later use. (Note: While it is good to have minimum oil in the cooking, however, without performing this step, the fragrance will not be there. However, you can try using “air fryer” but I am unsure whether the taste will be the same.)

  • Depending on your preference, you can use the same oil to stir fry the mock duck, gingko, lotus seeds, mushrooms, carrots etc. for a few minutes such that the mock goose and mushroom aromas blends with the other ingredients. Set aside for later use. This illustration bypassed this step to minimize the usage of cooking oil in the porridge and the taste will not be compromised much.

IMG_6645

  • Clean your rice and place in the rice cooker. Add in all other ingredients except “fat Choy”. Select porridge function for cooking the porridge.

IMG_6646

  • Just a few minutes before the porridge function was done, add in fat Choy and seasonings. Suggested seasonings are light soya sauce, salt, sugar or other flavour enhancers. Note that some of the ingredients already have some seasonings, please take some porridge out for tasting before you put the condiments.

Note that you can also use pressure cooker but remember to select the porridge function if it have. Alternatively, I have ever cooked the porridge over the stove and in this way it is easier for you to monitor the desire texture of your porridge though the cooking time may be longer. As long as all ingredients are soft, the porridge is considered as done.

 IMG_6603

  • Best served hot with “you tiao” – a type of Chinese plain dough fritters or additional crispy “mock goose”. Both these are optional.

IMG_65921


CONCLUSION

As I have said earlier, I fell in love with this special porridge when I have my first bowl years back. I  am confident you will like it too. Bookmark this page for your future usage. You may want to cook it during Chinese New Year like me!

Hope you like the post today. Cheers

IMG_66011

If you are looking for more CHINESE NEW YEAR COOKIES,  you may want to visit this post summarizing all relevant Chinese New Year Cuisines.

Chinese New Year Cookies21


For more recipes, you can refer to my RECIPE INDEX here and you can follow me at PINTEREST or visit this blog’s FACEBOOK PAGE .


group-board-picture72222222222222222


If you are a Pinterest user and you are interested to have more recipes, you can join or follow this Pinterest Board set up by me  where there are more than 1000 recipes worldwide and pinned by various bloggers: FOOD BLOGGERS AND FOODIES UNITED PINTEREST BOARD. You can also join the Food Bloggers and Foodies United Group Facebook Group to see more recipes.

IMG_65991

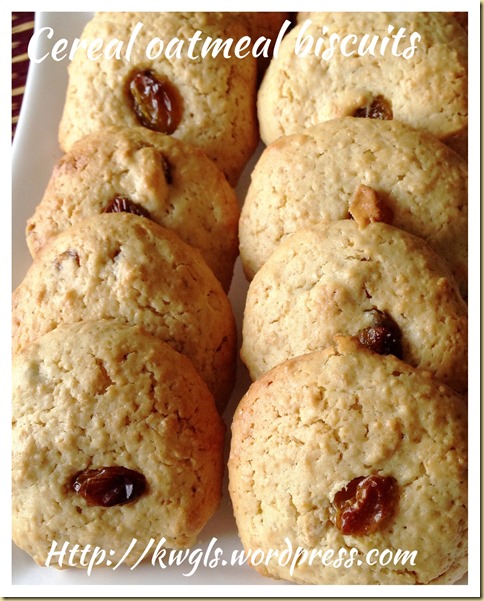
Soft Chewy or Crispy,You Choose Yourself! – Baby Cereal Oatmeal Cranberry Biscuits (麦片饼干)

IMG_7746

UPDATED POST ON 2-10-2014

A biscuit that I like very much but went unnoticed because I did not like the initial pictures taken.. Since I have some cereal at home, I decided to prepare this for my relatives as a hand gift. Nothing change except that I substitute the oats portion with instant cereal since I do not have it at home. In addition, instead of cranberry, I have used raisin instead. It is crispy outside and chewy in the middle. You can make it totally crispy if you make it a smaller size and extend the baking time at a lower temperature. A rather addictive cookie and I really love the cereal flavouring.

IMG_7750


IMG_5907


INTRODUCTION

One number baking ratio now extends it to biscuit and of course it had to be slightly amended. In this recipe, one portion of milk was being substituted by a portion of flour to make it a cookie liked structure.  This biscuits can be a soft chewy type of biscuit that is crispy on the outside but slightly soft in the middle. It can also be a crispy type of biscuits it you prefer it to be crunchy.

This is not the first time I prepared these biscuits. I prepared these biscuits a few months back. I loved it for its chewy texture and the baby cereal fragrance.

IMG_7745


WHAT WILL HAPPEN WHEN INSTANT OATS “MEET” QUAKER OATS

I like to blend my instant Quaker Oats with the Nestum Baby Cereals and make it into a breakfast cereal drink. I usually put 50% of instant oats and 50% of baby cereals and use a food processor to blend these two items. The breakfast cereal drinks will have instant oats “stickiness” but with baby cereals fragrance. I usually sweetened it by some condensed milk and if it was too “sticky”, I will add in some fresh milk. Bananas and nuts were added when I craved for it. May be I shall have another post on this wonderful breakfast drinks and you wouldn’t be disappointed with this cereal drink..

IMG_5899


WHAT IS REQUIRED

IMG_5918

  • 100 grams of butter

  • 100 grams of plain flour

  • 50 grams of instant oat

  • 50 grams of instant baby cereals

  • 100 grams of sugar

  • 100 grams of eggs

  • 50 grams of cranberry (optional and substitutable with raisins or other dry fruits)

  • 1 teaspoon of baking powder

  • 0.5 teaspoon of baking soda

IMG_7748


STEPS OF PREPARATION

Preparing the instant oat baby cereal mixture

IMG_5919

  • Blend 50 grams of instant oats and instant baby cereal each using a food processor until your desired textures.


Preparation

  • Get ready 2 baking trays lined with parchment paper or baking paper.

  • Pre-heat oven to 180 degree Celsius.

IMG_5913


Preparation the batter and baking

IMG_5886

  • Cream the butter and sugar. Add the eggs and followed by the mixture of oats/baby cereals. Stir and mix well.

IMG_5887

  • Add in the sifted flour, baking powder and baking soda, mix until just combined. Stir in cranberries or raisins and mix well.

  • Place one teaspoon/tablespoon full of soft dough (depending on the size you want) on the parchment or baking paper.  Give adequate space for the dough to expand when cooked.

IMG_5888

  • Bake in the oven at 180 degree Celsius for 15-20 minutes or until the colour starts to turn golden brown on the edges but still soft in the centre.

  • Cooled completely in a rack before store in an air tight container.

  • Best served with hot tea and coffee and as a snack.

IMG_5905

VARIATIONS

  • If you preferred the crunchy version, after the 20 minutes baking at 180 degree Celsius, reduce your temperature to 150 degree Celsius and continue baking for another 10 minutes. Note that the cookies will not be hardened until you take it out from the oven. Let it cool and see if that is your desired texture. In the event you prefer to be even crispier, put back to the oven and baked for another 5 minutes. The longer you baked, the more moisture will be lost making it to be crispier. However, do watch out for the colour of cookies. If it is too brown, you can turn off the top heat and use the bottom heat to continue the baking.


CONCLUSION

From preparing the biscuits until I finished this posting, it took me about 2 hours. Therefore, readers should comprehend how easy this biscuit was. If you like baby cereal like I do, you will like it. If you like soft chewy type of biscuits where the edges are crispy and soft in the inside, you will like it. Take a step to make this, tailor to your family taste buds, it definitely wouldn’t disappoint yourself and your family members.

IMG_7747

Join me to have some of these cookies as breakfast and of course, not forgetting a cup of hot Earl Grey tea.

IMG_7752

Cheers and have a nice day!

IMG_7744


  • For more recipes, you can refer to my RECIPE INDEX (updated as at 28 July 2014)  here and you can follow me at PINTEREST or visit the blog’s FACEBOOK PAGE to keep abreast of my future posts.  

IMG_7743

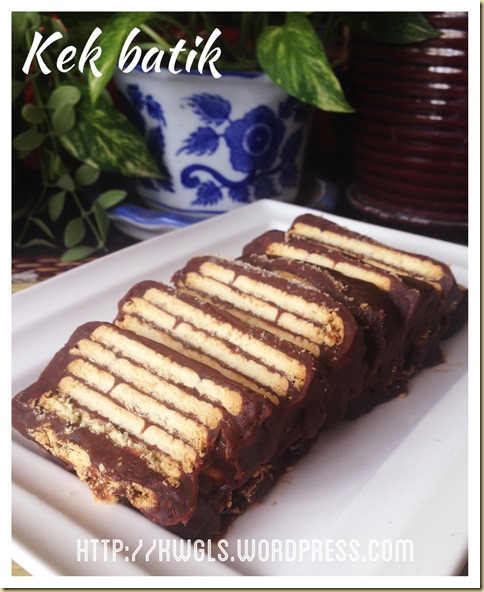
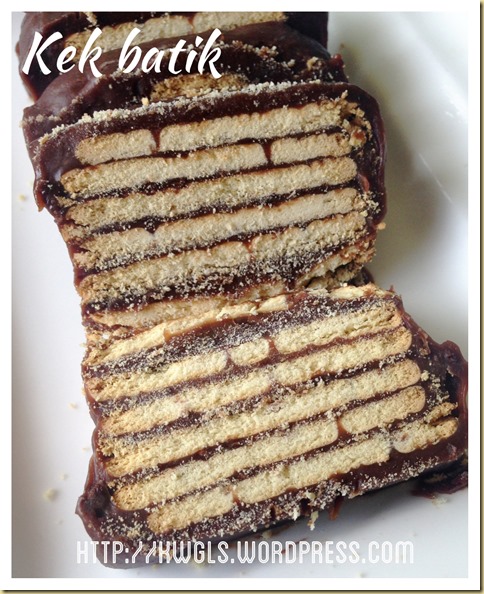
Traditional Batik Cake or Hedgehog Cake

IMG_8465


Updated post on 10-10-2014

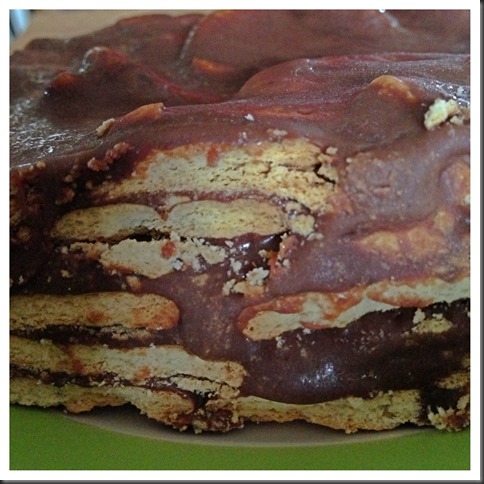
Have not prepare this cake for one year. A sudden craving made me wanted to prepare this rich and sinful cake to curb the sugar cravings. However, I have added 3 eggs to the recipe and using the boiling method.

IMG_8467

The simplified method are:

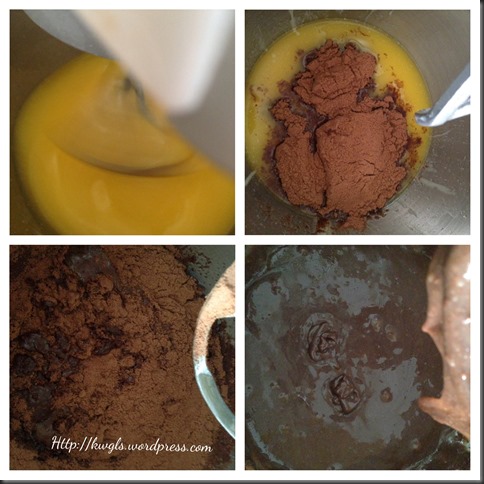
  • Melt the butter, add in condensed milk, beaten eggs and milo, cooked under medium heat until it starts to thicken. Transfer the mixture to the baking tin lined with Marie biscuits. Cover the base layer of Marie biscuits with the mixture. Put another layer of Marie biscuit on top and follow by another year of mixture. 

The shape is better and it wouldn’t melt in the hot weather. Of course, it will not be that creamy like the chilled version since it had been cooked. Happy trying.

IMG_8483


IMG_5662


INTRODUCTION

Don’t bombard me this controversial version of batik cake or “hedgehog” cake. It is simplified by Guaishushu as he had omitted the cooking steps.

Guaishushu like traditional cakes for its simple to follow ratio. Due to lack of precise measuring equipment in the early days, most household cakes recipes are simple such as pound cakes.

Today, Guaishushu is not promoting the one number baking ratio. Instead, he is making a cake that truly reflects the lifestyles of the people living in Malaysia in the early 70’s to 80’s. This cake is a simple cake that Guaishushu’s have made a long long time ago, may be 30 years back. Then, there was no oven in the house and his family just have a very simple fridge.

IMG_5658

This was one of the easiest cake that he can make because it required no oven, no mixer and just need a fork and a spoon. In addition, the ingredients were household common breakfast items such as Milo beverage drink and Marie biscuits. There was no internet then and most recipes were by words of mouth. He can’t recall which relative gave him the recipe, what he could remember very clearly was the nice pattern in the cake.

IMG_8479

In Malaysia, the cake was called BATIK CAKE. Batik is a cloth that is traditionally made using a manual wax-resist dyeing technique. It is a beautiful cloth and usually wore by Malay in the Malay Peninsular.

(Source: http://en.wikipedia.org/wiki/Batik)

Guaishushu had long wanted to make the cake but he did not have the recipe. He had in fact bought the Marie biscuits but did not have the time to search for a recipe. Coincidentally, one of the members in a Google Plus communities disclosed that her week end adventure was preparing a batik cake, Guaishushu immediately felt extremely happy and asked her for the recipe. The member was very kind to share her recipe and uploaded a picture. Guaishushu showed his wife the picture and his wife concurred that she have missed the cake too as she had not eaten this for ages.. With her recipe, Guaishushu started his preparation and within one hour, everything was done and send to the fridge for chilling.

IMG_8471

This recipe is a bit different from the original recipe in that Guaishushu do not cook the mixture. No cooking is actually required because all the ingredients are cooked ingredients. He opted just to mix and chilled to simplify the preparation. Of course, without cooking, the texture will be much softer and it can be treated as a type of chocolate sauce.

IMG_8473

The cooked version will have  a better shape but the texture is slightly chewy . Non cooked version will have a totally different texture, soft and smooth and rich in chocolate flavour.

IMG_5646

IMG_8504


WHAT IS REQUIRED

IMG_5670

  • 1 can of condensed milk (385 grams)
  • 385 grams of milo (breakfast beverage drink)
  • 385 grams of melted butter
  • 1 packet of Marie biscuits (about 250 grams) – a bit more or less is okay.
  • 3 eggs (optional) – If eggs are added, you will have to use the cooked version.

IMG_5664


STEPS OF PREPARATION

There are two methods of preparation. Either you melt the butter, milo, eggs  and condensed milk in a sauce pan and cooked under low heat until it thickens. In this case, you cake will be chewy and more shapely (Please refer to the update post for procedures)  For better presentation, it is advised that you follow this method such that it had a nicely cut cake. But for taste wise, it is advise that you follow the second method below.

The second method is as in this illustration where no cooking is required, therefore, you final products will become very creamy, soft as if you are having some rich chocolate sauce with biscuits.

Chilled Version

IMG_5671

  • In a big mixing bowl, place melted butter and condensed milk together, use hand or machine whisk until texture is consistent.

  • Add in milo powder and mix until it is well mix.

IMG_5672

  • Arrange your Marie biscuits in the tin and pour some chocolate sauce over the biscuits. Add another layer and repeat the same procedures until all biscuits and batter are used up.

  • Freeze it in the freezer for 1 hour or until temporary set. Cut into the desired size and served immediately out from the fridge. The sauce will gradually melt in the room temperature and therefore you shouldn’t put in the serving plate too early especially in hot weather like Malaysia and Singapore.

  • Best serve cold as a form of dessert.

IMG_5650


Cooked Version

IMG_8488

  • Melt the butter, add in condensed milk, beaten eggs and milo, cooked under medium heat until it starts to thicken. Transfer the mixture to the baking tin lined with Marie biscuits. Cover the base layer of Marie biscuits with the mixture. Put another layer of Marie biscuit on top and follow by another year of mixture. 

 IMG_8500


CONCLUSIONS

This is a twist of the traditional Batik Cake. I have purposely not to cook the batter since all ingredients are cooked ingredients. The texture and the level of enjoyment is totally different. While the traditional method of cooking the batter will provide you with better shaping but to me, its texture is compromised. I would prefer something soft, silky, rich and creamy full of chocolaty flavour to go with this simple plain biscuit. Whether or not this can still called a batik cake is irrelevant to me. The texture and taste will definitely a better alternative for me.

IMG_5662

The cake is made with simple ingredients, no complicating beating using expensive equipment, why not making one today and try. You can add nuts if you want to, can add some Nescafé if you prefer, change to some other types of biscuits if this suit your taste buds.  Remember, boiling method can give you a better shape but the texture is slightly harder. Chilling method is very creamy but a bit messy. If you asked me which do I prefer? For small gathering at home, chilling method. As gift or buffet style, boiling method…. Last but not least, I forgot to say that this taste like Asian Kit Kat.. Ha-ha.

IMG_8477

Cheers and have a nice day.

IMG_8469


  • For more recipes, you can refer to my RECIPE INDEX (updated as at 8 June 2014)  here and you can follow me at PINTEREST or visit the blog’s FACEBOOK PAGE to keep abreast of my future posts.  

IMG_8481

Is Pavlova Originated From Australia, Russia or New Zealand?–Strawberry and Blueberry Pavlova

IMG_5533

INTRODUCTION

Yesterday is really a busy day for me. I have been making mayonnaise, baking pizza and this Pavlova. By the time  I have to take picture of this Pavlova, I was feeling extremely tired and after I ate one slice and kept 3 slices for other families members, I gave away the rest to my neighbour who were having some sort of house gathering. I hoped I have adequate pictures to share with readers.

IMG_5529

Pavlova actually sounds familiar to me. Just like Vladimir, Sergei, Liana and Nathasia, the name sounds so Russian. I have spent some times in Russian before and one of my ex-colleagues do carry the name Pavlova. In fact, I do not know it is the name of one of the famous desserts until very recently when I did a read up on meringue, macaroons and other egg whites based pastry items.

IMG_5535

WHAT IS PAVLOVA?

Per Wikipedia:

Pavlova is a meringue-based dessert named after the Russian ballet dancer Anna Pavlova. It is a meringue dessert with a crisp crust and soft, light inside.

The dessert is believed to have been created in honour of the dancer either during or after one of her tours to Australia and New Zealand in the 1920s. The nationality of its creator has been a source of argument between the two nations for many years, but formal research indicates New Zealand as the source.

The dessert is a popular dish and an important part of the national cuisine of both countries, and with its simple recipe, is frequently served during celebratory and holiday meals. It is a dessert most identified with the summer time, but is eaten all year round in many Australian and New Zealand homes.

(http://en.wikipedia.org/wiki/Pavlova_(food))

Meringue based dessert will mean this dessert only utilizes egg whites and some sugar. It is not really a common dessert in Singapore and Malaysia. The challenge is to prepare a Pavlova that had a crispy outside of soft cotton liked inside. Preparation is not really that tough but patience is needed in the baking of this simple meringue.

IMG_55331


WHAT IS NEEDED

IMG_5468

  • 4 egg whites (at room temperature)

  • 1 1/4 cups of icing sugar or castor sugar

  • 2 teaspoon of potatoes starch/corn starch

  • 1 teaspoon of lemon juice

  • 1 teaspoon of vanilla extract

  • Fresh fruits of your choice. In this illustration, I have used fresh strawberry and blueberry.

IMG_5522

Note:

  • The egg whites have to be at room temperature. Colder egg whites are more difficult to beat to peak condition.

  • I have substituted the castor sugar with icing sugar as it will be easier for it to dissolve in the egg whites. If it is difficult for you to get icing sugar, just blend the castor sugar using a food processor.

  • Usually, corn starch is used. However, as I did not have corn starch with me, I have used potatoes starch. By the same logic, sweet potatoes starch and tapioca starch can also be used. What is needed is a small quantity of flour that is light and smooth to help holding the Pavlova structure.


STEPS OF PREPARATION

IMG_5572

  • In a baking tray. have a piece of baking/parchment paper. Use a 8” round baking tin and draw a big circle on the baking sheet. Set aside for later use.

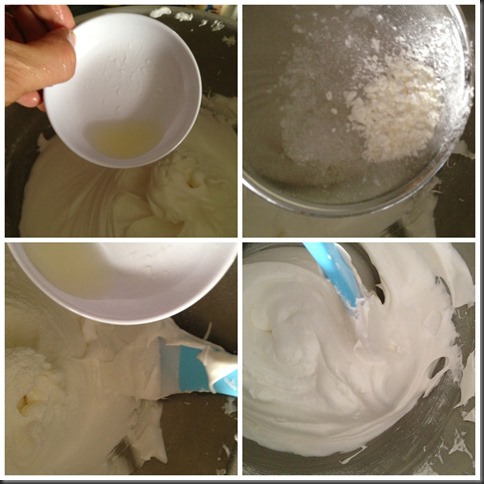
  • In a mixing bowl, Add egg white and beat until soft peak form. Add in icing sugar spoon by spoon and continue to beat until the egg white is thick and glossy.

IMG_5573

  • To check if all sugars have been dissolved, rub a bit of the beaten egg whites (meringues) between the thumb and index fingers. If it is smooth, it means that the sugars have been dissolved. If it feels sandy, it means that the sugar has yet to be dissolved. Continue beating for another 1-2 minutes and test again.

  • Add in vanilla essence and continue beating until it is well mixed.

  • Off the machine if the meringue is glossy and in its stiff peak form. Stiff peak form means when you hold up the beater, the meringue can point upwards as shown in picture number 4.

IMG_5574

  • Take out the mixing bowl. Add/sprinkled the lemon juices. Sift in the potatoes/corn flours.

  • Use a spatula to fold in the flour and lemon juice quickly. Handle lightly until all the lemon juice and flour are well mixed.

IMG_5575

  • Place the meringue on top of the baking paper within the circle drawn. Smoothing the edges.

  • Baked in the oven at low temperature of 130 degree Celsius for about 60-90 minutes or until the outer crust are dry and pale cream colour.

IMG_5576

  • IMPORTANT: Leave the Pavlova inside the oven with the door ajar and let it cool inside the oven until it is completely cool. It is generally okay if the middle part of the Pavlova collapsed as we will be decorating with whipped cream.

  • PRIOR TO SERVING, beat about 200 ml of whipping cream until top peak and placed on top of the Pavlova. Place your fresh fruits on top of the Pavlova.

IMG_5526


CONCLUSION

Pavlova is good to be served as a dessert. It’s sweet crusty tops and sides goes well with most fruits. One can also consider using fruits such as Kiwi and mangos. The Pavlova can be prepared in advance and keep for 3-4 days in an air tight container. Of course, the size of Pavlova have to be reduced accordingly for it to store in the container. It can also be made into a one bite size.

IMG_55391

If you are health conscious, you can substitute the whipped cream to low fat whipped cream and slightly reduce the amount of icing sugar used. Remember whipped cream and fruit toppings shall only be used prior to serving as the whipped cream and fruit juices will make the meringue soggy if not consume on time.

Hope you like the post today and have a nice day. Cheers.

newmarvelousmondays-button 9VwhltV

 IMG_5524

Agar Agar is not the same as Agak Agak… Agar Agar is Red Algae !!

IMG_5342 

INTRODUCTION

Agar Agar is a Malay word for red algae, apparently it has been accepted as an English word. It is hard for a lay man like me to explain agar agar, so  as usual, I will quote Wikipedia’s explanation of agar agar for reader’s understanding.

Per Wikipedia:

“The word “agar” comes from agar-agar, the Malay name for red algae (Gigartina, Gracilaria) from which the jelly is produced. It is also known as kanten, China grass, Japanese isinglass, Ceylon moss or Jaffna moss. 

Agar-agar is a natural vegetable gelatin counterpart. White and semi-translucent, it is sold in packages as washed and dried strips or in powdered form. It can be used to make jellies, puddings, and custards. For making jelly, it is boiled in water until the solids dissolve. Sweetener, flavouring, colouring, fruit or vegetables are then added and the liquid is poured into moulds to be served as desserts and vegetable aspics, or incorporated with other desserts, such as a jelly layer in a cake. “ (Source: http://en.wikipedia.org/wiki/Agar)

IMG_5320

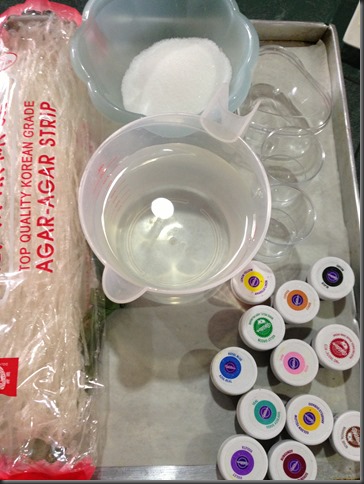
Agar agar is one type of traditional dessert commonly found in Singapore and Malaysia. It is easy to prepare and is a common item being served during Chinese New Year and other festivals. To make it requires no complicated kitchen utensils, just need to boil and mould. Traditionally, households used dried agar agar as shown in this illustration as the raw ingredient. However, in recent years, most households have started to use agar agar powder instead of dried agar agar.

IMG_5355

Traditionally, due to the lack of weighing scales, sophisticated kitchen utensils and written recipes, housewives usually prepare agar agar based on words of mouth using common kitchen items such as cups as the unit of measurement.

I was told that previously, the recipe is 1 cup of soaked agar agar will requires 1 cup of sugar and 1 cup of water. I liked this type of simple ratio recipe, however, when I tried out, it just turned out to be extremely sweet and tough.

Well, that type of recipe may not be acceptable nowadays since we have so many resources available. In olden days, the challenge to make a good agar agar is to get hold of the correct ratio of water to agar agar. The end product shall be slightly chewy and not to soft like the current jelly. In order to achieve such texture, housewives some times dried their agar agar under the sun. They believed that the less water content in the agar agar, the better it is. In fact, some house hold cut it into one bite size, dried it under the sun until it is very chewy, store in a container and eat it as a snacks or sweets!

IMG_5328

In recent years. preparation of agar agar is not entirely based on texture since all ingredients can be measure rather accurately. It is rather easy but the challenge had shifted to the colour combination and moulding. If you have the relevant mould, you can create your own design based on your creativities. One of the most trendy agar agar moulding will be agar agar moon cake where the agar agar were mould into a moon cake shape. Inside the agar agar moon cake, there is a yellow colour balls resembling the egg yolk.

Again that is deal with planning, making and moulding. It can be rather stressful if there are no prior planning on the colour selection and mould selection. Of course, it can be as simple as just a single colour one flat piece of agar agar. The taste will definitely be the same but of course it is less impressive to your guest.

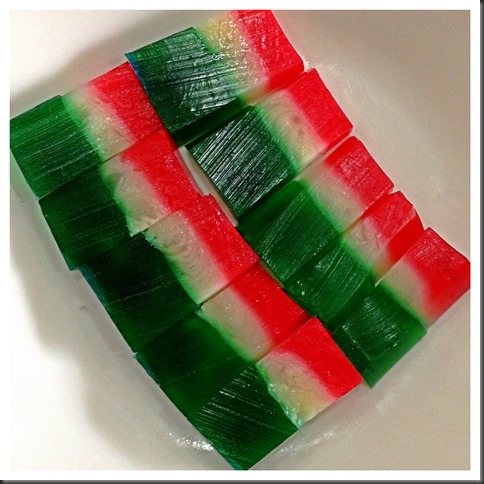
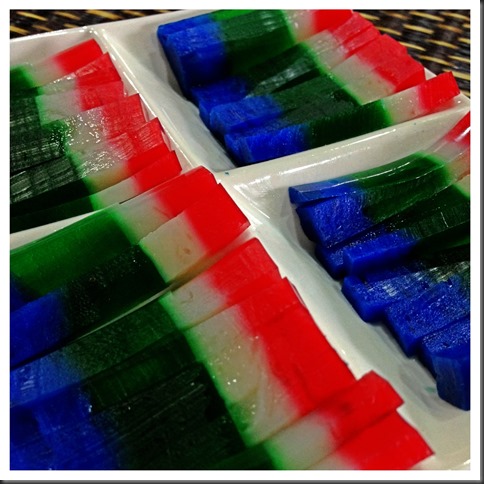
This illustration will only provide you with the simplest layered agar agar procedures. You can chose your own colour and shape of your mould. I have use some heart shape mould and the colour is purely selected for this illustration only. At home, we will not go until this extent and usually have one to two colours plus 2-3 layers of agar agars.

IMG_5363


NATURAL COLOUR SELECTION

There are a lot of natural colour available and you can totally throw away the artificial colouring, if you wish. Suggested colours are:

  • White and milky – condense milk, coconut milk, fresh milk
  • Chocolate – instant coffee paste, chocolate  paste or powder
  • Red colour – red colour dragon fruits paste
  • Yellow – mango paste
  • Green – pandanus paste
  • Violet or blue – pea flowers
  • Purple –black currant drink
  • Red – strawberry paste
  • Dots in the agar agar –  dragon fruits

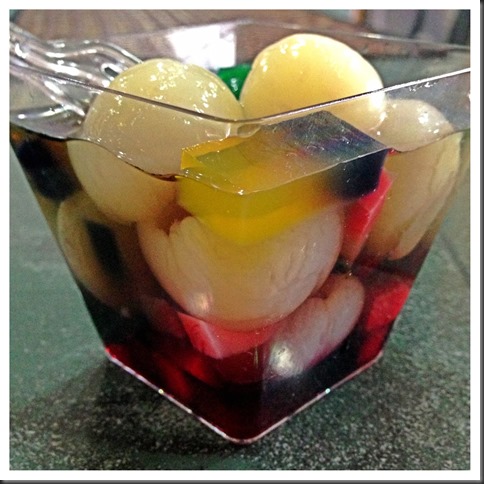
Besides the above colours, many varieties of cut fruits can also be included. For example, yam cubes with coconut milk is a good combination. Coffee with milk is another welcoming combination to make into agar agar. Canned Longan or lychee with black currant flavoured agar agar is also a presentable dessert. All this is very much depend on reader’s creativities to prepare one that is acceptable to the guest or family members.

IMG_5353


WHAT IS REQUIRED

IMG_5301

I have intentionally left out the quantities as it is best that you follow the instruction on the the package of agar agar that you bought. Be it dried agar agar strips as shown above or agar agar powders, they will have detail instructions on the quantity of water required. It is best that you follow these instruction as every brands of agar agar will requires different liquid to reach the desired textures.

  • 1 package of agar agar strip (about 38g)
  • Some water (refer package)

  • Some sugar (refer package)

  • Some permitted food colouring of your choice or the type of natural colouring ingredients as mentioned above.

  • Some moulds of your preference

  • Few leaves of Pandanus leaves – bundled (optional)

IMG_5346


STEPS OF PREPARATION

IMG_5371

  • Wash the dried agar agar by soaking in clean water for 1-2 minutes.

  • In a pot, put in the water as stated in the package and add dried agar agar. Use medium heat to bring the water to boil. Continue stirring until all the agar agar are dissolved.

  • Add in the required sugar into the agar agar solution and stirred until dissolve. Turn the heat to the minimal. You just need the heat to prevent the agar agar from solidifying while you do the layering. Alternatively, you can put your agar agar in a big basin of hot water.

IMG_5372

  • Take out some container of your choice, add in your preferred colouring and  pour into the mould.

  • Once done, put it in the freezer or chiller or under the fan and once it is set on the top, you can pour the second layer. How long will it take will depends on your room temperature, the concentration of your agar agar and the types of you container. For my today’s illustration, it is rather fast because the container is very small and my agar agar is quite concentrated.

  • Repeat the same for different layers until all the agar agar were used up.

  • Put in the fridge for another 10-15 minutes.
  • Remove from the mould, cut into your desired size and shape and put in your preferred serving plate.
  • Best served cold as a dessert.

IMG_5361


CONCLUSIONS

This is extremely simple. It is best that you based on what is stated in the package label to prepare the agar agar. Different brands will have different instructions.

Though this illustration is using traditional dried agar agar, you can use agar agar powder instead. The price for both dried agar agar and agar agar powder is rather economical and in my humble opinion, it is still a good choice of snacks or desserts. Variations are many and you have full flexibility to choose your desired flavour, colour and moulding. You guest will surely be impressed by your creativities.

Try this traditional Asian dessert and I am sure you wouldn’t regret preparing it. Hope you like the post today. Have a nice day and cheers.

IMG_5348

Don’t Sandwich Me, I Can’t Breathe … Baked Hasselback Potatoes With Bacon And Mozzarella Cheeses..

Processed with MoldivIMG_3282

INTRODUCTION

I remembered that  immediately when I read the recipe Easy Bacon Potatoes published by Ms. Paula Jones’s,  I immediately shared in my Google Plus timeline and promised wanted to try out the recipe.

Yesterday, when I needed to prepare a lunch in a rush, I suddenly thought of this recipe but was unable to locate it. I searched high and low but in vain.

Therefore, based on my recollections, I just “anyhow” put together bacon and potatoes and this is what I have prepared.

Processed with Moldiv

Taste is superb but sizes and some of the ingredients were totally different from Ms. Paula Jones recipes from www.callmepmc.com. Hers’ definitely look more appetizing but too sad, I only managed to find out the recipe when I am searching to credit her recipe while writing this report.

IMG_3278


WHAT IS REQUIRED?

IMG_3293

  • 10 small washed baby potatoes

  • 4 thin pieces of bacon cut into small rectangular shape

  • 1 teaspoon of general Italian herbs for Italian cooking (optional)

  • 1 tablespoon of soft butter

  • 1 teaspoon of salts

  • 1 cup full of mozzarella or cheddar cheese or parmesan cheese

  • 2 large tablespoons of mayonnaise or sour cream (optional)

  • 2 slices of breakfast cheese (optional)

Processed with Moldiv


STEPS OF PREPARATION

 IMG_3294

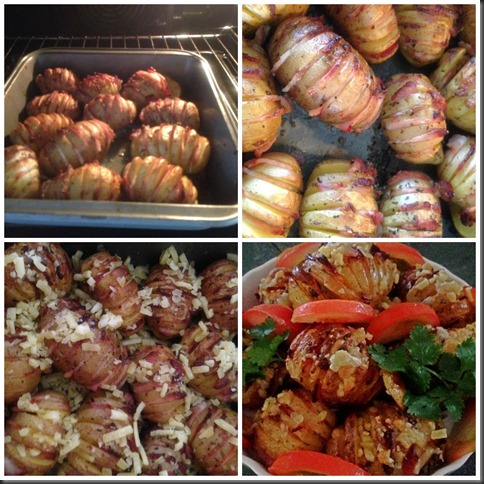
  • Wash your baby potatoes. Slightly cut off one side so that the potato can stand on its own.

  • Use a sharp knife to slice open the potato with about 0.5 cm thick towards the direction of the bottom but do not slice through.

  • Rub with salt, butter and Italian herbs (optional). Set aside for next steps.

IMG_3295

  • Slice the bacons into thin strips and place it in between the spaces between the cut potatoes.

  • Place the potatoes in low casserole dish or baking tin.

IMG_3296

  • Baked in the oven at 180 degree Celsius for at least 30 minutes.

  • Take out and sprinkled with mozzarella or cheddar cheese and baked for 10 –15 minutes or until the cheese had melted.

Processed with Moldiv

  • Preferably served hot with generous amount of sour cream or moderate amount of mayonnaise or toppings of your choice. Plain serving is acceptable if preferred.

  • This is good to go with any Western set meals and as an alternative for baked potato skins, mash potatoes, potato chips or any other carbohydrate loaded meal items.

IMG_3276


VARIATIONS

  • If you runs out of time, you can always sliced it directly instead followed what I described above. You can refer to Ms Paula Jone’s version here.

  • All ingredients mentioned above are mostly substitutable to suit your family taste buds. If you are health conscious, you can lower the usage of mayonnaise or go for low fat mayonnaise dressing. Alternatively, you can also consider replacing the bacons with chicken frank or even fresh meat slices (for steamboat) if you preferred. If you preferred fresh Western herbs, you can put in dill, basil, rosemary and etc.….Full flexibility is the key and I encouraged readers to think out of the box and made one that suits your family’s taste buds.

  • Instead of putting mozzarella cheese, you can also substitute with breakfast cheese slice. As I have run out of mozzarella cheese, I decided to place a slice of breakfast cheese and it tasted equally well.

Processed with Moldiv

CONCLUSION

This dish is simple though the process is a bit laborious. However, you can always cut through the potatoes if you run out of time. It is a good choice as a party “snack” (depending on your size), a side meal and some simple home gatherings. It is a comfort  food and the combination of bacon, cheese with potatoes runs well beyond your visual expectations. The taste is just superb. Try and let me know.

Processed with Moldiv

Hope you like the post today and have a nice day. Cheers.

IMG_3326

  GUAI SHU SHU | Guai Shu Shu is a “shu shu” that is “guai“….


  • For more recipes, you can refer to my RECIPE INDEX (updated as at 20 November 2014)  here and you can follow me at PINTEREST or visit the blog’s FACEBOOK PAGE to keep abreast of my future posts.  

Processed with Moldiv

What I “Ate” Today (家常便饭系列)…. 17 August 2013- Special

IMG_3227

You may be surprised about this title! In fact, the title is not correct either. What I am going to post is not “what I cooked today” or “what I ate today”. It was a gathering at one of my relative’s house and she had cooked some Chinese dishes that are not common among Fujian or Guangdong Province.

My relative is from Jiangxi Province and therefore the food that she cooked were rather different! As you all know, Singaporean and Malaysian Chinese are descendants of immigrants mainly from the South Eastern Coastal Fujian and Guangdong Province.


JIANGXI CUISINES

Per Wikipedia:

Jiangxi (Chinese: 江西; pinyin: Jiāngxī; Wade–Giles: Chiang-hsi; Postal map spelling: Kiangsi, Gan: Kongsi) is a province in the People’s Republic of China, located in the southeast of the country. Spanning from the banks of the Yangtze River in the north into hillier areas in the south and east, it shares a border with Anhui to the north, Zhejiang to the northeast, Fujian to the east, Guangdong to the south, Hunan to the west, and Hubei to the northwest. (http://en.wikipedia.org/wiki/Jiangxi)

As compared to Nanyang Chinese (Malaysian and Singaporean Chinese), in a household meal, they are more dishes but with a smaller portion. For us, we will usually serve 3 dishes and 1 soup, for them the dishes can be as many as 6-12 dishes. Today, the host is kind enough to cook us 7 dishes (excluding desserts and sweet soups). Jiangxi dishes were rather spicy (chilli hot) and as my kids were having meals with us, for some dishes, they have to prepare both the spicy and non spicy version.

Note than I am currently on a vegetarian  diet and since I did not told them in advance, I have taken my meals before joining them.  Therefore, I did not join them for meals.


SPICY AND SOUR SHREDDED POTATOES (酸辣土豆丝)

IMG_3226

Yes, this is my favourite. Potatoes were julienned into thin strips. There were then soaked in cold water until all the starch were gone. This will make the potatoes “crunchy” and water have to be changed regularly. Look at the thin strips, these were all manually done. They were then stir fried with spring onions, black vinegars and chilli. This is something that I have yet to share the cooking illustrations with readers but I can assure you it is something simple yet the taste is superb. Kids are fighting for this.


BRAISED BEEF (酱牛肉)

IMG_3221

I do not know if there is any translation of this dish. It is basically beef braised in dark soya sauce (and herbs and spices). It was then air dried. If it was kiln dried, it will become smoked beef. This is a form of meat preservation that can be commonly found in many parts of China. My relatives have prepared these meat in China and brought it over.

I still remembered  when I was stationed in Changchun, China about 10 years ago, one of the past time is to buy some braised chicken drumsticks and ate it in the hotel. It is delicious and thinking about it make me drooling. Depending on the regions, the preservations can be sugar based or salt based.


TOMATOES FRIED WITH EGGS (番茄炒蛋)

IMG_3222

A common household dish in China. Besides stir frying, another way of cooking this combination is making it into a soup.

Tomato is not a common vegetable in my  traditional house cooking. Tomatoes are considered vegetables imported from other countries (though this may not be true any more). This is evidenced in its Chinese name literately translated as Western Persimmon (西红柿)or Foreign brinjal (番茄)。In Hokkien dialects, it was called Caucasian Brinjal (angmokio)!  Therefore, my mom seldom cooked tomatoes in the house.

As my girl is a tomato fanatic, this will definitely her top choice. However, as my boy is tomato phobia, this is definitely a good dish to make my boy eating tomato.  Though he is a tomato phobia but he is an egg fanatic. I usually requested that if he wanted to eat 2 tablespoons of eggs, he will need to finish 1 tablespoon of tomatoes. Haha


STEAMED CHINESE SAUSAGE WITH CHINESE BLACK FERMENTED BEANS (腊肠蒸豆豉)

IMG_3223

The Chinese sausages were prepared by my relatives in China and brought it over. You can hardly find any fats in the Chinese sausages. Before I am on my vegetarian diet, I have tried the sausages before and it is delicious.

The Chinese sausages were cut into slices, steamed with Chinese black fermented beans and chopped garlics. May be after my vegetarian diets end, I shall cook this. Good thing about having this post is that it can remind me of what I should cooked when I run out of ideas.


PIGTAILS PORK BELLIES SOUP (猪尾猪肚汤)

IMG_3224

I never have this combination before, pork bellies plus pigtails. The reason is because both meats have different cooking times. You know pork bellies are rather difficult to cook until soft. So, it is not easy to cook this soup. Even if you used pressure cooker, both items will have to be cooked separately. There is no vegetables or white peppers. It is pure meat broth!

If you ask me whether it is yummy or not, of course, I can’t tell you directly because I did not taste it. However, from my years of cooking experience, I can tell you that it is a good soup because the soup had turn milky meaning all the gelatine from the meat have been dissolved in the soup/broth.

Don’t believe me, freeze it and you will see that it become jellish and you can use a knife to cut it into small pieces. Teochew dialect group also have a dish that after braising certain meat for a long time, they cut the meat into very small pieces, freeze the broth and become a jelly. The jelly was then cut into small pieces and served as cold dish (猪头粽)


STIR FRIED CHINESE WATER CRESS (清炒西洋菜)

IMG_3225

I remembered when I told my mother in law and wife to stir fry water cress previously, they are against it as they always used water cress to cook soup. It is generally true that most Chinese dialect groups like to boil soup with this vegetable. However, when I travelled to China, I always have stir fried water cress in restaurants. Usually, this vegetable were stir fried using garlic without any other ingredients.

Try and tell me whether it is nice or not! Remember that you have to stir fry the vegetables using high heat, otherwise, it may be bitter.


STEAMED KUDZU FLOUR COATED PORK WITH PUMPKIN (南瓜米粉肉)

IMG_3220

When I asked for the name of the dish, I was told  “namguamifenrou”. However, I can’t find any rice vermicelli or Beehoon. Later she explained the 米粉 is not rice vermicelli, it means “rice flour”. Though the name is called rice flour, the coating of the meat can be any types of flour. It can be corn flour, sweet potato flour, potato flour and etc.…But today the flour that she used is kudzu flour (葛根粉). Again this is brought from Jiangxi and she disclosed that this was made from wild kudzu roots.

Kudzu has many health benefits and among them are relief symptoms of postmenopausal women, reducing alcohol intake, alleviating cluster headaches, managed metabolic syndromes etc. etc. etc. In Singapore, we do have a type of Chinese instant flu medicine called Kudzu soup (葛根汤) that you consumed when you have a fever and it is believed that it will help to reduce your body temperature. You may want to know more about kudzu from here.

Coming back to the dish. Meat were seasoned and coated with kudzu flour. The meat was then placed on top of the pumpkins and steamed under high heat until the pumpkins were soft. The purpose of the flour is to retain the meat juiciness in the process of steaming. Any meat juices that escaped will dripped into the pumpkins those flavoured the pumpkins.

Lastly, I want to convey my sincere thanks to my relatives who cooked us a sumptuous meal and we really appreciate that.

Hope you like the post today and I find this post is meaningful to share with readers about other different types of Chinese cuisines.

Have a nice day and cheers.

CCC – Cheesy Cassava Cake–A Modified Version of The Traditional Nonya Kuih Bengka Ubi

IMG_08801

INTRODUCTION

Tapioca or cassava is a staple root widely consumed in regions like Africa, Asia, Oceania and etc. It is easily propagated and commonly found in South East Asian countries. Thailand, Vietnam and Indonesia are the top three exporter of tapioca in the world.

Tapioca or cassava cake is a very common household cake of any races (be in Chinese, Malay, Indian or other races) in Singapore and Malaysia. However, in the Peranakan cooking, Kueh Bengka Ubi is one the most famous items in its cuisines.

IMG_08491

There are generally two methods of making cassava cake, by steaming or baking. Chinese preferred to have its cassava cake steamed, as soft as possible and served with shredded coconut (at times this is needed as the cake are so soft and smooth that it is shapeless). On the other hand, the Nonya preferred to bake the cake using charcoal stoves or ovens. Usually, the baked cassava cake have a slightly burnt crusty top and the body is yellowish in colour and texture is rather “elastic”. It is very aromatic with a mixture of fragrances from pandanus leaves, coconut milks and eggs.

 IMG_0888


CHEESEY CASSAVA CAKE

This recipe is my own without making reference to any recipes in the internet. As usual, I have prepared based on what I think is workable, memories on the cake that I have tasted before and one or two attempts a few months back.

This cake is different in its texture and its taste. Besides the normal fragrance of the traditional cassava cake, the  cake have a rich and cheesy fragrance. In addition, as you can infer from the pictures above, the texture is moist but not soggy or sticky. In fact, you can cut it into any shape that you want.

IMG_08501

The incorporation of cream cheese had made the cassava cake smoother and creamier. It helps to heighten the flavour of the eggs, coconut milk, butter and the cassava original flavour.

I have used small sago balls to enhance the texture. Grated cassava, under high heat can turn very sticky and subsequently become very chewy. The additions of sago balls somehow will help to sooth the texture making it even smoother.

IMG_08651


WHAT IS REQUIRED

IMG_0830

  • 100 g of sago balls – soaked in water (Volume of water should be about 2 times of the sago ball and note that the balls will expand)
  • 150 g of butter
  • 200 g of cream cheese
  • 250 g of granulated sugar

IMG_0829

  • 4 eggs
  • 200 ml of thick coconut milks
  • 1 kg of finely grated tapioca or cassava. You can buy in the market and grate it yourself. If you want to grate it yourself, you will have to use the food processor to chop it as finely as possible, and then you can proceed to use  a blender (instead of an cake mixer) to perform the following steps. You will need to put in your chopped cassavas, eggs, coconut milks and blend it to as smooth as possible).
  • Red and green (pandanus) colouring (optional) – I have resorted to the use of red and green colouring this illustration as I find that the traditional cake are rather dull in colour and I want my cake to look more colourful and appetizing.

IMG_08731


STEPS OF PREPARATION

IMG_0875

  • Pre-heat your oven to 180 degree Celsius.
  • Get ready a 8 inch x 8 inch baking tin. Slightly grease the tin with either butter or cooking oil. Dust some wheat flour if necessary.
  • In the mixing bowl, beat your butter, cream cheese and sugar using medium speed until evenly mixed. Note that the purpose of this step is not to let you have a fluffy cake like other cake recipes. The beating here is mainly a mixing step, a step to ensure that the butter and cream cheese are evenly mixed.

IMG_0876

  • Once well mixed, add in your eggs one at a time and followed by the coconut milk. You should only use low speed for this simple mixing purpose. Scrap out the bottom and sides of the mixing bowl to ensure that there are not cheeses sticking to the bowl.
  • At this stage, you will notice that the mixture become more and more watery which is normal and hence SPEED SHOULD BE LOW as long as mixing can be performed.

IMG_0877

  • Add in the grated cassava and soaked sago balls. “Beat” at the lowest speed possible. You will see that after 1-2 minutes of slow mixing, the liquid start to disappear as it was further absorbed by the sago balls.
  • Separate into approximately 4 equal portions. One portion with red colouring, one portion with green colouring and the other two portions maintain the original colour.

IMG_0878

  • Pour the uncoloured portion of the batter to the tin, followed by green and red portion. It is entirely up to readers as to what design you want your cake to cook like. For me , I have opted to have some simple big stripes design. As the batter is not very watery, it is rather easy for you to design your pattern.
  • Baked using 190 degree Celsius for about 30-45 minutes or until set. Until set means when you push the baking tin, the centre of the cake does not “vibrate”. Another test is that you insert a skewer in the centre of the cake, the skewer come out clean. However, as this is a cassava cake, cassava when hot can be slightly slimy and as long as you taste it is not raw, the cake is consider as cooked.
  • Leave the cake in the tin for about 10 minutes before turning out onto a wire rack to cool completely.
  • Cutting of cake is  best done 3-4 hours after baking to ensure that centre of the cake is completely cool. As long as when you cut the cake, there are some cake stick to the knife, your cake is considered as not cool completely.

  • Serving suggestions – you can serve with shredded coconut with white sugar and hot tea or coffee.
IMG_08791


CONCLUSIONS

  • This is a modified recipe by incorporating cream cheese and sago balls to the traditional cassava cake. The main aim is to smoothen the cake texture and make the cake creamier along with the fragrance of eggs, coconut milk and cassava.
  • Resulting from the modification, this will be totally different from the traditional cassava cake that you may have tried. It is soft, slightly springy and with cheesy coconut fragrance.  The shredded sugar coconut with heighten the palate and reach another higher dimensions.
IMG_08821
  • It is easy to cut into your desired sizes and looks presentable in tea party as a snack items.
  • If you think that you are a professional Nonya cake baker, you should try and tell me what is your opinion. If you are new to pastry making, this is one item that will not ruin your confidence.

Hope you LIKE it and have a nice day. Cheers

IMG_0889


IMG_08811


For more recipes, you can refer to my RECIPE INDEX here and you can follow me at PINTEREST or visit this blog’s FACEBOOK PAGE .

group-board-picture72222222222222222[2]


If you are a Pinterest user and you are interested to have more recipes, you can join or follow this Pinterest Board set up by me  where there are more than 400 recipes worldwide and pinned by various bloggers: FOOD BLOGGERS AND FOODIES UNITED PINTEREST BOAR

Let’s See How An Asian Make The Tomato Pasta Sauce From Scratch ….

Processed with Moldiv

INTRODUCTION

This is the homemade pasta sauce from scratch. I learned this many years ago from one of my French friends staying in Paris, France. When I visited her, she is preparing the pasta sauce and I can vividly remember certain steps in the preparation but sad to say, I can’t really recall the happy time we had during the dinner.

IMG_67861

This post will consist of two parts:

Part 1  –  the making of homemade pasta sauce and

Part 2 – the making of baked pasta with pineapple

Processed with Moldiv


PART I – MAKING OF HOMEMADE PASTA SAUCE


WHAT IS NEEDED

This recipe is adequate to make tomato pasta sauce for at least 6 persons and have about 600 grams left for baked pasta.

IMG_0701

  • 1 kg of tomatoes 
  • 2 big size capsicums (preferably red in colour but green colour is acceptable) – optional 
  • 3 big stalks of celery – optional and in this illustration, I did not include this 
  • 3 large onions 
  • 6 chicken franks – optional
  • 500 g of fresh button mushroom (can be substituted with canned mushrooms) – optional 
  • 500 g of minced meat (beef or chicken or pork). In this illustration, pork was used.

IMG_0739

  • 20 cloves of garlic 
  • 30 grams of butter (can be substituted with olive oils)
  • 1 tablespoon of Italian dried herbs 
  • 100 grams of mozzarella cheese 
  • 10 tablespoons of tomato ketchups (optional, for “colouring” purposes) 
  • 1 pack (about 300g) of pasta of your choice. 
  • Seasoning (Salt, black pepper, sugar)

Processed with Moldiv


PREPARING THE RAW INGREDIENTS……..

IMG_0706

  • Clean the tomato and all other raw ingredients.
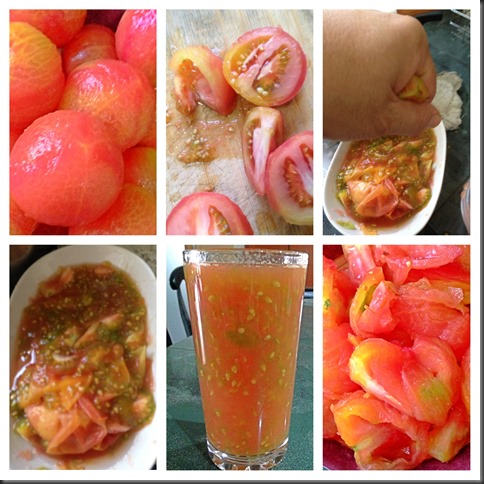
  • In a big pot, bring some water to boil. Place the tomato into the hot water and let it boil for a few minutes or until the skin slightly peeled it off. Note that as long as the skin start to break, you can transfer to the cold water as mentioned below.
  • Get ready a pot of icy cold water. Place the tomato in the icy cold water.
  • Peel off the skin by hand which is rather easy.

IMG_0704

  • Cut opened the de-skinned tomato. Use a spoon to scoop out the seeds.
  • Use your hand to squeeze off the seeds and/or juices into a clean container.
  • You can either throw away these juices or keep it as tomato juices. It is okay to drink the seeds as it is very fine and slippery.
  • Set aside the tomato flesh for future uses.

IMG_0741

  • Traditional way of making pasta sauces do not really utilize food processors. However, I have opted to use food processors to cut short the braising time.Traditionally, all items were julienned or cut into small chunks for the cooking.
  • Use the food processors to cut the garlic and onion in small chunks (need not to be overly fine since you are going to braise them), set aside.
  • Use the same blender to blend the red and green capsicum or celery (if any). For celery, you will need to de-skin the celery first before you put into the blender. The red and green capsicum and celery will help to add volumes and flavour to your pasta sauce. If only tomato is used, it may be too sour.

IMG_0742

  • Cut the chicken franks into small chunks. This is optional and rather “Asian” taste. I have put this because my kids love to eat chicken franks.
  • Cut your button mushrooms into thin slices. Canned mushrooms works equally well.
  • Minced meat of your choice. Traditionally, beefs were used. As I do not eat beef, I have substituted with minced pork or at times minced chicken. I have bought the ready made minced meat from the supermarket.
  • Grated mozzarella cheese. I have opted to buy the grated mozzarella cheese but it is not necessary at all. If you have un-grated cheese, you can just cut a slice (without grating) and put it in the sauce later. It will melt subsequently.

THE COOKING BEGINS…..

IMG_0773

  • In a big pot, put the butter and let it melt.
  • Add in the chopped garlics, stir fried until it turns slightly brown or the aroma start to emit.
  • Add in the chopped onion and stir fry for 2 minutes.
  • Add in the chopped green and red capsicums and stir fry for another 2 minutes.

IMG_0774

  • Add in the chopped tomato and bring them to boil under high heat.
  • Once boiled, turn to medium heat and let the mixture simmer for at least half an hour.
  • Add in seasoning and herbs and let them boil for another 5 minutes. Seasonings can include pinches of sugar, black pepper and salt. As for the Italian herbs, I have bought the over-the-counter dried herbs which consist of basil, oregano, garlic, thyme, red bell peppers and parsley.
  • If you just want pure pasta sauce without any meat. You can stop here and you can keep it in sterilized containers and keep for at least a month in the fridge. The steps that follows are meat sauces for the spaghettis or other pastas.

IMG_0775

  • Add in your minced meat and cooked for another 2-3 minutes.
  • Add sliced mushrooms and chicken franks.
  • As this is home made pasta sauce, the colour will very much depends on the types of tomato that you bought. In Singapore and Malaysia, it is rather hard for you to find Roman tomato, we can just use whatever tomatoes we have. However, the colour may not be that appealing, you can add in bottled tomato sauce to make the colour darker. In addition, it will help to enhance the flavour of the pasta sauce.

IMG_0776

  • Continue to boil for at least 10 minutes, add mozzarella cheese and once boiled, off the heat and your home made pasta sauce is ready.

Processed with Moldiv


COOKING THE PASTA…..

This is rather standard and you should read the instructions of the packaging for the pasta that comes with it.

IMG_0783

  • In a pot with about 2 litres of water, add 2 tablespoons of cooking oil (olive oil) and pinches of salt. Bring to boil under high heat.
  • Add the pasta and continue to boil for 8-10 minutes or till desired texture.
  • Drain away hot water and pour some cold water on top of the pasta for one minute.
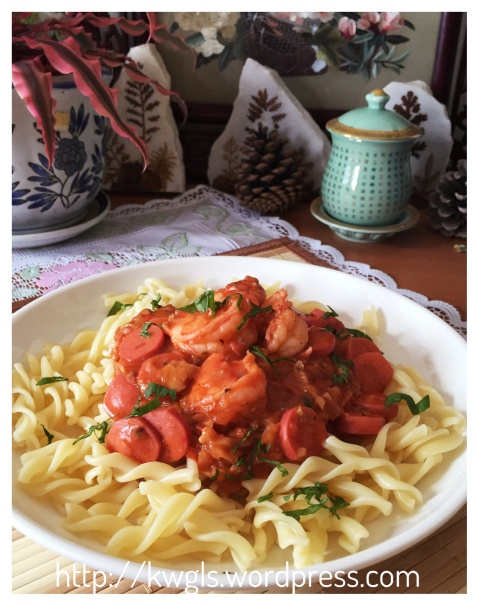
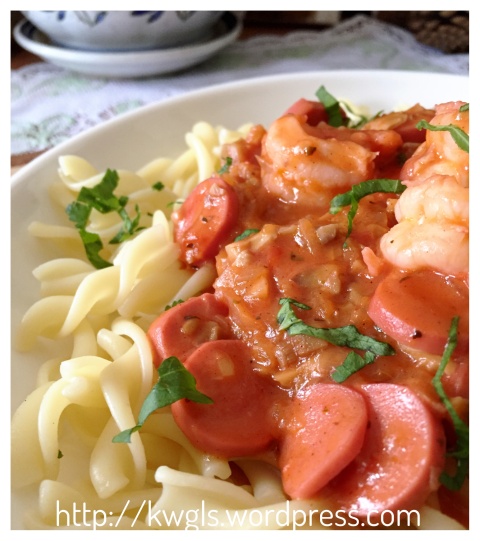
  • Drain, add in pasta sauce and garnished with parsley or any other desired herbs  and it is ready to serve.

IMG_0708


Processed with Moldiv


CONCLUSION

  • Home made pasta give you the a full flexibility of adapting the ingredients and herbs to your family taste buds and health objectives. Most ingredients are substitutable and trial and error or mix and match appeared to be the best approach to design your own favourite pasta sauce. I have also opted to use food processor in the preparation process and that have cut short the preparation tremendously.
Processed with Moldiv

For my readers from Western countries, since baked pasta and pasta sauce are more popular in your countries, tell me if you think the pasta is yummy and if the baked pasta will suit your taste buds.

Hope you LIKE the post and have a nice day. Cheers.

Processed with Moldiv


Processed with Moldiv

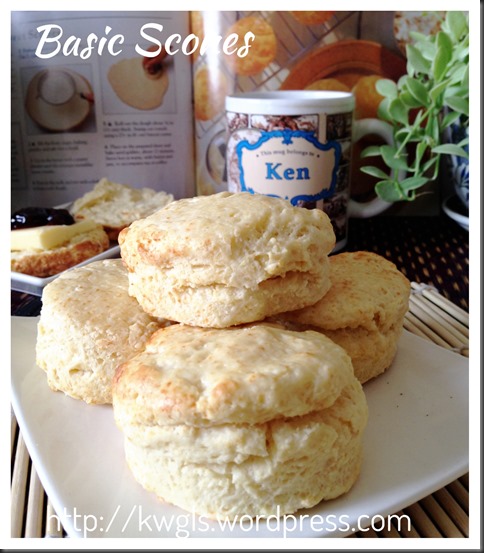
Basic But Presentable, Basic But Irresistible…Basic Raisin Scones Shared… (葡萄干司康)

IMG_5363

IMG_6460


Updated Post on : 7 September 2014

This post was issued on 7 July 2013, more than a year ago. Then I just started my blog and I barely have any idea of photo taking for the recipes. I felt that I have not do any justice to this post as it is a workable recipe that I like very much. Since today I am preparing this for breakfast, I have decided to do another photo shot.

IMG_5385

All scones recipes are basically the same, comprising flour, milk and butter. What create a difference is the handling, remember : LIGHT AND SWIFT HANDLING, as long as it can form a dough, you can shape and bake. Scones will never look pretty, a rugged look will mean it is well risen and air were incorporated into the pastry. Hope all will like it.

IMG_5371


INTRODUCTION

Yes, today baking item is rather simple and basic. There is no short cut method and lets start from the basic of “pastry” making. A traditional, simple yet delicious breakfast items – Raisin Scones.

IMG_5377

SCONE DEFINED

A scone is a single-serving cake or quick bread. They are usually made of wheat, barley or oatmeal, with baking powder as a leavening agent, and are baked on sheet pans. They are often lightly sweetened and are occasionally glazed. The scone is a basic component of the cream tea or Devonshire tea. It differs from a tea cake and other sweet buns, which are made with yeast. (Source: http://en.wikipedia.org/wiki/Scone)

IMG_5367


WHAT IS NEEDED?

Materials for scone are extremely simple and basic. It is flour (wheat flour or oatmeal flour), liquid (milk), fats (butter) and some leavening agents (baking powder). It’s proportion of butter to flour are very low therefore, making it drier and unlike cakes which are moist and greasy.

IMG_6446

The following measurements are in the making 10 medium sized scones.

  • 500 g of plain flour – sieved
  • 100 g of cold butter cut into cubes and keep in the fridge for further use.
  • 2 cups (about 500 ml) of cold milk, plus a few tablespoons for glazing
  • 1 cup (about 160 g) of raisins (optional)
  • Pinches of salt.
  • 2 teaspoons of baking powder

IMG_5381


STEPS OF PREPARATION

IMG_6447

  • Preheat the oven to hot 2200C and lightly grease a baking tray or put a baking paper on the baking tray.
  • Sift the flour, pinches of salt and baking powder into a big mixing bowl.
  • Add the butter cubes from the fridge.
  • Use finger tips to lightly rub the butter until butter and flour are well mixed resembling crumbs. Rubbing should be light and fast.

IMG_6448

  • Compare the first and second picture, you can that the butter have stick to the flour and small crumbs were formed.

IMG_6450

  • Add in raisins and mixed lightly with the buttered flour.
  • Make a centre in the flour. Add almost all the cold milk and mix lightly in the same direction with a spoon/spatula/flat bladed knife.

IMG_6451

  • Mix until the dough comes together in a clump. Because the moisture content of flours may varies, therefore. amount used can also varies depending on the room temperature or attitude!  If it is too dry, use the remaining cold milk.
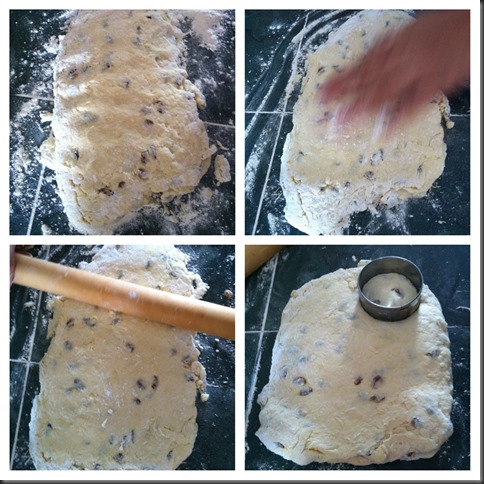
  • Dust some flour in the table and in your hand.

IMG_6452

  • Use floured hand and gather the dough together.
  • Lightly shape it into a smooth ball and lift out onto a lightly floured surface;
  • Lightly pat the dough in a 2 cm thick and use a rolling pin to lightly roll on the dough until even.
  • Use a 5 cm diameter cutter to cut the scones into rounds. Note that if you do not have the round cutter, you can also cut it into a triangular shape which is perfectly acceptable for a scone. Traditional scones are triangular shapes in fact.

IMG_6453

  • Gather the trimmings together, press out as before and cut more rounds.
  • Lightly brush with milk.

IMG_6454

  • Bake for 15 minutes, or until risen and golden on top.
  • If it had already risen and the top is not golden yet, brushed with additional milk and bake until the milk dries up. The color shall be darker now.

IMG_6455

  • A successful should have some signs of rising along the side signifying that it is well risen, light and not compact.

IMG_6463

  • Scones are best served fresh from the oven, warm at room temperature.
  • Served  with whipped cream, butter or jam. All these are suggestions and optional. However, the combination of these three items with a warm scone is definitely worth the efforts of preparing it.
  • Usually, it was usually served as a breakfast item or at tea time “quick breads” with a pot of hot tea.
  • If you can’t finish the scone, just freeze it. Heat up before next servings.

IMG_5375


TIPS ON MAKING A GOOD SCONE

If you are observant enough, you will notice that I have kept repeating the words “cold” and “light”. Yes, in order to have butter crumbs, the butter need to be cold so that it is in a solid state.

IMG_5383

If the butter melts at room temperature (it will at times when the room temperature is too high, it will not become a crumb but become a batter instead. The need to have butter in solid form is to introduce air into the dough. When butter melts, it will become a hole in the dough and replaced by air. The scone will be lighter and softer.

IMG_5373

The same principle applies to light handling of the dough. The use of flat bladed knife will introduce air to the mixture, rough handling on the other hand, will push all the air out of dough causing the dough to be hard and possibly chewy. Therefore, never knead your dough like making the bread.

IMG_5365


CONCLUSION

To conclude:

  • Scones are easy to prepare and an excellent choice of breakfast or tea time item.
  • As scones have very low fat contents, it is rather dry and usually served with cream, jam or butter. However, these are all optional depending on individual health objectives.
  • All types of scones are prepared using the same principle, adding the liquid mixture to the dry ingredients, mix the dough as briefly, lightly and swiftly as possible. This recipe is rather basic and you can easily modify it to become cranberry, lemon flavoured or other flavours that suit your taste buds.

IMG_5379

Lastly, hope that you enjoy reading and take a step out to try making the scones..  

Have a nice day and cheers.

scone collage1


  • For more recipes, you can refer to my RECIPE INDEX (updated as at 28 July 2014)  here and you can follow me at PINTEREST or visit the blog’s FACEBOOK PAGE to keep abreast of my future posts.  

IMG_5369