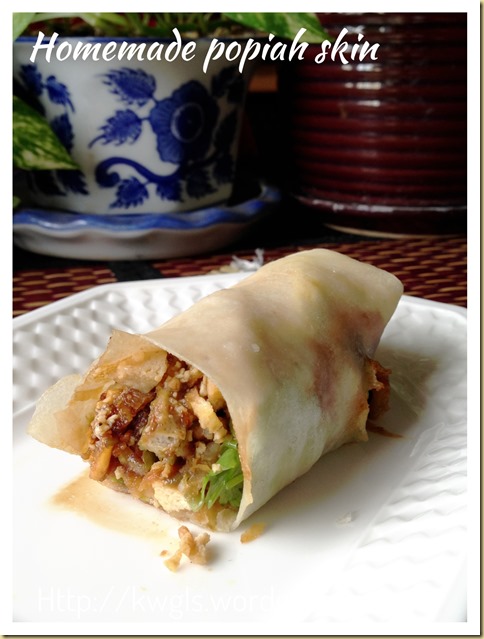
Malaysian Singaporean Chinese Food–Popiah Sarawak Style (干式薄饼)

IMG_8078

UPDATED POST ON 6-10-2014

As this is an very old post, I have decided to prepare some Sarawak Style dry popiah and do some picture shooting. Being one of the very first post of this blog, the pictures were not well taken.

Today, I have prepared these popiah using home made popiah skin and  if you are interested you can refer to this post: Homemade Spring Roll Crepes–Popiah Skin (春卷皮,薄饼皮, 润饼皮)

IMG_8059


INTRODUCTION

Popiah (Pe̍h-ōe-jī: pȯh-piáⁿ) is a Fujian/Chaozhou-style fresh spring roll common in Taiwan, Singapore, Malaysia and Burma/Myanmar, where it is called kawpyan. Popiah is often eaten in the Fujian province of China (usually in Xiamen) and its neighbouring Chaoshan on the Qingming Festival. In the Teochew (Chaozhou) dialect, popiah is pronounced as “Bo-BEE-a”(薄餅仔). [1]which means “thin wafer”. In Thailand, no doubt influenced by its large Teochew Overseas Chinese community, the spring rolls are called “Bpaw! Bee Uh”. In variants of the Hokkien dialect, it is also commonly referred to as “lun-BEE-a”(潤餅仔), which probably explains why the spring rolls are referred to as “lumpia” in the Philippines. It is sometimes referred to as runbing (潤餅) or baobing (薄饼) in Mandarin, and also as bópíjuǎn (薄皮卷).        – http://en.wikipedia.org/wiki/Popiah  

First and foremost, I have to qualify that the name Popiah – Sarawak Style was used because it is different from the popiah that I have eaten in West Malaysia and Singapore. What I have cooked and written here is based on my memories that my late mother have prepared for us and the type that were commonly sold in the “kueh” stalls in Kuching about 20 years ago. We can easily buy popiah  together with other Kuehs such as curry puffs, fried bananas, angku kueh etc. as breakfast items. It is prepared in advance and not the type that they only wrapped it when you order as commonly found in the food courts or hawker stalls.  The hawkers who sell the popiah usually did not prepare the Popiah on the spot. However, I am uncertain if this type of popiah is still common among Kuchingites but internet research shows not many bloggers talking about this version of popiah (presumably out-dated). However, I still insist to prepare popiah in this manner as it is easier to prepare and store (if you cannot finish) and personally more tasty and less soggy.….

IMG_8082

Difference between Popiah Sarawak Style and West Malaysian/Singapore style

So, what is so different about my Popiah Sarawak Style. Frankly, not much difference except once critical process of  preparing  the jicama filling. Instead of simmering the cabbage and jicama in prawn soup etc. as in West Malaysian/Singapore style, we fried it  and therefore I termed mine as the dry version.

IMG_87481

Singapore and West Malaysian Popiah appeared to be the Hokkien version of popiah originated from Xiamen, China, jicama and cabbage were julienned and cooked over slow fire in prawn stock or plain water until they are very soft. When wrapping, people used fork or other kitchen utensils to press against the cooked jicama for purposes of squeezing the water out before wrapping using the rice crepes.

IMG_87521

For dry version, no cabbage was used and jicamas were usually julienned into thicker stripes. It was then sprinkled with some salt to “force” the water out using the principle of osmosis. After that, it will be fried together with other ingredients. One thing to note is that the jicama when julienned, should not be too fine.   Other wise, your fried fillings will be too soggy for wrapping.

IMG_1171

Preparation process

I have to admit that I hate to make popiah as it involves a lot of works of slicing, dicing, julienning and cutting of ingredients and most of the processes have no shortcut using food processor except using your own hands. Among the main steps are:

  1. Julienning jicama (bangkuang);
  2. Dicing of taukwa ( I am looking for the hard yellow taukwa for dicing but I can’t find it this round, instead I use the brown taukwa. Unlike the wet version, they prefer to mesh the white taukwa)
  3. Slicing of dried mushrooms;
  4. Mincing of dried shrimps;
  5. Picking of bean sprouts’ “tail” and blanching the bean sprouts
  6. Chopping of garlics and onions into very fine pieces for frying (this I opt to use a food processor);
  7. Shelling of prawns, blanched and diced into cubes;
  8. Dicing of French beans;
  9. Frying of eggs pancake and julienned into small stripes;
  10. Grounding of peanuts and sugar;
  11. Mincing of pork belly (I opted to buy ready make)
  12. Cleaning of lettuce and coriander. Use some clean cloth to dry the lettuce and flatten it.
  13. Preparation of sweet sauce (corn starched with sugar but I opt to buy the ready made sauce)
  14. Preparation of chilli sauce (I have used the chilli sauce that I have made earlier)

IMG_1221  IMG_1220

Therefore, from the above, the process of preparing of raw material is laborious and  it would be  tough for one person to shoulder all the responsibilities of preparing all the ingredients by one self. In old time, such preparation process is actually a “come and help” social gathering whereby usually lady guests will come earlier and help with the preparation of the raw ingredients and the man would come after all the popiahs were wrapped! 

SARAWAK STYLE POPIAH

Cooking process – the dry version

  • Fried some minced garlics and onion until brown, sieved and set aside for later use.

IMG_1178   IMG_1219

  • Stir fried minced garlics and onion, dry prawns and mushrooms until the fragrant comes out. At this stage, I usually add some condiments such as pepper and salt at this stage.

  • Throw in the minced pork belly, French beans, dried tofu  (in this order) one by one until the pork belly is 70% cooked. Add the jicama and bean sprouts and fried until you see the jicama start to get soft (which is very fast). I have to caution against that jicama should not be over cooked other wise it will be soggy.

  • Mixed the blanched prawns, add additional condiments to taste and you are done. You should have a rather dry filling.

IMG_1189

IMG_8068

IMG_8067

Wrapping process

IMG_8074

  • Lay one Popiah skin on the table, put a leaf of “flattened” fresh lettuce, put some deep fried garlics and spread some sweet sauces and chillies on the lettuce. It is wise to spread this fix ins on the lettuce because this will prevent liquids penetrating the skin making the skin too soggy for wrapping.

  • Put some fillings, eggs stripe, coriander leaves on top of the lettuce;

  • Put some sweet sauce on top followed by some groundnut powder. Note, I only put sweet sauce at this junction, again, I want to let the sweet sauce penetrate the filling and collected by the lettuce.

IMG_1224IMG_1223IMG_1226

  • Fold the spring rolls and open your mouth to eat….smile.

IMG_8084

Serving

  • Serving of the dry version is usually not cut into small pieces. As it is dry, you can just take one and popped into your month without utilizing any spoon and plates. In older days, it was wrapped with a piece of white paper to facilitate your holding and prevent juices coming out of the filling.

  • If you cannot finish it, you can just wrap it and store in the fridge. The next day, just fried it and it will become fried spring roll. If the skin is too damp, since it is frying, you can add another skin. Alternatively, you can store you left over filling in the fridge and wrap it the next day before frying or consider making the Kueh Pie Tee.

You can have as many variants of popiah as possible but in my humble opinion, the following ingredients should not be substituted to make it to taste like popiah: taukwa, jicama, French beans, beansprouts, grounded peanuts and sweet sauce. 

IMG_8088

Lastly, please note that the filling for these Chinese style Sarawak Popiah can be used in Kuih Pie Tee as well. If you are interested, you can refer to this post: Malaysian Singaporean Chinese Food -Kueh Pie Tee

IMG_8726


CONCLUSION

Lastly, I found two bloggers talking about these version of popiah and they also name this Sarawak Popiah but none is certain about the name but stressed that “this is the style my mum used to serve us back in Sarawak”. The reasons of what culture influenced the elder Sarawakian prepared this type of popiah is still unknown and I would be glad if any of the reader can tell me the evolution of this type of popiah in Kuching. Sarawakians, shall we patent it ?? LOL

IMG_8080

Hope you like the post today. Cheers and have a nice day.

IMG_8086


  • For more recipes, you can refer to my RECIPE INDEX (updated as at 8 June 2014)  here and you can follow me at PINTEREST or visit the blog’s FACEBOOK PAGE to keep abreast of my future posts.  

IMG_8076

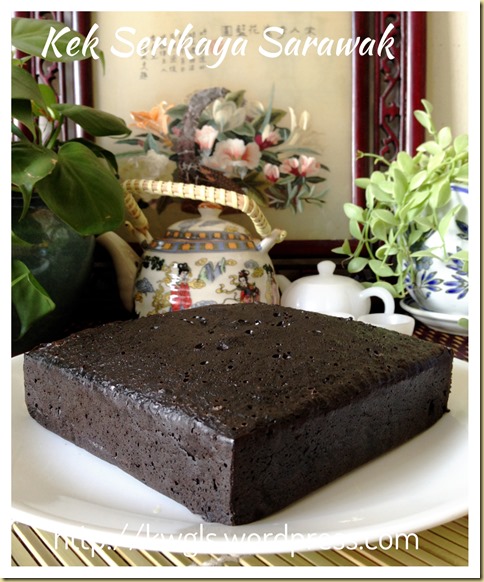
Where is my cake? I Can’t See!–Famous Sarawak Midnight Cake (Cake Seri kaya Sarawak, Kek Belachan, Kek Hati Parit) revisited.. (砂朥越深夜蛋糕)


IMG_5444

IMG_5216

IMG_5448

UPDATED POST ON 8-9-2014

I have decided to prepare this cake this afternoon as I craved for this cake… I don’t usually prepare this cake because it is addictive, rather costly and time consuming. Even in Sarawak, this cake was only available during festivals such as Hari Raya Aidilfiltri..

IMG_5456

When I posted in the Facebook, most members of Facebook Group who have tasted the cake said that it is nice, rich and dense. For those that they purchased, it is also very expensive due to the cost of ingredients. Further discussion also revealed that this cake is also called Kek Hati Parit and Kek Belachan because its darkness resemble the shrimp paste.

IMG_5454

INTRODUCTION

Sarawak  is one of the states in Malaysia located in the island of Borneo. It has many unique cuisines and one of the rather unique pastries is the Sarawak Midnight Cake as mentioned in this post and another one more famous cake is the Sarawak layered cake or Kek Lapis Sarawak that looks below.

  Sarawak Layered cake: pic courtesy of http://senai.olx.com.my/

This post is concerned about Sarawak Midnight Cake or more well known locally as Seri kaya Sarawak Cake (hereinafter referred to as “Seri kaya Sarawak). Note that kaya is also known as coconut jam made using coconut milk, eggs and sugars.

Seri kaya Sarawak has lots of names. It is synonymous with “Black Cake” (Kek hitam), “Sarawak Black Forest Cake”, “Belachan Cake” ( a type of shrimp paste) or the more Americanized name of “Sarawak Midnight Cake!” 

So from the name Seri kaya, Midnight Cake, Belachan Cake what can we say about the cake? As can be inferred from its names, the cake has Kaya (coconut egg jam) with a belachan shape (and color) and it’s DARK in color. Recipes are calling to use various coloring agents to darken the cake be it artificial coloring, chocolate molasses, Sarawak black palm sugars, chocolate paste and even unconventional dark soya sauce. 

The uniqueness of this cake is that it is a moist, rich and dense steamed cake. 


WHY THIS CAKE

While I was writing some thing about Sarawak Cuisines in the Authentic Sarawak Food and History Page, Seri kaya Sarawak is one of the cakes that I have mentioned. After writing the post, I really felt the urge to make the cake since I have not tasted this cake for more than 15 years at least. 

When I was in Kuching,Sarawak, during Chinese New Year, one relative used to give us this cake and during Hari Raya time (a Muslim festival whereby we do house visit), whenever I visited my Malay friends, I will always look out for this cake. I usually can’t stop eating the cake because it is just so yummy.. Looking at the picture of the cakes made me drooling and therefore I have decided to bake my own cake.

Food bloggers some time called this cake “secretive cake” and most of them do not willing to provide a recipe to the cake, They just bake the cake and show to the readers. Even if you can get hold of some recipes, the recipes that you  have collected can be very different for each recipe. Be it the ratio, types of ingredients used, preparation method, everyone will claimed theirs  were the best.

For me, too many recipes is equivalent to no recipe. I have decided to create my own cake based on my memoirs on the texture of the cake and aroma of the cake. I have analyzed various recipes and come out with this recipe that I want to share with readers today.

This is a rather simple recipe by passing a number of traditional methods of baking and skipped some unimportant ingredients usually used by other recipes. The output is at least 90%-95% similar to the cakes that I have tasted many years ago. (Note: this cake has a very distinct taste and it should be a moist, dense cake with fragrance of Horlicks (chocolate malt) and Milo).


WHAT YOU NEED

Most of the ingredients that was used are the breakfast beverages items.

IMG_5219

  • 125 g of Milo
  • 125 g of Ovaltine Malt Drinks – Most recipe called for Horlicks but I have substituted this with Ovaltine Malt drinks as the price is at least 50% cheaper but the taste is quite indifferent;
  • 125g of  condensed milk or sweetened creamer
  • 250g of Kaya (coconut egg jam)

IMG_5315

  • 125 gram of brown sugar
  • 250 gram of eggs (about 4-5)
  • 250 gram of unsalted butter – melted
  • 2.5 table spoons of chocolate emulco
  • 250 gram of plain flour (not in the picture above)


Do you see any trend in the measurements of the above recipe? The recipe can be summarized again in the following ratio.

Brown sugar+Condensed milk : Milo + Ovaltine :Plain Flour : Coconut Jam = 250g : 250g : 250g : 250g = 1  :   1   :  1  :   1

The picture below summary all the ingredients

IMG_5317


STEPS OF PREPARATION

These steps of preparation are rather unconventional. Conventional method will advise the use of creaming method (meaning beating of sugar and butter). The creaming step is mainly used if you want a fluffier and lighter cake.

However, as this cake is supposed to be moist and DENSE, therefore, I do not use the creaming method. I have used the mixer purely for mixing purposes. In all the steps, just ensure that the mixer is at low speed and as long as the ingredients are well mixed, just put another ingredient in. Well mixed basically means that the color are consistent. This mixing method will saves you a lot of time as compared to the creaming method.

If you do not have a mixer, you can mix it manually and it shouldn’t be very difficult as most ingredients are liquid and has lot of moisture content.

IMG_5318

  • In a mixing bowl, put the brown sugar, condensed milk and melted butter together. Beat at low to medium speed;  It will take the most 1-2 minutes and look like the batter in pic 3.
  • Add in the cracked eggs and continue beating at the same speed until well mixed.

IMG_5319

  • Add in the coconut jam (kaya) and continue to beat at same speed for 1 minutes.
  • Note that I have used the Nonya Kaya which is greenish in color. However, you can also use other types of kaya such as gula melaka kaya (dark brownish) or Hainanese kaya (orange to light brownish).
  • Add in the Milo and Ovaltine (chocolate malt and can use Horlicks as well) and continue to beat for another 1 minutes or until color consistency is reached.

IMG_5320

  • After adding Ovaltine and Milo, you will note that the color start to turn brownish. As Ovaltine and Milo will coagulate and takes a while to dissolve, you just have to ensure that there are no more lumps in the mixture.
  • Sieve the plain flour into the mixture and continue to mix until color consistency is reached.
  • Plain flour shall be used and not the cake flour or self raising flour and no baking powder or baking soda is needed. THIS IS A DENSE CAKE and therefore, you do not want your cakes to be too fluffy.

IMG_5321

  • After it is ready, add in 2 table spoons of chocolate emulco (alternative chocolate paste, black palm sugar, brown color agent) and beat until the there is no more lumps and color is consistent. It takes another 1-2 minutes.
  • If you use black palm sugar, there is no need to use brown sugar. Volume will be 150g black palm sugar.

IMG_5322

  • Get ready a 6 inch square tin, grease the sides and bottom, dust with wheat flour.
  • Greasing can be done with any fats such as cooking oil etc. I have used the wrapper for the butter to grease the sides. Alternatively, you can just use the left over melted butter in your bowl to grease the side. This is something not usually presented in the recipe books but I have purposely put it here to share with readers since it is a good practice to “conserve” world resources, joking.

IMG_5323

  • Get ready a steamer and bring the water to boil. As this cake is very dense, therefore, it need a few hours of steaming. That steaming process can be rather long reaching 2-3 hours and if it an 8 inch tin, may need 4-5 hours.
  • Pour your batter into the baking tin and cover with aluminum foil. This is to avoid the condensation of water vapors dripping into the cake batter making it hard to get cooked.
  • When the water boiled, put in the cake tin and steaming over medium to high heat for 3-4 hours.
  • Note that how long it takes to cook will depend on lots of factors including the size of baking tins you used (a big baking tin with a shallower batter will be faster to get cooked than a smaller tin), the environment (in an enclosed environment it will be easier to get cooked than in a well ventilated area).
  • As a guideline, after 2 hours of steaming, you can slightly lift up the aluminum foil and see if the batter was set. Set means when you push, the batter wouldn’t move. Usually, the middle part is the part that takes longer to cook.
  • Whatever you do for this process, you have to be careful to minimize the heat loss, otherwise it will take time to get enough heat for the cake to rise again and some may not be able to rise as the cake structure had been destroyed.
  • If there is not enough water, just boil some hot water and pour inside the steamer carefully. You may need to replenish the water 2-3 times.


IMG_5324

  • The cake is cooked when it looks like the first picture. To counter ensure that it is cooked, use some stick to pierce down the batter and see if anything sticky in your stick. If none, the cake is ready.
  • Let it rest for say 30 minutes and transfer to your cake rake if you want. Note that when it is hot, the cake structure can be very fragile, cooling will gel backed the structure . So, any handling have to be done gently.
  • The 1st picture showed the cake just come out from the steamer. After about 1.5 hour of resting, I dusted with some Ovaltine and Milo (optional) powder. You can see from the cross section of the cake that it is very moist and dense.
  • Cutting the cakes into the desired size, serve with or without sauce.


Serving Suggestions

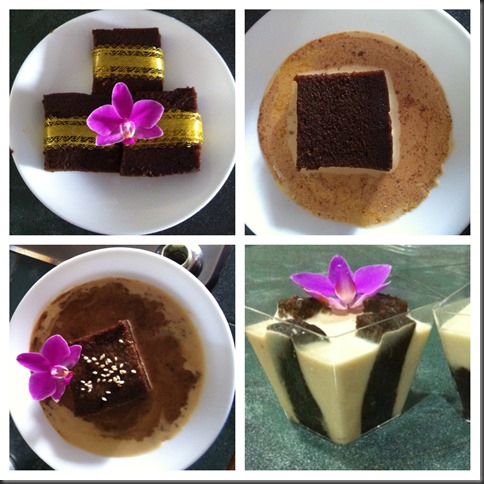
IMG_5329

  • Picture one is serving without any sauce.
  • Picture two to four is serving with evaporated milk and some dusted with Ovaltine and Milo powder. Fresh milk can also be used.
  • In picture four, I have decided to turn it into some form of wet dessert soaking in milk. As the texture is very soft, you can actually turn it into any shape with it. Trust me, it wouldn’t compromise the original taste. The original taste is very strong and this will smoothen out the strong cocoa and chocolate malt flavor.

IMG_5442


CONCLUSION

  • This is a super rich and dense cake. You can treat it as another form of chocolate mud cake or American midnight fudge cake. Taking a bite is resembling like having a scope of butter, coconut jam, chocolate malt, condense milk all at once which is extremely smooth and with the nice aromatic smell of breakfast beverages.
  • The origin of this cake is still unknown but it is unique that all the main ingredients are related to the breakfast items such as Milo, Horlicks, condensed milks and coconut jams used for toast. Could this be influenced by the British during the British colonization of Sarawak before 1945’s? Only coconut jam and black palm sugar is quite local and all other ingredients are most imported or originated from European countries. 

IMG_5450

  • The Western version of fudge cake or midnight cake requires chocolates, using the creaming method and utilizing the oven for baking. As oven is a luxury in traditional Sarawak, steaming method was used instead. Imported chocolate will cost a bomb and therefore these were substituted by breakfast beverages. Does it sound logical? Otherwise, how can an isolated island with so much diverse culture can come out with such a rich and nice cake like the desserts in Western countries? Let me know your opinion.
  • Like Sarawak Laksa paste, too secretive a recipe and too many versions of a recipe will equivalent to no recipe. I have simplified the ratio and the preparation method with no compromise in the texture and taste of my cakes.

I hoped for those who never try this cake before, please try to make one and you will never regret it. Hope that you enjoy the  post and happy reading. Cheers

IMG_5452


  • For more recipes, you can refer to my RECIPE INDEX (updated as at 28 July 2014)  here and you can follow me at PINTEREST or visit the blog’s FACEBOOK PAGE to keep abreast of my future posts.  


IMG_5446


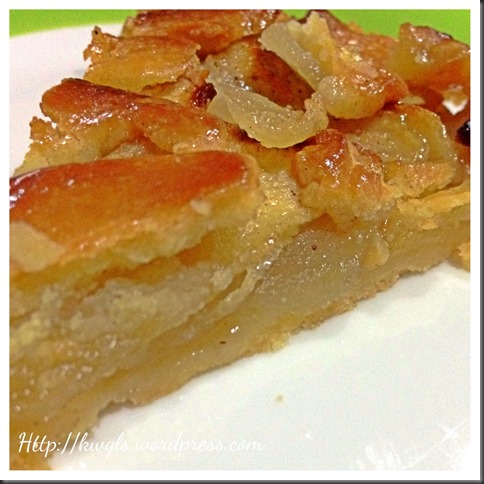
Small Appetite Foodie’s Apple Pie

Processed with MoldivIMG_6806

INTRODUCTION

Being a business analyst before I become a food blogger, I like to do research if times permit. Therefore, readers who read my blog may be wondering why I like to quote Wikipedia’s definition. Seriously, I like Wikipedia’s concise definition on the food that I blogged about and at times I will use it as a benchmark against the food that I made. The same applies for today’s pastry, apple pie.

Processed with Moldiv

Per Wikipedia’s http://en.wikipedia.org/wiki/Apple_pie,

“An apple pie is a fruit pie (or tart) in which the principal filling ingredient is apples. It is sometimes served with whipped cream or ice cream on top, or alongside cheddar cheese. Pastry is generally used top-and-bottom, making it a double-crust pie, the upper crust of which may be a circular shaped crust or a pastry lattice woven of strips; exceptions are deep-dish apple pie with a top crust only, and open-face Tarte Tatin.”

Processed with Moldiv

I have made an apple pie yesterday. When I was chatting with a friend in Google plus about my red dragon fruit cheesecake, he was asking me if I know how to make an apple pie. I told him that I have not prepared before as apples are rather expensive. Unlike Western countries, most apples were imported from temperate countries. However, I have tasted apple pies before and it should not be a big problem for me to replicate the apple pie that I have eaten before.

Processed with Moldiv

Actually, the apple pie that I am most familiar with are those sold in McDonalds. However, those pies were deep fried and what I am going to share in this post is the modified version of baked apple pie to suit Asian Foodies’ smaller appetite for sweet desserts… Pardon me if I am wrong..

IMG_6788


IMG_6800


WHAT IS REQUIRED

Dough – make one 8 inch pie without  top pastry

IMG_6846

  • 35 grams egg (lightly beaten)

  • 150 grams plain flour (sifted)

  • 30 grams of icing sugar (sifted)

  • 75 grams of chilled butter cut into cubes

  • 1 teaspoon of vanilla essence.

Note: If you want to cover the entire pie with top pastry, you will have to multiply by 1.5 times the above volume. The above volume did not intend to have a upper pie crust like American style apple pie.

Processed with Moldiv


Apple Fillings

IMG_6847

  • 4 large apples (de-skin, pitted and cut into 0.5 cm slices)

  • half cup of brown sugar

  • 1/2 teaspoon of cinnamon powder

  • 1/2 teaspoon of nutmeg powder

Note:

  • Selection of apples – Apples selected shall be those that are crunchy in texture such as Fuji Apple or Granny’s green apple.

  • Quantity of apples – The apples stated here are for the preparation of a flat thin pie of about 1.5 cm height. If you like the American version of apple pie, you may want to consider to increase your apples to at least 6 large apples (or even 8 depending on how deep your baking glass dish can take)

IMG_6794


STEPS OF PREPARATION

IMG_5683

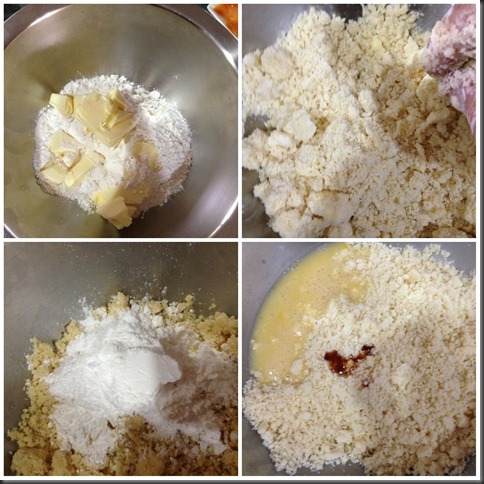
  • In a big mixing bowl, put butter cubes and sifted plain flour together. Use the finger tips to rub the butter cubes and flours together until it become crumby. Add in sifted icing sugars and continue to rub until well mix.

 IMG_6843

  • Add lightly beaten eggs and vanilla essence, mix slowly until it become a dough. Put it in the fridge to chill for 20-30 minutes. Note that if you are able to handle soft dough, you can by pass this step.

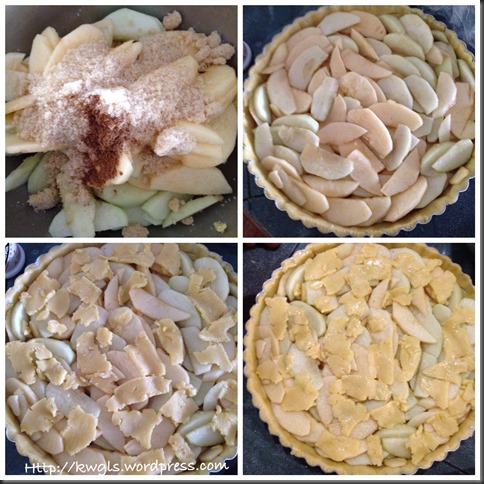
  • Have a clinging wrap on the table, take the dough from the fridge and place on top of it. Put another clinging wrap on top of the dough. Use a rolling pin to roll it into a flat sheet with about 0.5 cm thickness. Transfer the dough to the pie tin and use you hand to press the dough against the sides and make it as even as possible. Use a fork to make some holes in the dough (optional). Set aside for later use. If you have some left over dough, just keep it to put on top of the apple fillings.

IMG_6844 

  • In another big mixing bowl, add the sugar and spices to the apple slices. Mix well and pour on top of the pie pastry.  Level it. If you have additional pastry left from the making of bottom pastry, your can put on top of the apple fillings.

Note: If you have opt to cover the apple pie with top pastry, cover the pastry on top the apple and make some hole to the let the water vapour escape when the apple is cooked.

IMG_6845

  • Bake in the oven at 180 degree Celsius for about 25-30 minutes or when the pie crust turn golden yellow. (Note that this is a thin pie therefore, cooking time is relatively short). Egg wash the top pastry if desired.

  • Can be served either hot or cold with sour cream, ice cream or even custards.

Processed with Moldiv


CONCLUSIONS

There are many variations of apple pies. Some have top pastry like the American style version. It were usually prepared using a deep glass dish. Some are without top pastry but substituted with bread crumbles and rolled oats as in the Swedish version of apple pies. The French have another version called Tarte Tatin.

IMG_6808

Knowing Asian’s small appetite for Western desserts, I have prepared this pie in a form of thin slice. Both pastry and apple filling are rather thin as compared to the Western version. And if the diner is of big appetite, he can just opt to have 2 slices at the same time……

Processed with Moldiv

GUAI SHU SHU | Guai Shu Shu is a “shu shu” that is “guai”….


  • For more recipes, you can refer to my RECIPE INDEX (updated as at 15 October 2014)  here and you can follow me at PINTEREST or visit the blog’s FACEBOOK PAGE to keep abreast of my future posts.  


IMG_68231

 Processed with Moldiv

Light Yet Sophisticated And Delicious Mango Puddings

 IMG_67491

INTRODUCTION

I remembered I first have my mango pudding when I stayed in Hong Kong in 1995. It was rather popular be it in the hotel restaurants or in the fast food chains. For commercially packed mango puddings, it can be easily bought in the supermarkets. The dessert is light and can be served with a variety of regional fresh fruits. It is especially soothing and comforting after a heavy meal of oily or spicy foods. I loved its rich and creamy texture.

IMG_6754


MANGO PUDDINGS DEFINED

As per Wikipedia:

“Mango pudding is a Chinese dessert usually served cold. It is very popular in Hong Kong, where pudding is eaten as a traditional British food. Mango pudding originated in India and the recipe was introduced from the British in the 19th century. There is very little variation between the regional mango pudding’s preparation. The dessert is also found in Singapore, Malaysia, Thailand, Macau and is often served as dim sum in Chinese restaurants.” (Source: http://en.wikipedia.org/wiki/Mango_pudding)

IMG_67371


WHAT IS REQUIRED

Make 6 desserts cups

IMG_6713

  • 200 ml of coconut milks

  • 200 ml of full cream evaporated milks

  • 250 ml of fresh milks

  • 1 egg yolk

  • 150 grams of sugar

  • 1 large mango (pitted and pureed)

  • 9 gelatine sheets (about 1.5 tablespoon gelatine powder)

As for the liquids, you can change between coconut milks, evaporated milks and fresh milks  but ensure that the total volumes add up to 750 ml. This means that you can use 750 ml of fresh coconut milks if you prefer. I usually like to dilute my coconut milk as I do not want the dessert to be overly creamy and for health conscious reasons.

Note that the colour of the final mango puddings will vary depends on the types of mango that you have. If evaporated milk were added, the colour will be creamy colour.

IMG_6762


STEPS OF PREPARATION

Preparing the mango purees

IMG_6718

  • De-skin and pitted (stoned) one large mango. Put the mango flesh in a food processor, blend it until puree form and set aside for later use.

IMG_6756


Preparing the puddings

IMG_6723

  • In a sauce pan, place all the liquids and sugar and heat it under medium heat until it boils. Once boiled, turn to lowest heat available.

  • Soak your gelatine sheets for 1 minutes and place the sheets into the sauce pan. Keep stirring until all the gelatine are dissolved. Off the heat but put on top of the stove to minimize the heat loss.

IMG_6728

  • In a big mixing bowl, use a whisk to whisk you egg yolk until light. Add the mango puree and whisk until well mixed. Sift the hot milk onto the mango puree and stir until well mixed.

  • Spoon the mixture into lightly oil pudding moulds or dessert cups and leave to cool. Chill the mango puddings in the refrigerator for at least 6 hours (or until set), preferably overnight.

IMG_67521


CONCLUSION

Easy to do and tasty desserts. Classic yet sophisticated. You can serve with fresh fruits or on its own. Additions of extra evaporated milks will make it creamier. Best to present to your guest after a heavy, oily and spicy meal.

IMG_6747

Hope you like the post today. Cheers.

IMG_67431

How About An Eggless, Butter Less, Milk Less Chocolate Almond Cup Cakes?

IMG_0496

UPDATED POST ON 5-11-2014

I will include in this post another recipe that I have developed this morning, it is gluten free, dairy free, egg less and fatless. It is a rather healthy moist and aromatic snack.  I hope this post will benefit those who are on a certain diet.

IMG_0508

It is the same recipe for both cookies and cupcakes. For cookies just make it in smaller size and bake slightly longer.. It can be crispy or chewy. It will not be as crispy as those using flour.

IMG_0504

Taste wise is satisfactory. You can imagine taking some almond meal, add some cocoa powder, water and sugar.. It is definitely acceptable to most. Please scroll down for the second recipe.

IMG_0494


IMG_6487

INTRODUCTION

Seriously, when I looked at the recipe, I was curious how it would turn out to be. When I prepared the batter and baking, I am even more doubtful about its outcome.. I did not have any picture to compare and I did not know whether what I have prepared and baked was correct or not. Not until I took the first bite this morning that I am confident to issue this post…

This is an eggless, butter less and milk less cup cake that I have adapted from a 2003 recipe. I have printed out this recipe as early as year 2005 when I just started to have interest in doing some baking. Then, I have been cracking my head to look for recipes that were suitable for niche markets like health conscious people or people that are less fortunate like diabetes . While flipping my recipe file yesterday, I saw this piece of printed paper and I thought I might wanted to give it a try.

IMG_6515

While I am writing this post, I try searching this recipe in All Recipes Cake Recipes website, I am rather happy that the recipe is still there but with no picture, that proves that it is a very old recipe. The recipe was submitted by Ms. Kathy Thurston and some body named Ms. Bernadette Beaupre had gave some explanation of this cake:

“This cake comes in handy when all you have left in the cupboard is the tin soups just before shopping day. It really was a treat served warm when we came in from the cold. And it was c-o-l-l-l-d-d-d, North of 53′. Sprinkle brown sugar or dust confectioner’s sugar over the top.” — Bernadette Beaupre (Source: All Recipes Cake Recipes website,)

Since it is an eggless, butter less and milk less, what should be the structure liked. If you looked at the recipe in detail in later part of the post, you will note that there are some shortening and water. Butter less can be substituted with cooking oil or vegetable shortening (as in this recipe) and milk less can be substituted with any liquids (be it eggs or water). Therefore, the crucial element that determine the outcome of the cup cake will be eggs.

IMG_6498

Eggs have the role of supporting the structure of the cup cake or in general any baked products. They are binder which help to hold the ingredients together. In addition, it contributed to the liquid component in a cake recipe. Therefore, it is expected that without eggs, the cake will be dense and the rising of the cake will depend entirely with the leavening agents such as baking powder and baking soda. 

IMG_6466

I am worry about whether the dense cake will be dry and difficult to swallow. The conclusion is not, as the recipe have minimal vegetable shortenings and some liquids which is adequate to make the cake moist.

In this recipe, I have increased the amount of water, addition of cocoa powder and some almonds chunks. The final baked products were well beyond my expectations and I concurred it was some form of good snacks. As I was experimenting with this recipe, I have reduced the volumes and managed to make 4 small cup cakes. As with any other cakes, serving with additional sauces and whipped cream will heighten the palate to another level.

IMG_6493


WHAT IS REQUIRED

Recipes adapted from: Eggless, Butter less and Milk less Recipe by Kathy Thurston (make 8 cup cakes)

IMG_6570

  • 2 cups plain four

  • 1 cup white sugar

  • 1 cup almond chunks

  • 2 cups water

  • 2 tablespoons vegetable shortening

  • 2 tablespoons cocoa powder

  • 1 teaspoon baking soda

  • 1 teaspoon of baking powder

IMG_6506


STEPS OF PREPARATION

  • Preheat the oven to 180 degree Celsius and get ready some cup cake moulds.

IMG_6571

  • In a sauce pan under medium heat, bring  the vegetable shortenings, water and sugar to boil and continue boiling for about 2 minutes.

  • Sift the flour, cocoa powder, baking powder and baking soda together into the liquid.

IMG_6572

  • Use a spatula to stir the batter until it is well mixed.

IMG_6573

  • Stir in the almond chunks and ensure it is well mixed.

  • Scoop into the paper cups for cup cakes and baked in the oven for about 20 minutes or when the skewer inserted come out clean.

IMG_6574


CONCLUSION

This is a rather unusual cake. So who should prepare this? In fact this cake is very suitable for people who are vegetarian in accordance with Buddhist principles.

In my circle of friends, I have a few friends who are vegetarians. However, though all are  vegetarians, there are certain ingredients that fell into “grey area” and subject to arguments.

IMG_6506

One of the ingredients is eggs. Some of my vegetarian friends do not eat eggs as they believed there may be an embryo attached to the eggs. However, other Buddhist vegetarians believed that current eggs are commercially “produced”, therefore , it is impossible to have any embryos in the eggs.  Even if you hatch the eggs, no chicks will be born,

Another two special ingredients are two diary products, milks and butters. Some vegetarian will not touch any food “produced” by an animals, therefore milks and butters were excluded in their diets. Whereas some choose to believe that as there is no need to kill a cow to get milks and butters, therefore, these can be included in the vegetarian diets.

IMG_6490

These belies have an impact in pastry terms. Every year, when I baked my pineapple tarts for my relatives and friends, I will have to bake two types, the normal with milk, eggs and butter and another version, which is rather hard to prepare that is eggless, milk less and butter less! Of course the onus will lie on me to find relevant substitute for the ingredients.

Hope you like this rather strange post today. But, I have to admit that looking at the picture, you may not be convinced until you take a bite of it. Have a nice day and cheers.

IMG_6513


RECIPE 2 – GLUTEN FREE, DAIRY FREE, EGG LESS AND FATLESS CHOCOLATE CUPCAKE AND COOKIES

 IMG_0498

WHAT IS REQUIRED

  • 1 cup of almond meal or almond flour
  • 3/4 cup of water
  • 1/3 cup of sugar
  • 2 tablespoons of cocoa powder

IMG_0500

STEPS OF PREPARATION

  • Pre-heat the oven to 160 degree Celsius
  • Mix all the ingredients above until well combined
  • Transfer to cup cakes cup .
  • Baked in the pre-heated oven at 160 degree Celsius for about 15 minutes or until a skewer inserted comes out clean

IMG_0502

  • For cookies, add about 1/8 teaspoon of baking powder to the batter, bake at 160 degree Celsius for about 20 minutes. Let it sit in the tray for 5 minutes before transfer to the rack for cooling. If you want it to be crispier, can extend baking time by another 5-10 minutes.

IMG_0506


  • For more recipes, you can refer to my RECIPE INDEX (updated as at 15 October 2014)  here and you can follow me at PINTEREST or visit the blog’s FACEBOOK PAGE to keep abreast of my future posts.  

IMG_0492


After Red Dragon Fruit Pie Bar, Shall We Have A Red Dragon Fruit Cheese Cake?

IMG_6387

INTRODUCTION

Life as a food blogger has his/her fair share of pressures. He/she will have to design a dish, prepare the dish, decorate the dish and take picture for the blog. A poorly taken picture may ruin all his efforts putting in for the dish he or she prepared.

IMG_6423

All bloggers will have its own strengths and weaknesses and some of my weaknesses are cake cutting, decoration and photographing. I am especially wary of cutting an 9” inch diameter cakes. I am not fully satisfy with the images in this post and I shall improve on it.

IMG_6400

Though I do not really like the colour of red dragon fruit, however, I am amazed by the visual presentation that it can create for cakes and pastry. I have blogged about red dragon fruit pie bars yesterday and have another half a red dragon fruit left. I thought it would be a good idea to use it for some cheese cakes. I looked up my favourite dessert cookbook “The Essential Dessert Cookbook” published by Murdock Books 2007 and found this Raspberry Swirl Cheesecake that I have always wanted to try but do not have the opportunity as it is not a seasonal fruit in Singapore and Malaysia. Prices of raspberry were rather costly and readers may not have a chance to prepare the cake if I blogged about it. So I have decided to use red dragon fruits for the cake.

IMG_6408


WHAT IS REQUIRED

For Biscuit Crust

IMG_6409

  • 150 grams of plain sweet biscuits

  • 50 grams of melted unsalted butter

For Fillings

IMG_6410

  • 500 grams cream cheese (at room temperature)

  • 125 grams caster sugar

  • 80 ml (1/3 cup) lemon juice

  • 315 ml (1 1/4 cups) of creamed (whipped)

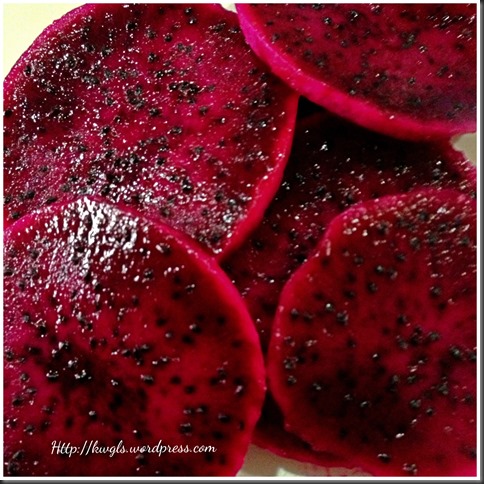
  • 250 grams of red dragon fruit (meshed and become puree)

  • <font face="Microsoft PhagsPa"3 tablespoons of gelatine

  • 1/3 cup of water

IMG_6435


STEPS OF PREPARATION

Preparation of biscuit crust

IMG_6411

  • Blend the biscuits in a food processor. Add the melted butter to the biscuit crust and mix well.

  • Have a 9” diameter spring form baking tin, spoon the crushed biscuits and press firmly against the base of the baking tin. Chilled in the refrigerator for at least half an hour or until firm. Lightly grease the sides of the baking tin with butter.

For biscuits, it can be any type of biscuits. In fact I have used some biscuits that have some meringue on top and therefore you can see some coloured meringues in my biscuit crusts.

IMG_6441


Melting the gelatine and preparation of red dragon fruit purees

IMG_6412

  • Have a metal bowl, put in 1/4 cup of water and sprinkled the gelatine on top of the cold water as evenly as possible. Use a tablespoon to lightly stir the gelatine powder solution and ensure all the gelatine absorb the water.

  • Bring a pot of water to boil in a stove. Turn off the heat. Place the metal bowl with gelatine on top of hot water, stir until all the gelatines are dissolved without signs of gelatine powder. Leave the metal bowl floating in the hot water for later use.

  • Put the dragon fruits in the food processor and blend it until it become puree form. Add in half of the gelatine and set aside for later use.

IMG_6413

  • In a standing mixer, whipped the cream until firm peak form and set aside for later use.

  • Using the same mixing bowl, put sugar and softened cream cheese.

IMG_6414

  • Beat until light and smooth. Scrap bottom of the mixing bowl and ensure there are no deposit of cheese at the bottom of mixing bowl.

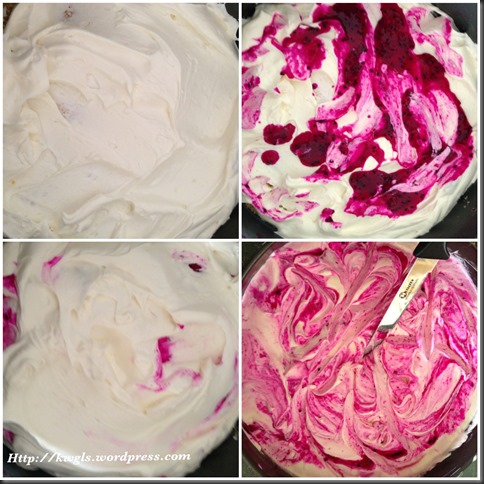
  • Add in half of the gelatine, lemon juice and whipped cream, use the slowest speed of the mixer to whisk until well mixed as indicated in the fourth images.

IMG_6415

  • Take out the spring form tin from the refrigerator and place some whipped cream cheese on top of the biscuit crust.

  • Place two to three tablespoons of dragon fruit puree on top of the whipped creamed and followed by another level of whipped cream cheese.

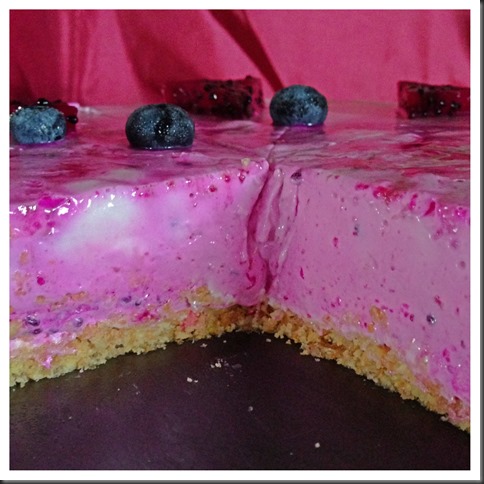
  • Perform the same procedures alternating between whipped cream cheese and dragon fruit puree until all was done. Use a knife to lightly swirl through the cheesecake.

IMG_6445

  • Lightly tap or shake your baking tin and you will see patterns start to evolve.

  • Chilled in the refrigerator for at least 4 hours before serving. Top with whipped cream or additional red dragon fruit or other topping as you wished.

IMG_6429

CONCLUSION

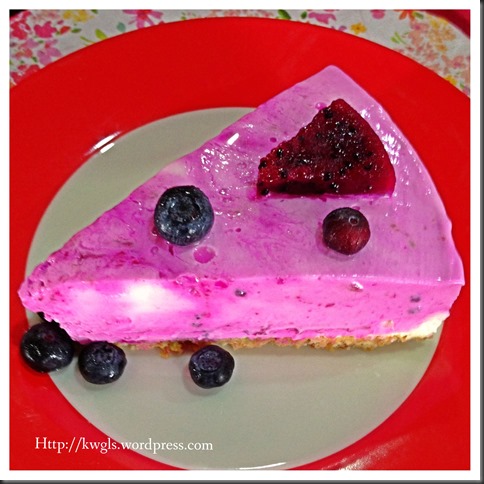
Not as difficult as one thinks to make this cake, The visual effect, in my humble opinion is astonishing. While in my red dragon fruit pie bars, the red dragon fruit appeared to be red in colour. However, in this cake, it appeared to be purplish colour which shocked me!

IMG_6439

It is a big cake, a 9” inches diameter cheese cake, I am now thinking how I can finish the whole cake!  Haha. If you are interested on cheese cakes, you may want to check out my other two cheese cakes –  Durian Cheese Cake , Ferraro Rocher Ice Cream Cheese Cake not forgetting the peanut flavour cream cheese ice – cream.

Hope you like the post today. Cheers and have a nice day.

IMG_6444

Let Try Something New–Red Dragon Fruits Pie Bar And Blueberry Pie Bar

IMG_2700

UPDATED POST ON 5-12-2014

Saw some blueberry in the supermarket and I have decided to update this post with some new pictures. Decided to prepare blueberry pie pars.. I have always loved pie bars especially its crumbly top.. Unlike normal pie, pie bars have more short crust pastry than its fillings. If you like short crust pastry of any sort, you shall try this..No major changes in the recipe, just torn down the sugar content to suit Asian taste buds..Changes are highlighted in red.

IMG_2696

INTRODUCTION

I have been challenged that most of my recipes that I have written are very “colourful”. If you think that I like permitted food colouring, that is not entirely true. You may have seen a few post that uses food colouring, but that essentially was because I am doing it more for illustration and picture taking purposes. If you read my post on Rainbow Loaf, you will understand how I justified the usage of permitted food colouring and struggling whether such a post should be issued. While I don’t encourage the use of food colouring, but we have to be realistic in our daily lives. I strongly believed the usage of permitted food colouring are all over the food outlets. What about Angkukueh? Do you think all mango puddings are consistently as yellow as what you saw every time your bought it? How about various type of tapioca pearls, milk teas, pasta sauces or even moon cakes? Well that is up to individual and I tend to choose to believe that NOT all the green colour in the Pandan Kaya or Kueh Srimuka/Salat that are sold in eating outlets  are all from the Pandanus leaves….

IMG_6254

This post is  using a natural colour. A colour that I am very hesitant to touch. I even hate it when it stained my cloth! It is one of the very strong natural colour – Purplish Red dragon fruits. There is an influx of purplish red dragon fruits in Singapore supermarkets in current year. Though I do not really like to touch the colour by itself, but I do believed it will help to create a visual effect in pastry’s presentation.

IMG_6250

In last week’s marketing, these dragon fruits were on sale and I managed to get 2 big red dragon fruits for S$2.50.. I think that it is a deal and I think I should made use of its natural colour to make some pastries. Then it reminded me of some blueberries pie bar that I read while browsing the internet. therefore, I have decided to use these dragon fruits to prepare some dragon fruits pie bars..

IMG_2692

Pie bar is a type of short crust pastry usually loaded with seasonal fruits and served as desserts. Fruits that are usually used include strawberries, blueberries and blackberries.

IMG_6305


WHAT IS NEEDED

IMG_6292

Pie Pastry for crust and toppings

  • 400 grams of plain flour

  • 330 grams of butter (cold and cut into cubes)

  • 300200) grams of sugar

  • Pinches of salt

IMG_6293

Dragon Fruit Fillings

  • 4 eggs (about 200 grams)

  • 400 (250 ) grams of sugar

  • 100 grams of plain flour

  • 150 grams of sour cream or whipped cream

  • Pinches of salt

  • 200 grams of dragon fruit (meshed) or mashed blueberries

IMG_2694


STEPS OF PREPARATION

Meshing Of Dragon Fruits

IMG_6301

  • Use some kitchen utensils or sharp objects such as forks or knifes or potatoes mashers to mesh the dragon fruits.

IMG_6252


Preparing the short crust pastry

  • Get ready a baking tray of 12” x 15” baking tray.

  • Preheat the oven to 180 degree Celsius

IMG_6300

  • In the big mixing bowl, put cold cut butter, flour and sugar. Use finger tips to rub the butter and flours mixtures together until resemble some crumbs.

  • Divide the crumbs into two portion, one for the bottom layer and another portion for the toppings.

  • Press half of the pastry against the bottoms of the baking tray. Use a fork to make a few holes in the pastry and set aside for later use. 

IMG_2690


Preparing the fillings

IMG_6298

  • In another mixing bowl, beat eggs, sugar, and cream together. Add flour and followed by mesh dragon fruits and mixed well.


Assembling And Baking The Pastry

IMG_6295

  • Pour the dragon fruits fillings on top of the pastry. Sprinkle the remaining flour mixture evenly over the fillings.

  • Bake in the oven for about 45 minutes at 180 degree Celsius.

  • Cool at least one hour before cutting your desired sizes.

  • Best served with some whipped creams, ice creams, additional fresh fruits or on its own.

IMG_6255


CONCLUSION

  • It is a dessert that is not that tough to prepare. I believed it is still relatively uncommon in Singapore and Malaysia. For a person with sweet tooth like me, I definitely wouldn’t object such a treat. The crispy and crunchy toppings resembles a bit of the biscuits with some mild fruity flavour of the red dragon fruits.

IMG_2702

  • I have hold up this post for one day as I am unsure about the colour combination and the acceptability of this desserts in this area of the world. When I posted up to one international communities in Google Plus, I was being encourage to proceed with the post as the pie bars looks appetizing.. Thanks to those members who have encouraged me to have this post.

IMG_6253

  • I have quite a number of posts in the past one month, this is due to the assistance from my mother in law who is visiting me and able to help me to “nag” my kids performs some household chores. In addition, Singapore was having a school holiday last week.  In the next few days, as my mother in law will be back to her home town, I will have to slow down my posting as I need my energies to nag and cooked for normal household meals. She has been a great helper in the house and I really appreciate and thankful for her presence and I know I am going to miss her like her grandsons and grand daughters…

Hope you like the post today. Cheers and have a nice day.

IMG_2698


  • For more recipes, you can refer to my RECIPE INDEX (updated as at 26 November 2014)  here and you can follow me at PINTEREST or visit the blog’s FACEBOOK PAGE to keep abreast of my future posts.  

IMG_2688

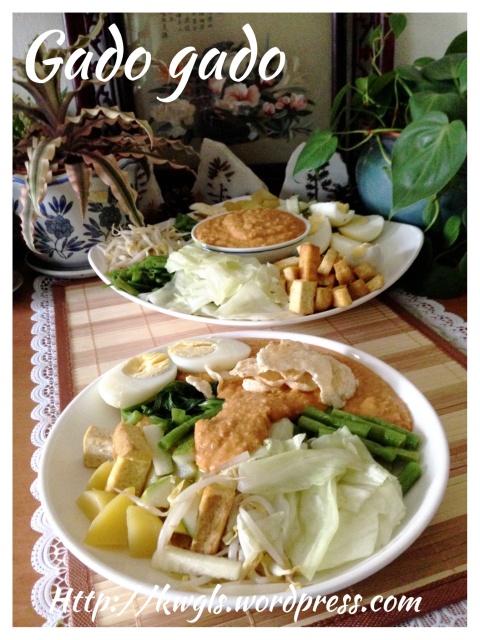
Don’t “Gaduh” over “Gado Gado”–Indonesian One Dish Salad, Gado Gado

Processed with Moldiv

INTRODUCTION

I used to travel a lot when I am in the corporate world. Most of the time, I need to travel and stay in the hotel by myself and at times, the trips will stretch to weeks or months. I still remember my 2 years secondment to Hong Kong and Shanghai, more than 80% of my stay was in the hotel. Room services was very common and cafes at the hotel become my “dining hall”. During these times, one of my favourite order was the “look-alike” home cooked was gado gado since the food was served with peanut aka satay sauce. Of course, other favourites in the hotel will include Singapore Hainanese Chicken rice and Singapore Fried Bee Hoon (新洲炒米粉)。

IMG_6144

That is how I first got in touch with gado gado. Gado gado in essence is Indonesian’s salad with peanut sauce. However, unlike Western salad, it is a one pot dish, meaning one can have gado gado as the main meal.

Processed with Moldiv

Gado gado in Indonesia means plural for “mixing” action and it shall not be confused with “gaduh gaduh” in Malaysia which means heated arguments.

Processed with Moldiv

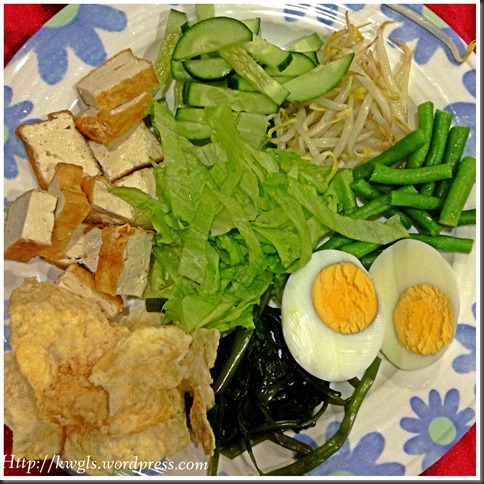
There are a few versions of Gado gado in Indonesia depending on which part of Indonesia you are in and this version is called “Gado Gado Siram” which was what I usually have in hotels and Indonesian Restaurants. Essentially, vegetables were cooked separately, put together in one plate and add some peanut sauce were poured on top, mixed and served.

IMG_6167


PREPARING OF PEANUT SUACE (Serving of about 5-6 adults) 

What is required

IMG_6103

Ingredients A

  • 50 grams of chilli powder (or dry chilli)

  • 100 grams of garlics

  • 40 grams of galangal (blue ginger)

  • 40 grams of lemon grass

  • 1 tablespoon of cumin powder

  • 1 tablespoon of coriander powder

(You can either use the powder form of the above ingredients or use its original form of raw ingredients)

Ingredients B

  • 500 grams of peanuts (coarsely ground)

  • 10 tablespoons of castor sugar or gula melaka (coconut palm sugar)

  • 5 tablespoons of cooking oils

  • Pinches of salt

  • Pinches of turmeric powder (optional)

  • 3 big tablespoons of tamarind paste (assam)

  • 5 cups of water

IMG_6160


Steps of Preparation

IMG_6108

  • Use a food processor to blend all the ingredients (except powder ingredients) in “A” until fine. Alternatively, you can use a mortar and pestle to pound the non-powder ingredients until fine as in the picture. 

IMG_6120

  • In  a big frying pan, add the cooking oil and stir fried the ingredients as in A until fragrance. Add in tamarind, water and remaining ingredients B (coarsely chopped peanut, sugar, salt) and bring to boil.

IMG_6126

  • Reduce heat and simmer until the sauce thickens and oil start to appear on top of the peanut sauce. Off the heat and stir in pinches of turmeric powder (optional) and add some hot water if the peanut sauce is too thick. Set aside for later use.

Processed with Moldiv


PREPARING THE SIDE INGREDIENTS

No quantities will be stated here as it is very much depends on your personal preferences.  Most ingredients are substitutable except the most common and must have are long beans, fried tau kwa). I did not prepare all the ingredients as I am having it by myself  and I will not be able to  finish if I used all the ingredients. However, I will list out the other side ingredients.

IMG_6142

  • Peanut sauce (as mentioned above)

  • Some long beans (cut into 4-5 cm) – blanched

  • Some bean sprouts – blanched

  • Some kangkong (convolvulus) – blanched

  • Some hard boiled eggs – cut into half

  • Some taukwa – deep fried and cut into slices – See below

  • Some cucumbers _ julienned into small chunks

  • Some lettuce – chopped

  • Some Empiring/Melinjo crackers (Indonesian padi oats crackers)-optional

Not in the pictures above

  • Some cabbages – blanched

  • Some potatoes – boiled and cut into cubes

  • Some lontong (rice cakes) – cut into small pieces

  • Some prawn crackers  (keropok udang)

  • Some tempeh (soya bean cakes) – cut into small pieces – optional

  • Fried Shallot.

IMG_6155

Deep Frying the Taukwa

IMG_6115

  • Marinate the taukwa (drier version of bean curd) with some salt, white pepper and coriander sauces. Deep fried under medium heat until the skin is crispy yet the inside is soft. Cut into small pieces and set aside for future use.

Blanching The Vegetables

IMG_6132

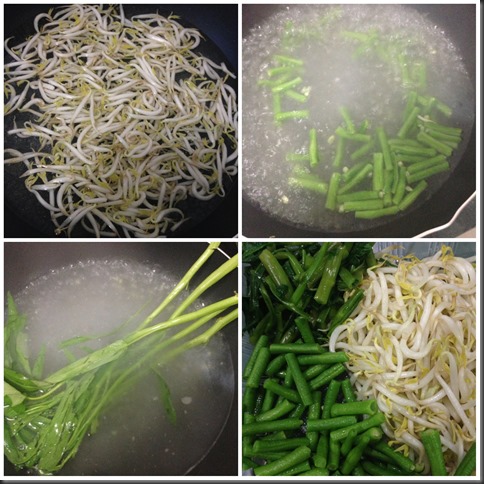
  • In a wok or frying pan, put some water, drizzles of oil and some salt and bring the water to boil. Add in beansprouts, green beans and kangkong (convolvulus) in this order. Take out and set aside for later use.


ASSEMBLING THE INGREDIENTS AND SERVINGS

IMG_6151

  • Arrange the lettuce on the serving plate and place all blanched vegetables , taukwa, eggs on top of it.

IMG_6153

  • Pour the warm peanut sauce over and garnish with Melinjo or prawn crackers and additional fried shallots, if desired.

IMG_6162


CONCLUSION

  • This is a rather simple dish to prepare except a bit laborious. However, it is a healthy dish as it is packed with vegetables and I like to eat it as a one dish meal.

Processed with Moldiv

  • Only pour sauce over the vegetables before serving otherwise, the peanut sauce may become watery due to the water excreted from the vegetables. If the sauce is too thick, add in some hot water and heat it up. Warm sauce is always preferred. For left over sauces, you can freeze it and used for other noodles dish (Satay Bee Hoon) or as dips for Satay.

Processed with Moldiv

Hope you like the post today and have a nice day. Cheers.

Processed with Moldiv


IMG_6149

Processed with Moldiv

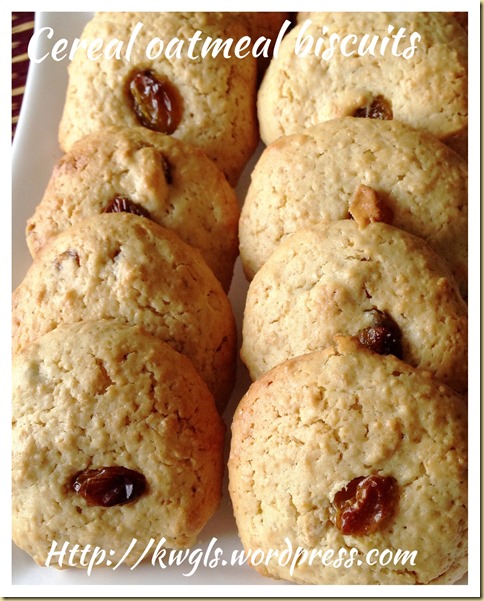
Soft Chewy or Crispy,You Choose Yourself! – Baby Cereal Oatmeal Cranberry Biscuits (麦片饼干)

IMG_7746

UPDATED POST ON 2-10-2014

A biscuit that I like very much but went unnoticed because I did not like the initial pictures taken.. Since I have some cereal at home, I decided to prepare this for my relatives as a hand gift. Nothing change except that I substitute the oats portion with instant cereal since I do not have it at home. In addition, instead of cranberry, I have used raisin instead. It is crispy outside and chewy in the middle. You can make it totally crispy if you make it a smaller size and extend the baking time at a lower temperature. A rather addictive cookie and I really love the cereal flavouring.

IMG_7750


IMG_5907


INTRODUCTION

One number baking ratio now extends it to biscuit and of course it had to be slightly amended. In this recipe, one portion of milk was being substituted by a portion of flour to make it a cookie liked structure.  This biscuits can be a soft chewy type of biscuit that is crispy on the outside but slightly soft in the middle. It can also be a crispy type of biscuits it you prefer it to be crunchy.

This is not the first time I prepared these biscuits. I prepared these biscuits a few months back. I loved it for its chewy texture and the baby cereal fragrance.

IMG_7745


WHAT WILL HAPPEN WHEN INSTANT OATS “MEET” QUAKER OATS

I like to blend my instant Quaker Oats with the Nestum Baby Cereals and make it into a breakfast cereal drink. I usually put 50% of instant oats and 50% of baby cereals and use a food processor to blend these two items. The breakfast cereal drinks will have instant oats “stickiness” but with baby cereals fragrance. I usually sweetened it by some condensed milk and if it was too “sticky”, I will add in some fresh milk. Bananas and nuts were added when I craved for it. May be I shall have another post on this wonderful breakfast drinks and you wouldn’t be disappointed with this cereal drink..

IMG_5899


WHAT IS REQUIRED

IMG_5918

  • 100 grams of butter

  • 100 grams of plain flour

  • 50 grams of instant oat

  • 50 grams of instant baby cereals

  • 100 grams of sugar

  • 100 grams of eggs

  • 50 grams of cranberry (optional and substitutable with raisins or other dry fruits)

  • 1 teaspoon of baking powder

  • 0.5 teaspoon of baking soda

IMG_7748


STEPS OF PREPARATION

Preparing the instant oat baby cereal mixture

IMG_5919

  • Blend 50 grams of instant oats and instant baby cereal each using a food processor until your desired textures.


Preparation

  • Get ready 2 baking trays lined with parchment paper or baking paper.

  • Pre-heat oven to 180 degree Celsius.

IMG_5913


Preparation the batter and baking

IMG_5886

  • Cream the butter and sugar. Add the eggs and followed by the mixture of oats/baby cereals. Stir and mix well.

IMG_5887

  • Add in the sifted flour, baking powder and baking soda, mix until just combined. Stir in cranberries or raisins and mix well.

  • Place one teaspoon/tablespoon full of soft dough (depending on the size you want) on the parchment or baking paper.  Give adequate space for the dough to expand when cooked.

IMG_5888

  • Bake in the oven at 180 degree Celsius for 15-20 minutes or until the colour starts to turn golden brown on the edges but still soft in the centre.

  • Cooled completely in a rack before store in an air tight container.

  • Best served with hot tea and coffee and as a snack.

IMG_5905

VARIATIONS

  • If you preferred the crunchy version, after the 20 minutes baking at 180 degree Celsius, reduce your temperature to 150 degree Celsius and continue baking for another 10 minutes. Note that the cookies will not be hardened until you take it out from the oven. Let it cool and see if that is your desired texture. In the event you prefer to be even crispier, put back to the oven and baked for another 5 minutes. The longer you baked, the more moisture will be lost making it to be crispier. However, do watch out for the colour of cookies. If it is too brown, you can turn off the top heat and use the bottom heat to continue the baking.


CONCLUSION

From preparing the biscuits until I finished this posting, it took me about 2 hours. Therefore, readers should comprehend how easy this biscuit was. If you like baby cereal like I do, you will like it. If you like soft chewy type of biscuits where the edges are crispy and soft in the inside, you will like it. Take a step to make this, tailor to your family taste buds, it definitely wouldn’t disappoint yourself and your family members.

IMG_7747

Join me to have some of these cookies as breakfast and of course, not forgetting a cup of hot Earl Grey tea.

IMG_7752

Cheers and have a nice day!

IMG_7744


  • For more recipes, you can refer to my RECIPE INDEX (updated as at 28 July 2014)  here and you can follow me at PINTEREST or visit the blog’s FACEBOOK PAGE to keep abreast of my future posts.  

IMG_7743

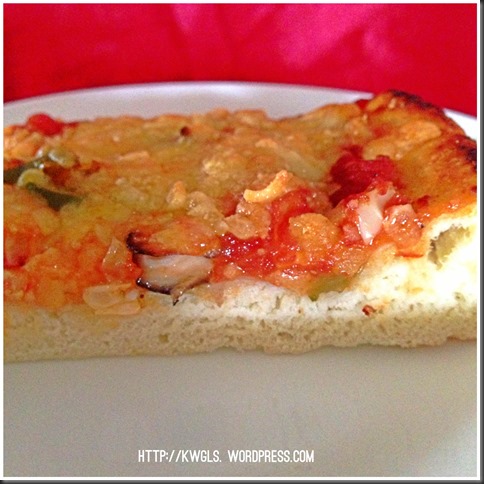
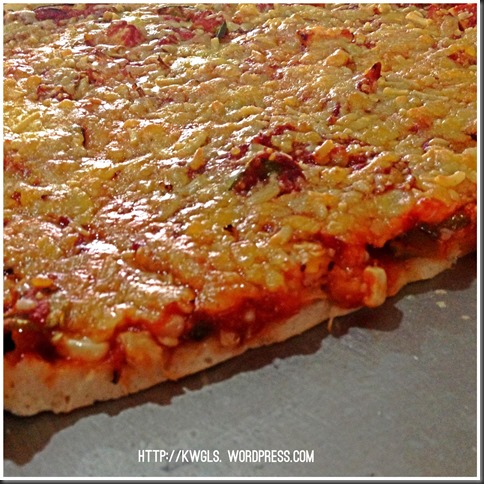
Vegetarian Pizza Is Just As Tasty ! Simple And Basic Vegetarian Pizza Preparation

IMG_5566

INTRODUCTION

I loved pizza. Pizza is one of the most common food that I ordered when I have meals in Western Restaurants. I love pizza for its dough and cheese. It is a comfort food that I can easily eat an 6 inches diameter pizza. However. I have never really ever prepare pizza since I start my baking 15 years ago. I am thinking that since I have made bread, cakes, muffins cupcakes etc., why don’t I make my own pizza?

IMG_5549

In my Facebook group : Food Bloggers and Foodies United, one of the bloggers Ms Ainy Wajahat from Pakistan have posted some pizza recipes and I promised here that I will bake some pizza. Therefore, I have based on her recipes to make the dough. For the toppings, since I am still on the vegetarian diet, I have used mostly vegetables found in my fridge.

Initially, I intended to make my own pasta sauce. Somehow, as I am too tired that afternoon, I rushed to a provision store nearby and bought a can of ready made pasta sauce. You can read the making of Pasta Sauce from fresh tomatoes HERE.

IMG_5545

Instead of preparing it  in the traditional round shape pizza, I have opted to make a rectangular shape pizza which is easier for me to bake and cut for later serving. I made the dough in the morning and intended to have the pizza for lunch, somehow, the family members decided to go out for lunch, therefore, I froze my dough in the fridge and only made the pizza during dinner time.

Making pizza is really simple and at times, I just wonder why shall I pay so much for pizzas that were sold in the eating outlets.

IMG_5559


WHAT IS REQUIRED

Dough – Recipe adapted from Ainy Cooks

IMG_5630

  • 500 grams plain flour

  • 30 grams butter (at room temperature) or olive oil or ghee or normal cooking oil

  • 300 ml of water

  • 1 egg

  • 1 teaspoon of salt

  • 1 tablespoon of instant yeast

Toppings

IMG_5631

  • Some Enoki mushrooms (cut into half)

  • Some fresh mutton mushrooms (shredded)

  • Some fresh sweet corns

  • Some green capsicums (shredded)

  • Some sausages (for my kids portion)

  • 1 tin of pasta sauce about –about 500 grams

  • Abundant of mozzarella cheeses or cheddar cheeses or goat cheese or other cheeses of your choice. 

The ingredients here are for reference only. You can add a whole range of your preferred vegetable such as tomatoes, pineapples, preserved olives, celeries and etc..

IMG_5553


STEPS OF PREPARATION

IMG_5611

  • In a big mixing bowl, place all materials except butter/ghee/cooking oil/olive oil and use a dough hook to mix until well mix. Add in butter and continue to beat until the dough is smooth. Let it proof for at least 1 hour or until the dough size double. Use a cling wrap or a wet towel to cover the top.

IMG_5612

  • Lightly grease a baking tin and pre-heat your oven to 200 degree Celsius.

  • Punch your dough in the centre to let the air escape. Lightly knead and use a roller pin to roll into  a flat piece resembling the shape of the baking tin. It will be about 0.5-1 cm thick for the dough to cover all the tin area. Make it as even as possible.

IMG_5613

  • Use a fork to lightly make some holes on top of the dough. As this is a big piece of pizza, this is to let the air to have some holes to escape.

  • Spread some pasta sauce on top of the dough

  • Fill the top with your choice of vegetables  and meats, if desired. sprinkle some Italian herbs mix such as basil, oregano etc..

  • Sprinkle sparingly with mozzarella cheese or other cheeses with your choice.

I have make half of the pizza as vegetarian and another half into ham and sausage pizzas for my kids.

IMG_5614

  • Bake your pizza in the oven for 15-20 minutes until the bases are cooked and cheeses have melt.

IMG_5633
 

  • Cur into your desired size and shape and best serve hot with your choice of additional sauces such as Tabasco sauces, mayonnaise or just plain.

IMG_5570


CONCLUSION

This was one of my very first basic vegetarian pizza that I have made  with great success. The post was very short because it deals with basic pizza preparation. More variations will come and Guaishushu will tailor the taste to the very Asian taste such as curry and etc.. However, that shall have to wait after Guaishushu finishes his vegetarian diet.

IMG_5557

Hope you like the post today and have a nice day. Cheers.

newmarvelousmondays-button

IMG_5632