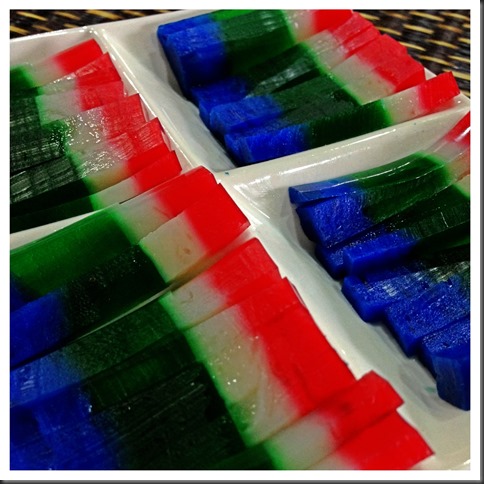
Agar Agar is not the same as Agak Agak… Agar Agar is Red Algae !!

IMG_5342 

INTRODUCTION

Agar Agar is a Malay word for red algae, apparently it has been accepted as an English word. It is hard for a lay man like me to explain agar agar, so  as usual, I will quote Wikipedia’s explanation of agar agar for reader’s understanding.

Per Wikipedia:

“The word “agar” comes from agar-agar, the Malay name for red algae (Gigartina, Gracilaria) from which the jelly is produced. It is also known as kanten, China grass, Japanese isinglass, Ceylon moss or Jaffna moss. 

Agar-agar is a natural vegetable gelatin counterpart. White and semi-translucent, it is sold in packages as washed and dried strips or in powdered form. It can be used to make jellies, puddings, and custards. For making jelly, it is boiled in water until the solids dissolve. Sweetener, flavouring, colouring, fruit or vegetables are then added and the liquid is poured into moulds to be served as desserts and vegetable aspics, or incorporated with other desserts, such as a jelly layer in a cake. “ (Source: http://en.wikipedia.org/wiki/Agar)

IMG_5320

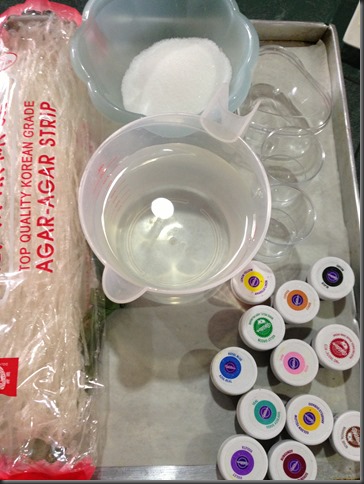
Agar agar is one type of traditional dessert commonly found in Singapore and Malaysia. It is easy to prepare and is a common item being served during Chinese New Year and other festivals. To make it requires no complicated kitchen utensils, just need to boil and mould. Traditionally, households used dried agar agar as shown in this illustration as the raw ingredient. However, in recent years, most households have started to use agar agar powder instead of dried agar agar.

IMG_5355

Traditionally, due to the lack of weighing scales, sophisticated kitchen utensils and written recipes, housewives usually prepare agar agar based on words of mouth using common kitchen items such as cups as the unit of measurement.

I was told that previously, the recipe is 1 cup of soaked agar agar will requires 1 cup of sugar and 1 cup of water. I liked this type of simple ratio recipe, however, when I tried out, it just turned out to be extremely sweet and tough.

Well, that type of recipe may not be acceptable nowadays since we have so many resources available. In olden days, the challenge to make a good agar agar is to get hold of the correct ratio of water to agar agar. The end product shall be slightly chewy and not to soft like the current jelly. In order to achieve such texture, housewives some times dried their agar agar under the sun. They believed that the less water content in the agar agar, the better it is. In fact, some house hold cut it into one bite size, dried it under the sun until it is very chewy, store in a container and eat it as a snacks or sweets!

IMG_5328

In recent years. preparation of agar agar is not entirely based on texture since all ingredients can be measure rather accurately. It is rather easy but the challenge had shifted to the colour combination and moulding. If you have the relevant mould, you can create your own design based on your creativities. One of the most trendy agar agar moulding will be agar agar moon cake where the agar agar were mould into a moon cake shape. Inside the agar agar moon cake, there is a yellow colour balls resembling the egg yolk.

Again that is deal with planning, making and moulding. It can be rather stressful if there are no prior planning on the colour selection and mould selection. Of course, it can be as simple as just a single colour one flat piece of agar agar. The taste will definitely be the same but of course it is less impressive to your guest.

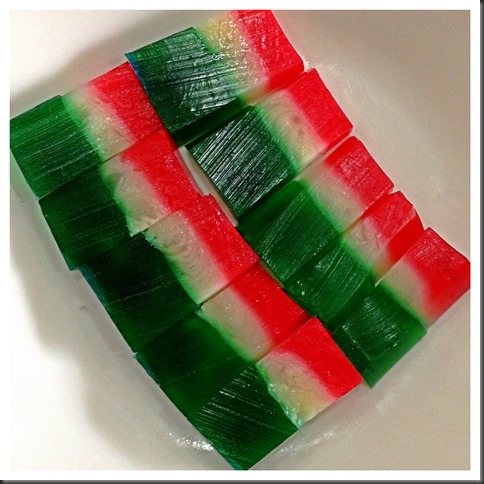
This illustration will only provide you with the simplest layered agar agar procedures. You can chose your own colour and shape of your mould. I have use some heart shape mould and the colour is purely selected for this illustration only. At home, we will not go until this extent and usually have one to two colours plus 2-3 layers of agar agars.

IMG_5363


NATURAL COLOUR SELECTION

There are a lot of natural colour available and you can totally throw away the artificial colouring, if you wish. Suggested colours are:

  • White and milky – condense milk, coconut milk, fresh milk
  • Chocolate – instant coffee paste, chocolate  paste or powder
  • Red colour – red colour dragon fruits paste
  • Yellow – mango paste
  • Green – pandanus paste
  • Violet or blue – pea flowers
  • Purple –black currant drink
  • Red – strawberry paste
  • Dots in the agar agar –  dragon fruits

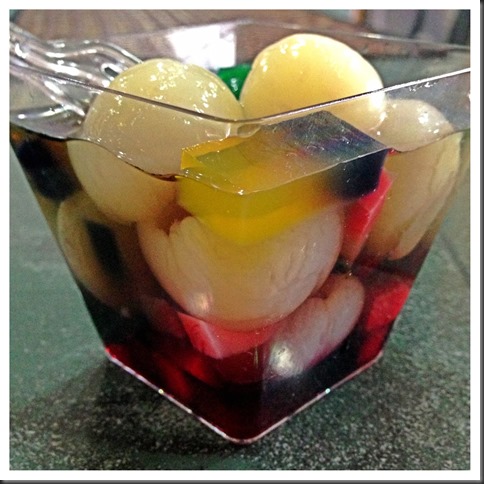
Besides the above colours, many varieties of cut fruits can also be included. For example, yam cubes with coconut milk is a good combination. Coffee with milk is another welcoming combination to make into agar agar. Canned Longan or lychee with black currant flavoured agar agar is also a presentable dessert. All this is very much depend on reader’s creativities to prepare one that is acceptable to the guest or family members.

IMG_5353


WHAT IS REQUIRED

IMG_5301

I have intentionally left out the quantities as it is best that you follow the instruction on the the package of agar agar that you bought. Be it dried agar agar strips as shown above or agar agar powders, they will have detail instructions on the quantity of water required. It is best that you follow these instruction as every brands of agar agar will requires different liquid to reach the desired textures.

  • 1 package of agar agar strip (about 38g)
  • Some water (refer package)

  • Some sugar (refer package)

  • Some permitted food colouring of your choice or the type of natural colouring ingredients as mentioned above.

  • Some moulds of your preference

  • Few leaves of Pandanus leaves – bundled (optional)

IMG_5346


STEPS OF PREPARATION

IMG_5371

  • Wash the dried agar agar by soaking in clean water for 1-2 minutes.

  • In a pot, put in the water as stated in the package and add dried agar agar. Use medium heat to bring the water to boil. Continue stirring until all the agar agar are dissolved.

  • Add in the required sugar into the agar agar solution and stirred until dissolve. Turn the heat to the minimal. You just need the heat to prevent the agar agar from solidifying while you do the layering. Alternatively, you can put your agar agar in a big basin of hot water.

IMG_5372

  • Take out some container of your choice, add in your preferred colouring and  pour into the mould.

  • Once done, put it in the freezer or chiller or under the fan and once it is set on the top, you can pour the second layer. How long will it take will depends on your room temperature, the concentration of your agar agar and the types of you container. For my today’s illustration, it is rather fast because the container is very small and my agar agar is quite concentrated.

  • Repeat the same for different layers until all the agar agar were used up.

  • Put in the fridge for another 10-15 minutes.
  • Remove from the mould, cut into your desired size and shape and put in your preferred serving plate.
  • Best served cold as a dessert.

IMG_5361


CONCLUSIONS

This is extremely simple. It is best that you based on what is stated in the package label to prepare the agar agar. Different brands will have different instructions.

Though this illustration is using traditional dried agar agar, you can use agar agar powder instead. The price for both dried agar agar and agar agar powder is rather economical and in my humble opinion, it is still a good choice of snacks or desserts. Variations are many and you have full flexibility to choose your desired flavour, colour and moulding. You guest will surely be impressed by your creativities.

Try this traditional Asian dessert and I am sure you wouldn’t regret preparing it. Hope you like the post today. Have a nice day and cheers.

IMG_5348

You Stingy Old Man, You Ruined My Mexican Coffee Buns–Polo Buns and Mexican Coffee Buns

IMG_2529

IMG_5798

INTRODUCTION

Please scroll down for the updated posts

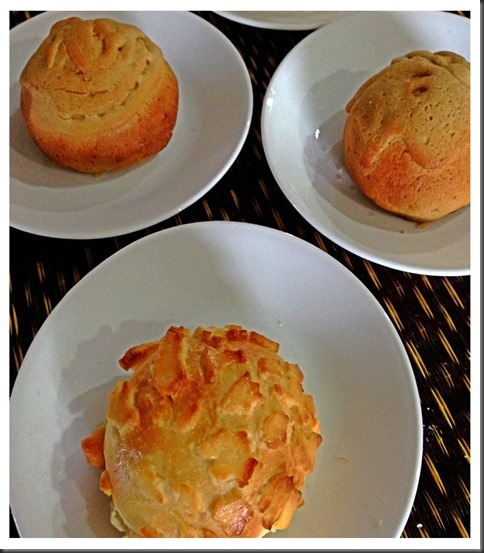
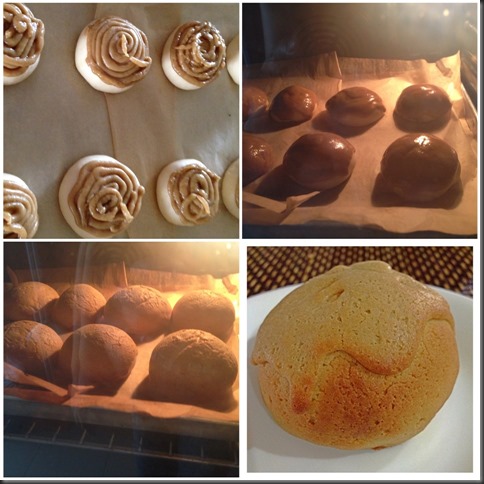
Guaishushu is seriously regretting for his “creativities” and “stinginess”. He made a batch of Polo buns and Mexican Coffee Buns. However, as the final proofing of his bun is less than his desired diameter, he was left with some coffee pastry dough. Instead of throwing it away, half way when he baked the buns, he just took out the buns and pumped in the left over coffee pastry dough thinking it will melt and become a coffee buns with double dose of crusty coffee toppings… And the end, he found that instead of making it more beautiful, he made a bunch of ugly buns… Well, he still decided to share the recipe here as readers can just follow the recipe and get some good quality buns…… Don’t be misled by Guaishushu’s pictures.

IMG_5192

POLO BUNS AND MEXICAN COFFEE BUNS

Polo bun or pineapple bun is a type of soft, sweet bun commonly found in Asia. The word “Polo” in Mandarin literally translated to pineapple. In another word, it is supposed to be a soft bun that have skin that resembles the skin of pineapples. Usually what is being sold in the market is with fillings such as barbecue pork. However, as I am on a vegetarian diet, I have opted to make it into a plain bun for breakfast. The buns were wrapped with a soft cookie liked dough on top of the buns, when it proved for the second time, the plain dough will start to make the soft cookie liked dough to break and those resembling the skin of a pineapple. Some have used a knife to cut into a pattern of a pineapple skin.

IMG_5812

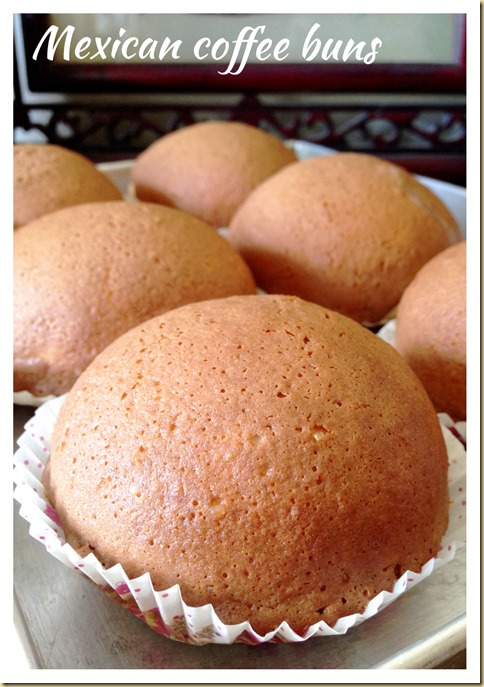
Mexican coffee buns is popularized by Rotiboy in Malaysia and it is a type of sweet bun with coffee flavoured crusty toppings. Usually, inside the buns, there is  a slice of butter which will melt when the buns are baked. Therefore the buns is full of buttery flavour.

THIS IS DEFINTELY A WORKABLE RECIPE AND IF YOU LOOK AT MY WORK IN PROGRESS PICTURES, YOU WILL SEE THE IT IS OKAY UNTIL THE VERY LAST MOMENT WHEN GUAISHUSHU IS GREEDY TO ADD ADDITIONAL COFFEE TOPPINGS.

IMG_5170


This post is a rather long post and have the following sections

Section A: Preparing the Buns

Section B: Preparing the Polo Buns Crusty Toppings

Section C: Preparing the Mexico Buns Crusty Toppings

Section D: Preparing Polo Buns for Baking

Section E: Preparing the Mexico Buns for Baking


SECTION A: PREPARING OF BUNS

What is required

IMG_5100

  • 500 g bread flour

  • 100 g castor sugar

  • Yeast one packet (about 11 grams)

  • 30 grams of butter (at room temperature)

  • Pinches of salt

  • 50 grams eggs (about 1 egg)

  • 240 grams of water


STEPS OF PREPARATION

IMG_5223

  • Mix all ingredients except softened butter and beat at slow speed for about 5 minutes.
  • Add the softened butter and continue kneading at medium high-speed for about 20-30 minutes or when the dough did not stick to the wall of your mixing bowl and do not break when you pull the dough.
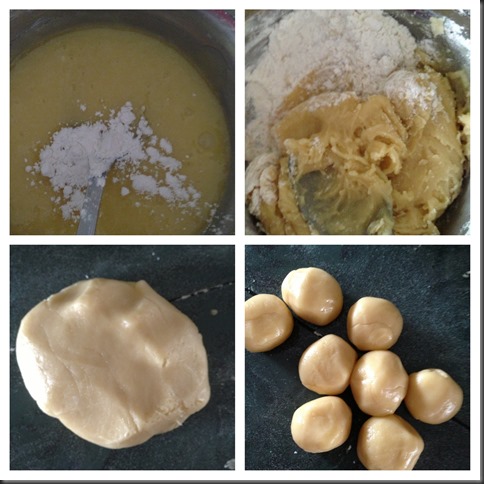
  • In the flat surface dusted with normal or bread flour, take out the dough from the mixing bowl and slightly knead it using hand for 1-2 minutes and shape it into a ball.
  • lightly oil you mixing bowl and place the ball in the bowl. Cover with damp cloth or cling wrap (to prevent moisture loss).

  • Leave it to proof until almost double in size. This should be about 30-45 minutes depending on the day’s temperature.

IMG_5188


SECTION B: PREPARING THE POLO BUNS CRUSTY TOPPINGS

What is required

IMG_5118

  • 75 grams butter, melted

  • 110 grams of bread flour self raising flour, sifted

  • 50 grams of icing sugar, sifted

  • 25  40 grams of eggs, lightly beaten

  • 30 grams of milk powder
  • One egg yolk for egg washing
  • Some sugar for sprinkling


Steps of preparation

IMG_5111 

  • Melt the butter in an microwave oven for 1 minute.

  • Add in beaten eggs, sifted icing sugar, milk powder and sifted bread flours self raising flour. Mixed well until it form a soft dough.

IMG_5117

  • Divide the dough into 8 equal portions.

  • Shape in round shape and set aside for later use.


Section C: Preparing the Mexico Buns Crusty Toppings

IMG_5106

What is required

  • 100 grams of butter, melted

  • 100 grams of flour, sifted

  • 80 grams of icing sugar, sifted

  • 50 grams of eggs, lightly beaten

  • 2 tablespoons of unsweetened instant coffee dissolved in 2 tablespoons of hot water.

  • 8 pieces of 1 cm x 3cm x 0.2 cm cold cut butter (sizes is just for reference and you can just cut the butter in a small piece) – for usage in Section E. Store the butter in the fridge.


Steps of preparation

IMG_5124

  • Melt the butter in an microwave oven for 1 minute.

  • Add in beaten eggs, sifted icing sugar, instant coffee paste and sifted bread flours. Mixed well until it form a soft sticky dough and set aside.

Note that in the above illustration pictures, I only add in the instant coffee paste at a later stage.


SECTION D: PREPARING POLO BUNS FOR BAKING

* For newer detail instruction of preparing it from frozen dough, please scroll towards the end for the updated post

IMG_5224

  • Take the dough out, punch into the dough to let any trapped air escaped. Knead for one minute and divide into 2 portions. Set aside one portion for Mexico Coffee Buns in Section E.

  • Divide the dough equally into 8 portions and shape it into a round ball.

IMG_5225

  • Use a roller to flatten the “cookie liked dough” as prepared in Section B.

  • Use a brush to lightly brush some water on the plain dough so that it is easier for the cookie dough to cling on the plain dough.

  • Wrap around the plain dough and let it prove until double in size.

  • As the dough proves, you will see the cookies dough started to break. If you find you cookies dough have the tendency to drop from plain dough, spray or brush with additional water to let them stick together.

IMG_5226

  • When double in size, baked in the oven at 190 degree Celsius for about 15 minutes.

* For newer detail instruction of preparing it from frozen dough, please scroll towards the end for the updated post

IMG_5176


SECTION E: PREPARING MEXICO COFFEE BUNS FOR BAKING

IMG_5229

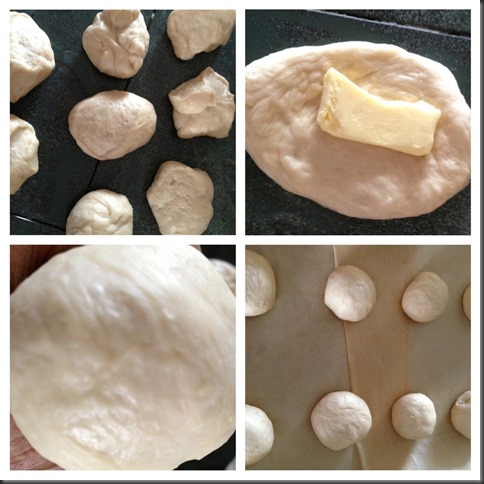
  • Lightly knead the other half of the dough as mentioned in Section D.

  • Divide the dough into 8 equal portions and shape into a sound ball.

  • Use a roller to roll the ball into a flat dough, place a piece of cold butter on top of the dough. Use the dough to wrap a butter and make it into a round ball.

  • Put it in the baking tray and proved until double in size.

IMG_5227

  • Put the coffee soft dough into a piping bag. Cut a small hole in the bottom.

  • Pipe the coffee soft dough on top of the proved buns in the pattern as in the above images.

IMG_5228

  • After finished piping, bake in the oven for 190 degree Celsius for about 15 minutes.

IMG_5172


CONCLUSIONS

In this post, I have shared two types of common sweet buns. If you have some baking basics, it is definitely not a difficult bun to prepare. The crispy toppings of both buns are rather similar except the proportion of each ingredient is different. These toppings can actually be prepared in advance to shorten the preparation time. Remember that you can always wrapped barbecue pork in the Polo buns and you can refer Guaishushu’s Facebook Page post P1 – Roast Meat Bun (烧肉餐包).

IMG_2523

Sincerely, honestly, faithfully hope you like the post today and don’t get discourage by the ugly pictures today. Guaishushu’s promise to be less stingy (at least for photo taking purposes, ha-ha) in my coming illustrations..

Have a nice day and cheers….

IMG_5822


UPDATED ON 2 AUGUST 2014


IMG_2525


I have prepared some Mexican Buns on today and I have decided to take some picture and update the post.

IMG_2533

As the above dough recipes uses tangzhong is rather time consuming, I have decided to use another faster dough as in my Blueberry Sweet Bread. It is definitely a faster and easier straight dough method that yields a fluffier bread.. As for the toppings, it is the same as the recipe above.

IMG_2537


UPDATED POST ON 12 SEPTEMBER 2014

With the frozen dough that I have in the fridge, I have decided to prepare some polo buns for the breakfast.

IMG_5808

There are some changes to the recipe as indicated in “red” as above as I found that this recipe for the topping is better. In addition, I have used another way of preparing the buns.

IMG_5781

  • Pre-heat the oven to 190 degree Celsius.

  • Weigh the  topping and divide into 10 equal balls. Take one topping, shape it like a ball, place a dough ball on top of the crust ball, wrap the topping around the dough ball. Use a knife to cut some lines on on top of the toppings.

IMG_5796

  • Let the dough proof until double in size, egg wash with the egg yolk followed by sprinkling some sugar on top of the crust. Bake in the pre-heated oven for 12-15 minutes or when the breads turn golden brown.

IMG_5824

IMG_5818


  • For more recipes, you can refer to my RECIPE INDEX (updated as at 28 July 2014)  here and you can follow me at PINTEREST or visit the blog’s FACEBOOK PAGE to keep abreast of my future posts.  

IMG_2539

IMG_5804

Blanching Vegetables in Chinese Cooking – 利用汆烫准备可口的中式的”菜”肴


IMG_5073

INTRODUCTION

Traditional Chinese cooking don’t usually use the blanching method for cooking its vegetables. Usually, they stir fried with oil in a hot wok or frying pan. 

My mum will usually take out a frying pan, put in some oil, stir fry the garlic or shallots until golden brown, throw in the vegetables, add seasonings, stir fried for another 1-2 minutes and scope in the plate for serving. That is rather traditional and applicable to almost all types of vegetables. The disadvantages of using oil for stir flying vegetables are that the vegetable’s will lose its color and some vitamins will lose in this process.

In most restaurants, realizing that the color of the vegetables will turn less appealing and that the texture will be compromised, the chef will usually blanched the vegetable before stir frying the vegetables. This will  cut short the stir frying time so as to preserve its greenish appearance and some of the vitamins.

In this post, I will share with you the various combinations that you can prepare your vegetable dish using the water blanching method without stir frying but the dishes are equally tasty. 


WHY THIS POST

My son, aged 7 have a slightly high body mass index and was requested by the school authority to participate in the weight reduction program. Knowing that the school is concerning about his weight issue, I have decided to alter my methods of cooking and one of which is by blanching the vegetables instead of stir frying the vegetables. The first meal (blanched kailan with oyster sauce)  was well received by my family members and the whole plate of vegetables were being snatched by my son, daughter and wife within 5 minutes of putting in the table. Seeing such a good response from the family members, I have decided to explore more vegetables and with as many types of dressing as possible..In the next 9 meals that I prepared, I have created different dressings with different vegetables and to my delight, they don’t really notice the difference and my son have requested for more vegetables..


BLANCHING METHOD DEFINED..

According to http://chinesefood.about.com,

“Blanching is a process whereby the food is briefly plunged in boiling water for a moment. Sometimes it is then immediately transferred to ice water to stop the cooking process. This technique is commonly used with Chinese vegetables prior to stir-frying. The goal is to bring out the color and flavor of the vegetable without overcooking.source: (http://chinesefood.about.com/od/glossary/g/blanch.htm)”


BLANCHING OF CHRYSANTHEMUM GREEN ILLUSTRATED

In this post, I will share with readers one vegetable dish that I have prepared for my dinner today – Chrysanthemum green with Chinese black vinegar dressing (春菊拌浙醋)。Measurements were intentionally omitted as it is just vegetables plus seasonings all of which can be adjusted to individual tastes.

Chrysanthemum green is a type of vegetables that are quite common in Korean, Japanese , Taiwanese and Cantonese Cuisines. It can be eaten raw but the stems can be slightly tough. It can be stir fried, blanched or cooked in soup or appeared as a garnish in some Chinese dishes like Taiwanese oyster pancake.


WHAT YOU NEED

IMG_5076

  • Some chrysanthemum greens (you can chopped the stems into smaller pieces)
  • Some cherry tomatoes
  • Some sesame seeds, fried onion for garnishing
  • Some light soya sauce, black vinegar or lime juice, sesame oils (onion oil), salt, sugar


STEPS OF PREPARATION

IMG_5079

  • Wash the vegetables and set aside. As this preparation only deal with blanching, you may wish to soak the vegetables in the water for a longer while to clear all unseen particles and chemicals..
  • Take out a container or salad bowl and put in your condiments. In the above picture, I have included some shredded chili, fried onions, Chinese black vinegar, salt, pepper and sesame oil.
  • In a frying pan, put in some water. Add in pinches of salt (as you can see the white patch next to the red color patch) and a few drops of onion oil (cooking oil also can be used). This feel drop of oils are very important to preserve the color of your blanched vegetables and to keep the juices in the vegetables.
  • When the water is boiling, throw in the chrysanthemum green and let it boiled for about 3 minutes.


IMG_5080

  • Add in the cherry tomatoes and blanched for another 1-2 minutes.
  • Sieve the blanched vegetables and transfer to the salad bowl or the mixing container. Note that I have by passed the step of blanching the vegetable in some ice water as the dish will be served immediately after it is prepared. However, if you prefer, you can dip the blanched vegetable in ice water of about 1 minutes to preserve its crunchiness (not necessary depending on type of vegetables) and color.
  • Stir until well mix and transfer to another plate. Sprinkle with sesame seed and best served hot with rice.

The dish is simple and as chrysanthemum greens are a bit tough, you can blanch it longer and cut into smaller pieces. This dish is full of vitamins and the Chinese black vinegar dressing is just like the French dressing in French cuisines. Of course there are oriental elements such as sesame oil and black vinegar that make it taste like Chinese cuisines. Should I have lime (kalamansi with me), I will use it instead of black vinegar. It is fully flexible be it type of dressings, toppings and vegetables.


VARIATIONS

For the sake of oil less cooking, there are many Chinese vegetable dishes which can use the blanching method instead of traditional stir frying method.

Blanching method of Chinese vegetable dishes like the Western cuisine’s salad preparation is a matter of finding the right combination of vegetables and dressings. Chinese are less prone to eating the vegetables freshly picked (raw), therefore in order to promote healthier eating habitat with minimal amount of fats possible, an intermediary step is to blanch the vegetables .

The following table shows different types of Chinese vegetables that I have ever cooked using the blanching method and different dressings used. Both the list of vegetables and dressings are endless and are open to all types of combinations depending on the chef’s creativities.

Vegetables Meat  (protein)
Kailan
Minced pork
Pak Choy Meat slices/strips
Choy Sim Chicken breast
Broccoli Prawns
White Stem Pak Choy Shredded chickens
Chrysanthemum Greens Pork /chicken floss
Capsicum Baby Shrimps
Celery

Anchovies
Tomatoes Egg omelet strips
etc., etc., etc.  (endless) etc., etc., etc.  (endless)
   
Something to bite Seasonings
Sesame seeds Black Vinegar
crunched nuts Lime/kalamansi juice
Japanese rice seasoning sprinkle Mayonnaise+Tomato sauce (‘000 island)
Macadamia Salt
Chopped chili Sugar
Chopped fresh garlic MSG (if you preferred)
Fried garlics or shallots Onion Oil
Pine seeds Pepper
Dry mushrooms stripes Belachan (shrimp paste)
Shredded century eggs Oyster sauce
etc., etc., etc.  (endless) etc., etc., etc.  (endless)

SAMPLE DISHES

The pictures below are some of the dishes that I have prepared for my family as detailed in “what I have cooked today series”. The preparation are basically the same, blanching and mixed. You can also see more in the linked – PINTEREST BOARD-VEGETABLE DISHES HERE

Blanched mix vegetables with prawns (杂菜虾球)


Blanched Baby Kailan with Oyster Sauce (

耗油小芥兰)

Blanched White Stem Pak Choy with anchovies (

小银鱼白菜)

Blanched Broccoli with Minced Pork (

肉碎西兰花)


Blanch Tri-color Capsicum with Chicken Breast (

三色柿子椒拌鸡柳)

Blanched baby Pak Choy with minced pork (

肉碎拌小奶白)

Pak Choi with Oyster Sauce (

耗油上海青)

Blanched Chye Sim with meat floss (菜心拌肉松)


CONCLUSIONS

In traditional Chinese cooking, blanching of vegetables is generally not common. The exposure of Western Cuisines have made me come out with this fusion which I believed will be acceptable by both Asians and non-Asians. Without stir frying, the vegetables can be equally tasty.

While this resembles salad in western cuisines’ term but it have elements of oriental cooking due to the type of condiments used. It will definitely healthier because fats intake will be limited and more vitamins will be retain in the vegetable resulting from shorter cooking time. It will also eliminate the fear of eating raw vegetables which is supposed to be even more nutritious.

My favorite dressing is a type of dip for my fried fish (light soya sauce + chili + lime juice + shredded garlics + bit of sugar). For me , it blends equally well when I used it for my blanched vegetables. I like to prepare this if I want to lose weight and of course this is an acquired taste. You can invent your own dressing and you will be surprised that how well received blanched vegetables are if the dressings are right!

Why don’t you try my favorite dressing and let me know what you think?

Bachelor’s Tomyam Noodles–Quick And Nice…

IMG_4987

INTRODUCTION

I am struggling whether I should post this simple noodle preparation. It is just that simple and up to your own creativities. I am thinking, will putting up this post insult my reader’s intelligence? Will it qualify as a professional blog post? Is this consider as an recipe? Well, after struggling for 10 minutes, I have decided to post this dish to gauge what is my reader’s reactions. Due to this impromptu decision, therefore, unlike other post, some pictures were not available.

This is a super fast dish that I cooked for myself today.  From cooking to eating to cleaning, it took me less than half an hour.  It is ideal for those who just want a simple, quick and nutritious meal.


WHY THIS DISH

I am alone by myself at home and I don’t feel like cooking for myself. Usually,  I would just eat the breakfast leftover items for lunch. But I have been eating breakfasts as lunches for the last 3 days and my body tells me that I need something that don’t taste like “breakfast”.

Cooking a dish for myself is never a problem, I just search my kitchen cabinet and my refrigerator and see what I have at home. As my kids were away on holiday and we will not be cooking these few days, therefore, my perishable stocks were very limited and this is what I found, a packet of Tom yam instant noodles.

IMG_4991 - Copy

As I have never fancy any instant noodles, this packet of instant noodles is not attractive to me at all especially if it is plain (meaning water plus instant noodles). But suddenly, it come across my mind and asked myself, why not cook myself some Tom Yam noodles. So I take out a pot and cooked my superfast Tom Yam noodles.


WHAT YOU NEED

IMG_4990

As far as I am concerned, there is nothing that you can’t put it. I usually cooked based on what I have especially the side vegetables. What I used this time:

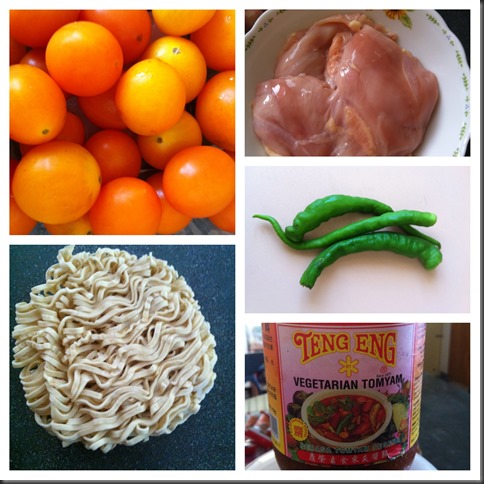
  • One pieces or dry egg noodles – this is exactly the same as your instant noodles except it is slightly firmer;
  • Some cherry tomatoes – supposingly to be eaten as fruits but since I have some in the fridge, I just dump it in.
  • Some chicken breast meat (optional) cut into small chunks – I had this in the fridge for quite a while and since I will not be cooking for the these 2 weeks, I have to “get rid” of it. But frankly speaking, it taste better with some meaty flavor;
  • Few pieces of chili (optional) – These chili were specially flown from China given by one of my guest who stay in Guangxi China. It is supposingly very spicy but for me, it is slightly more spicy than the red chili but not as spicy as chili padi.
  • Tom Yam paste – It is good to keep some ready made tom yam paste at home for making quick soups, fried noodles and etc. My wife have bought this vegetarian tom yam paste which I don’t think there is much differences. The only difference in ingredients that I can think off is the shallots and garlics since Buddhist vegetarian were not allowed to consume any shallots and garlics.

STEPS OF PERPARTION

I have no picture to show as this post was rather impromptu and only decided half way when I was cooking. In fact, it is such a simple dish that there are only 2-3 steps and further elaboration will “insult” my reader’s intelligence. If you really can’t understand what I am trying to say, just imagine you are cooking some instant noodles in a pot.

  • Take out a pot and pour in some plain water. Put a few table spoon of tom yam paste (depending on taste) and bring to boil. Throw in other ingredients in these orders – meat, chili, tomato, egg noodles. 

  • As I am using chicken breast and cut into small chunks, it is rather quick to cook. The smaller your meat is, the easier it is to cook! You can use some sweet potato flour or corn flour to slightly cover your meat before you put them in the pot. The role of these flours is to keep the juice inside the meat and also make its texture smoother. For me, as I want it to be quick, I have not perform this step, I just put my meat in without adding any corn flour.
  • Boil for 1-2 minutes until your noodles have soften.
  • I prefer to rest it for a while until the noodles absorbed all the soup and this will make it tastier and softer.
  • Variations – There are many variations that you can have. You may want to add some eggs. or sausages. some cabbage, red carrots, celery, etc. and the lists are endless. These are all up to your imaginations and creativities.

FINAL OUTPUT

IMG_4988

In the picture, does it look appetizing to you?

To make it look better you can consider using mushrooms for black color, red chili for red color, baby corns for yellow color and carrot for orange color.

Compare to the 1st picture and the last picture, you can see that noodles is softer as it had absorbed the gravy.

Taste wise, if you want it more sour, you can squeeze some lime juice. For me that is just nice. It is essentially tom yam cooked with chicken stock and if you like tom yam, this is a suitable meal for you!


CONCLUSIONS

  • Not all foods need to be elaborately prepared before it is considered as tasty. Simple meal like this is ideal for those who are kitchen phobia or short of time to prepare a nutritious meal;
  • It is nutritious because the ingredients that were used are simple (like my post on Nasi Aruk here) but packed with proteins and vitamins. Tom yam paste itself is full of herbs and spices that is beneficial to the body.
  • It is healthier because no oil and further seasonings were used. IT IS DEFINITELY HEALTHIER THAN INSTANT NOODLE AS NO MSG WAS USED。When you ate plain instant noodles, most people will craved for stronger flavor as the taste is very monotonous and you need seasonings to make your palate “happy”. With slight additions of meat and vegetables, your attention will gear towards your meats and vegetables. The soups will have some meaty flavor and you don’t feel the need to add any more seasonings. Is it not healthier?
  • It is fast to prepare, full flexibility and you can substitute any ingredients with what you have at home.

Because it is so flexible, it essentially means there is no recipe. So, do you like this type of simple dish or you think reading my post is wasting your precious time?

I treasure your feedback and let me know how you feel about it.

Happy reading and cheers.


I have recently open a Facebook community page ‘AUTHENTIC SARAWAK FOOD AND HISTORY” and I hoped you can support the page by visiting the page. If you find the page benefits you in some way, please give it a “LIKE”.

The page is intended to become a center of collection of unique Sarawak Cuisines. For those who don’t know where is Sarawak, Sarawak is one of states belong to Malaysia and in the Island of Borneo. It is famous of its eco-tourism and multi racial society. Its unique cuisine are cuisines like Sarawak Laksa, Kolo mee and scarce vegetables such as jungle fern shoot, hairy eggplant etc. PLEASE COME  AND UNDERSTAND MORE ABOUT SARAWAK CUISINES HERE.


IMG_4708     IMG_3838   


IMG_4988

Thousand apologies.  I have to put this picture here due to technical error. Otherwise it will mess up my Tumblr. accounts posting and my Facebook posting.