Is Pavlova Originated From Australia, Russia or New Zealand?–Strawberry and Blueberry Pavlova

IMG_5533

INTRODUCTION

Yesterday is really a busy day for me. I have been making mayonnaise, baking pizza and this Pavlova. By the time  I have to take picture of this Pavlova, I was feeling extremely tired and after I ate one slice and kept 3 slices for other families members, I gave away the rest to my neighbour who were having some sort of house gathering. I hoped I have adequate pictures to share with readers.

IMG_5529

Pavlova actually sounds familiar to me. Just like Vladimir, Sergei, Liana and Nathasia, the name sounds so Russian. I have spent some times in Russian before and one of my ex-colleagues do carry the name Pavlova. In fact, I do not know it is the name of one of the famous desserts until very recently when I did a read up on meringue, macaroons and other egg whites based pastry items.

IMG_5535

WHAT IS PAVLOVA?

Per Wikipedia:

Pavlova is a meringue-based dessert named after the Russian ballet dancer Anna Pavlova. It is a meringue dessert with a crisp crust and soft, light inside.

The dessert is believed to have been created in honour of the dancer either during or after one of her tours to Australia and New Zealand in the 1920s. The nationality of its creator has been a source of argument between the two nations for many years, but formal research indicates New Zealand as the source.

The dessert is a popular dish and an important part of the national cuisine of both countries, and with its simple recipe, is frequently served during celebratory and holiday meals. It is a dessert most identified with the summer time, but is eaten all year round in many Australian and New Zealand homes.

(http://en.wikipedia.org/wiki/Pavlova_(food))

Meringue based dessert will mean this dessert only utilizes egg whites and some sugar. It is not really a common dessert in Singapore and Malaysia. The challenge is to prepare a Pavlova that had a crispy outside of soft cotton liked inside. Preparation is not really that tough but patience is needed in the baking of this simple meringue.

IMG_55331


WHAT IS NEEDED

IMG_5468

  • 4 egg whites (at room temperature)

  • 1 1/4 cups of icing sugar or castor sugar

  • 2 teaspoon of potatoes starch/corn starch

  • 1 teaspoon of lemon juice

  • 1 teaspoon of vanilla extract

  • Fresh fruits of your choice. In this illustration, I have used fresh strawberry and blueberry.

IMG_5522

Note:

  • The egg whites have to be at room temperature. Colder egg whites are more difficult to beat to peak condition.

  • I have substituted the castor sugar with icing sugar as it will be easier for it to dissolve in the egg whites. If it is difficult for you to get icing sugar, just blend the castor sugar using a food processor.

  • Usually, corn starch is used. However, as I did not have corn starch with me, I have used potatoes starch. By the same logic, sweet potatoes starch and tapioca starch can also be used. What is needed is a small quantity of flour that is light and smooth to help holding the Pavlova structure.


STEPS OF PREPARATION

IMG_5572

  • In a baking tray. have a piece of baking/parchment paper. Use a 8” round baking tin and draw a big circle on the baking sheet. Set aside for later use.

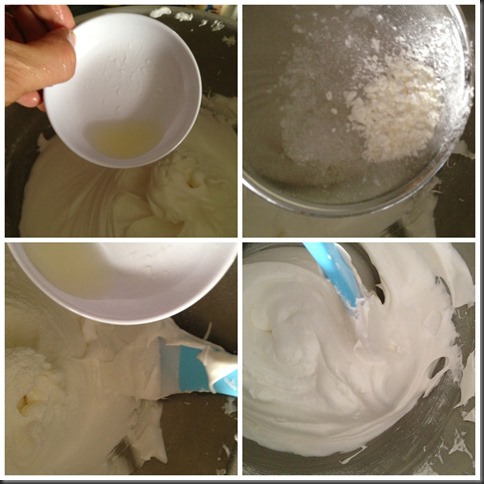
  • In a mixing bowl, Add egg white and beat until soft peak form. Add in icing sugar spoon by spoon and continue to beat until the egg white is thick and glossy.

IMG_5573

  • To check if all sugars have been dissolved, rub a bit of the beaten egg whites (meringues) between the thumb and index fingers. If it is smooth, it means that the sugars have been dissolved. If it feels sandy, it means that the sugar has yet to be dissolved. Continue beating for another 1-2 minutes and test again.

  • Add in vanilla essence and continue beating until it is well mixed.

  • Off the machine if the meringue is glossy and in its stiff peak form. Stiff peak form means when you hold up the beater, the meringue can point upwards as shown in picture number 4.

IMG_5574

  • Take out the mixing bowl. Add/sprinkled the lemon juices. Sift in the potatoes/corn flours.

  • Use a spatula to fold in the flour and lemon juice quickly. Handle lightly until all the lemon juice and flour are well mixed.

IMG_5575

  • Place the meringue on top of the baking paper within the circle drawn. Smoothing the edges.

  • Baked in the oven at low temperature of 130 degree Celsius for about 60-90 minutes or until the outer crust are dry and pale cream colour.

IMG_5576

  • IMPORTANT: Leave the Pavlova inside the oven with the door ajar and let it cool inside the oven until it is completely cool. It is generally okay if the middle part of the Pavlova collapsed as we will be decorating with whipped cream.

  • PRIOR TO SERVING, beat about 200 ml of whipping cream until top peak and placed on top of the Pavlova. Place your fresh fruits on top of the Pavlova.

IMG_5526


CONCLUSION

Pavlova is good to be served as a dessert. It’s sweet crusty tops and sides goes well with most fruits. One can also consider using fruits such as Kiwi and mangos. The Pavlova can be prepared in advance and keep for 3-4 days in an air tight container. Of course, the size of Pavlova have to be reduced accordingly for it to store in the container. It can also be made into a one bite size.

IMG_55391

If you are health conscious, you can substitute the whipped cream to low fat whipped cream and slightly reduce the amount of icing sugar used. Remember whipped cream and fruit toppings shall only be used prior to serving as the whipped cream and fruit juices will make the meringue soggy if not consume on time.

Hope you like the post today and have a nice day. Cheers.

newmarvelousmondays-button 9VwhltV

 IMG_5524

Agar Agar is not the same as Agak Agak… Agar Agar is Red Algae !!

IMG_5342 

INTRODUCTION

Agar Agar is a Malay word for red algae, apparently it has been accepted as an English word. It is hard for a lay man like me to explain agar agar, so  as usual, I will quote Wikipedia’s explanation of agar agar for reader’s understanding.

Per Wikipedia:

“The word “agar” comes from agar-agar, the Malay name for red algae (Gigartina, Gracilaria) from which the jelly is produced. It is also known as kanten, China grass, Japanese isinglass, Ceylon moss or Jaffna moss. 

Agar-agar is a natural vegetable gelatin counterpart. White and semi-translucent, it is sold in packages as washed and dried strips or in powdered form. It can be used to make jellies, puddings, and custards. For making jelly, it is boiled in water until the solids dissolve. Sweetener, flavouring, colouring, fruit or vegetables are then added and the liquid is poured into moulds to be served as desserts and vegetable aspics, or incorporated with other desserts, such as a jelly layer in a cake. “ (Source: http://en.wikipedia.org/wiki/Agar)

IMG_5320

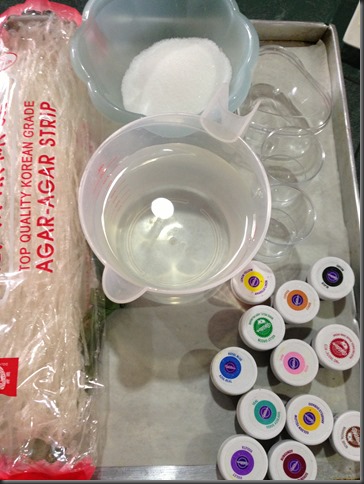
Agar agar is one type of traditional dessert commonly found in Singapore and Malaysia. It is easy to prepare and is a common item being served during Chinese New Year and other festivals. To make it requires no complicated kitchen utensils, just need to boil and mould. Traditionally, households used dried agar agar as shown in this illustration as the raw ingredient. However, in recent years, most households have started to use agar agar powder instead of dried agar agar.

IMG_5355

Traditionally, due to the lack of weighing scales, sophisticated kitchen utensils and written recipes, housewives usually prepare agar agar based on words of mouth using common kitchen items such as cups as the unit of measurement.

I was told that previously, the recipe is 1 cup of soaked agar agar will requires 1 cup of sugar and 1 cup of water. I liked this type of simple ratio recipe, however, when I tried out, it just turned out to be extremely sweet and tough.

Well, that type of recipe may not be acceptable nowadays since we have so many resources available. In olden days, the challenge to make a good agar agar is to get hold of the correct ratio of water to agar agar. The end product shall be slightly chewy and not to soft like the current jelly. In order to achieve such texture, housewives some times dried their agar agar under the sun. They believed that the less water content in the agar agar, the better it is. In fact, some house hold cut it into one bite size, dried it under the sun until it is very chewy, store in a container and eat it as a snacks or sweets!

IMG_5328

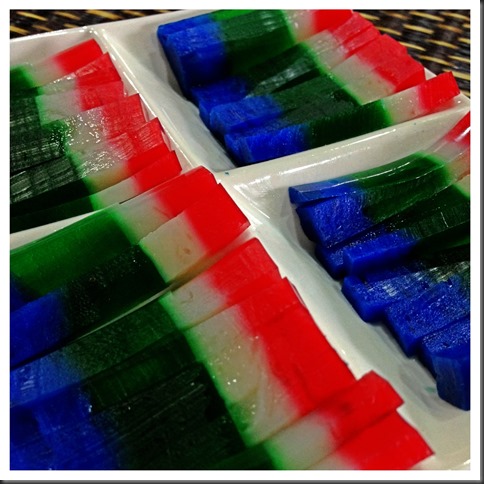
In recent years. preparation of agar agar is not entirely based on texture since all ingredients can be measure rather accurately. It is rather easy but the challenge had shifted to the colour combination and moulding. If you have the relevant mould, you can create your own design based on your creativities. One of the most trendy agar agar moulding will be agar agar moon cake where the agar agar were mould into a moon cake shape. Inside the agar agar moon cake, there is a yellow colour balls resembling the egg yolk.

Again that is deal with planning, making and moulding. It can be rather stressful if there are no prior planning on the colour selection and mould selection. Of course, it can be as simple as just a single colour one flat piece of agar agar. The taste will definitely be the same but of course it is less impressive to your guest.

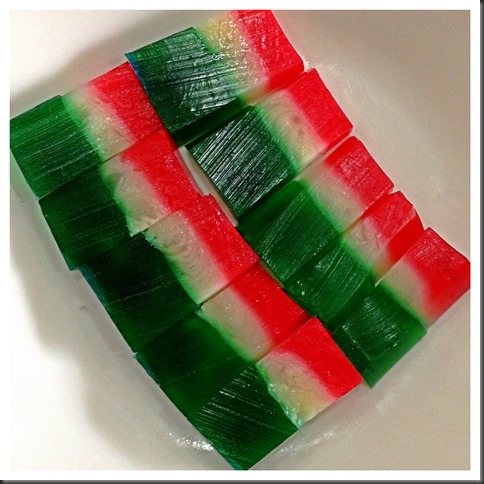
This illustration will only provide you with the simplest layered agar agar procedures. You can chose your own colour and shape of your mould. I have use some heart shape mould and the colour is purely selected for this illustration only. At home, we will not go until this extent and usually have one to two colours plus 2-3 layers of agar agars.

IMG_5363


NATURAL COLOUR SELECTION

There are a lot of natural colour available and you can totally throw away the artificial colouring, if you wish. Suggested colours are:

  • White and milky – condense milk, coconut milk, fresh milk
  • Chocolate – instant coffee paste, chocolate  paste or powder
  • Red colour – red colour dragon fruits paste
  • Yellow – mango paste
  • Green – pandanus paste
  • Violet or blue – pea flowers
  • Purple –black currant drink
  • Red – strawberry paste
  • Dots in the agar agar –  dragon fruits

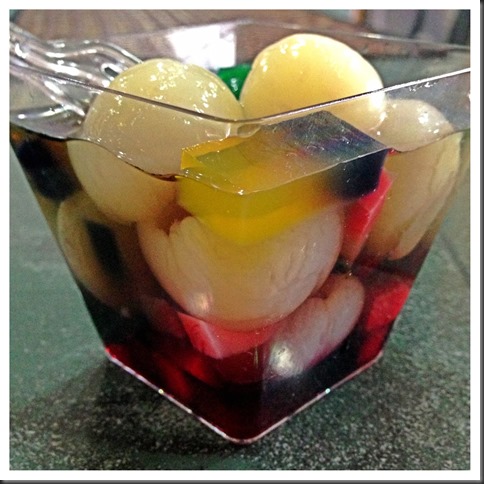
Besides the above colours, many varieties of cut fruits can also be included. For example, yam cubes with coconut milk is a good combination. Coffee with milk is another welcoming combination to make into agar agar. Canned Longan or lychee with black currant flavoured agar agar is also a presentable dessert. All this is very much depend on reader’s creativities to prepare one that is acceptable to the guest or family members.

IMG_5353


WHAT IS REQUIRED

IMG_5301

I have intentionally left out the quantities as it is best that you follow the instruction on the the package of agar agar that you bought. Be it dried agar agar strips as shown above or agar agar powders, they will have detail instructions on the quantity of water required. It is best that you follow these instruction as every brands of agar agar will requires different liquid to reach the desired textures.

  • 1 package of agar agar strip (about 38g)
  • Some water (refer package)

  • Some sugar (refer package)

  • Some permitted food colouring of your choice or the type of natural colouring ingredients as mentioned above.

  • Some moulds of your preference

  • Few leaves of Pandanus leaves – bundled (optional)

IMG_5346


STEPS OF PREPARATION

IMG_5371

  • Wash the dried agar agar by soaking in clean water for 1-2 minutes.

  • In a pot, put in the water as stated in the package and add dried agar agar. Use medium heat to bring the water to boil. Continue stirring until all the agar agar are dissolved.

  • Add in the required sugar into the agar agar solution and stirred until dissolve. Turn the heat to the minimal. You just need the heat to prevent the agar agar from solidifying while you do the layering. Alternatively, you can put your agar agar in a big basin of hot water.

IMG_5372

  • Take out some container of your choice, add in your preferred colouring and  pour into the mould.

  • Once done, put it in the freezer or chiller or under the fan and once it is set on the top, you can pour the second layer. How long will it take will depends on your room temperature, the concentration of your agar agar and the types of you container. For my today’s illustration, it is rather fast because the container is very small and my agar agar is quite concentrated.

  • Repeat the same for different layers until all the agar agar were used up.

  • Put in the fridge for another 10-15 minutes.
  • Remove from the mould, cut into your desired size and shape and put in your preferred serving plate.
  • Best served cold as a dessert.

IMG_5361


CONCLUSIONS

This is extremely simple. It is best that you based on what is stated in the package label to prepare the agar agar. Different brands will have different instructions.

Though this illustration is using traditional dried agar agar, you can use agar agar powder instead. The price for both dried agar agar and agar agar powder is rather economical and in my humble opinion, it is still a good choice of snacks or desserts. Variations are many and you have full flexibility to choose your desired flavour, colour and moulding. You guest will surely be impressed by your creativities.

Try this traditional Asian dessert and I am sure you wouldn’t regret preparing it. Hope you like the post today. Have a nice day and cheers.

IMG_5348

One Number Ratio Baking Adventures – Layered Pound Cake ………

IMG_3196

This is a post with no recipe. This is Guaishushu’s baking adventures.

As mentioned in Guaishushu’s zebra pattern pound cake, Guaishushu don’t like to follow recipes and remember numbers. Therefore, Guaishushu is constantly experimenting his 1 number pound cake ratio theory, that is 1 egg : 1 butter : 1 flour : 1 sugar : 1 milk (hereinafter refer to as “One number Ratio”) and today, he applied this to the famous Indonesian Layered Cake (Kek Lapis). However, as he is in the experimenting stage, he did not care much about the details on the additions of spices, control of temperature and etc.

He assured that he will publish a full post with detailed recipe and illustrations.

IMG_3198

The origins of Indonesian layered cakes is believed to be the Baumkuchen/Tree cake, an authentic cake in Germany and Holland. However, due to the Dutch colonization of Indonesia, the Dutch had modified the traditional version by incorporation of local spices. Therefore, the Indonesian layered cake is called the lapis legit (spiced layered cake) whereby a spice mix were added to the batters.

Based on Guaishushu’s One number cake ratio pound cake as mentioned in this post, Guaishushu believed that “one number ratio” can apply to cup cakes, fruit cakes and other cakes such as layered cake. Of course, the cakes could not be called baumkuchen but it is just  a “layered pound cake” baking using total different ingredients ratio..

IMG_3195

The taste of the cake is similar with the pound cake but the texture is difference, slightly denser. Putting the legit spice mix, it will taste like the Indonesia Kek Lapis Legit.

The difference with the original texture of pound cake  is because of the differences in the method of making the layered cake though ratio is the same. The constant layering of the cakes will make it dense. In addition, the temperature used is higher to make the layered cake therefore becoming drier. With slight tuning of the oven temperature, timing of layering, the cake can be as beautiful and as delicious as with other common Indonesian layered cakes.

While most common layered cakes will required about 10-30 eggs, this cake only uses 5 eggs. In addition, some recipes uses 500g butter whereas this is the pound cake that uses 250g of butter only. That could also resulted a cake that is denser and less moist than other layered cakes.


  IMG_3201

Just give readers a glimpse of how to bake a layer cake, you will have to use top heat for baking. Put a few tablespoons of batter each time until the top layer turns brownish. Continue until all the batters finished.

IMG_3200


Well, that is Guaishushu’s experimentation with the making of layered pound cake. Do making of layered cake have  any short cut? Can the “one number ratio” applicable to a layered cake? Guaishushu believes that the answer is yes!


Guaishushu will continue to experiment more recipes using this “one number ratio” and this layered cake will be further modified and tested before the recipe is published.


Have a nice day and cheers.


IMG_3197

Let’s See How An Asian Make The Tomato Pasta Sauce From Scratch ….

Processed with Moldiv

INTRODUCTION

This is the homemade pasta sauce from scratch. I learned this many years ago from one of my French friends staying in Paris, France. When I visited her, she is preparing the pasta sauce and I can vividly remember certain steps in the preparation but sad to say, I can’t really recall the happy time we had during the dinner.

IMG_67861

This post will consist of two parts:

Part 1  –  the making of homemade pasta sauce and

Part 2 – the making of baked pasta with pineapple

Processed with Moldiv


PART I – MAKING OF HOMEMADE PASTA SAUCE


WHAT IS NEEDED

This recipe is adequate to make tomato pasta sauce for at least 6 persons and have about 600 grams left for baked pasta.

IMG_0701

  • 1 kg of tomatoes 
  • 2 big size capsicums (preferably red in colour but green colour is acceptable) – optional 
  • 3 big stalks of celery – optional and in this illustration, I did not include this 
  • 3 large onions 
  • 6 chicken franks – optional
  • 500 g of fresh button mushroom (can be substituted with canned mushrooms) – optional 
  • 500 g of minced meat (beef or chicken or pork). In this illustration, pork was used.

IMG_0739

  • 20 cloves of garlic 
  • 30 grams of butter (can be substituted with olive oils)
  • 1 tablespoon of Italian dried herbs 
  • 100 grams of mozzarella cheese 
  • 10 tablespoons of tomato ketchups (optional, for “colouring” purposes) 
  • 1 pack (about 300g) of pasta of your choice. 
  • Seasoning (Salt, black pepper, sugar)

Processed with Moldiv


PREPARING THE RAW INGREDIENTS……..

IMG_0706

  • Clean the tomato and all other raw ingredients.
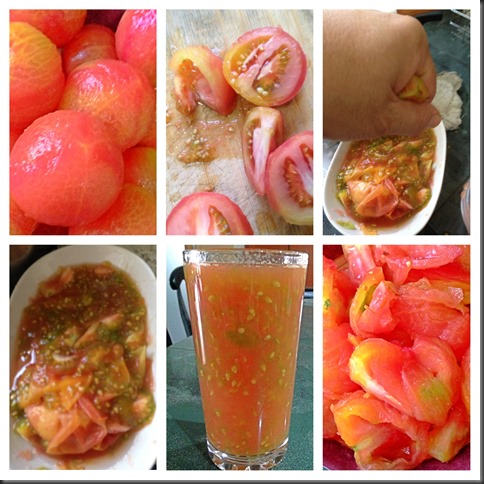
  • In a big pot, bring some water to boil. Place the tomato into the hot water and let it boil for a few minutes or until the skin slightly peeled it off. Note that as long as the skin start to break, you can transfer to the cold water as mentioned below.
  • Get ready a pot of icy cold water. Place the tomato in the icy cold water.
  • Peel off the skin by hand which is rather easy.

IMG_0704

  • Cut opened the de-skinned tomato. Use a spoon to scoop out the seeds.
  • Use your hand to squeeze off the seeds and/or juices into a clean container.
  • You can either throw away these juices or keep it as tomato juices. It is okay to drink the seeds as it is very fine and slippery.
  • Set aside the tomato flesh for future uses.

IMG_0741

  • Traditional way of making pasta sauces do not really utilize food processors. However, I have opted to use food processors to cut short the braising time.Traditionally, all items were julienned or cut into small chunks for the cooking.
  • Use the food processors to cut the garlic and onion in small chunks (need not to be overly fine since you are going to braise them), set aside.
  • Use the same blender to blend the red and green capsicum or celery (if any). For celery, you will need to de-skin the celery first before you put into the blender. The red and green capsicum and celery will help to add volumes and flavour to your pasta sauce. If only tomato is used, it may be too sour.

IMG_0742

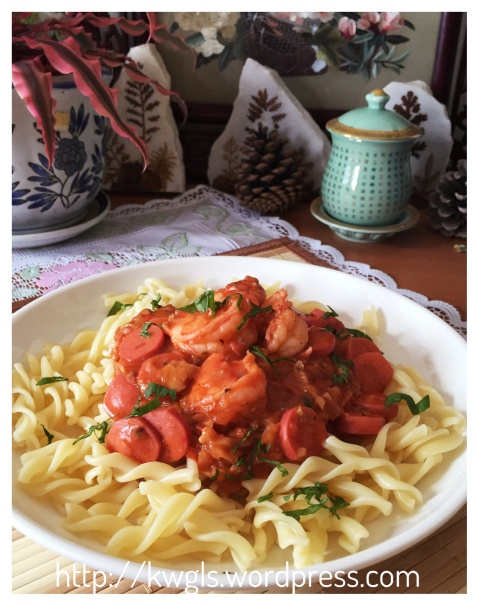
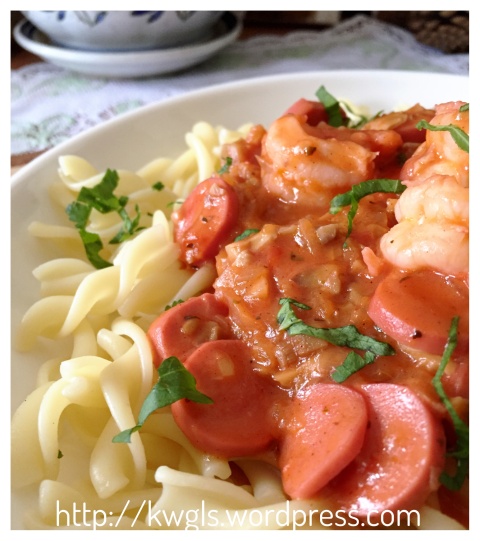
  • Cut the chicken franks into small chunks. This is optional and rather “Asian” taste. I have put this because my kids love to eat chicken franks.
  • Cut your button mushrooms into thin slices. Canned mushrooms works equally well.
  • Minced meat of your choice. Traditionally, beefs were used. As I do not eat beef, I have substituted with minced pork or at times minced chicken. I have bought the ready made minced meat from the supermarket.
  • Grated mozzarella cheese. I have opted to buy the grated mozzarella cheese but it is not necessary at all. If you have un-grated cheese, you can just cut a slice (without grating) and put it in the sauce later. It will melt subsequently.

THE COOKING BEGINS…..

IMG_0773

  • In a big pot, put the butter and let it melt.
  • Add in the chopped garlics, stir fried until it turns slightly brown or the aroma start to emit.
  • Add in the chopped onion and stir fry for 2 minutes.
  • Add in the chopped green and red capsicums and stir fry for another 2 minutes.

IMG_0774

  • Add in the chopped tomato and bring them to boil under high heat.
  • Once boiled, turn to medium heat and let the mixture simmer for at least half an hour.
  • Add in seasoning and herbs and let them boil for another 5 minutes. Seasonings can include pinches of sugar, black pepper and salt. As for the Italian herbs, I have bought the over-the-counter dried herbs which consist of basil, oregano, garlic, thyme, red bell peppers and parsley.
  • If you just want pure pasta sauce without any meat. You can stop here and you can keep it in sterilized containers and keep for at least a month in the fridge. The steps that follows are meat sauces for the spaghettis or other pastas.

IMG_0775

  • Add in your minced meat and cooked for another 2-3 minutes.
  • Add sliced mushrooms and chicken franks.
  • As this is home made pasta sauce, the colour will very much depends on the types of tomato that you bought. In Singapore and Malaysia, it is rather hard for you to find Roman tomato, we can just use whatever tomatoes we have. However, the colour may not be that appealing, you can add in bottled tomato sauce to make the colour darker. In addition, it will help to enhance the flavour of the pasta sauce.

IMG_0776

  • Continue to boil for at least 10 minutes, add mozzarella cheese and once boiled, off the heat and your home made pasta sauce is ready.

Processed with Moldiv


COOKING THE PASTA…..

This is rather standard and you should read the instructions of the packaging for the pasta that comes with it.

IMG_0783

  • In a pot with about 2 litres of water, add 2 tablespoons of cooking oil (olive oil) and pinches of salt. Bring to boil under high heat.
  • Add the pasta and continue to boil for 8-10 minutes or till desired texture.
  • Drain away hot water and pour some cold water on top of the pasta for one minute.
  • Drain, add in pasta sauce and garnished with parsley or any other desired herbs  and it is ready to serve.

IMG_0708


Processed with Moldiv


CONCLUSION

  • Home made pasta give you the a full flexibility of adapting the ingredients and herbs to your family taste buds and health objectives. Most ingredients are substitutable and trial and error or mix and match appeared to be the best approach to design your own favourite pasta sauce. I have also opted to use food processor in the preparation process and that have cut short the preparation tremendously.
Processed with Moldiv

For my readers from Western countries, since baked pasta and pasta sauce are more popular in your countries, tell me if you think the pasta is yummy and if the baked pasta will suit your taste buds.

Hope you LIKE the post and have a nice day. Cheers.

Processed with Moldiv


Processed with Moldiv