Hi, Let Start Cooking the Laksa …. An In Depth Analysis and Pictorial Procedural Description Of The Famous Sarawak Laksa (Part III)

UPDATED POST ON 16-10-2014 – NEW PICTURE TAKING

IMG_89771


PART III   COOKING THE SARAWAK LAKSA

Image

Part I and Part II are rather “theoretical” and this post will show you the practical steps to prepare the Sarawak laksa.

IMG_27271

To make a delicious bowl of Sarawak Laksa, besides having some good laksa paste that I mentioned in Part II, there are few important things that you should note in your course of preparation. The process of preparation is rather laborious and I will list out the steps and unlike other posts, you should consider follow the order of steps here to save your time of preparation..

IMG_89851


WHAT YOU NEED?

In this post, the units or quantities listed out here is for about 15 bowls of laksa and you should reduce it accordingly after taking into considerations the number of persons and personal preferences.

IMG_2955 

  • Fresh Prawns or Shrimps (1kg)
  • Chicken Breast (0.75kg)
  • Coconut milk (500g) 

For coconut milk, you can use fresh or packet coconut milk. If you like it more milky (lemak), you can add in more coconut milk. If you are health conscious, either substitute it with evaporated milk or don’t add any milk at all. Have you ever heard that this delicacy is a “cardiologists nightmare”?

 IMG_3152 

  • Thin Rice Vermicelli – 1 kg (about 2.5 packets commonly sold in the markets)
  • Home-made laksa paste or ready-made laksa paste  – 1.5 kg (2-3 big packets commonly sold in the markets)

Do you know that to qualify a dish as laksa, the noodles must be either thick or thin rice vermicelli in it? Curry Mee is not a laksa as per definition of laksa here. At home, we do eat it with instant egg noodles ..Smile

 IMG_2957

  • Calamansi (about 20-30 pieces)
  • Some Sambal Belachan
  • Bean Sprouts
  • Coriander leaves and Chinese celery chopped into small pieces

One of the most important condiments in this dish is Sambal Belachan, a type of condiments made from shrimp paste. You can know more about belachan here. That is why sometime Sarawak Laksa is called Sarawak Sambal Laksa. I have buy the over-the-counter sambal belachan in Singapore and the taste just blends especially well with the soup.

If you have kids at home and they do not take spicy food, actually, when making the Laksa Paste, you can ignored chilli as an ingredients. So the laksa broth or soup that you cooked will not be spicy and you can let your kids have this. When you are eating on your own, just have one big scope of Sambal Belachan in it, the taste will be similar with those paste that have chilli in it..

IMG_89891

MAY BE I SHOULD CONSIDER MAKING  LAKSA PASTE FOR SALES TO CHILDREN OR SILVER AGE MARKET.   THEORITICALLY, SARAWAK LAKSA WITHOUT COCONUT MILK AND TOO MUCH OIL SHOULD BE CONSIDER AS A HEALTH FOOD SINCE IT IS FULL OF SPICES AND HERBS…Smile

The coriander leaves that you see in my picture is the type sold in Singapore and West Malaysia. Traditionally, in Kuching, Sarawak, coriander “seedlings” were used. However, it is harder to get it nowadays. In my old days, as one of my brothers do not like the strong smells of coriander leaves, we use Chinese celery instead. Until today, I still have the habit of mixing these two leaves as a garnish for the laksa.

IMG_89811


THE COOKING BEGINS…

If you don’t want to add seasonings like “axinomoxo”, then try to follow these steps as it will save you time and seasonings! Joking.


Step 1 – Blanching the Chicken Breast

IMG_2959

  • Clean your chicken breast, boil your water and put in the chicken breast. The minimum amount of water required will be at least to cover the chicken breast. But you can use more water as it will be used later.
  • Use medium heat and boil for about 20 minutes until cooked. Don’t cook too long because you breast will be juicy as all the juice will be in the soup.
  • Traditionally, in Kuching, chicken breasts were used because it is easier to hand shred and with less bones. However, you can also use the whole chicken. If this is the case, you have to use high heat to bring the water to  boil, submerged your chicken and simmer for 30 minutes. Once cooked, dip in ice cold water. You can refer to my post on chicken rice here.
  • Hand shred your chicken breast  and set aside for use.
  • Remember to keep your “chicken stock” for future use.


Step 2 – Blanching the prawns

IMG_2972

  • Clean the prawns. Blanch the prawns with the chicken stocks in Step 1.
  • Personally, I prefer to blanch the prawns with shells at it will keep all the juices. If you shell the prawns, the blanch prawns will be less tasty.
  • This process will take only about 5 minutes. Sieve the prawns and set aside the “prawns and chicken stock”.
  • As long as the prawns are cool, shelled the prawns and devein it. If you found that the prawns are dirty after you devein it, use some cooked water to clean it.
  • DON’T THROW AWAY THE SHELL, keep it for next use.


Step 3 – Making of additional Prawn Stocks

IMG_3170

  • In another pot, put in some more water and boil the prawn shells until the colour starts to turn whitish. If you don’t need that much of soup, continue using the stock from Step 2 to cook the prawn shells.
  • The stock in the first picture is the prawn + chicken stock as mentioned in Step 2 (from blanching of chicken breast and the fresh prawns).
  • The stock in the third picture is the prawn stocks from boiling the prawn shells;
  • Look at the colour of the stock, the milky colour means that the soup is very concentrated and you can just take a spoon and taste it. It will be very delicious. A side note, if you are not cooking Sarawak Laksa, when you shelled the prawns, just keep it in the fridge until a sizeable amount, then use this step to cook the prawn stock, then you can use this stock to cook the Hokkien Prawn Mee or Penang Prawn Mee!
  • If you are concerned about the chicken oil and if you have time. Put in the fridge and let the oil solidify, just throw the oil away.


Steps 4 – Cooking the Laksa Soup

IMG_2984

  • Put the home made laksa paste into the stock from Step 2 and 3. Bring to boil, add in coconut milk and other condiments. Off the fire immediately when it start to boil again. Otherwise, the coconut milk will turn into coconut oil and your laksa broth will be spoilt.
  • Remember that if you are afraid of having high cholesterol, use evaporated milk instead. How much coconut milk to add is very much depends on your personal preference. I remember when I was young, my parents sometime cook laksa without coconut milk….
  • Besides adding salt as a condiments, I have the habit of putting fish sauce instead.
  • Note that the colour of my laksa broth is very bright because I use only fresh red chilli. If I used dry chilli, the colour will be darker.
  • Cooking laksa will definitely yields quite a lot of oils. Just scope it away before you use the broth.  Like chicken stock, you can put in the fridge for 2-3 hours, let the red oil solidify and throw that away. Heat up and serve. In that case your stock will look quite dull (brownish in colour).


Step 5 – Making the Egg Omelettes

 IMG_2958 

  • Break the eggs, put a few drops of cooking oil, use fork or chop stick to slightly beat it until all the yolks and the whites are completely mixed.
  • Have a hot pan, pour some egg mixture into the pan. Either use a spatula to spread them evenly. You can also do this by twisting your pan slight in a circular motion.
  • As soon as the egg mixture is firm in the bottom and you can smell the fragrance of fried eggs, just scope up the omelettes, let it cool and shred in fine long pieces.
  • Note that if you are using a non stick frying pan, there is no need for you to use oil for frying as long as your pan is very clean and free from any food particles. You can also add a few drops of oil to the egg mixture before you pan fried them.
  • THIS STEP CAN BE PERFORMED IN BETWEEN ANY STEPS BETWEEN STEP 1 AND STEP 4


Step 6 – Blanching The Bean Sprouts and Rice Vermicelli


IMG_2974

  • In a frying pan, fill in some water and drip a few drops of cooking oil. Bring to boil, blanch the bean sprouts (approximately 5 minutes). Sieve the bean sprouts, set aside for later use.
  • Use the same water to blanch the rice vermicelli. That will take about 10-15 minutes depending how soft you want it to be. The process can be shortened if you have soaked the uncooked rice vermicelli before hand.
  • Once you  sieved the rice vermicelli, quickly put it under running tap water (or if you don’t like to drink from tap water, use some cold boiled water) for about 2 minutes.The purpose of this step is to ensure that you have some springy rice vermicelli instead of soggy rice vermicelli that stick together.
  • The few drops of oil also have the role of ensuring that the rice vermicelli would not stick together. In addition, that small amount of oil will help you to “preserve” the colour of your bean sprouts. It will look fresher instead of cook.
  • If you cannot stand the tails of the bean sprouts, you can hand picked the tails before you blanched them. For me, I usually hand picked the tails but when I run of times, I will just eat with the tails!!

  • This step is best carry out before you serve the guest.


Step 7 – Assembling and Garnishing

IMG_3175

IMG_89911


  • After a few hours of ordeal, you should start to “regret” making this dish!  Lets have a quick recap of all the ingredients before serving.
  • You should have blanched rice vermicelli, blanched bean sprouts, chopped coriander leaves and Chinese celery, cooked Sarawak Laksa broth, blanched prawns, shredded chicken breasts, stripped egg omelettes, calamansi and sambal belachan.
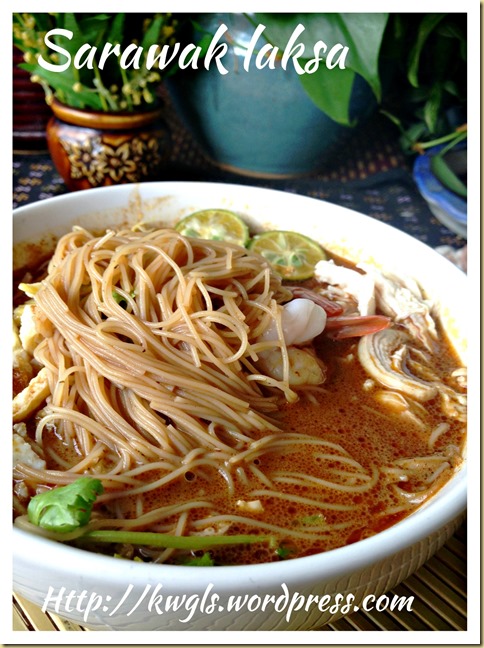
  • Take a bowl and assemble the ingredients following the sequence as in the picture (from left to right then to second row…) This, I believe will be the best presentation of your Laksa Sarawak. While the rice vermicelli have submerge in the soup, your prawns and the colour egg stripes are sitting happily on top of you reddish gravy, Do you think it is appetizing.

IMG_3176

IMG_89791


CONCLUSIONS

  • In Part 1, the definition of Sarawak Laksa, its uniqueness and the popularity have been discussed HERE.
  • Part 2 dwelled into the details of making the Sarawak Laksa Paste with a list of all major raw ingredients, its procedures and a comparison analysis between recipes. Please refer HERE.
  • Part 3 detailed how Sarawak Laksa should be prepared.

IMG_89931

  • Hopefully, this will benefit those who are keen to learn more about Sarawak Laksa and for those who are overseas, as all these spices are mostly imported from Middle Eastern countries, you can start making the paste using the powder form purchased from Indian stores. In that case, you will not worry about the kitchen equipment required, how to cook and grind the raw materials, it will at least cut short half of your time. I believed that this is also what our manufacturers in Sarawak is doing.
  • This is a long post that dealt with lots of research, reading and testing. If you found that it is useful, please forward to your friends. I will be most happy to answer any queries they have. Any factual findings that are not accurate, please drop me a line to let me know.
  • Appreciate your time reading this series and ENJOY YOUR HOME MADE SARAWAK LAKSA…

IMG_89831


  • For more recipes, you can refer to my RECIPE INDEX (updated as at 15 October 2014)  here and you can follow me at PINTEREST or visit the blog’s FACEBOOK PAGE to keep abreast of my future posts.  

IMG_89751

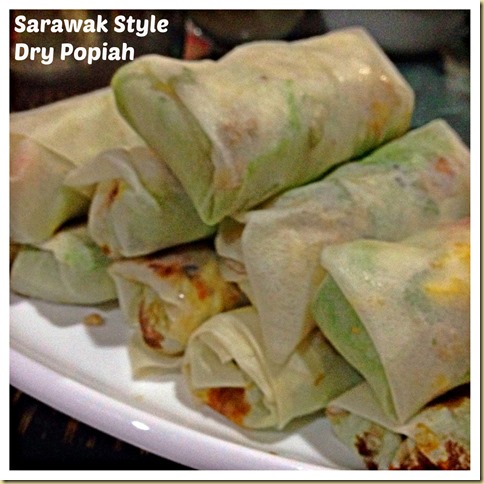
Malaysian Singaporean Chinese Food–Popiah Sarawak Style (干式薄饼)

IMG_8078

UPDATED POST ON 6-10-2014

As this is an very old post, I have decided to prepare some Sarawak Style dry popiah and do some picture shooting. Being one of the very first post of this blog, the pictures were not well taken.

Today, I have prepared these popiah using home made popiah skin and  if you are interested you can refer to this post: Homemade Spring Roll Crepes–Popiah Skin (春卷皮,薄饼皮, 润饼皮)

IMG_8059


INTRODUCTION

Popiah (Pe̍h-ōe-jī: pȯh-piáⁿ) is a Fujian/Chaozhou-style fresh spring roll common in Taiwan, Singapore, Malaysia and Burma/Myanmar, where it is called kawpyan. Popiah is often eaten in the Fujian province of China (usually in Xiamen) and its neighbouring Chaoshan on the Qingming Festival. In the Teochew (Chaozhou) dialect, popiah is pronounced as “Bo-BEE-a”(薄餅仔). [1]which means “thin wafer”. In Thailand, no doubt influenced by its large Teochew Overseas Chinese community, the spring rolls are called “Bpaw! Bee Uh”. In variants of the Hokkien dialect, it is also commonly referred to as “lun-BEE-a”(潤餅仔), which probably explains why the spring rolls are referred to as “lumpia” in the Philippines. It is sometimes referred to as runbing (潤餅) or baobing (薄饼) in Mandarin, and also as bópíjuǎn (薄皮卷).        – http://en.wikipedia.org/wiki/Popiah  

First and foremost, I have to qualify that the name Popiah – Sarawak Style was used because it is different from the popiah that I have eaten in West Malaysia and Singapore. What I have cooked and written here is based on my memories that my late mother have prepared for us and the type that were commonly sold in the “kueh” stalls in Kuching about 20 years ago. We can easily buy popiah  together with other Kuehs such as curry puffs, fried bananas, angku kueh etc. as breakfast items. It is prepared in advance and not the type that they only wrapped it when you order as commonly found in the food courts or hawker stalls.  The hawkers who sell the popiah usually did not prepare the Popiah on the spot. However, I am uncertain if this type of popiah is still common among Kuchingites but internet research shows not many bloggers talking about this version of popiah (presumably out-dated). However, I still insist to prepare popiah in this manner as it is easier to prepare and store (if you cannot finish) and personally more tasty and less soggy.….

IMG_8082

Difference between Popiah Sarawak Style and West Malaysian/Singapore style

So, what is so different about my Popiah Sarawak Style. Frankly, not much difference except once critical process of  preparing  the jicama filling. Instead of simmering the cabbage and jicama in prawn soup etc. as in West Malaysian/Singapore style, we fried it  and therefore I termed mine as the dry version.

IMG_87481

Singapore and West Malaysian Popiah appeared to be the Hokkien version of popiah originated from Xiamen, China, jicama and cabbage were julienned and cooked over slow fire in prawn stock or plain water until they are very soft. When wrapping, people used fork or other kitchen utensils to press against the cooked jicama for purposes of squeezing the water out before wrapping using the rice crepes.

IMG_87521

For dry version, no cabbage was used and jicamas were usually julienned into thicker stripes. It was then sprinkled with some salt to “force” the water out using the principle of osmosis. After that, it will be fried together with other ingredients. One thing to note is that the jicama when julienned, should not be too fine.   Other wise, your fried fillings will be too soggy for wrapping.

IMG_1171

Preparation process

I have to admit that I hate to make popiah as it involves a lot of works of slicing, dicing, julienning and cutting of ingredients and most of the processes have no shortcut using food processor except using your own hands. Among the main steps are:

  1. Julienning jicama (bangkuang);
  2. Dicing of taukwa ( I am looking for the hard yellow taukwa for dicing but I can’t find it this round, instead I use the brown taukwa. Unlike the wet version, they prefer to mesh the white taukwa)
  3. Slicing of dried mushrooms;
  4. Mincing of dried shrimps;
  5. Picking of bean sprouts’ “tail” and blanching the bean sprouts
  6. Chopping of garlics and onions into very fine pieces for frying (this I opt to use a food processor);
  7. Shelling of prawns, blanched and diced into cubes;
  8. Dicing of French beans;
  9. Frying of eggs pancake and julienned into small stripes;
  10. Grounding of peanuts and sugar;
  11. Mincing of pork belly (I opted to buy ready make)
  12. Cleaning of lettuce and coriander. Use some clean cloth to dry the lettuce and flatten it.
  13. Preparation of sweet sauce (corn starched with sugar but I opt to buy the ready made sauce)
  14. Preparation of chilli sauce (I have used the chilli sauce that I have made earlier)

IMG_1221  IMG_1220

Therefore, from the above, the process of preparing of raw material is laborious and  it would be  tough for one person to shoulder all the responsibilities of preparing all the ingredients by one self. In old time, such preparation process is actually a “come and help” social gathering whereby usually lady guests will come earlier and help with the preparation of the raw ingredients and the man would come after all the popiahs were wrapped! 

SARAWAK STYLE POPIAH

Cooking process – the dry version

  • Fried some minced garlics and onion until brown, sieved and set aside for later use.

IMG_1178   IMG_1219

  • Stir fried minced garlics and onion, dry prawns and mushrooms until the fragrant comes out. At this stage, I usually add some condiments such as pepper and salt at this stage.

  • Throw in the minced pork belly, French beans, dried tofu  (in this order) one by one until the pork belly is 70% cooked. Add the jicama and bean sprouts and fried until you see the jicama start to get soft (which is very fast). I have to caution against that jicama should not be over cooked other wise it will be soggy.

  • Mixed the blanched prawns, add additional condiments to taste and you are done. You should have a rather dry filling.

IMG_1189

IMG_8068

IMG_8067

Wrapping process

IMG_8074

  • Lay one Popiah skin on the table, put a leaf of “flattened” fresh lettuce, put some deep fried garlics and spread some sweet sauces and chillies on the lettuce. It is wise to spread this fix ins on the lettuce because this will prevent liquids penetrating the skin making the skin too soggy for wrapping.

  • Put some fillings, eggs stripe, coriander leaves on top of the lettuce;

  • Put some sweet sauce on top followed by some groundnut powder. Note, I only put sweet sauce at this junction, again, I want to let the sweet sauce penetrate the filling and collected by the lettuce.

IMG_1224IMG_1223IMG_1226

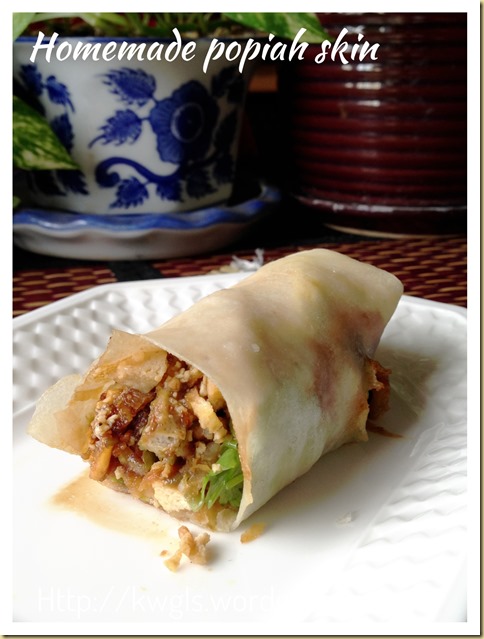
  • Fold the spring rolls and open your mouth to eat….smile.

IMG_8084

Serving

  • Serving of the dry version is usually not cut into small pieces. As it is dry, you can just take one and popped into your month without utilizing any spoon and plates. In older days, it was wrapped with a piece of white paper to facilitate your holding and prevent juices coming out of the filling.

  • If you cannot finish it, you can just wrap it and store in the fridge. The next day, just fried it and it will become fried spring roll. If the skin is too damp, since it is frying, you can add another skin. Alternatively, you can store you left over filling in the fridge and wrap it the next day before frying or consider making the Kueh Pie Tee.

You can have as many variants of popiah as possible but in my humble opinion, the following ingredients should not be substituted to make it to taste like popiah: taukwa, jicama, French beans, beansprouts, grounded peanuts and sweet sauce. 

IMG_8088

Lastly, please note that the filling for these Chinese style Sarawak Popiah can be used in Kuih Pie Tee as well. If you are interested, you can refer to this post: Malaysian Singaporean Chinese Food -Kueh Pie Tee

IMG_8726


CONCLUSION

Lastly, I found two bloggers talking about these version of popiah and they also name this Sarawak Popiah but none is certain about the name but stressed that “this is the style my mum used to serve us back in Sarawak”. The reasons of what culture influenced the elder Sarawakian prepared this type of popiah is still unknown and I would be glad if any of the reader can tell me the evolution of this type of popiah in Kuching. Sarawakians, shall we patent it ?? LOL

IMG_8080

Hope you like the post today. Cheers and have a nice day.

IMG_8086


  • For more recipes, you can refer to my RECIPE INDEX (updated as at 8 June 2014)  here and you can follow me at PINTEREST or visit the blog’s FACEBOOK PAGE to keep abreast of my future posts.  

IMG_8076

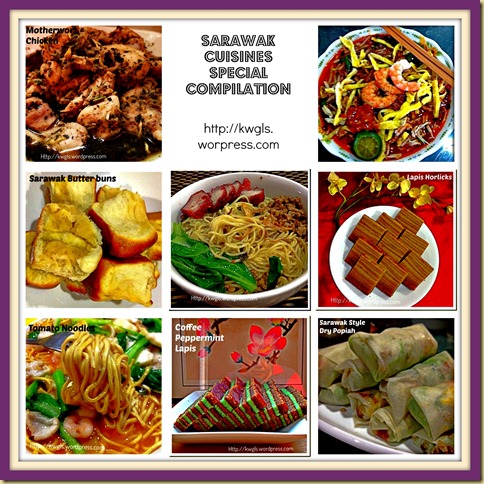
Special Compilation of Sarawakian Cuisines

PicMonkey Collage101

INTRODUCTION

Since I started my blog about a year ago, I have blogged quite a number of Sarawak cuisines and I will add as and when I have blogged about new Sarawak cuisines. Some of these cuisines are uniquely Sarawak cuisines. Take a look and see what are these cuisines and remember, if you travel to Sarawak, do try these cuisines locally. For those who are interested to read more about Sarawak,

“Sarawak  is one of two Malaysian states on the island of Borneo. Known as Bumi Kenyalang (“Land of the Hornbills“), Sarawak is situated on the northwest of the island, bordering the Malaysian state of Sabah to the northeast, Indonesia to the south, and surrounding Brunei. It is the largest Malaysian state. The administrative capital is Kuching, which has a population of 700,000.Major cities and towns include Miri (pop. 350,000),Sibu (pop. 257,000) and Bintulu (pop. 200,000)”. As of the last census (2010), the state population was 2,420,009.“  (http://en.wikipedia.org/wiki/Sarawak)

As per Sarawak Tourism’s “top 10 iconic food” in 2012 are:

  • Sarawak Laksa (included in this post)
  • Kolo Mee (included in this post)
  • Ayam Pansuh – Chicken cooked in bamboo tube
  • Midin Belacan – Jungle fern fried with shrimp paste
  • Ikan Terubok Masin – A hard to get river estuary fish
  • Umai – Shashimi alike but Sarawak version with different seasonings and condiments
  • Kompia – A traditional Foochow bread that is bagel look alike
  • Terong Dayak Soup – A special breed of yellow brinjal commonly found in Sarawak
  • Dabai – A black colour fruit that local Chinese called is olive and can be preserved to be used as side dish for porridges or rice
  • Kampua Noodle – A type of Foochow noodle which was rather similar to kolo mee as mentioned above but mostly served in plate with slightly different type of noodles and condiments.

Being in Singapore, I have difficulty to blog a lot of the cuisines from my home town due to the lack of raw material. However, the effort continues. If you are keen to learn more about Sarawak Cuisines, you can visit my humble page of Authentic Sarawak Food and History. However, I have to apologize the page had not been updated for quite a while due to time constraints. I also wanted to take this opportunity to invite interested Sarawakian readers who had a passion in Sarawak Cuisines to take over this Facebook Page.

Please click on the pictures or blue colour links to go to the respective recipes.


Noodles Dishes

Sarawak Laksa – Cooking Illustration – A unique laksa that Most Sarawakian will be proud of. You can refer to here where I have written some concise history for ICNN travel report. In this post, I have written a very detail method of preparation for this special laksa dish.

img_2847

Sarawak Laksa – Recipe – Most of the Sarawak household have cooked the laksa by using the ready pre-mix laksa paste. Being in Singapore, I have decided to try preparing my own. Overseas readers, if you are keen to prepare your own Sarawak laksa paste, you can read this post and start your own adventures.

img_3107

Sarawak Laksa – History . Why Most Sarawakian are very proud of this special laksa dish, but there is a lack of literature write up on the history and evolution of this laksa dish and why is it unique to Sarawak. If you want to go a bit further to understand the history of commercially sold Sarawak Laksa paste, you can read this short history of Sarawak Laksa paste.

img_3053_thumb

Sarawak Kolo Noodles or Dry Noodles – Sarawak Kolo noodles is rather special type of dry noodles (干捞面)that most if not all Sarawakian will be proud of. A light colour dry noodles and comfortably sits after Sarawak Laksa in the food ranking. As far as my circle of friends are concerned, none have ever rejected this noodles and Sarawakian can have this for breakfast until supper.

img_8476_thumb

Kolo Beehoon – What if you can’t the special noodles? My wife used to prepare this simplified version of kolo beehoon for our breakfast. Of course the ingredients will depends on what we have in the fridge..

IMG_22301

Tomato Yimin Noodles (茄汁伊面) – This noodle is rather special as it is cooked with tomato ketchup. The original noodles are deep fried noodles. In this illustration, I have used the commercially sold yimin instead. I have always called Sarawak style spaghettis and see if you concur with me.

noodles-4


Meat Dishes

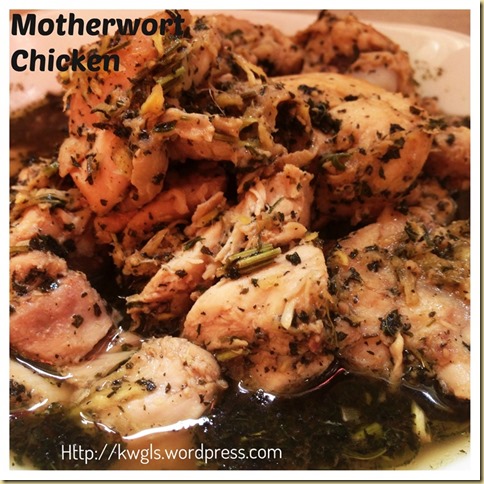
Motherworts Chicken (益母草姜酒鸡) This is a traditional confinement dish for ladies who just gave birth. Motherwort have been used by midwives for centuries in Europe to assist in delivery, How this special herb become a confinement dish in Sarawak remained unclear, possibly because of the influenced of British during previous colonisation of Sarawak.. Though it is a confinement dish, but it is well liked by all age groups and sexes.

img_02091


Pastry, Cakes and Snacks

Chinese Style Citrus Zested Pancake (风吹饼,风筝饼, 烘吹饼) – A rather unique type of snack in Sarawak and lots of Sarawakian Chinese love this snack. As constrasted to this illustration, it is usually round and without sesame seeds . For some Sarwakian Chinese dialect group, this is also another type of moon cake they are having.

img_5075_thumb

Sarawak Midnight Cake a cake which is full of breakfast beverages ingredients, a rich dense and dark coloured cake usually served during festivals such as Chinese New Year, Hari Raya Aidilfitri and Gawai Dayak etc. It is so dark that I have decided to call it a midnight cake and taste is awesome and rich.

IMG_5181

Horlicks Lapis (好力克千层蛋糕)– Sarawak is famous for it layered cake after introduction from Indonesian in late 1980’s. The lapis or layered cake are many with its special design and flavouring. This is one of the classic household lapis.

img_21751_thumb

Coffee Peppermint Lapis (咖啡薄荷千层蛋糕)– Another type of lapis for your consideration though the more common type is the chocolate peppermint lapis. This is the healthier version of lapis.

img_75871_thumb

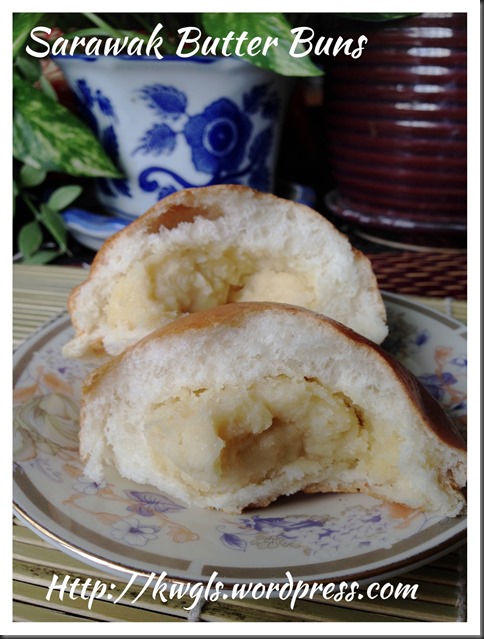
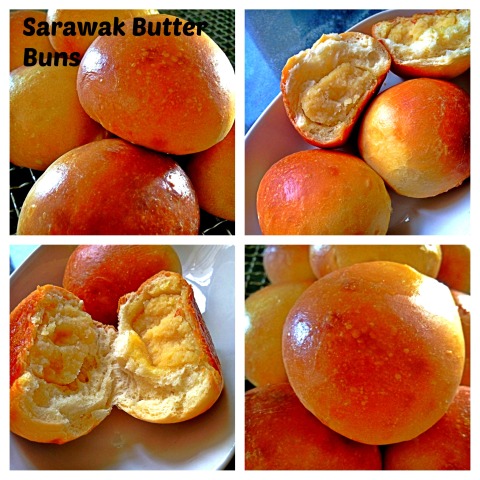
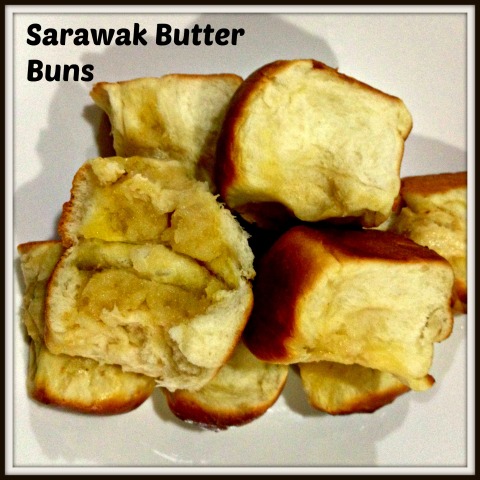
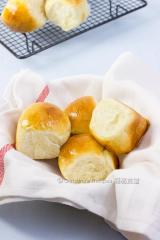
Sarawak Style Butter Buns – The uniqueness of Sarawak style butter buns is its buttery fillings. Its filling is made from mixing the butter with some flour. Sarawakian craved for this and there are no close substitute of these buns found elsewhere. Any mystery as to why this bun is common in Sarawak but not elsewhere.

img_06621

Popiah  – Sarawak Style – Though it may be a generalization, Sarawak style popiah is generally came with dry type of fillings. Unlike West Malaysia or Singapore version, jicama were not simmer until soft. With these drier filling, popiah can be found in stalls selling kuih and other snacks. One can just pick up one and have it on its way to office.

IMG_87481


For more recipes, you can refer to my RECIPE INDEX (updated as at 21 March 2014)  here and you can follow me at PINTEREST or visit this blog’s FACEBOOK PAGE .  

group-board-picture72222222222222222

If you are a Pinterest user and you are interested to have more recipes, you can join or follow this Pinterest Board set up by me  where there are more than 1800 recipes worldwide and pinned by various bloggers: FOOD BLOGGERS AND FOODIES UNITED PINTEREST BOARD. You can also join the Food Bloggers and Foodies United Group Facebook Group to see more recipes.

 PicMonkey Collage13

Home Made Sauces, Pickles and Preserved Items .

Sauces 

INTRODUCTION

This is a compilation of common sauces, preserved vegetables, pickles and etc. targeted at house chefs.   It is definitely not a bad choice to prepare home made sauces though outsourcing some items can be cheaper at times. One good thing is that you are aware of what is included in the read made sauces.  One of the sauces that I like is homemade pasta sauces and you may want to have a look.

For recipes, click on the picture or title and go to the relevant link. If the link goes to Facebook Pages, click on individual picture, all the recipes and instructions were stated in the relevant picture.


img_0001_thumb


1175520_542082739196144_1577973425_n


1239480_540850262652725_1352941831_n


1231410_539545469449871_1936750270_n


1148762_535478556523229_971371020_n


1175003_531389786932106_1473778025_n


img_67861


IMG_56291


img_06114_thumb


img_9365_thumb


img_96611_thumb

Hope you like the post today. Cheers.


For more recipes, you can refer to my RECIPE INDEX (updated as at 10th February 2014)  here and you can follow me at PINTEREST or visit this blog’s FACEBOOK PAGE .  

group-board-picture72222222222222222[1]

If you are a Pinterest user and you are interested to have more recipes, you can join or follow this Pinterest Board set up by me  where there are more than 1500 recipes worldwide and pinned by various bloggers: FOOD BLOGGERS AND FOODIES UNITED PINTEREST BOARD. You can also join the Food Bloggers and Foodies United Group Facebook Group to see more recipes.


sauces2

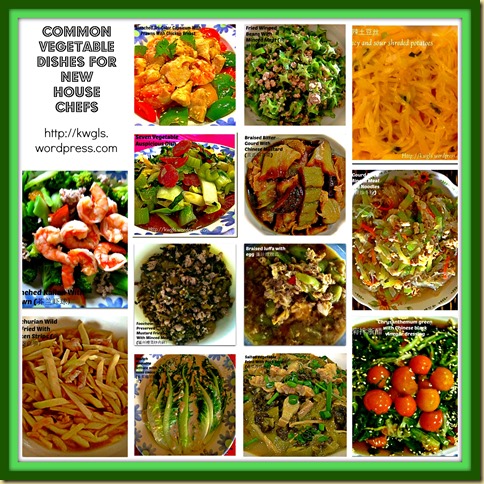
Common Chinese Dishes For New House Chefs

Vegetable collage 

INTRODUCTION

This is a compilation of common Chinese household vegetable dishes targeted as new house chefs. Including in one post is the technique of vegetable blanching and the common sides ingredients to go with the vegetable dishes.  The list is endless and it will constantly be updated.

For recipes, click on the picture or title and go to the relevant link. If the link goes to Facebook Pages, click on individual picture, all the recipes and instructions were stated in the relevant picture.


BLANCHING VEGETABLE AS A HEALTHIER ALTERNATIVE

Vegetables_1


VEGETABLE DISHES

Braised luffa with egg 蛋汁炆丝瓜

1001847_508826269188458_1598866455_n1

Foochow Preserved Mustard Fried With Minced Meat (福州糟菜炒肉碎)

 994206_511823292222089_547264078_n1

Fried Winged Beans With Minced Meat (肉碎四棱豆)

1016378_522608357810249_1328985347_n1

Blanched Kailan With Prawn (芥兰虾球)

1016249_512426902161728_1279207442_n1

Blanch Romaine lettuce with miso sauce (味真酱罗明旦)

993934_10201793676706448_1810259799_n1

Manchurian Wild Rice Fried With Chicken Strips (鸡丝炒茭白笋)

1208824_542508392486912_1417209003_n1

Hairy Gourd Fried With Minced Meat and Glass Noodles (毛瓜肉碎炒冬粉)

1186319_530276603710091_1350167083_n1

Braised Bitter Gourd With Chinese Mustard (苦瓜焖芥菜) 

1001230_528285057242579_537158963_n1

Salted Vegetable Fried With Pork Strips (咸菜炒肉丝)  

1375823_551424474928637_11647081557_n

Spicy and Sour Shredded Potatoes (酸辣土豆丝)

1157575_532288513508900_758575896_n

Blanched Tri-Colour Capsicum With Prawns With Chicken Breast (虾仁鸡柳拌三色甜椒)

946052_570786789659072_611669176_n


Chrysanthemum Green With Chinese Black Vinegar (春菊拌浙醋)

IMG_50681

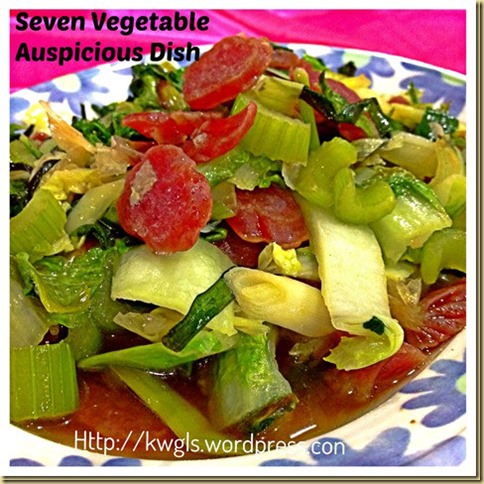
Seven Vegetable Auspicious Day For Chinese New Year (七色菜-人日)

img_80441_thumb

Hope you like the post today. Cheers.


For more recipes, you can refer to my RECIPE INDEX (updated as at 10th February 2014)  here and you can follow me at PINTEREST or visit this blog’s FACEBOOK PAGE .  

group-board-picture72222222222222222[1][2]

If you are a Pinterest user and you are interested to have more recipes, you can join or follow this Pinterest Board set up by me  where there are more than 1500 recipes worldwide and pinned by various bloggers: FOOD BLOGGERS AND FOODIES UNITED PINTEREST BOARD. You can also join the Food Bloggers and Foodies United Group Facebook Group to see more recipes.


vegetable 2

15 Selected Asian Desserts

desserts collection 

INTRODUCTION

As my blog index is quite in a mess, I have decided to summarize my blog entries for reader’s easier reference. These are the Chinese or Asian desserts that I have prepared captured both from this blog and from Guaishushu’s Facebook Page and you may want to take a quick look. Click on the link or the pictures to get the recipes.


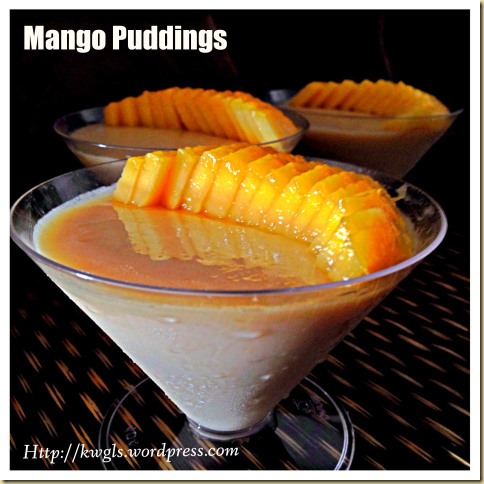
Mango Puddings (芒果布丁)

img_67491

Winter Melon Dried Longan Sweet Soup (冬瓜桂圆糖水)

img_85541_thumb

Aloe Vera Sweet Soup (芦荟水果甜汤)

IMG_9568

Poached Bosc Pears & Dragon Fruits (博斯克梨龙珠果炖冰糖)

1000217_516883395049412_1853807840_n

Barley Peanut Soup (薏米花生汤)

img_2272-2_thumb

Black Glutinous Rice (黑糯米)

img_7460

Sweet Potato Soup (番薯糖水)

sweet potatoes sweet soup

Barley/Black Glutinous Rice(黑糯米薏米糖水)

img_1819

Bubur Cha Cha (摩摩喳喳) 

549554_527490427322042_1122694018_n

Fruits Soup (水果牛奶)- Soup Buah

598444_531903710214047_687072965_n

Mung Bean Sweet Soup (绿豆爽)Tau Suan

1234832_534477789956639_1901682014_n

Sugar Coated Yam and Sweet Potatoes Sticks (反沙芋头地瓜条)

1098417_534853123252439_1417092672_n

Yam and Pumpkin Paste Desserts With Gingko (白果金瓜芋泥)

1150934_535877229816695_1272497758_n

Hoen Kwe – Mung Bean Flour Dessert(粉糕)

1148869_537524669651951_1925647470_n

Agar Agar(燕菜) 

img_5348_thumb


If you are interested to get Chinese recipes, just copy the blog address, select translate from English to Chinese, paste it in Google Translate and you will be translated into Chinese language

Capture


For more recipes, you can refer to my RECIPE INDEX (updated as at 3 March 2014)  here and you can follow me at PINTEREST or visit this blog’s FACEBOOK PAGE .  

group-board-picture72222222222222222[1]

If you are a Pinterest user and you are interested to have more recipes, you can join or follow this Pinterest Board set up by me  where there are more than 1500 recipes worldwide and pinned by various bloggers: FOOD BLOGGERS AND FOODIES UNITED PINTEREST BOARD. You can also join the Food Bloggers and Foodies United Group Facebook Group to see more recipes.

desserts collection

Homesick Buns? Yes, I am homesick of Sarawak Style Butter Buns..

IMG_8512 

UPDATED POST ON 11-10-2014

Craving for the buns that I can get hold in Singapore, and I have decided to prepare these buns to surprise my wife. We usually bought back from Sarawak if we visited our home town. There is no change in the recipe but I have decided to use the BASIC BREAD DOUGH RECIPE instead of the tangzhong dough recipe here.  Please refer here for the BASIC BREAD DOUGH RECIPE. I find that the basic dough is much faster without compromise quality of the buns.

IMG_8519


 IMG_0613

INTRODUCTION

This is a rather simple basic bun of which I am yet to trace the history. The uniqueness of this bun is its filling. The filling is made of butter, sugar and flour. Throughout my years overseas, I have yet to find buns that have this filling. The nearest that I have came across is butter milk buns where milk powder is used used instead of pure butter.

IMG_06101

I came from Sarawak, Malaysia. Sarawak is located in the island of Borneo. Since young, I have been eating these buns for breakfasts and snacks.

I missed the buns. The fillings are aromatic. It is sweet and buttery in flavour. When I made the first batch 2 days ago, I posted my pictures in the Google plus certain baking communities and my Facebook timeline, I was surprised that there are a number of readers and my friends are requesting for the recipe. What shocked me is that most of them in Google plus communities have never seen or eaten the buns before. Apparently, they are either curious about the fillings based on my descriptions.

IMG_8521

As for the first batch, I did not take any measurements, I have decided to do the second batch so as to share the recipe with the readers.

IMG_06591


SARAWAK STYLE BUTTER BUNS

Sarawak style butter buns shall not be confused with the butter soft buns that are mentioned in other recipe books. The so called butter buns in recipe books are mostly refer to buns with no filling. It shall also not to be confused with the Hong Kong cocktail buns where the fillings are shredded coconuts and butters. In addition, they are also different from the so called “butter buns” whereby a butter cube is wrapped by the dough and when baked, the butter melts into the bread. Since there are possibilities of misunderstanding, I shall call these special buns as “Sarawak Style Butter Buns”.

Butter Buns – Normal buttery buns with no filling. (pic courtesy:  http://en.christinesrecipes.com)

Hong Kong Cocktail Buns – Fillings are shredded coconut and butter http://cornercafe.wordpress.com

Buttery Buns – Butter in the centre of the bun and melted when baked. This is also the type of buns commonly found in the famous Malaysian chain store called “Rotiboy” .http://thenewartofbaking.blogspot.sg

IMG_0487

Sarawak Style Butter Buns – Butter fillings. Found in Sarawak only.


THE PROCESS OF MAKING SARAWAK STYLE BUTTER BUNS

This illustration will use the Tangzhong method of bread making and it involved 5 stages in the following orders:

Part 1 – Making the Tanzhong (Water Roux) ..– Best to prepare the night before

Part 2 – Preparing the Dough for the 1st Proofing

Part 3 – Preparing the Butter Fillings

Part 4 – Preparing the Dough – Wrapping the Fillings and 2nd Proofing

Part 5 – The Baking Process

IMG_8523


TANZHONG METHOD OF BREAD MAKING

Tangzhong (汤种)is a relatively new method of bread making and the main advantages of it is because bread made using tangzhong were usually soft and fluffy and  able to keep longer. Previously, bread improver were used to make the bread softer for a longer period of time. However, this method have used all natural ingredients without any chemicals  to get the same effect.

According to Cookipedia:

“Tang zhong (also known as a ‘water roux‘) is a method used in bread making to create soft and fluffy bread which was originated by the Japanese. However, it was popularised throughout south-east Asia in the 1990s by a Chinese woman called Yvonne Chen who wrote a book called The 65° Bread Doctor. Using this method also allows bread to stay fresh for longer without needing to use artificial preservatives.

To make the tang zhong, you mix together one part flour with five parts liquid (by weight) to make a smooth paste. This is usually water, but can be milk or a mixture of both. The mixture is then heated in a saucepan until it reaches exactly 65°C (149°F), removed from the hob, covered and left to cool until it is down to room temperature, when it will be ready to use. It would be useful have a digital thermometer with a probe when making this as other types of thermometer tend to be too large. If you are not making your bread immediately, the tang zhong will keep in the fridge for a couple of days, but will need to be brought up to room temperature before use. The tang zhong is added to the main flour with the liquid and mixed in and kneaded as normal.

The amount of tang zhong used should be about 35% of the weight of the main flour. It is best to make a little extra, because the liquid will evaporate slightly during heating. To make a loaf weighing about 1kg, I would suggest using 480g flour, 200g liquid and 170g tang zhong (made with 30g flour and 150g liquid), which will give a hydration of about 68%. You can of course adjust the amount of liquid either side of the 200g, but the tang zhong proportions should not be adjusted. “

(http://www.cookipedia.co.uk/recipes_wiki/Tang_zhong)

You will note that my recipe for Tang zhong (that are detailed below) are different from what is mentioned above. You can either use my recipe or the recipe as mentioned above.

 IMG_8508


PROCESS OF MAKING THE SARAWAK STYLE BUTTER BUNS

PART 1 – MAKING THE TANG ZHONG (WATER ROUX) …..

What is required

  • 50g bread flour
  • 50g boiling water (water should be boiling hot, otherwise you have to put it over the stove to cook it)

Steps of preparation

IMG_6793

  • Get ready the bread flour in a mixing bowl. Pour the boiling hot water into the flour, mixed well and shaped into a ball.
  • Let the ball cooled down at room temperature. Once cooled, covered bowl with a cling wrap and keep it in the fridge overnight.
  • This recipe will make about 90 g of tanzhong. If you cannot finish tanzhong, you can put it in a container and keep it in the fridge for future use.

Update:

The picture below is from my second batch whereby I have used the method specified in the Cookipedia above and is append here for your reference.

IMG_0665

What is required

  • 25 g of bread flour
  • 125 g of cold water

Steps of preparation

  • In a metal mixing bowl, mixed the water with the cold water. Stirred until well mixed.
  • Place the flour mixture under medium to low heat until the mixture boils.
  • Continue to stir until it resembles some types of glue or when the mixtures start to dissociate itself from the wall of the bowl. Cool and keep it in the refrigerator for the portion that was not used.

PART 2 – PREPARING THE DOUGH – 1st Proofing

What is required

IMG_0636

  • 180 g of bread flour (you can substitute 5 g of bread flour with milk powder, in that case you need only 175 g of bread flour)
  • 30 g of sugar
  • 4 g of instant dry yeast
  • Pinches of Salt
  • 35 g of beaten egg (the above picture is for illustration. 35 g of eggs is equivalent to about 1 egg)

IMG_0637

  • 55 ml of fresh milk
  • 20 g of butter – soften
  • 45 g of tangzhong, refer to recipe above (about half of the tangzhong made above)


Steps of preparation (dough)

 IMG_0638

  • Mix all ingredients except softened butter and beat at slow speed for about 5 minutes.
  • Add the softened butter and continue kneading at medium high-speed for about 20-30 minutes or when the dough did not stick to the wall of your mixing bowl and do not break when you pull the dough.
  • In the flat surface dusted with normal or bread flour, take out the dough from the mixing bowl and slightly knead it using hand for 1-2 minutes and shape it into a ball.
  • lightly oil you mixing bowl and place the ball in the bowl. Cover with damp cloth or cling wrap (to prevent moisture loss).

IMG_0639

  • Leave it to proof until almost double in size. This should be about 30-45 minutes depending on the day’s temperature.
  • If you are using a metal mixing bowl which are slightly cold when touched, put it in your oven at temperature of about 30 degree Celsius for about 10 minutes or when your bowl feel warm when touched.


PART 3 – PREPARING THE BUTTER FILLINGS

IMG_0616

What is required

  • 150 g of butter
  • 150 g of sugar
  • 180 g of flour

Steps of preparation

  • Melt the butter in the microwavable bowl (1 minute). Alternatively, you can also melt it over the smallest heat directly under the fire.
  • Add the sugar to the hot melted butter, stirred until dissolved.
  • Add in the sifted flour gradually and used a spoon to stir until well mixed.
  • Let the flour mixture cooled down and let it rest for at least 5-10 minutes (note that the flour need sometime to absorb the liquid and don’t worry if it is too watery. After 5 minutes, the flour will also expand and you can see a slight increase in volume.
  • Once cool, shaped it into 10 small balls of about 40 g each. Set aside for later use.


PART 4 – PREPARING THE DOUGH – Wrapping the fillings and 2nd Proofing

IMG_0606

  • Take the dough out, punch into the dough to let any trapped air escaped. Knead for one minute and divide into 10 equal size round ball.

IMG_0607

  • Wrap the dough around the butter filling ball as even as possible. Put it in a baking tray and cover with the same damp cloth.
  • Let it proof for another 30 minutes or when balls were almost double in size.


PART 5 – THE BAKING PROCESS

IMG_0608

  • Set the oven to temperature 190 degree Celsius.
  • Put  in the oven and bake at 10-15 minutes. After 10 minutes of baking, egg wash (please see below) the buns quickly and continue baking for about 5 minutes or when the top start to turn slightly golden brown. Alternatively, you can egg wash first before you send into the oven. I prefer to egg wash at the latter stage as I can control the colour better.
  • Egg wash – Crack one egg and mixed with 3 teaspoons of water and 2 drops of oil, slightly beat and sift into a small box, use the brush to brush on top of the surface. The purpose is to let the buns looks shinny and golden brown. 

IMG_0609

  • Take out from the oven and transfer to a rack for cooling.

IMG_8510


MODIFICATIONS AND VARIATIONS

  • For the butter fillings, you can add 1-2 tablespoons of milk powder to the flour. Personally, I do not prefer to have milk powder added since it will negate the butter aroma. However, commercially, they do add milk powder to this and in fact, my kids loved the fillings that have milk powder.
  • For the dough, you can add 1 teaspoon of milk powder as well. However, both this modification are not traditional methods of preparation.

IMG_06141


CONCLUSIONS

  • This is a traditional bun that is very popular among the Sarawakians.  The history has yet to be traced. However, this bun is usually prepared by Hainanese “kopitiam” (coffee shops) and most of the good bakers are Hainanese. Hainanese are the descendants of immigrants from the Island of Hainan in People’s Republic of China. It is also a Chinese dialect group and they are very good chefs and pastry chiefs. This is because they arrived South East Asia later than other Chinese dialect groups (like Cantonese, Hokkien, Foochow) and they were employed as chefs in the then British families and well to do local and nonya families. They were trained by the British in baking and when the colonial era ceased, they started to set up coffee shops cater for the Chinese immigrants in from China. The consumption and usage of butter in pastry were mostly influenced by the British administration. Though unconfirmed, however , it appeared to be logical because Chinese traditional cooking did not use its butter in its delicacies.
  • The Sarawak Style butter buns have a nice buttery fragrance and taken a bit resembles taking a teaspoon of butter and sugar in the mouth….It is divine especially eaten with a cup of tea or coffee. It is ideal as a breakfast item or afternoon snacks.
  • The use of tanzhong in this recipe made the bread softer even after a day or two. This newly developed baking method is widely used by bakers in the Asian region and that is one of the reasons that sweet buns and soft buns were popular in Asian region. The texture will definitely different from the traditional method of bread baking.

IMG_8517

Hope you take a move in trying out this new recipe. For my readers who are in other countries and never tasted this bun, just take a bowl, add equal amounts of melted butter, sugar and flours, stirred and put in the microwave for 2 minutes. Have a small scoop of filling and tell me if this is your cup of teas.

Thanks for reading and have a nice day. Cheers. 

IMG_06621


  • For more recipes, you can refer to my RECIPE INDEX (updated as at 8 June 2014)  here and you can follow me at PINTEREST or visit the blog’s FACEBOOK PAGE to keep abreast of my future posts.  

IMG_8514

Soy, Soy, Soy, Join Me to Cook Soy Related Products

IMG_9581

INTRODUCTION

I doubt if any Chinese , Japanese and Koreans do not know any thing about soya beans. Some soya bean products such as bean curds are so common that the Chinese name (“Tofu” or “ 豆腐“) have been accepted as an English word. I was once told that Japanese women had one of the lowest breast cancer risk because of their long term consumption of soya beans based products. However, for this post, I did not do a detail research on this.

Soya beans have isoflavones that may inhibit the risk of breast cancers and there is an inverse relationship between the intake of isoflavones and miso soup with the risk of breast cancer.  (source: Soy, Isoflavones, and Breast Cancer Risk in Japan) . I have to be fair that there are also subsequent, contradictive research studies that rebutted its properties of inhibition and proved that “it may not necessary be able to inhibit the risk of breast cancer…”. Well, just from these two simple conclusions without going into details, in my humble opinion, soya based products are general good and nutritious to your body. If it’s able  to inhibit breast cancer, it will definitely a plus point. However, without this property, tofu are packed with vitamins and proteins which are essential for our body growth.

IMG_9573Miso Soup with Egg Tofu and Tofu Puff Meat Balls

There are really many types of soya based products which are used as Chinese cooking ingredients. This post will roughly highlight to you the various common types of soya bean related products in Chinese household cooking. Due the worldwide globalization and improve in communication systems, some of the soya bean related products originated from Japan and Korea are also being accepted by Malaysian and Singapore Chinese households. One good example will be the Miso soya bean paste.

IMG_9594Meat stuffed taukwa and tofu puffs with fermented black bean sauce.

The post will have two recipes – Tofu Puff Meat Balls In Miso Soup and  Meat Stuffed Taukwa with Sweet Black Fermented Beans Sauce. In addition, I will refer you to another few recipes that I have written on soya bean products. These recipes will use the following common type of soya beans products.

IMG_9679

  • Tofu puffs –  This is a type of tofu that were deep fried with a golden yellowish skin. It is fluffy and light and can withstand long hours of cooking;

  • Taukwa – This is also called hard bean curd, a type of tofu that has less moisture content than the normal silky bean curd or tofu. It is firmer and with a meaty texture. It is good for stir frying and deep frying.

  • Chinese black fermented beans – This is a type of fermented soya beans made by fermenting and salting. Usually, it is used in Chinese cuisines for flavouring and used in making the black bean sauce (as in the recipe below) for dipping or as toppings. The normal type of Chinese black fermented beans can be slightly spicy and very salty. However, today, the brand I used had a totally different taste. It is a product from Taiwan ROC, sweet and no other condiments are deemed necessary when cooking using these black beans.

  • Japanese Miso pastes – Most will know that Miso is another type of fermented soya bean paste. It is brownish and in a paste form. It is tasty in its unique way and most commonly used in the cooking of Japanese seaweed soup.

  • Egg Tofu – Egg tofu is rather common in recent years. It is just like the normal tofu except with the addition of eggs in a certain prescribed ratio. It is soft, full of egg fragrance and one of the well received dishes by kids. Egg tofu are usually used in soups or some light stir frying dishes due to its silky texture.


WHAT IS REQUIRED

These ingredients are for both recipes (servings: 3-4)

IMG_9485

Minced meats to be used for both dishes

  • 500 grams of minced meat
  • 200 grams of fish paste (optional)
  • 2 tablespoons of corn flour
  • 1 tablespoon of sesame oil
  • 1 teaspoon of white pepper
  • Some chopped spring onions (optional)
  • Some winter vegetables (optional) 

Tofu puff meatballs in Miso Soup*

  • 5-6 square small tofu puffs
  • 5 big tablespoons of Miso Paste
  • 1 tube of egg tofu
  • Some lettuces

Meat Stuffed Taukwa with Fermented Black Bean Sauce*

  • 1 big piece of taukwa (drier bean curd)
  • 2 big tablespoons of black fermented black beans (sweet)
  • 1 shallot minced
  • 1 cm ginger minced
  • 1 tablespoon of corn starch

* Ingredients in these two categories were not in the picture above.


STEPS OF PREPARATION

Marinating The Meat (both for recipes)

IMG_9490

  • In a big bowl, put all the ingredients together (fish meat, corn flour, spring onion, minced meat, sesame oil, white pepper, winter vegetables). Use a pair of chopsticks or a tablespoon to stir it until well mix. Marinate for 15 minutes.

Meat Stuffing The Tofu Puffs

IMG_9495

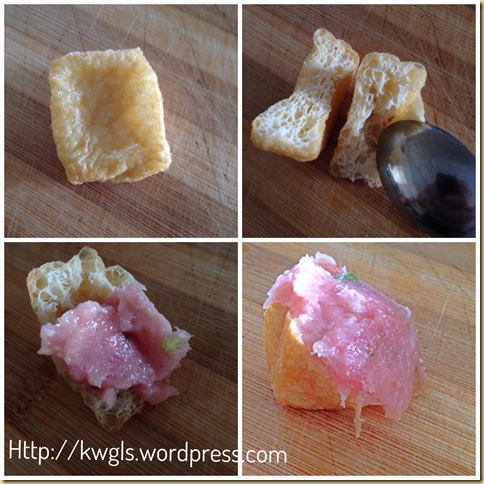
  • Take a piece of tofu puff. Cut it diagonally into two halves. Use a teaspoon to “poke” the centre and make a tofu puff boat. Put 1-2 teaspoons of the marinating meat inside the cavity. Try to stuff as many as possible until it resemble the shape of a volcano (as my kids called it). Set aside and put it in the fridge.

 My kids “insisted” they want to help before they take the bath

IMG_9500 Uncooked Meat Stuff Tofu Puffs

Meat Stuffing The Taukwa (Firm Tofu)

IMG_9505

  • Cut the taukwa into 4 smaller pieces. Use a knife to cut the centre a bit, use a tablespoon to dig out a cavity. Stuff as much minced meat as possible inside the taukwa. Set aside and put it in the fridge.

Making the Meat Balls

IMG_9510

  • Put some minced meat in your hand. Squeeze until a small ball appeared. Use a teaspoon to scoop out the balls. Set aside for later use. Store in the fridge. If it is too sticky, put some water in your hand and continue.

IMG_9586Cooked Tofu Puff Meatballs


TOFU PUFF MEAT BALLS IN MISO SOUP

IMG_9561

  • To summarize, for the dish, you should have the tofu puff meat balls, half of the meat balls, some lettuces, 2 tablespoons of miso paste, 1 egg tofu.

  • Bring a pot (about 5 cups) of water to boil under high heat. Add in tofu puff meat balls and meat balls. Let it boiled for about 3-4 minutes. The meat balls will considered to be cooked when it starts to float in the Miso soup.

IMG_9566

  • For the egg tofu, cut into small pieces and put in the boiling Miso soup. Add in lettuces and off the heat. No seasoning or condiment is required as the Miso soup is already very tasty.

IMG_9575Cooked Miso Soup with Tofu Puff Meat Balls and Egg Tofu

  • Best served hot as a soup item to go with a full set Chinese meal.


MEAT STUFFED TAUKWA WITH BLACK FERMENTED BLACK BEAN SAUCE

IMG_9544

  • To summarize, for the dish, you should have some minced ginger, minced garlics, corn starch solution (1 tablespoon of corn starch in 3 tablespoons of water), 2 tablespoons of sweet black fermented beans, half of the meat balls and the meat stuffed taukwa.

  • In a frying pan, put some oils, heat the oils under high heat. Deep fry the meat stuff taukwa and meat balls until the outer layer is golden in colour. The taukwa may take about 5 minutes but the meat balls will be cooked within 2-3 minutes. Drain and transfer to a serving plate. If you prefer, you can put these in an oil absorbing paper.

IMG_9701

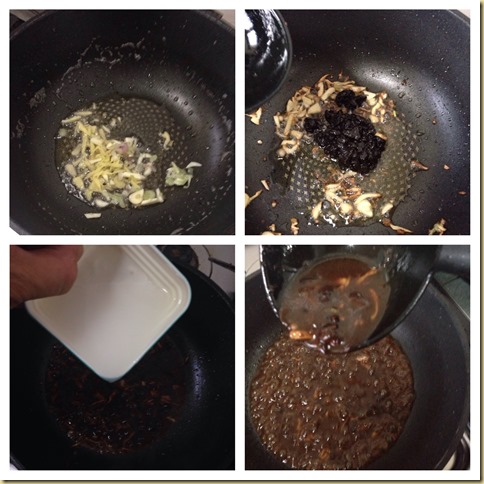
  • In the pan, use some oil from deep frying the meat stuffed taukwa, put in minced gingers and garlics, stir fry until aromatic. Add in Chinese fermented black beans, stir fry for 2-3 minutes. Add in half cup of plain water and let it simmer for 1-2 minutes. Slowly add in the corn starch solution. Let it cook for 1-2 minutes or when the sauce is transparent (meaning not milky). Off the heat.

IMG_9702

  • Place the fermented black soya sauce on the serving plate. Arrange the meat stuff taukwa and meat ball in the desired pattern. Drizzle some fermented black bean sauce on the top of the meat stuffed taukwa and meatballs. Garnished with some spring onions or coriander leaves before serving.

  • Best served hot as a side dish in a full Chinese meals.

Note: If there are no black fermented beans, you can just serve the fried meat stuff taukwa with mayonnaise or Thai sweet chilli sauce, or just oyster sauce alone.

IMG_9571


OTHER SOYA BEAN RELATED POST

For other soya bean cuisines, you may want to refer the following post:

STEAMED EGGS WITH TOFU (Please click the link or the picture below)

HOT AND SPICY TEMPEH (Please click the link or the picture below)

SEAFOOD TOFU (Please click the link or the picture below)

GADO GADO (Indonesia Salad) (Please click the link or the picture below)

CHINESE MEAT ROLLS (Wrapped with dry bean curd sheets) (Please click the link or the picture below)

Others:


CONCLUSION

This is a rather long post. As can be seen the various recipes here, soya bean play a very important role in most Malaysian and Singapore Chinese diets and cuisines. We can easily put up a meal that are full of “tofu relatives”. What I have covered in this post may only accounted for 20-30% of the soya bean products used in our cuisines. There are many other ingredients such as the silken tofu, tofu jelly, dried bean curd stick, light soya sauce, dark soya sauce, bean curd sheets etc…

IMG_9577

Hopefully for my international readers, you will have a better understanding about tofu and its related products. Do try to have some simple tofu dishes at home and I am sure it wouldn’t disappoint you. Hope you like the post today.

IMG_9568

This post is linked to the event, Little Thumbs up organised by Doreen from my little favourite DIY and Zoe of Bake for Happy Kids, hosted by Mich of Piece of Cake at this post.

For more recipes, you can refer to my RECIPE INDEX here and you can follow me at PINTEREST or visit this blog’s FACEBOOK PAGE.

Four-Seasons-JPG29622

For Four Seasons Blog Hop where I am the Co-host, please join us for the party where you can get a lot of the family related posts. Please click the above logo to enter your post.

IMG_9582

Another Uniquely Chinese Cuisine–Chinese Style Barbecue Pork–Char Siu (蜜汁叉烧)

IMG_6646

FOR AN UPDATED POST 21-SEPTEMBER 2014, PLEASE SCROLL DOWN TOWARDS THE END OF THE POST

IMG_8020 

IMG_80071

IMG_80271

  IMG_80501

INTRODUCTION

This post is concerning about CHAR SIU – CHINESE STYLE BARBECUE PORK (叉烧).

IMG_80091

Before I start my post, as usual, for the benefits of my international readers, I shall take the liberty to let Wikipedia to have a brief and concise description of this particular Chinese barbecue meat:

“Char siu (Chinese: 叉燒 caa1 siu1literally “fork-roast”; also Romanised chasu, cha siu, cha shao, char siew) is a popular way to flavor and prepare barbecued pork in Cantonese cuisine. It is classified as a type of siu mei (燒味), Cantonese roasted meat. It is listed at number 28 on the “world’s 50 most delicious foods” readers’ poll compiled by CNN Go in 2011.”

IMG_80401


POPULARITY OF CHAR SIU OR CHINESE BARBECUE PORKS

I doubt if there is any Chinese worldwide who have never tasted barbecue pork or Char Siu. I have eaten this as long as I can remember. Whenever I went, I saw Char Siu being sold in local Chinese restaurants. When I was in Douala Cameroon, Africa, I can remember clearly that the Chinese restaurant in Douala is selling wonton noodles with Char Siu. Even when I travelled to Siberian cities like Irkutsk, Krasnoyarsk, Khabarovsk, Char Siu is also one of the must have items in  their Chinese restaurants. Most Char Siu overseas is the Cantonese version, which is sweet and slightly glossy. This type of Chinese barbecue pork had gain popularity and acceptance because of its sweet taste, nice fragrance and tender meat. Char Siu is quite an international taste and can generally suit international foodies’ taste buds since it resembles honey roasted pork.

IMG_8015


WHY THIS DISH

It is another dish that I have prepared out of my cooking passion and own challenge. I have chosen the more commonly accepted Cantonese style of barbecue pork. There are many, many, many recipes in the internet both in English and Chinese languages. Of course I am not capable to read every one of them, and this recipe is the first and only recipe that I read. 

I “digest” this blogger’s article (in Chinese) with great interest as she is very detailed in her approach. Though I have materially modified her recipe, I still want my readers who understand Chinese to read her article and credits have to go Jennifer, a Taiwanese whom in 2011 lives in San Diego. In her post 自己做….廣式蜜汁叉燒肉, she had a detail analysis in how she combined several recipes to come out with her own recipes. It is a rather long post but please take sometimes to read her post. From her post, I come out with my own recipe and modified my approach along the way.

IMG_8031


RED YEAST RICE WINE AND RED FERMENTED BEAN CURDS

I think that the following 2 natural colouring agents deserves special mention in the post. One is red yeast rice wine (红糟酒)and the other red fermented bean curd (红腐乳)。Red yeast rice (红曲米)is also called koji in Japanese and is a bright reddish purple fermented rice, which acquires its colour from being cultivated with the mold Monascus purpureus. (Source: http://en.wikipedia.org/wiki/Red_yeast_rice).  Red yeast rice wine is the glutinous rice wine made using red yeast rice. You can easily obtain red yeast rice in Chinese medical shops and as for red yeast rice wine, I got some from my neighbour. However, if you can’t obtain red yeast rice wine, you can substitute with normal Chinese cooking wine and red yeast rice residue (红糟)from the making of the wine. The red rice residue can be easily obtained from the supermarket under condiments sections. For more understanding on red yeast rice, please refer to HERE.

IMG_8053

Red fermented bean curd is a type of Chinese fermented bean curds and coloured using red yeast rice above. It is used in a number of Chinese cuisines or it can be eaten with porridge. It is salty and can be easily bought in Chinese provision shops or supermarkets.

However, both these ingredients are  optional. If you do not want your barbecue pork to have reddish colour, you can just straight away substitute the red yeast rice wine with normal Chinese cooking wine and the red fermented bean curd with cream coloured fermented bean curd.

IMG_8033


WHAT IS REQUIRED

Recipe adapted from: 自己做….廣式蜜汁叉燒肉

IMG_7849

Ingredients A (at day of marinating)

  • 1 kg of pork (not in picture) -cut into 5 cm x 15 cm x 3 cm (note below)

  • 2 tablespoons of chopped garlic

  • 2 tablespoons of honey

  • 2 tablespoons of oyster sauce

  • 1 tablespoon of dark soya sauce

  • 5 tablespoons of red yeast rice wine or cooking wine

  • 3 tablespoons of white sugar

  • 10 tablespoons of plain water

  • 1 teaspoon of 5 spice powder

  • 1/4 teaspoon of salt

  • 1 cube of red fermented bean curd plus some fermented bean curd sauce (optional)

IMG_8013

Ingredients B (at day of roasting)

  • 1 tablespoon of honey

  • 5 tablespoons of sugar

  • 5 tablespoons of water

  • 1 tablespoon of dark soya sauce

  • 2 tablespoons of red fermented bean curd sauces

Others

  • Some iron wires to hang the meat or some big size paperclip

Note: For the meat, you can ask the butcher to cut for you and even ask them to recommend the best type of meat for the preparation of barbecue pork. They will be able to offer good advises.

IMG_80011


STEPS OF PREPARATION

Marinating the Meat

IMG_7855

  • Pour all Ingredients A into a big plastic box. Stir well and ensure that all the pork were coated with the sauce. Marinate for at least 1-3 days in the refrigerator. For this illustration, I have marinated for about 2 days.


Preparing for Grilling

IMG_8054

  • Arrange the wire rack of the oven to sit at the highest level of the oven possible. Put a big piece of aluminium foil on top of the baking tray and put it at the lowest level of the oven. Preheat the oven to 180 degree Celsius.

  • Wash the wire with clean water and pierce the wire into the marinated meat and making it into a S hooked shape.


The Grilling Starts

IMG_7989

  • Mix all Ingredients B together and set aside.

  • BE CAREFUL NOT THE TOUCH THE OVEN RACK AS IT IS HOT. Hang your meat in the oven rack and grilled for 15 minutes. You may have some marinating sauces left in the plastic box, add it to Ingredients B above. In the grilling, you will witness the meat juices and some marinating sauces start to drip down to the aluminium foil. If you want, you can scoop out the meat juices or sauces and put it together with ingredients B. If you note that some of meat juices or sauces in the aluminium foil start to get burnt, add some water to the aluminium foil.

  • After 15 minutes, open the oven door and take out the meat and it is okay if the colour of the meat is very faint. Coat the meat thoroughly  with Ingredient B sauces. Hang it back in the oven rack (BE CAREFUL!). Do the same for all the meat strips.

IMG_7997

  • Grilled for another 5 minutes and repeat the same at the interval of 5 minutes until all the sauces are used. I have repeated 3-4 cycles and you will gradually see the meat glossier and glossier. For the last cycle, let it grilled for 10 minutes before taking the barbecue pork out of the oven.

  • After you take out the meat, you may have a lot of sauces of meat juices in the aluminium foil. Slight shape the aluminium foil to reduce the surface area and continue grilling until the barbecue sauce thickens. Once you see lots of bubbles in the aluminium foil, it means that sugar has started to caramelize and barbecue sauce is almost done.  Once done, take it out and pour on the serving bowl for later dipping. It took me about 2-3 minutes to thicken the meat juices and sauces.

  • Cut into slices and can be served with wanton noodles, white rice, porridges or as a meat dish on its own.

IMG_8035


CONCLUSION

Making this is not really difficult but slightly laborious. Via this exercise, I found that the final part of re-coating with the sauces is the most important. After 15 minutes, the meat is almost cooked. The final exercise is to “cosmetically decorated” the meat before serving. Via this way of preparation, your barbecue pork with be glossy and juicy.

IMG_8018

Depending on your preference, the type of meat is of prime importance. I have to admit that I do not really know which part of meat I have bought. I am telling the butcher that I want to make barbecue pork and he gave me these meats. “Post mortem” showed that it was slightly lean and not as juicy as in the restaurant. Obviously, it was due to the wrong type of meats used. Therefore, butchers right recommendation is very important.

IMG_8005

I have to say that the taste of the meat is much better than what I have expected. Forgive me if I am not humble enough to say that it was like what I usually purchased in the stores.  Though there are many sauces and seasonings used, however, I am of the opinion that the most important ingredients are garlic, red fermented bean curd sauces, dark soya sauce and most important of all sugar or honey. Meat has its own flavour and even if your marinating is not long enough, you can still make good the taste at the last 15 minutes of grilling.

Hope you like the post today. Cheers and have a nice day.

IMG_80291


PicMonkey Collage1

IMG_6650


UPDATED POST ON 21-9-2014


I have prepared some barbecue pork today. Since I cannot get hold of the red glutinous rice wine and do not have red fermented bean curd with me, I have substitute with red yeast rice powder. Red yeast rice powder (红曲粉) can be easily obtained in Singapore bakeries. Just sharing some photo for this batch of Char Siu. Plan to use these char siu to prepared some barbecue buns etc..

IMG_6653

IMG_6642

IMG_6648


  • For more recipes, you can refer to my RECIPE INDEX (updated as at 28 July 2014)  here and you can follow me at PINTEREST or visit the blog’s FACEBOOK PAGE to keep abreast of my future posts.  

IMG_6652

A Cuisine With A Long Chinese History– Dongpo Meat (东波肉)

IMG_77171


INTRODUCTION

I love the dish but I am eating the dish in guilt. I have prepared this purely out of my passion for cooking and a challenge to myself for the ability of preparing some authentic traditional Chinese dishes. I first tried Dongpo Meat (“东波肉”) in Shanghai, China many years ago. It is slightly sweet and though very fatty, you wouldn’t feel the greasiness after eating it. In Chinese, it is called 肥而不腻. It is a very aromatic piece of meat and you may ended up having a few more pieces without noticing it.

 IMG_77291


HISTORY OF DONGPO MEAT

This is a dish with a very long Chinese history “invented” by a famous Chinese scholar and poet named Su Shi (苏轼), alias Dong Bo (东坡), (1036-1101).

I am reluctant to re-write the history of the dish but I shall refer you to a very good article (“Dongpo Pork”) which provide a very detail historical account and several recipes of this cuisine. In the article, it was written:  

“One day, he (Su Dongpo) was cooking pork when a friend dropped by. Switching the fire to gentle heat, he left the kitchen to play chess with the visitor. So engrossed was he with the game that he forgot the cooking. It was only at the end of the game he suddenly recalled the pork and rushed to the kitchen. Expecting to find the pork burnt to crisp, he was surprised by the aroma when the lid of the pot was lifted. The edible pork had a rich red colour, tender crispy but not flaky with a glutinous texture without the greasy taste. Henceforth, it became a regular dish for himself and his guests who couldn’t get enough of it. (Source: http://www.chinahistoryforum.com/index.php?/topic/1249-dongpo-pork-)

IMG_7759


WHAT IS NEEDED

 IMG_7664

  • 1 kilograms of pork belly meat

  • 50 grams of ginger cut into slices

  • 100 grams of spring onion

  • 100 grams of rock sugar

  • 50 ml of light soya sauce

  • 50 ml of dark soya sauce

  • 300 ml of Chinese cooking wine

  • Adequate water to cover meat

IMG_7727


STEPS OF PREPARATION

IMG_7670

  • Have a big pot of boiling water and blanched the meat for 2-3 minutes until the outer layer is slightly cooked and hardened. Take out and cut into 5cm x 5 cm pieces and put back to the boiling water to harden the outer layer. Take out the pork and coat with some dark soya sauces.

IMG_7675

  • In a pot or clay pot, put a layer of ginger and spring onion, put the pork on top of the ginger and spring onion. Add dark soya sauce, light soya sauce, Chinese cooking wine, rock sugar and adequate water to cover your pork.

  • Bring to boil under high heat. Once boiled, turn to smaller heat and continue boiling to about 1.5 hours. After 1.5 hours, open the lid and turn the meat to the other side and continue boiling for another 0.5 hours.

  • Let the meat rest in the pot for say 0.5 hour, take the meat out and arrange nicely in a serving plate and steamed under high heat for another 15 minutes. (note that this step is optional. Some recipes do bypass this step and I found that as my meat is a bit lean, therefore, the lean part is slightly hard, steaming will incorporate moisture to the meat and make it even softer.

IMG_7739

As the pork belly meats in Singapore were rather lean, therefore, it can be cut into pieces as shown in the picture. In the restaurant, the usual serving is one piece of 5cm x 5cm meat per guest. Secondly, in order to make the colour slightly reddish as seen in the restaurant, there are many speculations, Some claimed that red colouring were added whereas some believed that the red colour fermented bean curd was used. However, in my humble opinion, there is no need to make the dish reddish colour since beside the colouring effects, it will not affect the taste of the meats.

IMG_7745


CONCLUSION

Moderation is still the key. This is a nice dish but do not consume too often. As I have said earlier, I am eating this in guilt. As a generation that is constantly reminded not to consume too much fats,  I have to be honest that I have cut away some fats when I was having this dish with rice yesterday. One thing good about  the pork belly meat in Singapore is that , in my humble opinion, is very “lean” as compared to the pork belly meat of other countries. Therefore, the amount thrown away is very minimal and you can still taste the nice Dongpo meat. If you searched images for “Dongpo Meat” in the internet, you will understand what I mean.

IMG_7719

Hope you like the post today. Cheers and have a nice day.

IMG_7731

 For more recipes, you can refer to my RECIPE INDEX here and you can follow me at PINTEREST or visit this blog’s Facebook Page.

IMG_77271