Homesick Buns? Yes, I am homesick of Sarawak Style Butter Buns..

IMG_8512 

UPDATED POST ON 11-10-2014

Craving for the buns that I can get hold in Singapore, and I have decided to prepare these buns to surprise my wife. We usually bought back from Sarawak if we visited our home town. There is no change in the recipe but I have decided to use the BASIC BREAD DOUGH RECIPE instead of the tangzhong dough recipe here.  Please refer here for the BASIC BREAD DOUGH RECIPE. I find that the basic dough is much faster without compromise quality of the buns.

IMG_8519


 IMG_0613

INTRODUCTION

This is a rather simple basic bun of which I am yet to trace the history. The uniqueness of this bun is its filling. The filling is made of butter, sugar and flour. Throughout my years overseas, I have yet to find buns that have this filling. The nearest that I have came across is butter milk buns where milk powder is used used instead of pure butter.

IMG_06101

I came from Sarawak, Malaysia. Sarawak is located in the island of Borneo. Since young, I have been eating these buns for breakfasts and snacks.

I missed the buns. The fillings are aromatic. It is sweet and buttery in flavour. When I made the first batch 2 days ago, I posted my pictures in the Google plus certain baking communities and my Facebook timeline, I was surprised that there are a number of readers and my friends are requesting for the recipe. What shocked me is that most of them in Google plus communities have never seen or eaten the buns before. Apparently, they are either curious about the fillings based on my descriptions.

IMG_8521

As for the first batch, I did not take any measurements, I have decided to do the second batch so as to share the recipe with the readers.

IMG_06591


SARAWAK STYLE BUTTER BUNS

Sarawak style butter buns shall not be confused with the butter soft buns that are mentioned in other recipe books. The so called butter buns in recipe books are mostly refer to buns with no filling. It shall also not to be confused with the Hong Kong cocktail buns where the fillings are shredded coconuts and butters. In addition, they are also different from the so called “butter buns” whereby a butter cube is wrapped by the dough and when baked, the butter melts into the bread. Since there are possibilities of misunderstanding, I shall call these special buns as “Sarawak Style Butter Buns”.

Butter Buns – Normal buttery buns with no filling. (pic courtesy:  http://en.christinesrecipes.com)

Hong Kong Cocktail Buns – Fillings are shredded coconut and butter http://cornercafe.wordpress.com

Buttery Buns – Butter in the centre of the bun and melted when baked. This is also the type of buns commonly found in the famous Malaysian chain store called “Rotiboy” .http://thenewartofbaking.blogspot.sg

IMG_0487

Sarawak Style Butter Buns – Butter fillings. Found in Sarawak only.


THE PROCESS OF MAKING SARAWAK STYLE BUTTER BUNS

This illustration will use the Tangzhong method of bread making and it involved 5 stages in the following orders:

Part 1 – Making the Tanzhong (Water Roux) ..– Best to prepare the night before

Part 2 – Preparing the Dough for the 1st Proofing

Part 3 – Preparing the Butter Fillings

Part 4 – Preparing the Dough – Wrapping the Fillings and 2nd Proofing

Part 5 – The Baking Process

IMG_8523


TANZHONG METHOD OF BREAD MAKING

Tangzhong (汤种)is a relatively new method of bread making and the main advantages of it is because bread made using tangzhong were usually soft and fluffy and  able to keep longer. Previously, bread improver were used to make the bread softer for a longer period of time. However, this method have used all natural ingredients without any chemicals  to get the same effect.

According to Cookipedia:

“Tang zhong (also known as a ‘water roux‘) is a method used in bread making to create soft and fluffy bread which was originated by the Japanese. However, it was popularised throughout south-east Asia in the 1990s by a Chinese woman called Yvonne Chen who wrote a book called The 65° Bread Doctor. Using this method also allows bread to stay fresh for longer without needing to use artificial preservatives.

To make the tang zhong, you mix together one part flour with five parts liquid (by weight) to make a smooth paste. This is usually water, but can be milk or a mixture of both. The mixture is then heated in a saucepan until it reaches exactly 65°C (149°F), removed from the hob, covered and left to cool until it is down to room temperature, when it will be ready to use. It would be useful have a digital thermometer with a probe when making this as other types of thermometer tend to be too large. If you are not making your bread immediately, the tang zhong will keep in the fridge for a couple of days, but will need to be brought up to room temperature before use. The tang zhong is added to the main flour with the liquid and mixed in and kneaded as normal.

The amount of tang zhong used should be about 35% of the weight of the main flour. It is best to make a little extra, because the liquid will evaporate slightly during heating. To make a loaf weighing about 1kg, I would suggest using 480g flour, 200g liquid and 170g tang zhong (made with 30g flour and 150g liquid), which will give a hydration of about 68%. You can of course adjust the amount of liquid either side of the 200g, but the tang zhong proportions should not be adjusted. “

(http://www.cookipedia.co.uk/recipes_wiki/Tang_zhong)

You will note that my recipe for Tang zhong (that are detailed below) are different from what is mentioned above. You can either use my recipe or the recipe as mentioned above.

 IMG_8508


PROCESS OF MAKING THE SARAWAK STYLE BUTTER BUNS

PART 1 – MAKING THE TANG ZHONG (WATER ROUX) …..

What is required

  • 50g bread flour
  • 50g boiling water (water should be boiling hot, otherwise you have to put it over the stove to cook it)

Steps of preparation

IMG_6793

  • Get ready the bread flour in a mixing bowl. Pour the boiling hot water into the flour, mixed well and shaped into a ball.
  • Let the ball cooled down at room temperature. Once cooled, covered bowl with a cling wrap and keep it in the fridge overnight.
  • This recipe will make about 90 g of tanzhong. If you cannot finish tanzhong, you can put it in a container and keep it in the fridge for future use.

Update:

The picture below is from my second batch whereby I have used the method specified in the Cookipedia above and is append here for your reference.

IMG_0665

What is required

  • 25 g of bread flour
  • 125 g of cold water

Steps of preparation

  • In a metal mixing bowl, mixed the water with the cold water. Stirred until well mixed.
  • Place the flour mixture under medium to low heat until the mixture boils.
  • Continue to stir until it resembles some types of glue or when the mixtures start to dissociate itself from the wall of the bowl. Cool and keep it in the refrigerator for the portion that was not used.

PART 2 – PREPARING THE DOUGH – 1st Proofing

What is required

IMG_0636

  • 180 g of bread flour (you can substitute 5 g of bread flour with milk powder, in that case you need only 175 g of bread flour)
  • 30 g of sugar
  • 4 g of instant dry yeast
  • Pinches of Salt
  • 35 g of beaten egg (the above picture is for illustration. 35 g of eggs is equivalent to about 1 egg)

IMG_0637

  • 55 ml of fresh milk
  • 20 g of butter – soften
  • 45 g of tangzhong, refer to recipe above (about half of the tangzhong made above)


Steps of preparation (dough)

 IMG_0638

  • Mix all ingredients except softened butter and beat at slow speed for about 5 minutes.
  • Add the softened butter and continue kneading at medium high-speed for about 20-30 minutes or when the dough did not stick to the wall of your mixing bowl and do not break when you pull the dough.
  • In the flat surface dusted with normal or bread flour, take out the dough from the mixing bowl and slightly knead it using hand for 1-2 minutes and shape it into a ball.
  • lightly oil you mixing bowl and place the ball in the bowl. Cover with damp cloth or cling wrap (to prevent moisture loss).

IMG_0639

  • Leave it to proof until almost double in size. This should be about 30-45 minutes depending on the day’s temperature.
  • If you are using a metal mixing bowl which are slightly cold when touched, put it in your oven at temperature of about 30 degree Celsius for about 10 minutes or when your bowl feel warm when touched.


PART 3 – PREPARING THE BUTTER FILLINGS

IMG_0616

What is required

  • 150 g of butter
  • 150 g of sugar
  • 180 g of flour

Steps of preparation

  • Melt the butter in the microwavable bowl (1 minute). Alternatively, you can also melt it over the smallest heat directly under the fire.
  • Add the sugar to the hot melted butter, stirred until dissolved.
  • Add in the sifted flour gradually and used a spoon to stir until well mixed.
  • Let the flour mixture cooled down and let it rest for at least 5-10 minutes (note that the flour need sometime to absorb the liquid and don’t worry if it is too watery. After 5 minutes, the flour will also expand and you can see a slight increase in volume.
  • Once cool, shaped it into 10 small balls of about 40 g each. Set aside for later use.


PART 4 – PREPARING THE DOUGH – Wrapping the fillings and 2nd Proofing

IMG_0606

  • Take the dough out, punch into the dough to let any trapped air escaped. Knead for one minute and divide into 10 equal size round ball.

IMG_0607

  • Wrap the dough around the butter filling ball as even as possible. Put it in a baking tray and cover with the same damp cloth.
  • Let it proof for another 30 minutes or when balls were almost double in size.


PART 5 – THE BAKING PROCESS

IMG_0608

  • Set the oven to temperature 190 degree Celsius.
  • Put  in the oven and bake at 10-15 minutes. After 10 minutes of baking, egg wash (please see below) the buns quickly and continue baking for about 5 minutes or when the top start to turn slightly golden brown. Alternatively, you can egg wash first before you send into the oven. I prefer to egg wash at the latter stage as I can control the colour better.
  • Egg wash – Crack one egg and mixed with 3 teaspoons of water and 2 drops of oil, slightly beat and sift into a small box, use the brush to brush on top of the surface. The purpose is to let the buns looks shinny and golden brown. 

IMG_0609

  • Take out from the oven and transfer to a rack for cooling.

IMG_8510


MODIFICATIONS AND VARIATIONS

  • For the butter fillings, you can add 1-2 tablespoons of milk powder to the flour. Personally, I do not prefer to have milk powder added since it will negate the butter aroma. However, commercially, they do add milk powder to this and in fact, my kids loved the fillings that have milk powder.
  • For the dough, you can add 1 teaspoon of milk powder as well. However, both this modification are not traditional methods of preparation.

IMG_06141


CONCLUSIONS

  • This is a traditional bun that is very popular among the Sarawakians.  The history has yet to be traced. However, this bun is usually prepared by Hainanese “kopitiam” (coffee shops) and most of the good bakers are Hainanese. Hainanese are the descendants of immigrants from the Island of Hainan in People’s Republic of China. It is also a Chinese dialect group and they are very good chefs and pastry chiefs. This is because they arrived South East Asia later than other Chinese dialect groups (like Cantonese, Hokkien, Foochow) and they were employed as chefs in the then British families and well to do local and nonya families. They were trained by the British in baking and when the colonial era ceased, they started to set up coffee shops cater for the Chinese immigrants in from China. The consumption and usage of butter in pastry were mostly influenced by the British administration. Though unconfirmed, however , it appeared to be logical because Chinese traditional cooking did not use its butter in its delicacies.
  • The Sarawak Style butter buns have a nice buttery fragrance and taken a bit resembles taking a teaspoon of butter and sugar in the mouth….It is divine especially eaten with a cup of tea or coffee. It is ideal as a breakfast item or afternoon snacks.
  • The use of tanzhong in this recipe made the bread softer even after a day or two. This newly developed baking method is widely used by bakers in the Asian region and that is one of the reasons that sweet buns and soft buns were popular in Asian region. The texture will definitely different from the traditional method of bread baking.

IMG_8517

Hope you take a move in trying out this new recipe. For my readers who are in other countries and never tasted this bun, just take a bowl, add equal amounts of melted butter, sugar and flours, stirred and put in the microwave for 2 minutes. Have a small scoop of filling and tell me if this is your cup of teas.

Thanks for reading and have a nice day. Cheers. 

IMG_06621


  • For more recipes, you can refer to my RECIPE INDEX (updated as at 8 June 2014)  here and you can follow me at PINTEREST or visit the blog’s FACEBOOK PAGE to keep abreast of my future posts.  

IMG_8514

Soft Chewy or Crispy,You Choose Yourself! – Baby Cereal Oatmeal Cranberry Biscuits (麦片饼干)

IMG_7746

UPDATED POST ON 2-10-2014

A biscuit that I like very much but went unnoticed because I did not like the initial pictures taken.. Since I have some cereal at home, I decided to prepare this for my relatives as a hand gift. Nothing change except that I substitute the oats portion with instant cereal since I do not have it at home. In addition, instead of cranberry, I have used raisin instead. It is crispy outside and chewy in the middle. You can make it totally crispy if you make it a smaller size and extend the baking time at a lower temperature. A rather addictive cookie and I really love the cereal flavouring.

IMG_7750


IMG_5907


INTRODUCTION

One number baking ratio now extends it to biscuit and of course it had to be slightly amended. In this recipe, one portion of milk was being substituted by a portion of flour to make it a cookie liked structure.  This biscuits can be a soft chewy type of biscuit that is crispy on the outside but slightly soft in the middle. It can also be a crispy type of biscuits it you prefer it to be crunchy.

This is not the first time I prepared these biscuits. I prepared these biscuits a few months back. I loved it for its chewy texture and the baby cereal fragrance.

IMG_7745


WHAT WILL HAPPEN WHEN INSTANT OATS “MEET” QUAKER OATS

I like to blend my instant Quaker Oats with the Nestum Baby Cereals and make it into a breakfast cereal drink. I usually put 50% of instant oats and 50% of baby cereals and use a food processor to blend these two items. The breakfast cereal drinks will have instant oats “stickiness” but with baby cereals fragrance. I usually sweetened it by some condensed milk and if it was too “sticky”, I will add in some fresh milk. Bananas and nuts were added when I craved for it. May be I shall have another post on this wonderful breakfast drinks and you wouldn’t be disappointed with this cereal drink..

IMG_5899


WHAT IS REQUIRED

IMG_5918

  • 100 grams of butter

  • 100 grams of plain flour

  • 50 grams of instant oat

  • 50 grams of instant baby cereals

  • 100 grams of sugar

  • 100 grams of eggs

  • 50 grams of cranberry (optional and substitutable with raisins or other dry fruits)

  • 1 teaspoon of baking powder

  • 0.5 teaspoon of baking soda

IMG_7748


STEPS OF PREPARATION

Preparing the instant oat baby cereal mixture

IMG_5919

  • Blend 50 grams of instant oats and instant baby cereal each using a food processor until your desired textures.


Preparation

  • Get ready 2 baking trays lined with parchment paper or baking paper.

  • Pre-heat oven to 180 degree Celsius.

IMG_5913


Preparation the batter and baking

IMG_5886

  • Cream the butter and sugar. Add the eggs and followed by the mixture of oats/baby cereals. Stir and mix well.

IMG_5887

  • Add in the sifted flour, baking powder and baking soda, mix until just combined. Stir in cranberries or raisins and mix well.

  • Place one teaspoon/tablespoon full of soft dough (depending on the size you want) on the parchment or baking paper.  Give adequate space for the dough to expand when cooked.

IMG_5888

  • Bake in the oven at 180 degree Celsius for 15-20 minutes or until the colour starts to turn golden brown on the edges but still soft in the centre.

  • Cooled completely in a rack before store in an air tight container.

  • Best served with hot tea and coffee and as a snack.

IMG_5905

VARIATIONS

  • If you preferred the crunchy version, after the 20 minutes baking at 180 degree Celsius, reduce your temperature to 150 degree Celsius and continue baking for another 10 minutes. Note that the cookies will not be hardened until you take it out from the oven. Let it cool and see if that is your desired texture. In the event you prefer to be even crispier, put back to the oven and baked for another 5 minutes. The longer you baked, the more moisture will be lost making it to be crispier. However, do watch out for the colour of cookies. If it is too brown, you can turn off the top heat and use the bottom heat to continue the baking.


CONCLUSION

From preparing the biscuits until I finished this posting, it took me about 2 hours. Therefore, readers should comprehend how easy this biscuit was. If you like baby cereal like I do, you will like it. If you like soft chewy type of biscuits where the edges are crispy and soft in the inside, you will like it. Take a step to make this, tailor to your family taste buds, it definitely wouldn’t disappoint yourself and your family members.

IMG_7747

Join me to have some of these cookies as breakfast and of course, not forgetting a cup of hot Earl Grey tea.

IMG_7752

Cheers and have a nice day!

IMG_7744


  • For more recipes, you can refer to my RECIPE INDEX (updated as at 28 July 2014)  here and you can follow me at PINTEREST or visit the blog’s FACEBOOK PAGE to keep abreast of my future posts.  

IMG_7743

Traditional Batik Cake or Hedgehog Cake

IMG_8465


Updated post on 10-10-2014

Have not prepare this cake for one year. A sudden craving made me wanted to prepare this rich and sinful cake to curb the sugar cravings. However, I have added 3 eggs to the recipe and using the boiling method.

IMG_8467

The simplified method are:

  • Melt the butter, add in condensed milk, beaten eggs and milo, cooked under medium heat until it starts to thicken. Transfer the mixture to the baking tin lined with Marie biscuits. Cover the base layer of Marie biscuits with the mixture. Put another layer of Marie biscuit on top and follow by another year of mixture. 

The shape is better and it wouldn’t melt in the hot weather. Of course, it will not be that creamy like the chilled version since it had been cooked. Happy trying.

IMG_8483


IMG_5662


INTRODUCTION

Don’t bombard me this controversial version of batik cake or “hedgehog” cake. It is simplified by Guaishushu as he had omitted the cooking steps.

Guaishushu like traditional cakes for its simple to follow ratio. Due to lack of precise measuring equipment in the early days, most household cakes recipes are simple such as pound cakes.

Today, Guaishushu is not promoting the one number baking ratio. Instead, he is making a cake that truly reflects the lifestyles of the people living in Malaysia in the early 70’s to 80’s. This cake is a simple cake that Guaishushu’s have made a long long time ago, may be 30 years back. Then, there was no oven in the house and his family just have a very simple fridge.

IMG_5658

This was one of the easiest cake that he can make because it required no oven, no mixer and just need a fork and a spoon. In addition, the ingredients were household common breakfast items such as Milo beverage drink and Marie biscuits. There was no internet then and most recipes were by words of mouth. He can’t recall which relative gave him the recipe, what he could remember very clearly was the nice pattern in the cake.

IMG_8479

In Malaysia, the cake was called BATIK CAKE. Batik is a cloth that is traditionally made using a manual wax-resist dyeing technique. It is a beautiful cloth and usually wore by Malay in the Malay Peninsular.

(Source: http://en.wikipedia.org/wiki/Batik)

Guaishushu had long wanted to make the cake but he did not have the recipe. He had in fact bought the Marie biscuits but did not have the time to search for a recipe. Coincidentally, one of the members in a Google Plus communities disclosed that her week end adventure was preparing a batik cake, Guaishushu immediately felt extremely happy and asked her for the recipe. The member was very kind to share her recipe and uploaded a picture. Guaishushu showed his wife the picture and his wife concurred that she have missed the cake too as she had not eaten this for ages.. With her recipe, Guaishushu started his preparation and within one hour, everything was done and send to the fridge for chilling.

IMG_8471

This recipe is a bit different from the original recipe in that Guaishushu do not cook the mixture. No cooking is actually required because all the ingredients are cooked ingredients. He opted just to mix and chilled to simplify the preparation. Of course, without cooking, the texture will be much softer and it can be treated as a type of chocolate sauce.

IMG_8473

The cooked version will have  a better shape but the texture is slightly chewy . Non cooked version will have a totally different texture, soft and smooth and rich in chocolate flavour.

IMG_5646

IMG_8504


WHAT IS REQUIRED

IMG_5670

  • 1 can of condensed milk (385 grams)
  • 385 grams of milo (breakfast beverage drink)
  • 385 grams of melted butter
  • 1 packet of Marie biscuits (about 250 grams) – a bit more or less is okay.
  • 3 eggs (optional) – If eggs are added, you will have to use the cooked version.

IMG_5664


STEPS OF PREPARATION

There are two methods of preparation. Either you melt the butter, milo, eggs  and condensed milk in a sauce pan and cooked under low heat until it thickens. In this case, you cake will be chewy and more shapely (Please refer to the update post for procedures)  For better presentation, it is advised that you follow this method such that it had a nicely cut cake. But for taste wise, it is advise that you follow the second method below.

The second method is as in this illustration where no cooking is required, therefore, you final products will become very creamy, soft as if you are having some rich chocolate sauce with biscuits.

Chilled Version

IMG_5671

  • In a big mixing bowl, place melted butter and condensed milk together, use hand or machine whisk until texture is consistent.

  • Add in milo powder and mix until it is well mix.

IMG_5672

  • Arrange your Marie biscuits in the tin and pour some chocolate sauce over the biscuits. Add another layer and repeat the same procedures until all biscuits and batter are used up.

  • Freeze it in the freezer for 1 hour or until temporary set. Cut into the desired size and served immediately out from the fridge. The sauce will gradually melt in the room temperature and therefore you shouldn’t put in the serving plate too early especially in hot weather like Malaysia and Singapore.

  • Best serve cold as a form of dessert.

IMG_5650


Cooked Version

IMG_8488

  • Melt the butter, add in condensed milk, beaten eggs and milo, cooked under medium heat until it starts to thicken. Transfer the mixture to the baking tin lined with Marie biscuits. Cover the base layer of Marie biscuits with the mixture. Put another layer of Marie biscuit on top and follow by another year of mixture. 

 IMG_8500


CONCLUSIONS

This is a twist of the traditional Batik Cake. I have purposely not to cook the batter since all ingredients are cooked ingredients. The texture and the level of enjoyment is totally different. While the traditional method of cooking the batter will provide you with better shaping but to me, its texture is compromised. I would prefer something soft, silky, rich and creamy full of chocolaty flavour to go with this simple plain biscuit. Whether or not this can still called a batik cake is irrelevant to me. The texture and taste will definitely a better alternative for me.

IMG_5662

The cake is made with simple ingredients, no complicating beating using expensive equipment, why not making one today and try. You can add nuts if you want to, can add some Nescafé if you prefer, change to some other types of biscuits if this suit your taste buds.  Remember, boiling method can give you a better shape but the texture is slightly harder. Chilling method is very creamy but a bit messy. If you asked me which do I prefer? For small gathering at home, chilling method. As gift or buffet style, boiling method…. Last but not least, I forgot to say that this taste like Asian Kit Kat.. Ha-ha.

IMG_8477

Cheers and have a nice day.

IMG_8469


  • For more recipes, you can refer to my RECIPE INDEX (updated as at 8 June 2014)  here and you can follow me at PINTEREST or visit the blog’s FACEBOOK PAGE to keep abreast of my future posts.  

IMG_8481

You Stingy Old Man, You Ruined My Mexican Coffee Buns–Polo Buns and Mexican Coffee Buns

IMG_2529

IMG_5798

INTRODUCTION

Please scroll down for the updated posts

Guaishushu is seriously regretting for his “creativities” and “stinginess”. He made a batch of Polo buns and Mexican Coffee Buns. However, as the final proofing of his bun is less than his desired diameter, he was left with some coffee pastry dough. Instead of throwing it away, half way when he baked the buns, he just took out the buns and pumped in the left over coffee pastry dough thinking it will melt and become a coffee buns with double dose of crusty coffee toppings… And the end, he found that instead of making it more beautiful, he made a bunch of ugly buns… Well, he still decided to share the recipe here as readers can just follow the recipe and get some good quality buns…… Don’t be misled by Guaishushu’s pictures.

IMG_5192

POLO BUNS AND MEXICAN COFFEE BUNS

Polo bun or pineapple bun is a type of soft, sweet bun commonly found in Asia. The word “Polo” in Mandarin literally translated to pineapple. In another word, it is supposed to be a soft bun that have skin that resembles the skin of pineapples. Usually what is being sold in the market is with fillings such as barbecue pork. However, as I am on a vegetarian diet, I have opted to make it into a plain bun for breakfast. The buns were wrapped with a soft cookie liked dough on top of the buns, when it proved for the second time, the plain dough will start to make the soft cookie liked dough to break and those resembling the skin of a pineapple. Some have used a knife to cut into a pattern of a pineapple skin.

IMG_5812

Mexican coffee buns is popularized by Rotiboy in Malaysia and it is a type of sweet bun with coffee flavoured crusty toppings. Usually, inside the buns, there is  a slice of butter which will melt when the buns are baked. Therefore the buns is full of buttery flavour.

THIS IS DEFINTELY A WORKABLE RECIPE AND IF YOU LOOK AT MY WORK IN PROGRESS PICTURES, YOU WILL SEE THE IT IS OKAY UNTIL THE VERY LAST MOMENT WHEN GUAISHUSHU IS GREEDY TO ADD ADDITIONAL COFFEE TOPPINGS.

IMG_5170


This post is a rather long post and have the following sections

Section A: Preparing the Buns

Section B: Preparing the Polo Buns Crusty Toppings

Section C: Preparing the Mexico Buns Crusty Toppings

Section D: Preparing Polo Buns for Baking

Section E: Preparing the Mexico Buns for Baking


SECTION A: PREPARING OF BUNS

What is required

IMG_5100

  • 500 g bread flour

  • 100 g castor sugar

  • Yeast one packet (about 11 grams)

  • 30 grams of butter (at room temperature)

  • Pinches of salt

  • 50 grams eggs (about 1 egg)

  • 240 grams of water


STEPS OF PREPARATION

IMG_5223

  • Mix all ingredients except softened butter and beat at slow speed for about 5 minutes.
  • Add the softened butter and continue kneading at medium high-speed for about 20-30 minutes or when the dough did not stick to the wall of your mixing bowl and do not break when you pull the dough.
  • In the flat surface dusted with normal or bread flour, take out the dough from the mixing bowl and slightly knead it using hand for 1-2 minutes and shape it into a ball.
  • lightly oil you mixing bowl and place the ball in the bowl. Cover with damp cloth or cling wrap (to prevent moisture loss).

  • Leave it to proof until almost double in size. This should be about 30-45 minutes depending on the day’s temperature.

IMG_5188


SECTION B: PREPARING THE POLO BUNS CRUSTY TOPPINGS

What is required

IMG_5118

  • 75 grams butter, melted

  • 110 grams of bread flour self raising flour, sifted

  • 50 grams of icing sugar, sifted

  • 25  40 grams of eggs, lightly beaten

  • 30 grams of milk powder
  • One egg yolk for egg washing
  • Some sugar for sprinkling


Steps of preparation

IMG_5111 

  • Melt the butter in an microwave oven for 1 minute.

  • Add in beaten eggs, sifted icing sugar, milk powder and sifted bread flours self raising flour. Mixed well until it form a soft dough.

IMG_5117

  • Divide the dough into 8 equal portions.

  • Shape in round shape and set aside for later use.


Section C: Preparing the Mexico Buns Crusty Toppings

IMG_5106

What is required

  • 100 grams of butter, melted

  • 100 grams of flour, sifted

  • 80 grams of icing sugar, sifted

  • 50 grams of eggs, lightly beaten

  • 2 tablespoons of unsweetened instant coffee dissolved in 2 tablespoons of hot water.

  • 8 pieces of 1 cm x 3cm x 0.2 cm cold cut butter (sizes is just for reference and you can just cut the butter in a small piece) – for usage in Section E. Store the butter in the fridge.


Steps of preparation

IMG_5124

  • Melt the butter in an microwave oven for 1 minute.

  • Add in beaten eggs, sifted icing sugar, instant coffee paste and sifted bread flours. Mixed well until it form a soft sticky dough and set aside.

Note that in the above illustration pictures, I only add in the instant coffee paste at a later stage.


SECTION D: PREPARING POLO BUNS FOR BAKING

* For newer detail instruction of preparing it from frozen dough, please scroll towards the end for the updated post

IMG_5224

  • Take the dough out, punch into the dough to let any trapped air escaped. Knead for one minute and divide into 2 portions. Set aside one portion for Mexico Coffee Buns in Section E.

  • Divide the dough equally into 8 portions and shape it into a round ball.

IMG_5225

  • Use a roller to flatten the “cookie liked dough” as prepared in Section B.

  • Use a brush to lightly brush some water on the plain dough so that it is easier for the cookie dough to cling on the plain dough.

  • Wrap around the plain dough and let it prove until double in size.

  • As the dough proves, you will see the cookies dough started to break. If you find you cookies dough have the tendency to drop from plain dough, spray or brush with additional water to let them stick together.

IMG_5226

  • When double in size, baked in the oven at 190 degree Celsius for about 15 minutes.

* For newer detail instruction of preparing it from frozen dough, please scroll towards the end for the updated post

IMG_5176


SECTION E: PREPARING MEXICO COFFEE BUNS FOR BAKING

IMG_5229

  • Lightly knead the other half of the dough as mentioned in Section D.

  • Divide the dough into 8 equal portions and shape into a sound ball.

  • Use a roller to roll the ball into a flat dough, place a piece of cold butter on top of the dough. Use the dough to wrap a butter and make it into a round ball.

  • Put it in the baking tray and proved until double in size.

IMG_5227

  • Put the coffee soft dough into a piping bag. Cut a small hole in the bottom.

  • Pipe the coffee soft dough on top of the proved buns in the pattern as in the above images.

IMG_5228

  • After finished piping, bake in the oven for 190 degree Celsius for about 15 minutes.

IMG_5172


CONCLUSIONS

In this post, I have shared two types of common sweet buns. If you have some baking basics, it is definitely not a difficult bun to prepare. The crispy toppings of both buns are rather similar except the proportion of each ingredient is different. These toppings can actually be prepared in advance to shorten the preparation time. Remember that you can always wrapped barbecue pork in the Polo buns and you can refer Guaishushu’s Facebook Page post P1 – Roast Meat Bun (烧肉餐包).

IMG_2523

Sincerely, honestly, faithfully hope you like the post today and don’t get discourage by the ugly pictures today. Guaishushu’s promise to be less stingy (at least for photo taking purposes, ha-ha) in my coming illustrations..

Have a nice day and cheers….

IMG_5822


UPDATED ON 2 AUGUST 2014


IMG_2525


I have prepared some Mexican Buns on today and I have decided to take some picture and update the post.

IMG_2533

As the above dough recipes uses tangzhong is rather time consuming, I have decided to use another faster dough as in my Blueberry Sweet Bread. It is definitely a faster and easier straight dough method that yields a fluffier bread.. As for the toppings, it is the same as the recipe above.

IMG_2537


UPDATED POST ON 12 SEPTEMBER 2014

With the frozen dough that I have in the fridge, I have decided to prepare some polo buns for the breakfast.

IMG_5808

There are some changes to the recipe as indicated in “red” as above as I found that this recipe for the topping is better. In addition, I have used another way of preparing the buns.

IMG_5781

  • Pre-heat the oven to 190 degree Celsius.

  • Weigh the  topping and divide into 10 equal balls. Take one topping, shape it like a ball, place a dough ball on top of the crust ball, wrap the topping around the dough ball. Use a knife to cut some lines on on top of the toppings.

IMG_5796

  • Let the dough proof until double in size, egg wash with the egg yolk followed by sprinkling some sugar on top of the crust. Bake in the pre-heated oven for 12-15 minutes or when the breads turn golden brown.

IMG_5824

IMG_5818


  • For more recipes, you can refer to my RECIPE INDEX (updated as at 28 July 2014)  here and you can follow me at PINTEREST or visit the blog’s FACEBOOK PAGE to keep abreast of my future posts.  

IMG_2539

IMG_5804

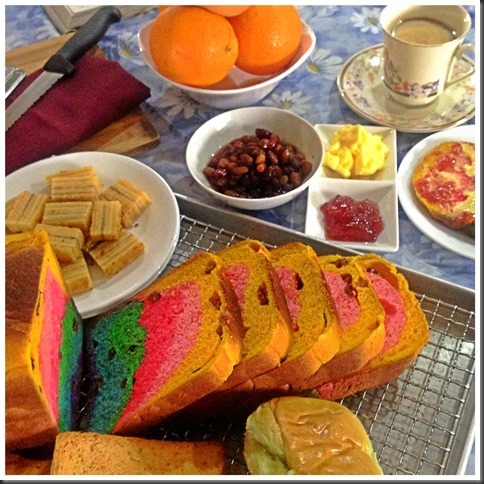
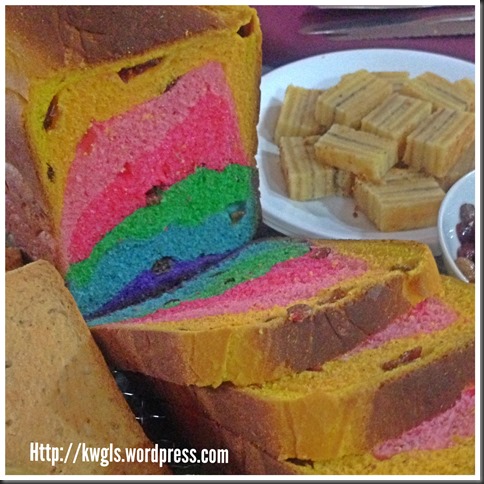
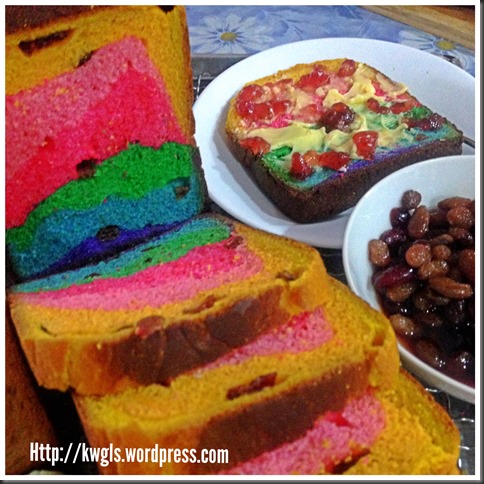
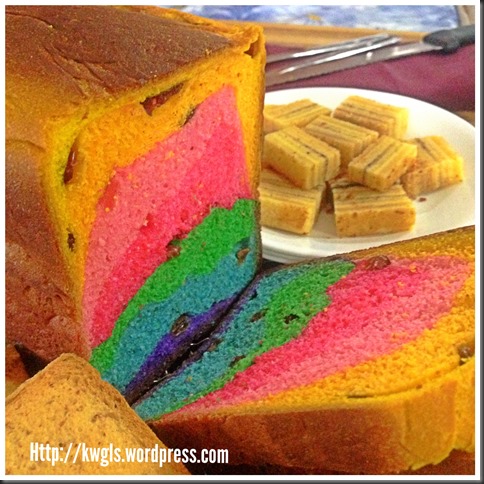
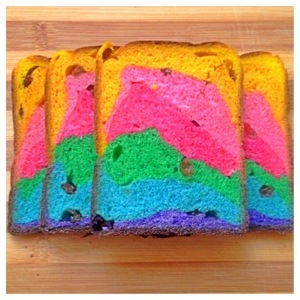
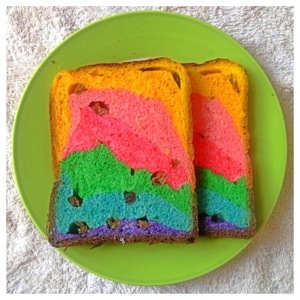
How I Wish This World Is As Colourful As A Rainbow–Cranberries Raisins Rainbow Loaf

IMG_3651.JPG (2)

INTRODUCTION

Guaishushu told himself, once in a while playing with colouring is okay since he did not have a chance to colour since after schooling.

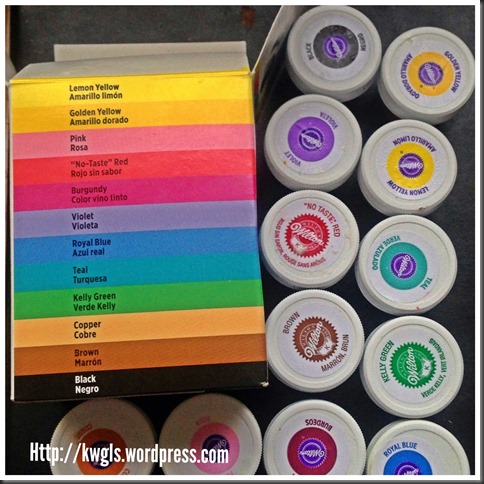
Two months ago, he “accidentally’ brought a full set of colouring intended for icing decoration for about SGD 30 and he thought that it’s only SGD3. By hook and by crook, he wanted to use up some of his colouring and he knew that the only colour that he really needed and always used is the red colour for the preparation of red eggs during his kids’ Lunar calendar birthday celebration. Besides making the red eggs, he really don’t know what to do with these colourings!

IMG_3667.JPG (2)

One day, when he was browsing his Flipboard application in iPhone, he saw some rainbow loaf which is extremely beautiful but he is hesitant whether or not he should proceed to prepare this since it will need a lot of colourings.

Though it is generally not encouraged to consume too much food with colouring, but there should be government regulations that governed the import of permitted food colourings. If it is hazardous to health, he shouldn’t be able to get it in this “efficiently administered” country, Singapore. He searched the manufacturer Wilton LLC, apparently, it is an USA well established company set up in 1929. He told himself he is just a commoner, if this company had been established for so many years, their products must have been used by many people in the world and he should not casting doubt on its product reliability! In this thinking process, he gradually convinced himself that it is acceptable for him to prepare the bread!

IMG_3691

He knew that if he bake the bread, he will have nothing to worry about the “marketability” of his rainbow loaf as his kids will definitely fight for the bread. While he was struggling to make a decision, he certainly thought of a blog “Bake for Happy Kids” by Ms. Zoe. Her blog title is correct, he should bake to make his kids happy!

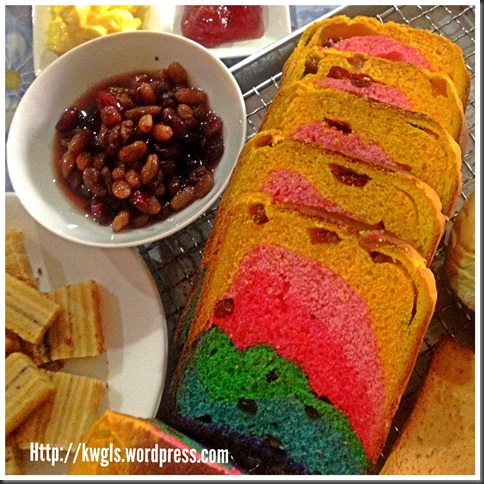
This post is about rainbow raisin and cranberry loaf. Guaishushu aims are to share about the making of rainbow loaf and raisin loaf. Therefore if readers are not fond of making the rainbow loaf, he can just make the raisin loaf instead.


WHAT IS REQUIRED

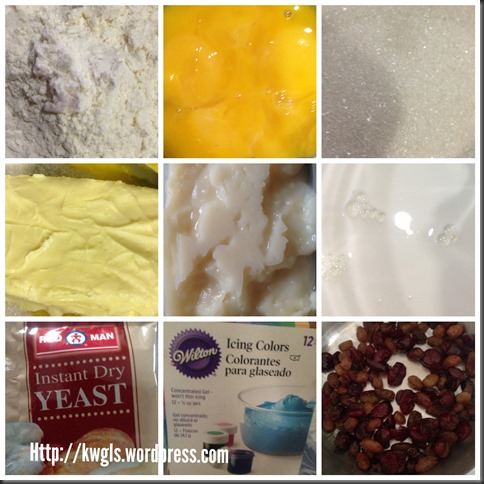
This recipe was adopted from the Sarawak buns recipe here and some of the picture are in the above mentioned post.

IMG_3689

  • 360 g of bread flour (you can substitute 10 g of bread flour with milk powder, in that case you need only 350 g of bread flour)

  • 70 g of beaten egg

  • 60 g of sugar

  • 40 g of butter – soften

  • 90 g of tangzhong (refer below)

  • 110 ml of fresh milk

  • 11 g of instant dry yeast ( 1 package)

  • 7 different types of colour gel or colouring (refer below)

  • 100 g of raisins and/or cranberry soaked in water/rum.

  • Pinches of salt

IMG_3673


THE PROCESS OF MAKING RAISIN AND CRANBERRY RAINBOW LOAF

This illustration will use the Tangzhong method of bread making and it involved 4 stages in the following orders:

Part 1 – Making the Tanzhong (Water Roux)

Part 2 – Preparing and Colouring the Dough for the 1st Proofing

Part 3 – Wrapping of Cranberries and Raisins and 2nd Proofing

Part 4 – The Baking Process


Part 1 – Making the Tanzhong (Water Roux)

PLEASE REFER TO THIS POST for the making of Tanzhong and reasons and history of Tanzhong.


Part 2 – Preparing and Colouring the Dough for the 1st Proofing

IMG_3679

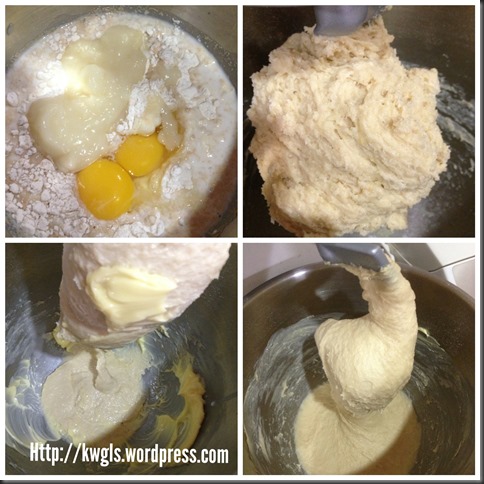
  • Mix all ingredients except softened butter and beat at slow speed for about 5 minutes.
  • Add the softened butter and continue kneading at medium high-speed for about 20-30 minutes or when the dough did not stick to the wall of your mixing bowl and do not break when you pull the dough.

IMG_3680

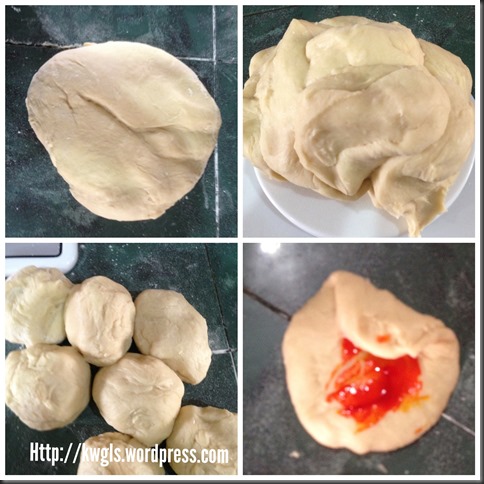
  • In a flat surface dusted with normal or bread flour, take out the dough from the mixing bowl and slightly knead it using hand for 1-2 minutes and shape it into a ball.
  • Weigh the ball and divide into 7 equal portions.

IMG_3681

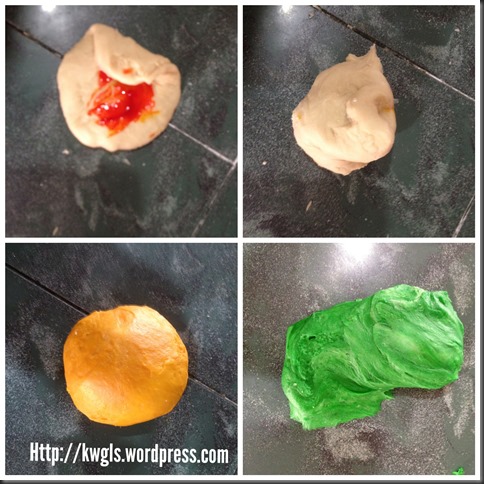
  • Take one dough and place some colour gel and knead until all the colour are even. Keep in a lightly greased bowl and covered with lightly greased cling wrap to prevent moisture loss.
  • Do the same for the remaining 6 dough with your desired colours.
  • Leave it to proof until almost double in size. This should be about 30-45 minutes depending on the day’s weather.

Colour Selection

For this pictorial illustration, the colours that I have selected was in this order (from left to right and eventually from the top level to the bottom level):

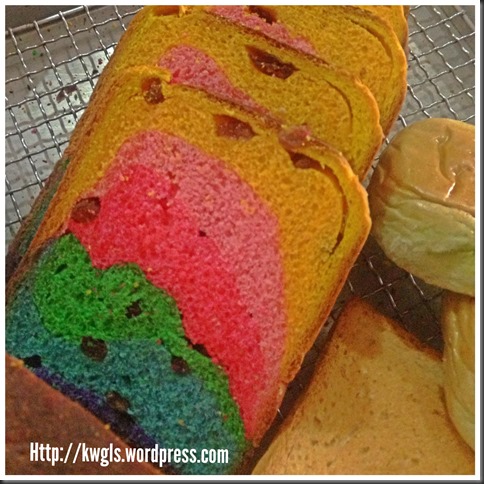
Lemon YellowGolden yellowPink”No-taste” RedKelly GreenRoyal BlueViolet

IMG_3609


Part 3 – Wrapping of Cranberries and Raisins and 2nd Proofing

IMG_3682

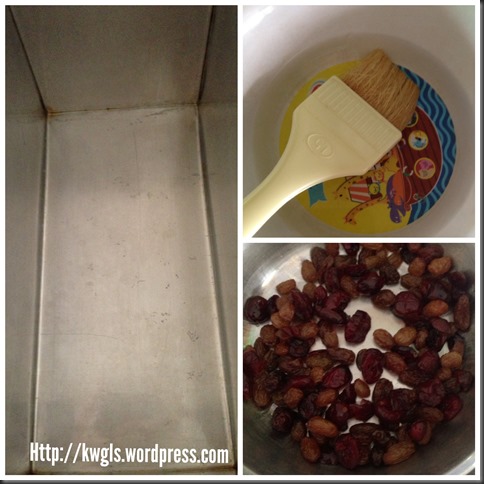
  • Lightly grease a loaf tin with a cover.

  • Get ready a small bowl of water and the raisins and/or cranberries to be wrapped in the dough.

IMG_3683

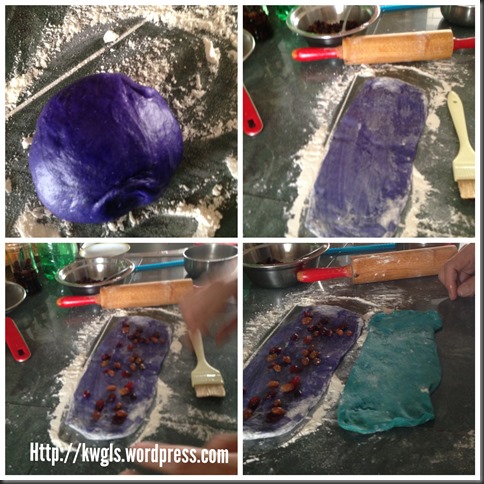
  • Start with the lowest layer, take out the violet dough and use a roller to roll into roughly the size of the loaf tin.

  • Brush slightly with some water on the surface and place your raisins/cranberries.

  • Get the royal blue dough (second bottom layer) and use the roller to roll into roughly the size of the loaf tin.

  • Place the royal blue dough on top of the violet dough. Press the sides and ensure that the royal blue dough and the violet dough stick together.

  • Brush slightly with some water on the surface and place some raisins and/or cranberries.

IMG_3684

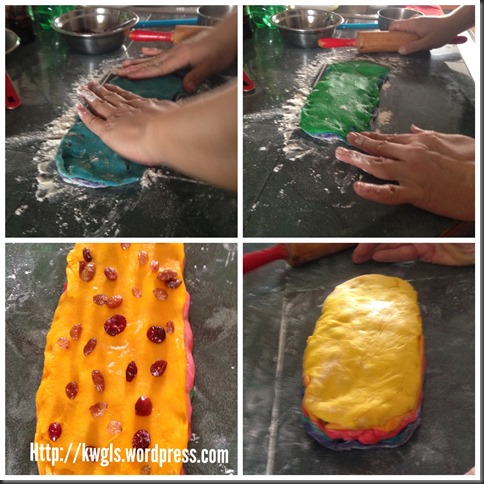
  • Get the Kelly green dough (third bottom layer) and use the roller to roll into roughly the size of the loaf tin.

  • Place the Kelly green dough on top of the royal blue dough. Press the sides and ensure that the Kelly green dough and the royal blue dough stick together on the sides.

  • Repeat the same for all the other layers and finished with the lemon yellow dough on the top.


Part 4 – The Baking Process

IMG_3685

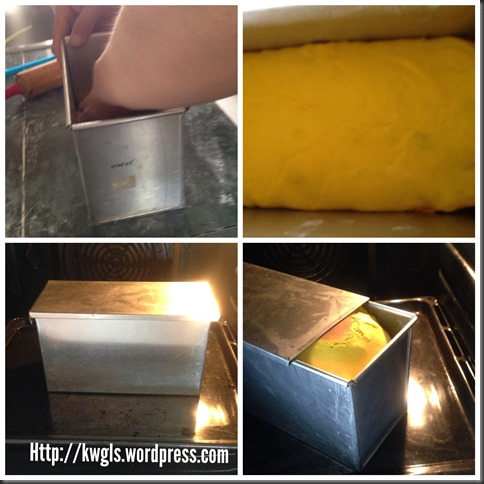
  • Place the dough into the lightly greased loaf tin and let it proof until it is double in size. How long it will take depend very much on the weather and today, it took me another 45 minutes to reach the desired size I want.

  • Set the oven temperature to 200 degree Celsius

  • When the second proofing is done, i.e when the dough have double the size, bake in the oven for 30 –45 minutes..

IMG_3686

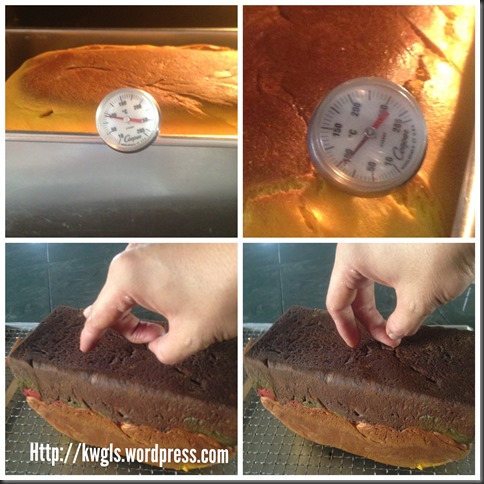
  • At about 35 minutes or when you start to smell the aroma of the bread, use an oven thermometer and insert into the bread and see if the temperature inside the loaf is more than 90 degrees Celsius. If it is less than 90 degrees Celsius, your bread will not be cooked and it is likely that when you take out the thermometer, there will be some wet dough stick with your thermometer. In this case, continue baking until when you inserted again the oven thermometer, the thermometer shows at least 90 degrees Celsius. If you find that the top starts to turn brownish, you can lower the temperature by 10 degree Celsius. General rule of thumb is that if you are unsure, rather bake slightly longer than under cooked.

  • If you don’t have an oven thermometer, one way of testing is after about 45 minutes (which is a reasonable timing for this size of loaf), take out the loaf from the loaf tin and try to use your finger to knock the bottom of the loaf. If it is a hollow sound, your loaf is cooked, otherwise, the loaf is uncooked. Put it back into the loaf tin and continue baking for another 10-15 minutes until you are certain that the dough is cooked. Again, if the top layer has signs of getting burnt, lower the temperature slightly.

IMG_3687

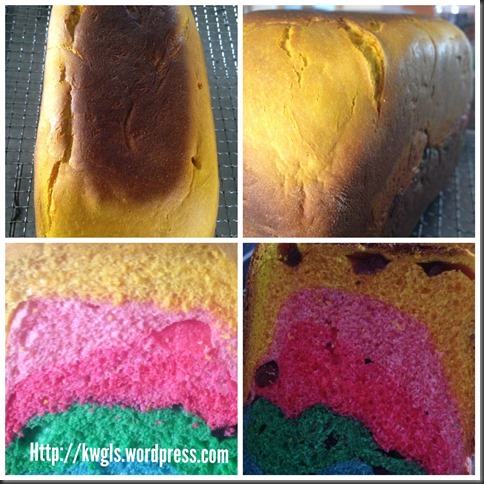
Note that the LOAF IS NOT BURNT. The dark brown color is the color of the violet dough on the side of the loaf.

IMG_3655.JPG (2)


CONCLUSION

While too much food colouring is not advisable, I choose to believe the Government’s stand on permitted food colouring. As long as consumption is not too often, such colouring shall not post a/any serious health hazard to our body.

While I am making this loaf, the kids were schooling. When they were back, I asked them to close their eyes and show it to them, “wow” are their reactions! They can’t believe that I am baking this loaf. They have requested to eat a piece of the bread but rejected by me because dinner is to start in 10 minutes time. In their mind, the loaf will definitely much tastier! Once in a while, why not bake your kids something “extraordinary” and joined them for a rainbow breakfast! Trust me, it will definitely a “colourful” and “fruitful” breakfast!

Hope you like this post on Cranberries and Raisins Rainbow Loaf. Have a nice day ahead and cheers.

IMG_3657.JPG (2)

IMG_3653

I am submitting this to Welcome To All My Bloggy Friends and #Recipeoftheweek

8646468202_0880f459d1   Link up your recipe of the week

20130821-081325.jpg

20130821-081409.jpg


Don’t Sandwich Me, I Can’t Breathe … Baked Hasselback Potatoes With Bacon And Mozzarella Cheeses..

Processed with MoldivIMG_3282

INTRODUCTION

I remembered that  immediately when I read the recipe Easy Bacon Potatoes published by Ms. Paula Jones’s,  I immediately shared in my Google Plus timeline and promised wanted to try out the recipe.

Yesterday, when I needed to prepare a lunch in a rush, I suddenly thought of this recipe but was unable to locate it. I searched high and low but in vain.

Therefore, based on my recollections, I just “anyhow” put together bacon and potatoes and this is what I have prepared.

Processed with Moldiv

Taste is superb but sizes and some of the ingredients were totally different from Ms. Paula Jones recipes from www.callmepmc.com. Hers’ definitely look more appetizing but too sad, I only managed to find out the recipe when I am searching to credit her recipe while writing this report.

IMG_3278


WHAT IS REQUIRED?

IMG_3293

  • 10 small washed baby potatoes

  • 4 thin pieces of bacon cut into small rectangular shape

  • 1 teaspoon of general Italian herbs for Italian cooking (optional)

  • 1 tablespoon of soft butter

  • 1 teaspoon of salts

  • 1 cup full of mozzarella or cheddar cheese or parmesan cheese

  • 2 large tablespoons of mayonnaise or sour cream (optional)

  • 2 slices of breakfast cheese (optional)

Processed with Moldiv


STEPS OF PREPARATION

 IMG_3294

  • Wash your baby potatoes. Slightly cut off one side so that the potato can stand on its own.

  • Use a sharp knife to slice open the potato with about 0.5 cm thick towards the direction of the bottom but do not slice through.

  • Rub with salt, butter and Italian herbs (optional). Set aside for next steps.

IMG_3295

  • Slice the bacons into thin strips and place it in between the spaces between the cut potatoes.

  • Place the potatoes in low casserole dish or baking tin.

IMG_3296

  • Baked in the oven at 180 degree Celsius for at least 30 minutes.

  • Take out and sprinkled with mozzarella or cheddar cheese and baked for 10 –15 minutes or until the cheese had melted.

Processed with Moldiv

  • Preferably served hot with generous amount of sour cream or moderate amount of mayonnaise or toppings of your choice. Plain serving is acceptable if preferred.

  • This is good to go with any Western set meals and as an alternative for baked potato skins, mash potatoes, potato chips or any other carbohydrate loaded meal items.

IMG_3276


VARIATIONS

  • If you runs out of time, you can always sliced it directly instead followed what I described above. You can refer to Ms Paula Jone’s version here.

  • All ingredients mentioned above are mostly substitutable to suit your family taste buds. If you are health conscious, you can lower the usage of mayonnaise or go for low fat mayonnaise dressing. Alternatively, you can also consider replacing the bacons with chicken frank or even fresh meat slices (for steamboat) if you preferred. If you preferred fresh Western herbs, you can put in dill, basil, rosemary and etc.….Full flexibility is the key and I encouraged readers to think out of the box and made one that suits your family’s taste buds.

  • Instead of putting mozzarella cheese, you can also substitute with breakfast cheese slice. As I have run out of mozzarella cheese, I decided to place a slice of breakfast cheese and it tasted equally well.

Processed with Moldiv

CONCLUSION

This dish is simple though the process is a bit laborious. However, you can always cut through the potatoes if you run out of time. It is a good choice as a party “snack” (depending on your size), a side meal and some simple home gatherings. It is a comfort  food and the combination of bacon, cheese with potatoes runs well beyond your visual expectations. The taste is just superb. Try and let me know.

Processed with Moldiv

Hope you like the post today and have a nice day. Cheers.

IMG_3326

  GUAI SHU SHU | Guai Shu Shu is a “shu shu” that is “guai“….


  • For more recipes, you can refer to my RECIPE INDEX (updated as at 20 November 2014)  here and you can follow me at PINTEREST or visit the blog’s FACEBOOK PAGE to keep abreast of my future posts.  

Processed with Moldiv

What I cooked today (家常便饭系列)- 25-7-2013

IMG_1402

On 25-7-2013, Chicken rice served with sweet kernel corn and mushroom soup.

As I have not cook chicken rice for quite a while, I have decided just to have a one dish dinner – Hainanese Chicken Rice. You can refer here for my detailed write up on the preparation of Chicken rice. Alternatively, you can refer to Guaishushu’s Facebook page for simple pictorial instructions.

IMG_1397

If you really observe the first picture, do you realize something are missing? Yes, two things were missing!  A very important garnish vegetables, cucumber slice. I always find that without cucumber slice, the whole chicken rice is missing something. Do you agree with me?

Secondly, there is a lack of green vegetable today. Usually, I would have a plate of blanched vegetable to go with it but because today is Friday, I have finished all the green vegetables in the fridge, Haha. I have said before in my earlier post, usually Sunday to Tuesday or Wednesday are leafy green vegetables and Thursday to Saturday are usually beans, melons or roots type of vegetables because it can be kept longer. We do marketing once a week and I am a rational cooker, I cooked based on First In First Out principle… I don’t usually cook impulsively..


IMG_1398

As I have additional chicken stock from simmering the chicken, I have decided to open a canned kernel corn and turned it into a corn soup. When I made the cake yesterday, I have some egg whites left and I just stir and “throw” inside the soup. It become a simple soup like the one you have in the chicken rice store.

Usually, when I cooked chicken rice, I will cook more than what is required. The rationale is that it take some efforts to prepare chicken rice, why not prepare some more. In addition, any left over chicken rice can be “recycled” and is a top choice for fried rice. Since it is already “marinated” rice and you need not to add much condiments and oil when you fried it.

Other than frying overnight chicken rice, we used to make it into chicken porridge for next day’s breakfast. After simmering the chicken, if you still have the chicken stock left, just keep it. In the next morning, just throw in the left over chicken rice, any chicken meat left (of course de-boned and possibly shredded into floss), add in a bit of condiments, it will become a bowl of chicken porridge.

Will it harm you to eat overnight food?  I do not want to think about it and as long as it is properly kept with no possibility of contamination, it should be ok. How about how grandparents or parents? Is it not the Westerners used to heat up frozen foods that were prepared well in advance?


Other than the above, the project of the day included the following:


Impromptu Ixora Birthday “Cup Cake”

Preparing an impromptu birthday cake for one of my internet friends who “requested” me to “bake” a birthday cake for her and wish her happy birthday over the internet. This cake is decorated with ixora flowers which is abundant in Malaysia and Singapore.. Do you mind if someone posted this cake to your timeline wishing you happy birthday?

IMG_1329


Butterfly Cupcake

IMG_1355

This is an extremely simple cup cake recipe. Add all ingredients and mixed well, bake and you get the cake. It was served with cream and strawberry jam as the basic cup cake have very little sugar. it was dusted with sugar powder. Do you think it will taste nice?


Rose Cake

IMG_1368

This should be a celebration cake but need further modifications. I am doing  in a rush and therefore  the workmanship is really terrible. Haha.


Modified Version of Raas Malai

This is a dessert originated from India and an extremely popular in South Asia. It was served in wedding ceremony and other important festival occasions. Traditionally, the raw ingredients are paneer (Indian Cheese) and milk. The recipe is adopted from http://free-advertising-ey.blogspot.it/2013/07/raas-malai-sweet-from-bangladesh.htmlk with some modifications to suit the Chinese taste buds. Modifications include reducing the use of spices such as cinnamon, cardamon and etc.. In addition, strawberry were added.

 
As this dessert look milky and cheesy, I have decided to let my kids try out the dessert exposing them to more international cuisines. The preparation are rather coincidence. This afternoon when I have over whipped my cream, I thought I might as well used this over whipped cream to make the dessert. I added fresh milk to the over whipped cream and heat until it boiled. Knowing that my kids will not really like spices like cardamon, cinnamon , I have decided to tailor it to a more Chinese taste buds. I meshed 5 ripe strawberries and add to the milk and let them boiled together with the milk.

As for the cheese balls, I have used mozarella cheese to make it instead of paneer or cheddar cheese. I meshed 2 strawberries, added to the cheese, added 1 tablespoon of water and shaped it into small balls. My balls are rather small compared to the authentic because I know my kids wouldn’t be able to take such a big cheesy ball.  I dropped the balls to the cool milk and put in the fridge. During serving, I found it too creamy (possibly due to my over whipped cream), I have further diluted with cold fresh milk and cut slices of fresh strawberry to go with it.


Verdict: Extremely nice sweet milky soup with strawberry flavour. As long as you like milk, I do not think you have any reasons not to like it.

As for the cheese balls, my girls can take all but my boys feels a bit too rich and salty to him. As for me, I loved the cold milk but for the cheese balls, one or two should be Ok but not too much as when I was young, Chinese were not exposed to ” cheesy things”…. Haha.. I will say those who like cheese, go ahead and make this milky desserts.. It is just delicious.
 

IMG_1401

LASTLY, HOPE YOU LIKE THE POST TODAY!  AND HAVE A NICE WEEK END.

IMG_1367

Hey, This is not Italian Meat Rolls, It Is Chinese Meat Rolls Called Ngoh Hiang

IMG_6897

INTRODUCTION

This post is sharing the Chinese version of meat rolls or Ngoh Hiang. It is different from the meat roll in Western cuisines such as the Italian meat rolls. Usually, minced meat (usually pork) and prawns were used and wrapped in a dry bean curd sheet.

Meat roll is an extremely popular dish for Malaysian and Singaporean Chinese households. The number of recipes available are the same with the numbers of Chinese grandmothers meaning every household have their unique recipe and all claims that theirs is the best. Depending on the dialect groups, meat rolls can be also be called ngoh hiang (five spices or 五香) or lok bak (卤肉)or hay g’ng (虾卷)

This recipe of mine, again is based on my recollection of what my late mother have prepared and the various meat rolls that I have tasted throughout the years.  I have purposely prepared this  meat roll for the noodle dish Lor Mee, a common Hokkien dish in Penang.

Usually, we prepared more meat rolls than required and stored in the refrigerators. When we wanted to serve the meat rolls, we will re-heat it.  Chinese meat rolls traditionally are commonly prepared for religious ceremonies or important house gatherings. The process  of preparation can be slightly laborious and usually ladies in the house were called to help with the preparation.


MEAT ROLLS OR NGOH HIANG DEFINED

As per Wikipedia: 

Ngo hiang (Chinese: 五香; pinyin: wǔxiāng; Pe̍h-ōe-jī: ngó͘-hiong), also known as heh gerng (Chinese: 虾卷; pinyin: xiājuàn; Pe̍h-ōe-jī: hê-kǹg) or lor bak (Chinese: 五香滷肉; Pe̍h-ōe-jī: ngó͘-hiong-ló͘-bah) is a unique Hokkien and Teochew dish served in many of Indonesia, Malaysia and Singapore’s hawker centres and in Cebú in the Philippines, in addition to its place of origin in eastern China. In parts of Malaysia the dish is known as loh bak or lor bak.

It is essentially a composition of various meats and vegetables and other ingredients, such as a sausage-esque roll consisting of minced pork and prawn (or fish) seasoned with five-spice powder (Hokkien: 五香粉, ngó͘-hiong-hún) after which it is named, rolled inside a beancurd skin and deep-fried, lup cheong, cucumber, century egg, ginger, deep-fried egg, deep-fried beancurd, fishball and many others. It is usually served with chili sauce and a house-special sweet sauce. Many stalls in Singaporean food courts and hawker centres sell fried bee hoon with ngo hiang; this combination is common for breakfast and lunch. In Indonesia, people enjoy ngo hiang with sambal sauce. (Source: http://en.wikipedia.org/wiki/Ngo_hiang)


WHAT IS REQUIRED

IMG_6881

  • 1 kg of minced meat – In this illustration, I have used minced pork. However, minced chicken breast can also be used.
  • 250 g of prawns cut into small chunks – you can also mince the prawns. I have opted to use chunked prawns instead of minced prawns as  I would like to have some prawns being seen in my meat rolls.
  • 200 g of fish paste (optional). I have used this to enhance the seafood fragrance and improve the binding properties of all materials inside the meat rolls.
  • 4-5 spring onions chopped into small pieces
  • 1 big onion chopped into small pieces
  • 10 water chestnuts peeled and cut into small pieces. The purpose of water chestnuts is to let the meat rolls have some feel of crunchiness when eaten.

IMG_6882


  • half cup of corn flour – purpose is to enhance the springiness of the meat roll;
  • 1 cup of wheat flour – purpose is to enhance the stickiness of the ingredients. Without wheat flour, the meat rolls can be rather loose.
  • 1 egg – purpose to increase the stickiness and fragrance of the meat rolls.
  • 1 tablespoon of salt 
  • 3 tablespoons of light soya sauce to taste
  • 2 teaspoons of five spices powder (optional). Though the name is called Ngoh Hiang (five spices), my family seldom put these spices as our family members do not really like the aroma. However, most of the meat rolls that I have tasted do put these spices.
  • 2 tablespoons of sesame oils
  • 5 teaspoons of white pepper
  • 5 tablespoons of granulated sugar
  • 12 sheets of bean curd sheets of 6 inches x 6 inches big


STEPS OF PREPARATION

Mixing the ingredients…….

IMG_6883

  • In a big mixing bowl, place all ingredients together. Use a big spoon to stir until all ingredients are well mixed. As some of the ingredients can be very fine (such as five spice powders, white peppers and etc.), you can also add the ingredients in stages if you find that it is difficult to mix well by putting all the ingredients all at once.
  • The final picture is the well mixed minced meats and it is considered as well mixed when the colour is even and consistent. The minced meat can be rather sticky due to the addition of egg and wheat flour.


Rolling the minced meats…

IMG_6884

  • In a flat surface, place a dried bean curd sheet. Use a wet hand to lightly pat the bean curd sheets. The purpose is to make it more flexible as too dry the bean curd sheets can be easily broken.
  • Placed about 150 grams of minced meats on top of the dry bean curd sheets.
  • Make a small roll, fold in the sides, used some of the minced meats or water to apply to the sides and corners of the bean curd sheets. Roll the minced meat until the end of the bean curd sheets. With the minced meat or water at the sides, it will help to  bind the bean curd sheets together.
  • If you runs out of bean curd sheets, you can shape the remaining into a ball and deep frying it. Please refer to the section below “When you runs of bean curd sheets”.


Steaming the meat rolls….


IMG_6885

  • In a steamer, place some water and bring to boil.
  • Transfer the meat rolls to the steamer and steamed for 15 minutes. Use a skewer/toothpick to penetrate one of the rolls and ensure that the skewer/toothpick  comes out clean.

IMG_6886


Deep frying the meat rolls……..

This step will involve frying the meat rolls. However, if you do not want the meat roll to be deep fried, you can also served it after steaming by cutting into small slices. Traditional ways of preparation will require the meat rolls to be deep fried such that the bean curd sheets will become crispy and golden brown.

IMG_6887

  • In a deep pot, have some oil until smoking hot. As a test of whether the oil is adequately hot for frying, place a wooden chopstick into the hot oil. If bubbles start to come out, it means that oil is ready for frying.
  • Place the meat rolls into the hot oil and deep fried until golden brown. Note that as the whole roll is already cooked, therefore the purpose of this step is just to ensure that bean curd sheets are crispy and the color is golden brown, therefore, the timing of the deep frying is rather fast usually less than  5 minutes.
  • Take out the meat rolls and place it in a plate with an oil absorbing paper on the plate.
  • Cut into small pieces when serving. Condiments can include sweet chilli sauce or plum sauce.


 IMG_6896


What would happens if you runs out of bean curd sheets….

It is rather difficult to estimate the exact quantity of bean curd sheets that you need. At times, you may run of bean curd sheets as not all rolls are of the same sizes. In that case, you can shape the minced meats into small balls and roll it in the biscuit crumbs before deep frying (steps as above).

IMG_6888

  • Have some biscuits and grind it as fine as possible. Add some corn flour to the biscuit crumbs.
  • Shaped the minced meats into small balls and roll the balls in the biscuit crumbs.
  • Placed in the hot oil until the skin of the balls turns golden brown. Take out and place in an oil absorbing paper.


CONCLUSIONS

Meat rolls are a common household dish among Malaysian and Singaporean Chinese.  There are many recipes and each family will claim their is the best. Making meat rolls can be laborious but the moment you put it in your mouth, the taste is worth every efforts preparing it. Meat rolls are usually prepared for religious ceremonies and is served in restaurants as one of the cold dish. It is also used for noodle dishes such as lor mee. A detail post on the preparation of lor mee will be released soon. Preparation of lor mee will require  the use of these meat rolls  and meat balls as the ingredients.

IMG_6902

Hope you LIKE the post to day. Have a nice day and cheers.


IMG_6901

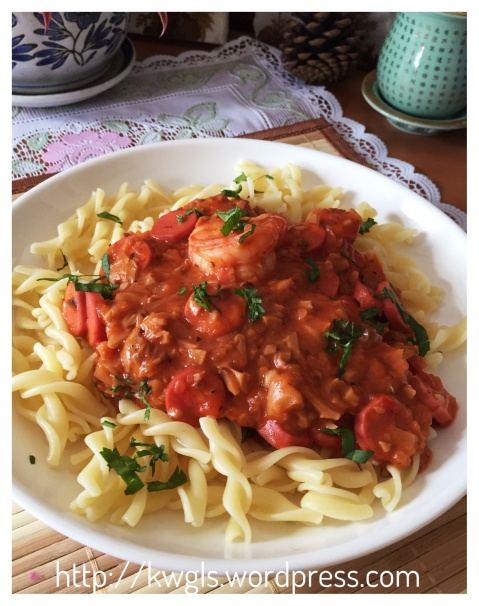
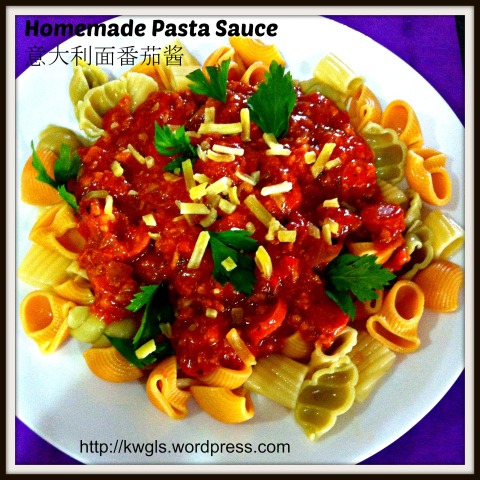
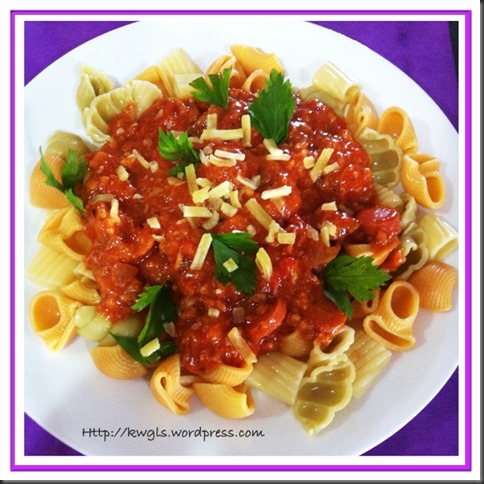
Let’s See How An Asian Make The Tomato Pasta Sauce From Scratch ….

Processed with Moldiv

INTRODUCTION

This is the homemade pasta sauce from scratch. I learned this many years ago from one of my French friends staying in Paris, France. When I visited her, she is preparing the pasta sauce and I can vividly remember certain steps in the preparation but sad to say, I can’t really recall the happy time we had during the dinner.

IMG_67861

This post will consist of two parts:

Part 1  –  the making of homemade pasta sauce and

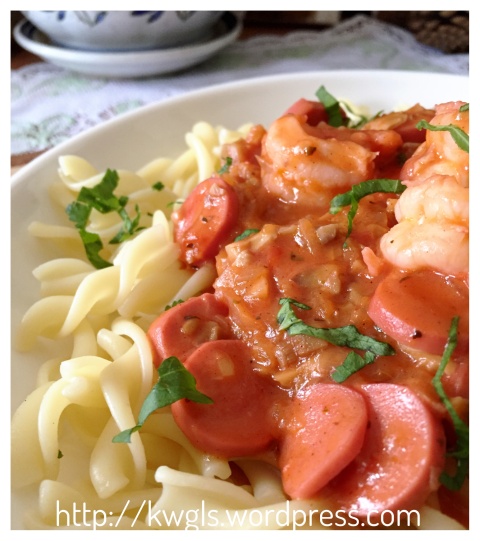
Part 2 – the making of baked pasta with pineapple

Processed with Moldiv


PART I – MAKING OF HOMEMADE PASTA SAUCE


WHAT IS NEEDED

This recipe is adequate to make tomato pasta sauce for at least 6 persons and have about 600 grams left for baked pasta.

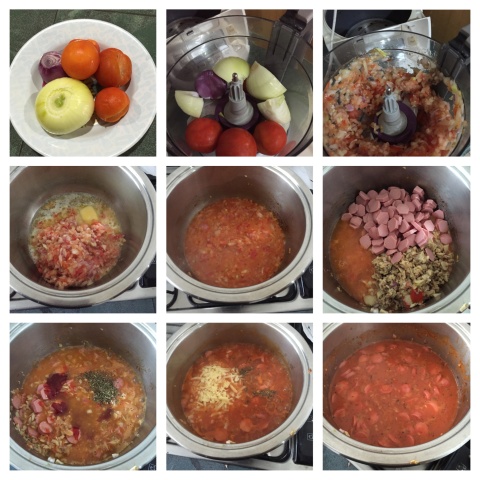
IMG_0701

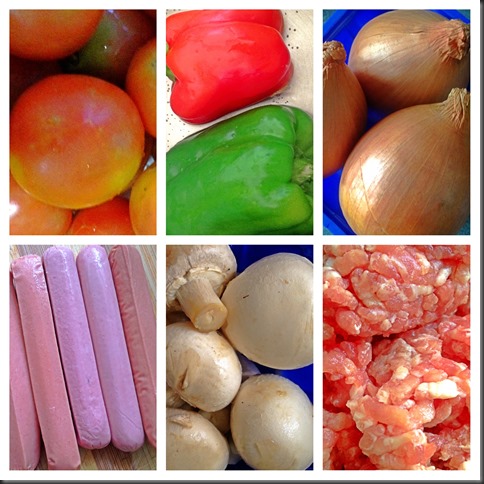
  • 1 kg of tomatoes 
  • 2 big size capsicums (preferably red in colour but green colour is acceptable) – optional 
  • 3 big stalks of celery – optional and in this illustration, I did not include this 
  • 3 large onions 
  • 6 chicken franks – optional
  • 500 g of fresh button mushroom (can be substituted with canned mushrooms) – optional 
  • 500 g of minced meat (beef or chicken or pork). In this illustration, pork was used.

IMG_0739

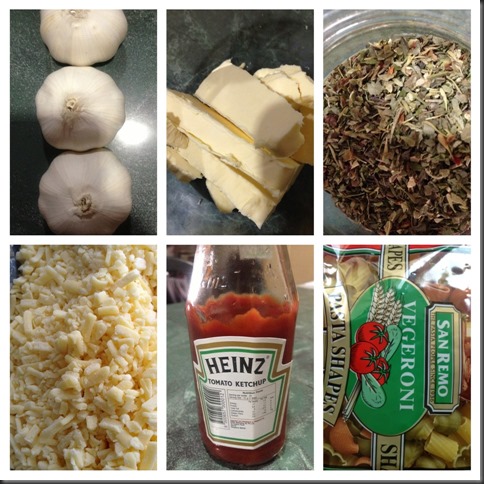
  • 20 cloves of garlic 
  • 30 grams of butter (can be substituted with olive oils)
  • 1 tablespoon of Italian dried herbs 
  • 100 grams of mozzarella cheese 
  • 10 tablespoons of tomato ketchups (optional, for “colouring” purposes) 
  • 1 pack (about 300g) of pasta of your choice. 
  • Seasoning (Salt, black pepper, sugar)

Processed with Moldiv


PREPARING THE RAW INGREDIENTS……..

IMG_0706

  • Clean the tomato and all other raw ingredients.
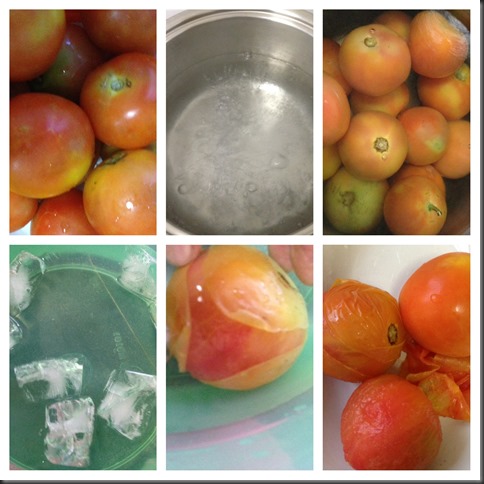
  • In a big pot, bring some water to boil. Place the tomato into the hot water and let it boil for a few minutes or until the skin slightly peeled it off. Note that as long as the skin start to break, you can transfer to the cold water as mentioned below.
  • Get ready a pot of icy cold water. Place the tomato in the icy cold water.
  • Peel off the skin by hand which is rather easy.

IMG_0704

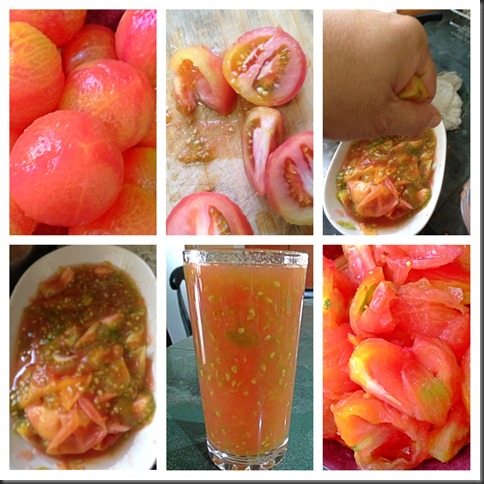
  • Cut opened the de-skinned tomato. Use a spoon to scoop out the seeds.
  • Use your hand to squeeze off the seeds and/or juices into a clean container.
  • You can either throw away these juices or keep it as tomato juices. It is okay to drink the seeds as it is very fine and slippery.
  • Set aside the tomato flesh for future uses.

IMG_0741

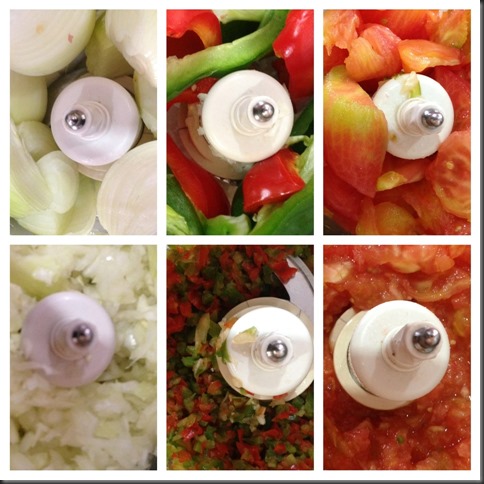
  • Traditional way of making pasta sauces do not really utilize food processors. However, I have opted to use food processors to cut short the braising time.Traditionally, all items were julienned or cut into small chunks for the cooking.
  • Use the food processors to cut the garlic and onion in small chunks (need not to be overly fine since you are going to braise them), set aside.
  • Use the same blender to blend the red and green capsicum or celery (if any). For celery, you will need to de-skin the celery first before you put into the blender. The red and green capsicum and celery will help to add volumes and flavour to your pasta sauce. If only tomato is used, it may be too sour.

IMG_0742

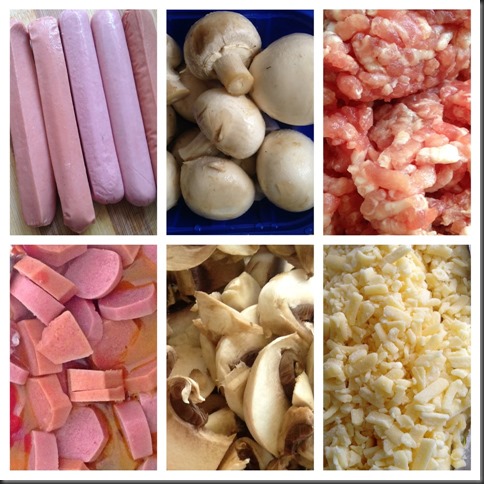
  • Cut the chicken franks into small chunks. This is optional and rather “Asian” taste. I have put this because my kids love to eat chicken franks.
  • Cut your button mushrooms into thin slices. Canned mushrooms works equally well.
  • Minced meat of your choice. Traditionally, beefs were used. As I do not eat beef, I have substituted with minced pork or at times minced chicken. I have bought the ready made minced meat from the supermarket.
  • Grated mozzarella cheese. I have opted to buy the grated mozzarella cheese but it is not necessary at all. If you have un-grated cheese, you can just cut a slice (without grating) and put it in the sauce later. It will melt subsequently.

THE COOKING BEGINS…..

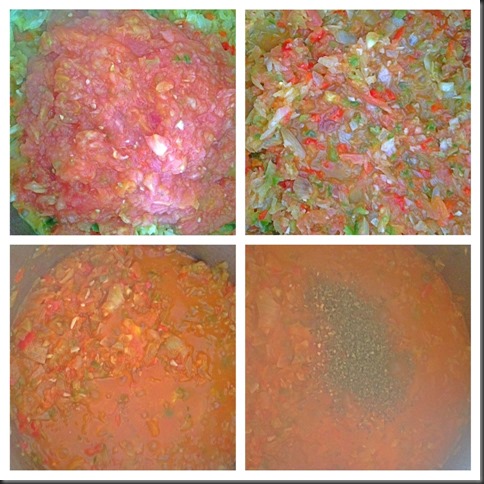
IMG_0773

  • In a big pot, put the butter and let it melt.
  • Add in the chopped garlics, stir fried until it turns slightly brown or the aroma start to emit.
  • Add in the chopped onion and stir fry for 2 minutes.
  • Add in the chopped green and red capsicums and stir fry for another 2 minutes.

IMG_0774

  • Add in the chopped tomato and bring them to boil under high heat.
  • Once boiled, turn to medium heat and let the mixture simmer for at least half an hour.
  • Add in seasoning and herbs and let them boil for another 5 minutes. Seasonings can include pinches of sugar, black pepper and salt. As for the Italian herbs, I have bought the over-the-counter dried herbs which consist of basil, oregano, garlic, thyme, red bell peppers and parsley.
  • If you just want pure pasta sauce without any meat. You can stop here and you can keep it in sterilized containers and keep for at least a month in the fridge. The steps that follows are meat sauces for the spaghettis or other pastas.

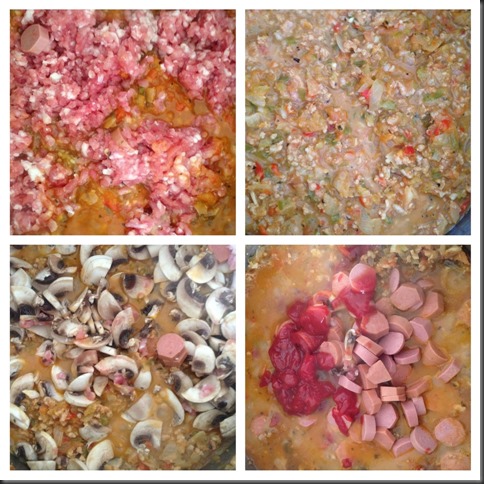
IMG_0775

  • Add in your minced meat and cooked for another 2-3 minutes.
  • Add sliced mushrooms and chicken franks.
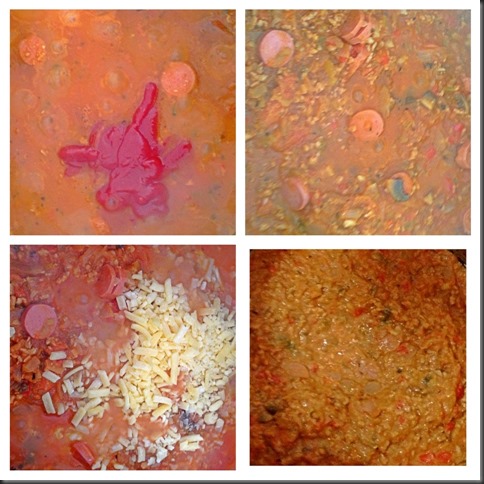
  • As this is home made pasta sauce, the colour will very much depends on the types of tomato that you bought. In Singapore and Malaysia, it is rather hard for you to find Roman tomato, we can just use whatever tomatoes we have. However, the colour may not be that appealing, you can add in bottled tomato sauce to make the colour darker. In addition, it will help to enhance the flavour of the pasta sauce.

IMG_0776

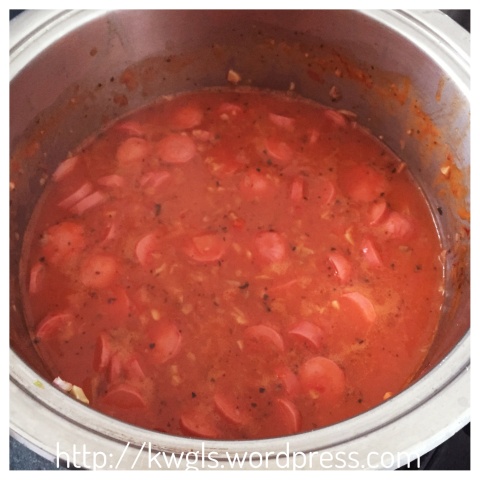
  • Continue to boil for at least 10 minutes, add mozzarella cheese and once boiled, off the heat and your home made pasta sauce is ready.

Processed with Moldiv


COOKING THE PASTA…..

This is rather standard and you should read the instructions of the packaging for the pasta that comes with it.

IMG_0783

  • In a pot with about 2 litres of water, add 2 tablespoons of cooking oil (olive oil) and pinches of salt. Bring to boil under high heat.
  • Add the pasta and continue to boil for 8-10 minutes or till desired texture.
  • Drain away hot water and pour some cold water on top of the pasta for one minute.
  • Drain, add in pasta sauce and garnished with parsley or any other desired herbs  and it is ready to serve.

IMG_0708


Processed with Moldiv


CONCLUSION

  • Home made pasta give you the a full flexibility of adapting the ingredients and herbs to your family taste buds and health objectives. Most ingredients are substitutable and trial and error or mix and match appeared to be the best approach to design your own favourite pasta sauce. I have also opted to use food processor in the preparation process and that have cut short the preparation tremendously.
Processed with Moldiv

For my readers from Western countries, since baked pasta and pasta sauce are more popular in your countries, tell me if you think the pasta is yummy and if the baked pasta will suit your taste buds.

Hope you LIKE the post and have a nice day. Cheers.

Processed with Moldiv


Processed with Moldiv

Microwaved Mug Cakes, Another Quick Alternative to Baked and Steamed Cakes…

IMG_8967

Updated Post on 16-10-2014

Last night, wife was asking what is for breakfast today? I told her I do not know and worst came to the worst, some biscuits.. Ha-ha. This morning, while I was cracking  my head what to prepare  muffins and scones that are fast and easy… It suddenly come across my mind to prepare some microwave butter cakes. It is very easy and moist and it took me about 15 minutes to prepare a 2 eggs cake- 10 minutes preparation and 5 minutes microwaving… I save my electricity, dishing, energy and time…

IMG_8969

The texture of microwave cake is always very moist and like the preparation of muffins, I gather the wet ingredients and dry ingredients, stir until well mixed and microwave…Happy trying.

IMG_8971


IMG_0395


IMG_8963

INTRODUCTION

This is another post in my simple pastry making series, a cup cake or mug, a cake baked in a cup. It is baked in a cup or a mug cake in the microwave oven. It is fast, utilizing about 5 minutes. No electrical beaters, just mix using your choice of utensils and you will be able to get a cake like above. Scale down all the ingredients, putting in a microwavable cup, you can even prepare one for your kids breakfast. This post will share with you a one man breakfast chocolate cake, a coffee log cake and a cheesy buttery log cake.


WHAT IS REQUIRED

Chocolate Cake
(1 man serving)
Coffee Log Cake
(6 inches log)
Cheesy Butter Cake
(6 inches log)
Container 1 microwavable cup of about 250 ml 1 microwavable cup of 600 ml 1 microwavable cup of 600 ml
Sugar 2 tbsp 80 g 80 g
Butter (melted) 2 tbsp 80 g 80 g
Cream cheese (room temperature) 80 g
Fresh milk 2-3 tbsp 80 g 120 g
Coffee liquid 80 g
Eggs 1 egg 80 g 80 g
Self raising flours 2 tbsp 160 g 160 g
Cocoa powder 2 tbsp
Sodium Bicarbonate (optional) 1/2 tsp 1/2 tsp
Microwavable time 3 minutes 5 minutes 5 minutes

IMG_8959


STEPS OF PREPARTION

The steps of preparation is the same be it for a small cup or a 3 inches diameter cup. The illustration below is for a small cup one man personal chocolate cake.

Chocolate cake (serving for one)

IMG_0391

  • In a 250ml microwavable cup (one normal coffee cup), put sugar, self raising flour and slightly stir it until well mixed.
  • Add fresh milk, melted butters and eggs and use a spoon stir it until well mixed or when colour is even and there are no lumps.
  • This step is rather important and make sure any flour stick in the bottom will be scraped up and mixed and there are no air in the mixture. Lightly tap your cup in the table to see if there is any air trapped in the mixture.

IMG_0392


  • Place your cup in the microwave oven and heat it for 3 minutes under high power.
  • You will start to see the cake start to rise after 1 1/2 minutes and by the sides will start to contract. If your cup is smaller, you may see the batter started to rise even higher and possibly 1-2 cm above the cup level. That is ok since the cooked batter (now becoming cakes) are able to withstand the weight any uncooked batter that subsequently rise to the top.
  • Wait for 1-2 minutes before you take it out from the cup. Theoretically, it should not stick to  the sides or bottom of the cup if your batter are mixed thoroughly with no lumps of unmixed flour.
  • Be careful when you handle the cakes as it can be quite hot especially the inside of the cake.
  • If you can’t finish your cake and on your next serving, just heat up your cakes for 10-15 seconds and your cake will become soft again.

For the coffee log cake and cheesy butter cake, the steps of preparation is the same except the measurements as mentioned above and the incorporation of cheese in the above batter. The follow steps will apply for both cakes.

Coffee Log Cakes and Cheesy Butter Cakes

IMG_0394

  • In a 600ml microwavable cup, put sugar, sifted self raising flour, sodium bicarbonate and slightly stir it until well mixed. You can also melt the butter in the microwave using the same cup for about 1 minute.
  • For coffee log cake, have 80 g of hot water and add 2-3 table spoons of instant coffee powder until it is fully dissolved. You can also use hot milk instead. Add melted butters, coffee liquids, butters and eggs and use a spoon to sir it until well mixed or when colour is even and there are no more lumps. This is the batter of coffee log cake.
  • For cheesy butter cake, after you melted the butter, put the cream cheese into the hot melted butter and stir until almost well mixed. Add fresh milks and eggs and use a spoon to stir it until well mixed or when colour is even and there are no more lumps. This the batter mixture of the cheesy butter cake.
  • Again, this step is rather important and make sure to scrap any flours on the sides and bottom of the microwavable cup, mixed and ensure that there are no air in the mixture. Lightly tap your cup on the table to see if there is any air trapped in the mixture.


  • Place your cup in the microwave oven and heat it for 5 minutes under high power.
  • You will start to see the cake start to rise after 3 minutes and by the sides will start to contract. If your cup is smaller, you may see the batter started to rise even higher and possibly a few cm above the cup level (as in the picture). That is ok since the cooked batter (now becoming cakes) are able to withstand the weight of any uncooked batter that subsequently rise to the top.
  • Wait for 1-2 minutes before you take it out from the cup. Theoretically, it should not stick to  the sides or bottom of the cup if your batter are mixed thoroughly with no lumps of unmixed flour.

IMG_8957

IMG_0400  Cheesy Butter Cake

 IMG_0404Coffee Log Cake

Serving suggestions

  • Best served when hot with glass of tea or coffee.
  • Reheat in microwave for 10-15 seconds if necessary.
  • Add some cream cheese or fresh cream if desired.

IMG_8961


CONCLUSIONS

  • This post introduced the use of microwave to prepare a cake, if you do not want be your cake in the cup or mug size, you can used other microwavable kitchen utensils of your liking.  Most microwaves nowadays have a detail function for each cooking methods, select baking functions if available. Otherwise, use the high power function.
  • The use of microwave in the “baking” of a cake have cut short its preparation time considerably. Making a cake within 5 minutes were unthinkable in the olden times. It is obviously a good alternative to the traditional baking and steaming of preparing a cake,
  • The texture of the cake is unique as it is soft and moist. That make the cake easy to cut into any sizes desired.
  • It is an good alternative as a traditional tea cake but offer advantages of quick and fast preparation as compared to traditional tea cakes.
  • There are many possibility of using this simple preparation methods to “invent” cakes that you want.. Try to explore, may be banana cakes, carrot cakes, blueberry muffins…… and the list is never ending. The point to note is that you can use the traditional recipes but the batter must be well mixed and make sure no air is trapped in your batter!


Lastly, take a cup and a spoon, walk towards the kitchen, put in 2 tbsp of flours, chocolate powder (milo/horlicks), sugar, melted butter (cooking oil acceptable), fresh milks and 1 egg, Stir well, put it in the microwave and tell me what it look like.

Hope you LIKE it and have a nice day.

IMG_0397

IMG_8965


  • For more recipes, you can refer to my RECIPE INDEX (updated as at 15 October 2014)  here and you can follow me at PINTEREST or visit the blog’s FACEBOOK PAGE to keep abreast of my future posts.  

IMG_8973