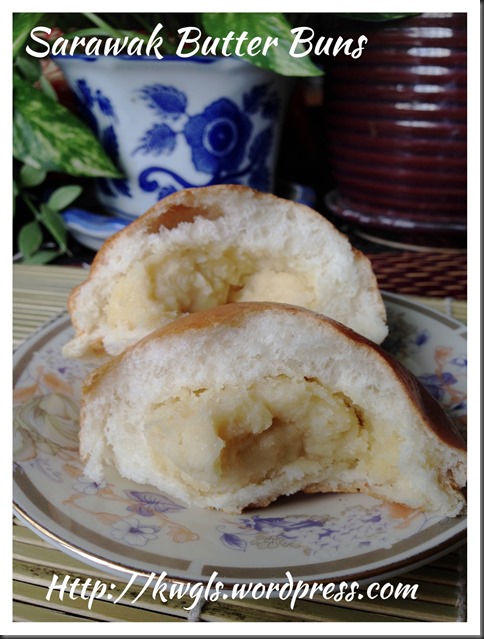
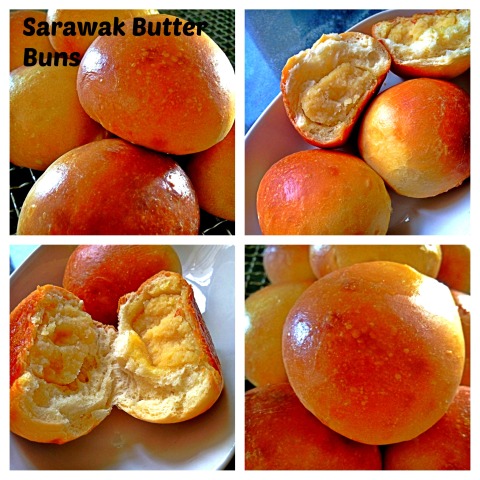
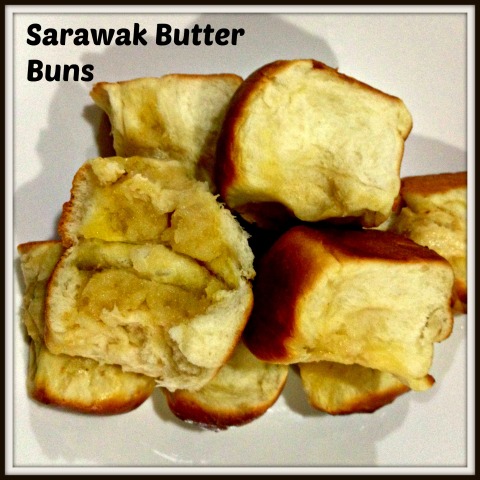
Homesick Buns? Yes, I am homesick of Sarawak Style Butter Buns..

IMG_8512 

UPDATED POST ON 11-10-2014

Craving for the buns that I can get hold in Singapore, and I have decided to prepare these buns to surprise my wife. We usually bought back from Sarawak if we visited our home town. There is no change in the recipe but I have decided to use the BASIC BREAD DOUGH RECIPE instead of the tangzhong dough recipe here.  Please refer here for the BASIC BREAD DOUGH RECIPE. I find that the basic dough is much faster without compromise quality of the buns.

IMG_8519


 IMG_0613

INTRODUCTION

This is a rather simple basic bun of which I am yet to trace the history. The uniqueness of this bun is its filling. The filling is made of butter, sugar and flour. Throughout my years overseas, I have yet to find buns that have this filling. The nearest that I have came across is butter milk buns where milk powder is used used instead of pure butter.

IMG_06101

I came from Sarawak, Malaysia. Sarawak is located in the island of Borneo. Since young, I have been eating these buns for breakfasts and snacks.

I missed the buns. The fillings are aromatic. It is sweet and buttery in flavour. When I made the first batch 2 days ago, I posted my pictures in the Google plus certain baking communities and my Facebook timeline, I was surprised that there are a number of readers and my friends are requesting for the recipe. What shocked me is that most of them in Google plus communities have never seen or eaten the buns before. Apparently, they are either curious about the fillings based on my descriptions.

IMG_8521

As for the first batch, I did not take any measurements, I have decided to do the second batch so as to share the recipe with the readers.

IMG_06591


SARAWAK STYLE BUTTER BUNS

Sarawak style butter buns shall not be confused with the butter soft buns that are mentioned in other recipe books. The so called butter buns in recipe books are mostly refer to buns with no filling. It shall also not to be confused with the Hong Kong cocktail buns where the fillings are shredded coconuts and butters. In addition, they are also different from the so called “butter buns” whereby a butter cube is wrapped by the dough and when baked, the butter melts into the bread. Since there are possibilities of misunderstanding, I shall call these special buns as “Sarawak Style Butter Buns”.
Butter Buns – Normal buttery buns with no filling. (pic courtesy:  http://en.christinesrecipes.com)

Hong Kong Cocktail Buns – Fillings are shredded coconut and butter http://cornercafe.wordpress.com

Buttery Buns – Butter in the centre of the bun and melted when baked. This is also the type of buns commonly found in the famous Malaysian chain store called “Rotiboy” .http://thenewartofbaking.blogspot.sg

IMG_0487

Sarawak Style Butter Buns – Butter fillings. Found in Sarawak only.


THE PROCESS OF MAKING SARAWAK STYLE BUTTER BUNS

This illustration will use the Tangzhong method of bread making and it involved 5 stages in the following orders:

Part 1 – Making the Tanzhong (Water Roux) ..– Best to prepare the night before

Part 2 – Preparing the Dough for the 1st Proofing

Part 3 – Preparing the Butter Fillings

Part 4 – Preparing the Dough – Wrapping the Fillings and 2nd Proofing

Part 5 – The Baking Process

IMG_8523


TANZHONG METHOD OF BREAD MAKING

Tangzhong (汤种)is a relatively new method of bread making and the main advantages of it is because bread made using tangzhong were usually soft and fluffy and  able to keep longer. Previously, bread improver were used to make the bread softer for a longer period of time. However, this method have used all natural ingredients without any chemicals  to get the same effect.

According to Cookipedia:

“Tang zhong (also known as a ‘water roux‘) is a method used in bread making to create soft and fluffy bread which was originated by the Japanese. However, it was popularised throughout south-east Asia in the 1990s by a Chinese woman called Yvonne Chen who wrote a book called The 65° Bread Doctor. Using this method also allows bread to stay fresh for longer without needing to use artificial preservatives.

To make the tang zhong, you mix together one part flour with five parts liquid (by weight) to make a smooth paste. This is usually water, but can be milk or a mixture of both. The mixture is then heated in a saucepan until it reaches exactly 65°C (149°F), removed from the hob, covered and left to cool until it is down to room temperature, when it will be ready to use. It would be useful have a digital thermometer with a probe when making this as other types of thermometer tend to be too large. If you are not making your bread immediately, the tang zhong will keep in the fridge for a couple of days, but will need to be brought up to room temperature before use. The tang zhong is added to the main flour with the liquid and mixed in and kneaded as normal.

The amount of tang zhong used should be about 35% of the weight of the main flour. It is best to make a little extra, because the liquid will evaporate slightly during heating. To make a loaf weighing about 1kg, I would suggest using 480g flour, 200g liquid and 170g tang zhong (made with 30g flour and 150g liquid), which will give a hydration of about 68%. You can of course adjust the amount of liquid either side of the 200g, but the tang zhong proportions should not be adjusted. “

(http://www.cookipedia.co.uk/recipes_wiki/Tang_zhong)

You will note that my recipe for Tang zhong (that are detailed below) are different from what is mentioned above. You can either use my recipe or the recipe as mentioned above.

 IMG_8508


PROCESS OF MAKING THE SARAWAK STYLE BUTTER BUNS

PART 1 – MAKING THE TANG ZHONG (WATER ROUX) …..

What is required

  • 50g bread flour
  • 50g boiling water (water should be boiling hot, otherwise you have to put it over the stove to cook it)

Steps of preparation

IMG_6793

  • Get ready the bread flour in a mixing bowl. Pour the boiling hot water into the flour, mixed well and shaped into a ball.
  • Let the ball cooled down at room temperature. Once cooled, covered bowl with a cling wrap and keep it in the fridge overnight.
  • This recipe will make about 90 g of tanzhong. If you cannot finish tanzhong, you can put it in a container and keep it in the fridge for future use.

Update:

The picture below is from my second batch whereby I have used the method specified in the Cookipedia above and is append here for your reference.

IMG_0665

What is required

  • 25 g of bread flour
  • 125 g of cold water

Steps of preparation

  • In a metal mixing bowl, mixed the water with the cold water. Stirred until well mixed.
  • Place the flour mixture under medium to low heat until the mixture boils.
  • Continue to stir until it resembles some types of glue or when the mixtures start to dissociate itself from the wall of the bowl. Cool and keep it in the refrigerator for the portion that was not used.

PART 2 – PREPARING THE DOUGH – 1st Proofing

What is required

IMG_0636

  • 180 g of bread flour (you can substitute 5 g of bread flour with milk powder, in that case you need only 175 g of bread flour)
  • 30 g of sugar
  • 4 g of instant dry yeast
  • Pinches of Salt
  • 35 g of beaten egg (the above picture is for illustration. 35 g of eggs is equivalent to about 1 egg)

IMG_0637

  • 55 ml of fresh milk
  • 20 g of butter – soften
  • 45 g of tangzhong, refer to recipe above (about half of the tangzhong made above)


Steps of preparation (dough)

 IMG_0638

  • Mix all ingredients except softened butter and beat at slow speed for about 5 minutes.
  • Add the softened butter and continue kneading at medium high-speed for about 20-30 minutes or when the dough did not stick to the wall of your mixing bowl and do not break when you pull the dough.
  • In the flat surface dusted with normal or bread flour, take out the dough from the mixing bowl and slightly knead it using hand for 1-2 minutes and shape it into a ball.
  • lightly oil you mixing bowl and place the ball in the bowl. Cover with damp cloth or cling wrap (to prevent moisture loss).

IMG_0639

  • Leave it to proof until almost double in size. This should be about 30-45 minutes depending on the day’s temperature.
  • If you are using a metal mixing bowl which are slightly cold when touched, put it in your oven at temperature of about 30 degree Celsius for about 10 minutes or when your bowl feel warm when touched.


PART 3 – PREPARING THE BUTTER FILLINGS

IMG_0616

What is required

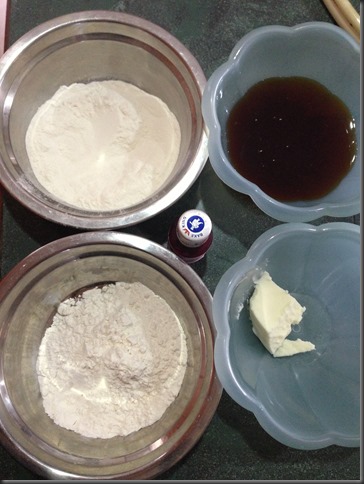
  • 150 g of butter
  • 150 g of sugar
  • 180 g of flour

Steps of preparation

  • Melt the butter in the microwavable bowl (1 minute). Alternatively, you can also melt it over the smallest heat directly under the fire.
  • Add the sugar to the hot melted butter, stirred until dissolved.
  • Add in the sifted flour gradually and used a spoon to stir until well mixed.
  • Let the flour mixture cooled down and let it rest for at least 5-10 minutes (note that the flour need sometime to absorb the liquid and don’t worry if it is too watery. After 5 minutes, the flour will also expand and you can see a slight increase in volume.
  • Once cool, shaped it into 10 small balls of about 40 g each. Set aside for later use.


PART 4 – PREPARING THE DOUGH – Wrapping the fillings and 2nd Proofing

IMG_0606

  • Take the dough out, punch into the dough to let any trapped air escaped. Knead for one minute and divide into 10 equal size round ball.

IMG_0607

  • Wrap the dough around the butter filling ball as even as possible. Put it in a baking tray and cover with the same damp cloth.
  • Let it proof for another 30 minutes or when balls were almost double in size.


PART 5 – THE BAKING PROCESS

IMG_0608

  • Set the oven to temperature 190 degree Celsius.
  • Put  in the oven and bake at 10-15 minutes. After 10 minutes of baking, egg wash (please see below) the buns quickly and continue baking for about 5 minutes or when the top start to turn slightly golden brown. Alternatively, you can egg wash first before you send into the oven. I prefer to egg wash at the latter stage as I can control the colour better.
  • Egg wash – Crack one egg and mixed with 3 teaspoons of water and 2 drops of oil, slightly beat and sift into a small box, use the brush to brush on top of the surface. The purpose is to let the buns looks shinny and golden brown. 

IMG_0609

  • Take out from the oven and transfer to a rack for cooling.

IMG_8510


MODIFICATIONS AND VARIATIONS

  • For the butter fillings, you can add 1-2 tablespoons of milk powder to the flour. Personally, I do not prefer to have milk powder added since it will negate the butter aroma. However, commercially, they do add milk powder to this and in fact, my kids loved the fillings that have milk powder.
  • For the dough, you can add 1 teaspoon of milk powder as well. However, both this modification are not traditional methods of preparation.

IMG_06141


CONCLUSIONS

  • This is a traditional bun that is very popular among the Sarawakians.  The history has yet to be traced. However, this bun is usually prepared by Hainanese “kopitiam” (coffee shops) and most of the good bakers are Hainanese. Hainanese are the descendants of immigrants from the Island of Hainan in People’s Republic of China. It is also a Chinese dialect group and they are very good chefs and pastry chiefs. This is because they arrived South East Asia later than other Chinese dialect groups (like Cantonese, Hokkien, Foochow) and they were employed as chefs in the then British families and well to do local and nonya families. They were trained by the British in baking and when the colonial era ceased, they started to set up coffee shops cater for the Chinese immigrants in from China. The consumption and usage of butter in pastry were mostly influenced by the British administration. Though unconfirmed, however , it appeared to be logical because Chinese traditional cooking did not use its butter in its delicacies.
  • The Sarawak Style butter buns have a nice buttery fragrance and taken a bit resembles taking a teaspoon of butter and sugar in the mouth….It is divine especially eaten with a cup of tea or coffee. It is ideal as a breakfast item or afternoon snacks.
  • The use of tanzhong in this recipe made the bread softer even after a day or two. This newly developed baking method is widely used by bakers in the Asian region and that is one of the reasons that sweet buns and soft buns were popular in Asian region. The texture will definitely different from the traditional method of bread baking.

IMG_8517

Hope you take a move in trying out this new recipe. For my readers who are in other countries and never tasted this bun, just take a bowl, add equal amounts of melted butter, sugar and flours, stirred and put in the microwave for 2 minutes. Have a small scoop of filling and tell me if this is your cup of teas.

Thanks for reading and have a nice day. Cheers. 

IMG_06621


  • For more recipes, you can refer to my RECIPE INDEX (updated as at 8 June 2014)  here and you can follow me at PINTEREST or visit the blog’s FACEBOOK PAGE to keep abreast of my future posts.  

IMG_8514

I Thought It Was A Chinese Fritter..–Vietnamese Hollow Donut or Hollow Bread (Bánh Tiêu)

IMG_6949 

INTRODUCTION

When I first saw the picture in a Vietnam recipe site, I didn’t realize that Chinese do not have this fried fitter. In fact, I thought it was some sort of fritters that was commonly sold together with You Tiao and Butterfly You Tiao (a type of Chinese deep fried dough fritters). However, after I prepared this, I asked my friends about this fritter, apparently most have not been able to give a name. However, they are kind enough to provide me the names of a few Chinese fritters that were very close to the one I have prepared.

IMG_6962

My friends was asking if there was any fillings inside. I said none, it is just hollow. They told me the one with red bean fillings is called Red Bean Fritters (“豆沙油饼“)。Another want is asking if there was any 5 spice powder, I told them no and this I know, the type with 5 spice powder is called Salty Fritters (“咸简饼“)。 At the end, I have decided to give up researching any further and follow the Vietnamese name of Hollow Donuts (Bánh Tiêu).

IMG_6955

Though the name is Vietnamese, however, the taste is exactly like the the other Chinese fried dough fritters as the ingredients are basically the same. I do not have a lot of picture for these fritters as it is our snack and it had been “snatched” away before I have time to take my picture.

IMG_6960


WHAT IS REQUIRED

Recipe adopted from: http://www.vietnamesefood.com.vn

IMG_6921

  • 400 grams of plain flour (or bread flour which I believed will produce better results)

  • 80 grams of sugar

  • 200 ml of water

  • 1 tablespoon of cooking oil or vegetable shortenings

  • 1 teaspoon of baking powder

  • 1 teaspoon of instant yeasts

  • 1/2 teaspoon of salt

  • Adequate sesame seeds for coating

IMG_6967


STEPS OF PREPARATION

IMG_6926

  • Mix the yeast and 1 teaspoon of sugar in the lukewarm water. Set aside for 10 minutes and see if there are some bubbles (froths) formation. If there are no froth formation, it means the yeast is death and you have to change the yeast.

  • In a machine mixing bowl, place plain flour, remaining sugar and baking powder. Slightly stir and make a well in the centre. Add in the yeast solution and use the spoon to slightly stir it.

IMG_6931

  • Use a the machine’s dough hook and use slow speed to mix the the dough for the first 2-3 minutes and continue to use medium speed to beat for 5 minutes. Add in vegetable shortening or cooking oil. Use high speed to beat until the dough is smooth which will take approximately 15 minutes.   (note that you can use hand to knead the dough also if you prefer not to use the machine)

  • Take out and knead it for 1-2 minutes and shape it like a ball and let it proof for at least 45 minutes or when the size doubled.

IMG_6962


IMG_6940

  • Take out the proofed dough, punch to let the air escape. Lightly knead for 1-2 minutes and divide into 10-20 equal balls. Coat with sesame seeds and let the balls proof for about 20-30 minutes. (Note that in this illustration, I have opt to make it into 10 balls which is slightly bigger than the one sold in the stalls, therefore, I would suggest to divide it into 15-20 balls).

IMG_6946

  • Heat up about 5 cm high of oil in a frying pan. Take a small piece of dough and drop to the hot oil and see if the dough starts to expand and float. If yes, the oil is ready.

  • Use your hand to flatten the dough to about 0.5 cm thick and put it into the hot oil.  Use a chopstick to flip it continuously and you should start to see the dough puffing up. Continuing doing so until the fritters are golden brown in colour. Place on a rack and let the fritters cool down.

  • Best serve immediately after it is cool.

IMG_6972

Note that the puff may become flat after it cooled. This is common as the dough do not have anything such as eggs to support its structure. Depending on your shaping, you should have a hole in the fried fritters. If your shaping is not perfect or do not have adequate time to proof, they may be no hole but the taste is equally fabulous like the sweet “butterfly fritters” you purchase in the stores.

IMG_6953


CONCLUSION

Vietnam is the neighbouring country of People’s of China. Obviously, Vietnamese cuisines will be influenced by Chinese cuisines and vice versa. This hollow donuts or hollow breads (as some Vietnamese called it) are definitely worth a try. In my humble opinion, it had no difference with the Chinese salted fritters “ham chim peng” except it is sweeter and do not have 5 spice powders. Do try to prepare and let me know if this suits your family’s taste buds.

IMG_6974

Lastly, I have pleased to share with readers the new “RECIPE INDEX” which have more than 150 over cuisines since I started the blog on 30 April 2013. This index have incorporated all the recipes that are either in this blog or in Guaishushu’s Facebook Page. You may want to take a look. It will be constantly upgraded and bookmark it for your future reference. Thanks for your kind support.  Cheers and have a nice day.

IMG_6964

Agar Agar is not the same as Agak Agak… Agar Agar is Red Algae !!

IMG_5342 

INTRODUCTION

Agar Agar is a Malay word for red algae, apparently it has been accepted as an English word. It is hard for a lay man like me to explain agar agar, so  as usual, I will quote Wikipedia’s explanation of agar agar for reader’s understanding.

Per Wikipedia:

“The word “agar” comes from agar-agar, the Malay name for red algae (Gigartina, Gracilaria) from which the jelly is produced. It is also known as kanten, China grass, Japanese isinglass, Ceylon moss or Jaffna moss. 

Agar-agar is a natural vegetable gelatin counterpart. White and semi-translucent, it is sold in packages as washed and dried strips or in powdered form. It can be used to make jellies, puddings, and custards. For making jelly, it is boiled in water until the solids dissolve. Sweetener, flavouring, colouring, fruit or vegetables are then added and the liquid is poured into moulds to be served as desserts and vegetable aspics, or incorporated with other desserts, such as a jelly layer in a cake. “ (Source: http://en.wikipedia.org/wiki/Agar)

IMG_5320

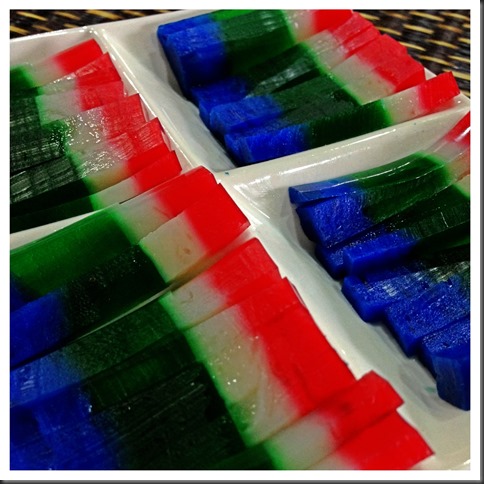
Agar agar is one type of traditional dessert commonly found in Singapore and Malaysia. It is easy to prepare and is a common item being served during Chinese New Year and other festivals. To make it requires no complicated kitchen utensils, just need to boil and mould. Traditionally, households used dried agar agar as shown in this illustration as the raw ingredient. However, in recent years, most households have started to use agar agar powder instead of dried agar agar.

IMG_5355

Traditionally, due to the lack of weighing scales, sophisticated kitchen utensils and written recipes, housewives usually prepare agar agar based on words of mouth using common kitchen items such as cups as the unit of measurement.

I was told that previously, the recipe is 1 cup of soaked agar agar will requires 1 cup of sugar and 1 cup of water. I liked this type of simple ratio recipe, however, when I tried out, it just turned out to be extremely sweet and tough.

Well, that type of recipe may not be acceptable nowadays since we have so many resources available. In olden days, the challenge to make a good agar agar is to get hold of the correct ratio of water to agar agar. The end product shall be slightly chewy and not to soft like the current jelly. In order to achieve such texture, housewives some times dried their agar agar under the sun. They believed that the less water content in the agar agar, the better it is. In fact, some house hold cut it into one bite size, dried it under the sun until it is very chewy, store in a container and eat it as a snacks or sweets!

IMG_5328

In recent years. preparation of agar agar is not entirely based on texture since all ingredients can be measure rather accurately. It is rather easy but the challenge had shifted to the colour combination and moulding. If you have the relevant mould, you can create your own design based on your creativities. One of the most trendy agar agar moulding will be agar agar moon cake where the agar agar were mould into a moon cake shape. Inside the agar agar moon cake, there is a yellow colour balls resembling the egg yolk.

Again that is deal with planning, making and moulding. It can be rather stressful if there are no prior planning on the colour selection and mould selection. Of course, it can be as simple as just a single colour one flat piece of agar agar. The taste will definitely be the same but of course it is less impressive to your guest.

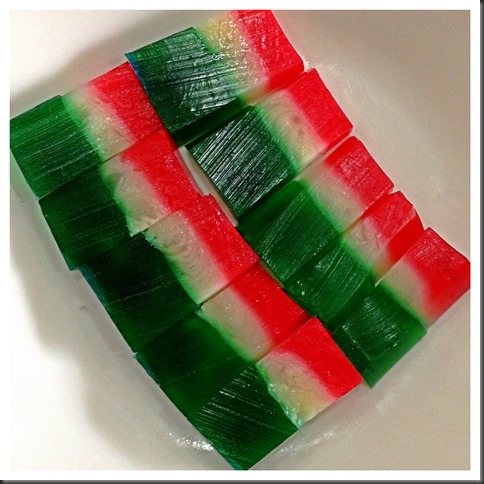
This illustration will only provide you with the simplest layered agar agar procedures. You can chose your own colour and shape of your mould. I have use some heart shape mould and the colour is purely selected for this illustration only. At home, we will not go until this extent and usually have one to two colours plus 2-3 layers of agar agars.

IMG_5363


NATURAL COLOUR SELECTION

There are a lot of natural colour available and you can totally throw away the artificial colouring, if you wish. Suggested colours are:

  • White and milky – condense milk, coconut milk, fresh milk
  • Chocolate – instant coffee paste, chocolate  paste or powder
  • Red colour – red colour dragon fruits paste
  • Yellow – mango paste
  • Green – pandanus paste
  • Violet or blue – pea flowers
  • Purple –black currant drink
  • Red – strawberry paste
  • Dots in the agar agar –  dragon fruits

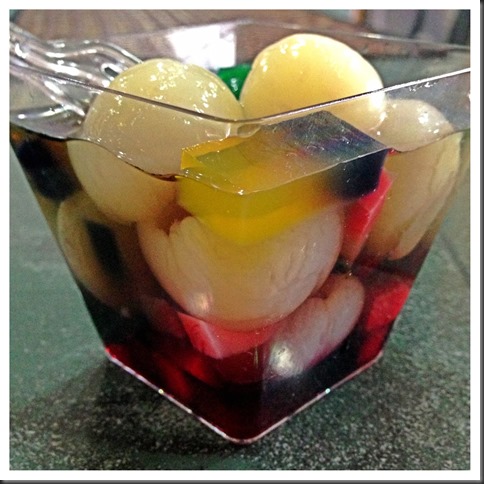
Besides the above colours, many varieties of cut fruits can also be included. For example, yam cubes with coconut milk is a good combination. Coffee with milk is another welcoming combination to make into agar agar. Canned Longan or lychee with black currant flavoured agar agar is also a presentable dessert. All this is very much depend on reader’s creativities to prepare one that is acceptable to the guest or family members.

IMG_5353


WHAT IS REQUIRED

IMG_5301

I have intentionally left out the quantities as it is best that you follow the instruction on the the package of agar agar that you bought. Be it dried agar agar strips as shown above or agar agar powders, they will have detail instructions on the quantity of water required. It is best that you follow these instruction as every brands of agar agar will requires different liquid to reach the desired textures.

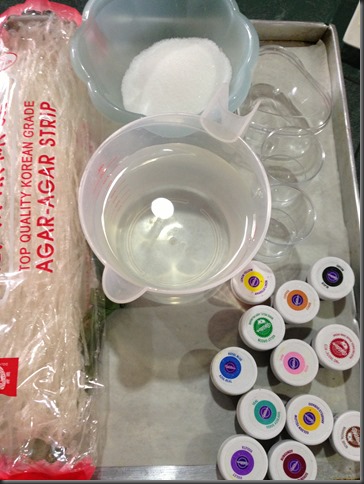
  • 1 package of agar agar strip (about 38g)
  • Some water (refer package)

  • Some sugar (refer package)

  • Some permitted food colouring of your choice or the type of natural colouring ingredients as mentioned above.

  • Some moulds of your preference

  • Few leaves of Pandanus leaves – bundled (optional)

IMG_5346


STEPS OF PREPARATION

IMG_5371

  • Wash the dried agar agar by soaking in clean water for 1-2 minutes.

  • In a pot, put in the water as stated in the package and add dried agar agar. Use medium heat to bring the water to boil. Continue stirring until all the agar agar are dissolved.

  • Add in the required sugar into the agar agar solution and stirred until dissolve. Turn the heat to the minimal. You just need the heat to prevent the agar agar from solidifying while you do the layering. Alternatively, you can put your agar agar in a big basin of hot water.

IMG_5372

  • Take out some container of your choice, add in your preferred colouring and  pour into the mould.

  • Once done, put it in the freezer or chiller or under the fan and once it is set on the top, you can pour the second layer. How long will it take will depends on your room temperature, the concentration of your agar agar and the types of you container. For my today’s illustration, it is rather fast because the container is very small and my agar agar is quite concentrated.

  • Repeat the same for different layers until all the agar agar were used up.

  • Put in the fridge for another 10-15 minutes.
  • Remove from the mould, cut into your desired size and shape and put in your preferred serving plate.
  • Best served cold as a dessert.

IMG_5361


CONCLUSIONS

This is extremely simple. It is best that you based on what is stated in the package label to prepare the agar agar. Different brands will have different instructions.

Though this illustration is using traditional dried agar agar, you can use agar agar powder instead. The price for both dried agar agar and agar agar powder is rather economical and in my humble opinion, it is still a good choice of snacks or desserts. Variations are many and you have full flexibility to choose your desired flavour, colour and moulding. You guest will surely be impressed by your creativities.

Try this traditional Asian dessert and I am sure you wouldn’t regret preparing it. Hope you like the post today. Have a nice day and cheers.

IMG_5348

What I cooked today (家常便饭系列)- 25-7-2013

IMG_1402

On 25-7-2013, Chicken rice served with sweet kernel corn and mushroom soup.

As I have not cook chicken rice for quite a while, I have decided just to have a one dish dinner – Hainanese Chicken Rice. You can refer here for my detailed write up on the preparation of Chicken rice. Alternatively, you can refer to Guaishushu’s Facebook page for simple pictorial instructions.

IMG_1397

If you really observe the first picture, do you realize something are missing? Yes, two things were missing!  A very important garnish vegetables, cucumber slice. I always find that without cucumber slice, the whole chicken rice is missing something. Do you agree with me?

Secondly, there is a lack of green vegetable today. Usually, I would have a plate of blanched vegetable to go with it but because today is Friday, I have finished all the green vegetables in the fridge, Haha. I have said before in my earlier post, usually Sunday to Tuesday or Wednesday are leafy green vegetables and Thursday to Saturday are usually beans, melons or roots type of vegetables because it can be kept longer. We do marketing once a week and I am a rational cooker, I cooked based on First In First Out principle… I don’t usually cook impulsively..


IMG_1398

As I have additional chicken stock from simmering the chicken, I have decided to open a canned kernel corn and turned it into a corn soup. When I made the cake yesterday, I have some egg whites left and I just stir and “throw” inside the soup. It become a simple soup like the one you have in the chicken rice store.

Usually, when I cooked chicken rice, I will cook more than what is required. The rationale is that it take some efforts to prepare chicken rice, why not prepare some more. In addition, any left over chicken rice can be “recycled” and is a top choice for fried rice. Since it is already “marinated” rice and you need not to add much condiments and oil when you fried it.

Other than frying overnight chicken rice, we used to make it into chicken porridge for next day’s breakfast. After simmering the chicken, if you still have the chicken stock left, just keep it. In the next morning, just throw in the left over chicken rice, any chicken meat left (of course de-boned and possibly shredded into floss), add in a bit of condiments, it will become a bowl of chicken porridge.

Will it harm you to eat overnight food?  I do not want to think about it and as long as it is properly kept with no possibility of contamination, it should be ok. How about how grandparents or parents? Is it not the Westerners used to heat up frozen foods that were prepared well in advance?


Other than the above, the project of the day included the following:


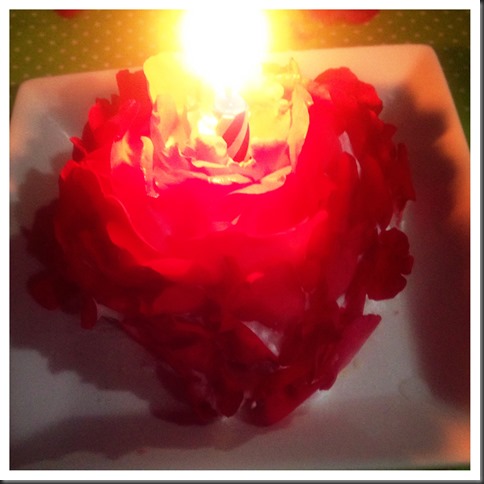
Impromptu Ixora Birthday “Cup Cake”

Preparing an impromptu birthday cake for one of my internet friends who “requested” me to “bake” a birthday cake for her and wish her happy birthday over the internet. This cake is decorated with ixora flowers which is abundant in Malaysia and Singapore.. Do you mind if someone posted this cake to your timeline wishing you happy birthday?

IMG_1329


Butterfly Cupcake

IMG_1355

This is an extremely simple cup cake recipe. Add all ingredients and mixed well, bake and you get the cake. It was served with cream and strawberry jam as the basic cup cake have very little sugar. it was dusted with sugar powder. Do you think it will taste nice?


Rose Cake

IMG_1368

This should be a celebration cake but need further modifications. I am doing  in a rush and therefore  the workmanship is really terrible. Haha.


Modified Version of Raas Malai

This is a dessert originated from India and an extremely popular in South Asia. It was served in wedding ceremony and other important festival occasions. Traditionally, the raw ingredients are paneer (Indian Cheese) and milk. The recipe is adopted from http://free-advertising-ey.blogspot.it/2013/07/raas-malai-sweet-from-bangladesh.htmlk with some modifications to suit the Chinese taste buds. Modifications include reducing the use of spices such as cinnamon, cardamon and etc.. In addition, strawberry were added.

 
As this dessert look milky and cheesy, I have decided to let my kids try out the dessert exposing them to more international cuisines. The preparation are rather coincidence. This afternoon when I have over whipped my cream, I thought I might as well used this over whipped cream to make the dessert. I added fresh milk to the over whipped cream and heat until it boiled. Knowing that my kids will not really like spices like cardamon, cinnamon , I have decided to tailor it to a more Chinese taste buds. I meshed 5 ripe strawberries and add to the milk and let them boiled together with the milk.

As for the cheese balls, I have used mozarella cheese to make it instead of paneer or cheddar cheese. I meshed 2 strawberries, added to the cheese, added 1 tablespoon of water and shaped it into small balls. My balls are rather small compared to the authentic because I know my kids wouldn’t be able to take such a big cheesy ball.  I dropped the balls to the cool milk and put in the fridge. During serving, I found it too creamy (possibly due to my over whipped cream), I have further diluted with cold fresh milk and cut slices of fresh strawberry to go with it.


Verdict: Extremely nice sweet milky soup with strawberry flavour. As long as you like milk, I do not think you have any reasons not to like it.

As for the cheese balls, my girls can take all but my boys feels a bit too rich and salty to him. As for me, I loved the cold milk but for the cheese balls, one or two should be Ok but not too much as when I was young, Chinese were not exposed to ” cheesy things”…. Haha.. I will say those who like cheese, go ahead and make this milky desserts.. It is just delicious.
 

IMG_1401

LASTLY, HOPE YOU LIKE THE POST TODAY!  AND HAVE A NICE WEEK END.

IMG_1367

Hey, This is not Italian Meat Rolls, It Is Chinese Meat Rolls Called Ngoh Hiang

IMG_6897

INTRODUCTION

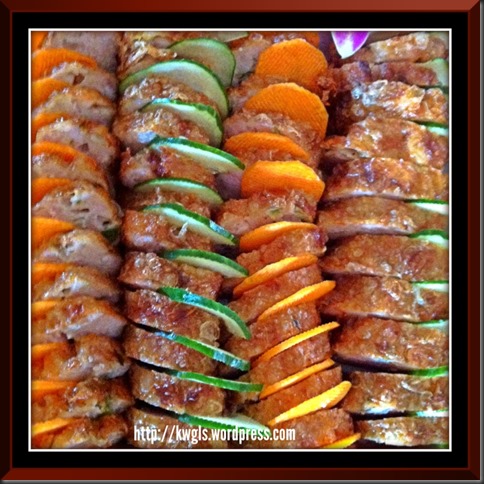
This post is sharing the Chinese version of meat rolls or Ngoh Hiang. It is different from the meat roll in Western cuisines such as the Italian meat rolls. Usually, minced meat (usually pork) and prawns were used and wrapped in a dry bean curd sheet.

Meat roll is an extremely popular dish for Malaysian and Singaporean Chinese households. The number of recipes available are the same with the numbers of Chinese grandmothers meaning every household have their unique recipe and all claims that theirs is the best. Depending on the dialect groups, meat rolls can be also be called ngoh hiang (five spices or 五香) or lok bak (卤肉)or hay g’ng (虾卷)

This recipe of mine, again is based on my recollection of what my late mother have prepared and the various meat rolls that I have tasted throughout the years.  I have purposely prepared this  meat roll for the noodle dish Lor Mee, a common Hokkien dish in Penang.

Usually, we prepared more meat rolls than required and stored in the refrigerators. When we wanted to serve the meat rolls, we will re-heat it.  Chinese meat rolls traditionally are commonly prepared for religious ceremonies or important house gatherings. The process  of preparation can be slightly laborious and usually ladies in the house were called to help with the preparation.


MEAT ROLLS OR NGOH HIANG DEFINED

As per Wikipedia: 

Ngo hiang (Chinese: 五香; pinyin: wǔxiāng; Pe̍h-ōe-jī: ngó͘-hiong), also known as heh gerng (Chinese: 虾卷; pinyin: xiājuàn; Pe̍h-ōe-jī: hê-kǹg) or lor bak (Chinese: 五香滷肉; Pe̍h-ōe-jī: ngó͘-hiong-ló͘-bah) is a unique Hokkien and Teochew dish served in many of Indonesia, Malaysia and Singapore’s hawker centres and in Cebú in the Philippines, in addition to its place of origin in eastern China. In parts of Malaysia the dish is known as loh bak or lor bak.

It is essentially a composition of various meats and vegetables and other ingredients, such as a sausage-esque roll consisting of minced pork and prawn (or fish) seasoned with five-spice powder (Hokkien: 五香粉, ngó͘-hiong-hún) after which it is named, rolled inside a beancurd skin and deep-fried, lup cheong, cucumber, century egg, ginger, deep-fried egg, deep-fried beancurd, fishball and many others. It is usually served with chili sauce and a house-special sweet sauce. Many stalls in Singaporean food courts and hawker centres sell fried bee hoon with ngo hiang; this combination is common for breakfast and lunch. In Indonesia, people enjoy ngo hiang with sambal sauce. (Source: http://en.wikipedia.org/wiki/Ngo_hiang)


WHAT IS REQUIRED

IMG_6881

  • 1 kg of minced meat – In this illustration, I have used minced pork. However, minced chicken breast can also be used.
  • 250 g of prawns cut into small chunks – you can also mince the prawns. I have opted to use chunked prawns instead of minced prawns as  I would like to have some prawns being seen in my meat rolls.
  • 200 g of fish paste (optional). I have used this to enhance the seafood fragrance and improve the binding properties of all materials inside the meat rolls.
  • 4-5 spring onions chopped into small pieces
  • 1 big onion chopped into small pieces
  • 10 water chestnuts peeled and cut into small pieces. The purpose of water chestnuts is to let the meat rolls have some feel of crunchiness when eaten.

IMG_6882


  • half cup of corn flour – purpose is to enhance the springiness of the meat roll;
  • 1 cup of wheat flour – purpose is to enhance the stickiness of the ingredients. Without wheat flour, the meat rolls can be rather loose.
  • 1 egg – purpose to increase the stickiness and fragrance of the meat rolls.
  • 1 tablespoon of salt 
  • 3 tablespoons of light soya sauce to taste
  • 2 teaspoons of five spices powder (optional). Though the name is called Ngoh Hiang (five spices), my family seldom put these spices as our family members do not really like the aroma. However, most of the meat rolls that I have tasted do put these spices.
  • 2 tablespoons of sesame oils
  • 5 teaspoons of white pepper
  • 5 tablespoons of granulated sugar
  • 12 sheets of bean curd sheets of 6 inches x 6 inches big


STEPS OF PREPARATION

Mixing the ingredients…….

IMG_6883

  • In a big mixing bowl, place all ingredients together. Use a big spoon to stir until all ingredients are well mixed. As some of the ingredients can be very fine (such as five spice powders, white peppers and etc.), you can also add the ingredients in stages if you find that it is difficult to mix well by putting all the ingredients all at once.
  • The final picture is the well mixed minced meats and it is considered as well mixed when the colour is even and consistent. The minced meat can be rather sticky due to the addition of egg and wheat flour.


Rolling the minced meats…

IMG_6884

  • In a flat surface, place a dried bean curd sheet. Use a wet hand to lightly pat the bean curd sheets. The purpose is to make it more flexible as too dry the bean curd sheets can be easily broken.
  • Placed about 150 grams of minced meats on top of the dry bean curd sheets.
  • Make a small roll, fold in the sides, used some of the minced meats or water to apply to the sides and corners of the bean curd sheets. Roll the minced meat until the end of the bean curd sheets. With the minced meat or water at the sides, it will help to  bind the bean curd sheets together.
  • If you runs out of bean curd sheets, you can shape the remaining into a ball and deep frying it. Please refer to the section below “When you runs of bean curd sheets”.


Steaming the meat rolls….


IMG_6885

  • In a steamer, place some water and bring to boil.
  • Transfer the meat rolls to the steamer and steamed for 15 minutes. Use a skewer/toothpick to penetrate one of the rolls and ensure that the skewer/toothpick  comes out clean.

IMG_6886


Deep frying the meat rolls……..

This step will involve frying the meat rolls. However, if you do not want the meat roll to be deep fried, you can also served it after steaming by cutting into small slices. Traditional ways of preparation will require the meat rolls to be deep fried such that the bean curd sheets will become crispy and golden brown.

IMG_6887

  • In a deep pot, have some oil until smoking hot. As a test of whether the oil is adequately hot for frying, place a wooden chopstick into the hot oil. If bubbles start to come out, it means that oil is ready for frying.
  • Place the meat rolls into the hot oil and deep fried until golden brown. Note that as the whole roll is already cooked, therefore the purpose of this step is just to ensure that bean curd sheets are crispy and the color is golden brown, therefore, the timing of the deep frying is rather fast usually less than  5 minutes.
  • Take out the meat rolls and place it in a plate with an oil absorbing paper on the plate.
  • Cut into small pieces when serving. Condiments can include sweet chilli sauce or plum sauce.


 IMG_6896


What would happens if you runs out of bean curd sheets….

It is rather difficult to estimate the exact quantity of bean curd sheets that you need. At times, you may run of bean curd sheets as not all rolls are of the same sizes. In that case, you can shape the minced meats into small balls and roll it in the biscuit crumbs before deep frying (steps as above).

IMG_6888

  • Have some biscuits and grind it as fine as possible. Add some corn flour to the biscuit crumbs.
  • Shaped the minced meats into small balls and roll the balls in the biscuit crumbs.
  • Placed in the hot oil until the skin of the balls turns golden brown. Take out and place in an oil absorbing paper.


CONCLUSIONS

Meat rolls are a common household dish among Malaysian and Singaporean Chinese.  There are many recipes and each family will claim their is the best. Making meat rolls can be laborious but the moment you put it in your mouth, the taste is worth every efforts preparing it. Meat rolls are usually prepared for religious ceremonies and is served in restaurants as one of the cold dish. It is also used for noodle dishes such as lor mee. A detail post on the preparation of lor mee will be released soon. Preparation of lor mee will require  the use of these meat rolls  and meat balls as the ingredients.

IMG_6902

Hope you LIKE the post to day. Have a nice day and cheers.


IMG_6901

CCC – Cheesy Cassava Cake–A Modified Version of The Traditional Nonya Kuih Bengka Ubi

IMG_08801

INTRODUCTION

Tapioca or cassava is a staple root widely consumed in regions like Africa, Asia, Oceania and etc. It is easily propagated and commonly found in South East Asian countries. Thailand, Vietnam and Indonesia are the top three exporter of tapioca in the world.

Tapioca or cassava cake is a very common household cake of any races (be in Chinese, Malay, Indian or other races) in Singapore and Malaysia. However, in the Peranakan cooking, Kueh Bengka Ubi is one the most famous items in its cuisines.

IMG_08491

There are generally two methods of making cassava cake, by steaming or baking. Chinese preferred to have its cassava cake steamed, as soft as possible and served with shredded coconut (at times this is needed as the cake are so soft and smooth that it is shapeless). On the other hand, the Nonya preferred to bake the cake using charcoal stoves or ovens. Usually, the baked cassava cake have a slightly burnt crusty top and the body is yellowish in colour and texture is rather “elastic”. It is very aromatic with a mixture of fragrances from pandanus leaves, coconut milks and eggs.

 IMG_0888


CHEESEY CASSAVA CAKE

This recipe is my own without making reference to any recipes in the internet. As usual, I have prepared based on what I think is workable, memories on the cake that I have tasted before and one or two attempts a few months back.

This cake is different in its texture and its taste. Besides the normal fragrance of the traditional cassava cake, the  cake have a rich and cheesy fragrance. In addition, as you can infer from the pictures above, the texture is moist but not soggy or sticky. In fact, you can cut it into any shape that you want.

IMG_08501

The incorporation of cream cheese had made the cassava cake smoother and creamier. It helps to heighten the flavour of the eggs, coconut milk, butter and the cassava original flavour.

I have used small sago balls to enhance the texture. Grated cassava, under high heat can turn very sticky and subsequently become very chewy. The additions of sago balls somehow will help to sooth the texture making it even smoother.

IMG_08651


WHAT IS REQUIRED

IMG_0830

  • 100 g of sago balls – soaked in water (Volume of water should be about 2 times of the sago ball and note that the balls will expand)
  • 150 g of butter
  • 200 g of cream cheese
  • 250 g of granulated sugar

IMG_0829

  • 4 eggs
  • 200 ml of thick coconut milks
  • 1 kg of finely grated tapioca or cassava. You can buy in the market and grate it yourself. If you want to grate it yourself, you will have to use the food processor to chop it as finely as possible, and then you can proceed to use  a blender (instead of an cake mixer) to perform the following steps. You will need to put in your chopped cassavas, eggs, coconut milks and blend it to as smooth as possible).
  • Red and green (pandanus) colouring (optional) – I have resorted to the use of red and green colouring this illustration as I find that the traditional cake are rather dull in colour and I want my cake to look more colourful and appetizing.

IMG_08731


STEPS OF PREPARATION

IMG_0875

  • Pre-heat your oven to 180 degree Celsius.
  • Get ready a 8 inch x 8 inch baking tin. Slightly grease the tin with either butter or cooking oil. Dust some wheat flour if necessary.
  • In the mixing bowl, beat your butter, cream cheese and sugar using medium speed until evenly mixed. Note that the purpose of this step is not to let you have a fluffy cake like other cake recipes. The beating here is mainly a mixing step, a step to ensure that the butter and cream cheese are evenly mixed.

IMG_0876

  • Once well mixed, add in your eggs one at a time and followed by the coconut milk. You should only use low speed for this simple mixing purpose. Scrap out the bottom and sides of the mixing bowl to ensure that there are not cheeses sticking to the bowl.
  • At this stage, you will notice that the mixture become more and more watery which is normal and hence SPEED SHOULD BE LOW as long as mixing can be performed.

IMG_0877

  • Add in the grated cassava and soaked sago balls. “Beat” at the lowest speed possible. You will see that after 1-2 minutes of slow mixing, the liquid start to disappear as it was further absorbed by the sago balls.
  • Separate into approximately 4 equal portions. One portion with red colouring, one portion with green colouring and the other two portions maintain the original colour.

IMG_0878

  • Pour the uncoloured portion of the batter to the tin, followed by green and red portion. It is entirely up to readers as to what design you want your cake to cook like. For me , I have opted to have some simple big stripes design. As the batter is not very watery, it is rather easy for you to design your pattern.
  • Baked using 190 degree Celsius for about 30-45 minutes or until set. Until set means when you push the baking tin, the centre of the cake does not “vibrate”. Another test is that you insert a skewer in the centre of the cake, the skewer come out clean. However, as this is a cassava cake, cassava when hot can be slightly slimy and as long as you taste it is not raw, the cake is consider as cooked.
  • Leave the cake in the tin for about 10 minutes before turning out onto a wire rack to cool completely.
  • Cutting of cake is  best done 3-4 hours after baking to ensure that centre of the cake is completely cool. As long as when you cut the cake, there are some cake stick to the knife, your cake is considered as not cool completely.

  • Serving suggestions – you can serve with shredded coconut with white sugar and hot tea or coffee.
IMG_08791


CONCLUSIONS

  • This is a modified recipe by incorporating cream cheese and sago balls to the traditional cassava cake. The main aim is to smoothen the cake texture and make the cake creamier along with the fragrance of eggs, coconut milk and cassava.
  • Resulting from the modification, this will be totally different from the traditional cassava cake that you may have tried. It is soft, slightly springy and with cheesy coconut fragrance.  The shredded sugar coconut with heighten the palate and reach another higher dimensions.
IMG_08821
  • It is easy to cut into your desired sizes and looks presentable in tea party as a snack items.
  • If you think that you are a professional Nonya cake baker, you should try and tell me what is your opinion. If you are new to pastry making, this is one item that will not ruin your confidence.

Hope you LIKE it and have a nice day. Cheers

IMG_0889


IMG_08811


For more recipes, you can refer to my RECIPE INDEX here and you can follow me at PINTEREST or visit this blog’s FACEBOOK PAGE .

group-board-picture72222222222222222[2]


If you are a Pinterest user and you are interested to have more recipes, you can join or follow this Pinterest Board set up by me  where there are more than 400 recipes worldwide and pinned by various bloggers: FOOD BLOGGERS AND FOODIES UNITED PINTEREST BOAR

What I cooked today (家常便饭系列)- 10-7-2013

IMG_0178

On 10 July 2013,

1 White Gourd Braised Rice 白莆焖饭
2 Oiless Fried Eggs 无油煎蛋
3 White Gourd Miso Soup with Meat Balls 白莆味真肉丸汤

White gourd braised rice can be consider as a dish by itself. However, I usually give everyone a fried egg. I dust it will seaweed pork floss since it is a bit sweet. You may be asking why is there white gourd miso soup since I already have a white gourd braised rice. This is because the white gourd that I bought is too big (about a kg) and I only used about 500g and I have only 500g left. Instead of keeping it, I just used it to make Miso soup and the taste is fantastic. I have added meatballs to it. I presumed this can be called a Japanese fusion dish..

The egg that I fried today is oil less fried rice, You may want to know how to do it from my earlier post here. As for the illustration of cooking Chawan braised rice, please refer to Guaishushu’s Facebook Page here.

Hope you like the post and have a nice day.


IMG_0180