What I Cooked Today Series (Special Post)- 2013 Mid Autumn Festival

IMG_0043

INTRODUCTION

I have not forgotten about this series –  “What I Cooked Today Series”! I have discontinued for a while because I am a vegetarian and the dishes were usually cooked by my mother in law who is visiting me. Therefore, I can’t claim the credit of the dishes cooked if I posted it.

Well this series will be starting soon in one two weeks time after end of my vegetarian diet. This year, I have calculated wrongly about the starting date of my diet, therefore, I am having slightly more than 2 months of vegetarian diet and it was pointed out by my neighbour when I keep on rejecting her meat dishes. She asked curiously why the diet is so long this year, she said it cannot be ! I asked my wife to recalculate again and yes, we are wrong as both of us are not that concern about anniversary dates.

IMG_6665

Yesterday is the Mid Autumn Festival, one of the very big festivals for the Chinese worldwide. Even People’s Republic of China’s government have declared this day as a holiday in recent years. Usually, in big festivals, family gathering and get together is very important.

I only confirmed to invite my nephew’s family for dinner yesterday morning and I told them that I would only cooked what I have at home. As they are my very close relatives, I need not really concerned about what I should cooked as he have been staying with me for the past few years. I did not have the time to plan for the meal as I have to take care of the kids and I have to rush out my report for Eight Treasure Porridge.

IMG_6658

I only started cooking at 4.00 pm in the afternoon. I looked at the fridge, I have some tofu, one pumpkin, one luffa, some chicken fillets, some asparaguses, minced meats, chicken thighs, drumsticks and fish fillets.

What influenced my dish menu last night was what I perceived what my family members like to have. I know anything soft and silky will be welcomed by them, so tofu and pumpkins would be good choices.

While the family always have bitter gourd with minced meat, but luffa with minced meat is something new to them. In addition, my kids loved luffa so luffa with minced meat was in the menu.

Preparing these two dishes had resulted some mesh pumpkins, minced meat and tofu left, therefore, I have decided to turn these 3 ingredients into  a dish.


PORK STUFFED LUFFA (丝瓜酿肉碎)

IMG_6694

This is a dish adapted from pork stuffed bitter gourd (苦瓜酿肉碎). The luffa was first de-skinned, and cut into 2 cm chunks. Make a hole in the centre and set aside. Minced pork were marinated for about 10 minutes with sesame oil, corn flour, light soya sauce, flavour enhancers, sugar, pepper, chopped coriander leaves and chopped winter vegetables. Stuff the minced pork into the hole of the luffa chunks, placed it in a serving plate nicely and put a goof berry on top of minced meat for garnishing. Before steaming, put some water in the plate of the meat stuffed luffa. (A bit of water is important as it will speed up the process of cooking the luffa. The luffa will be “water bathed” causing it easier to get cooked). Steamed for about 20 minutes or until your luffa is soft.  More juices will be secreted out and these gravy was very tasty as it was essentially a meat and vegetable broth.  You can put some corn starch to thicken this juices if desirable.

IMG_6663


TOFUS SAIL IN PUMPKIN SEA (豆腐金瓜海)

IMG_6696

I have to admit that I do not know how to name this dish. Since it looks like a seas of mashed pumpkins, I  named this as “tofu sail pumpkin seas”. Firstly, I cut opened a pumpkin, de-seeded and steamed the pumpkin until the pumpkin was soft. I then scratched out the pumpkin flesh, put some sesame oils, salt, mushroom concentrate, mixed well and let the mashed pumpkin to cool.

Two packets of tofu’s were cut into 8 pieces and arrange in a serving plate. I used a teaspoon to make a hole on the tofu, put some mashed pumpkins to cover the hole. Use the remaining pumpkin to put beside the tofu and steamed for about 10 minutes. Surprisingly, the tofu and pumpkins really blends well.

 IMG_6655


MINCED PORK FRIED WITH MASHED PUMPKINS AND TOFUS (山寨蟹粉豆腐)

IMG_6676

From the above two dishes, I have some mashed pumpkin left , some tofu left (from making a hole in the tofu cubes), some minced meat left (as I have prepared one package of minced meat for the luffa dish, therefore, I still have about half of the minced meat left). With these 3 ingredients, I have decided to mash the tofu and fried these 3 ingredients together.

I first stir fried some spring onion (white part) in a frying pan of hot oil until aromatic, followed by the minced meat and once the meat was 50% cooked, add the mesh pumpkin and mesh tofu. Stir fried for another 2-3 minutes, add white pepper, sugar, light soya sauce and salt and it become a rather presentable dish..like the famous Shanghai dish, “Tofu With Hairy Crab Roe”. Therefore I have named this dish in Mandarin the “Fake Tofu With Hairy Crab Roe”.

The dish was very tasty and smooth, it is well liked by the kids because of the aromatic spring onions.  I have placed the cooked dish in the empty shell of the pumpkin for serving.

IMG_6672


BLANCHED ASPARAGUS WITH CHICKEN FILLETS (芦笋鸡柳)

IMG_6651

This is really an easy dish.

Asparagus were de-skinned (depends on whether it is too mature or not) and cut into same length. Chicken fillet were first cut into the desired sizes, marinated with sesame oil, pepper and light soya sauce for about 10 minutes,

Have a pot of boiling hot water, drizzle a few drops of cooking oil and pinches of salt. Get ready a serving plate and put some oyster sauce on the plate.  Blanched the asparagus in the hot boiling water for 3 minutes and dip in icy cold cooked water.

Place these asparagus neatly in the serving plate on top of the oyster sauce. Coated the chicken fillet with some corn flours and blanched the chicken fillets in the hot boiling water for about 5 minutes. Scoop out and placed on top of the blanched asparagus. Sprinkled some fried shallots on top of the chicken and the dish was done.

This was definitely an easy and healthier dish as it involved no frying like the traditional method. Though I did not taste the asparagus but I can tell you that it was sweet as all the juices were being sealed inside the asparagus via blanching method of cooking.

IMG_6653


CENTURY EGGS WITH PICKLED GINGER (皮蛋酸姜)

IMG_6685

This dish was usually treated an appetizer in Chinese full course dinners and did not really need any preparation. As I have quite a lot of pickled ginger left from my demonstration in Guaishushu’s Page, therefore, I have decided to prepare this dish as an appetizer. You may want to learn about how to prepare the pickled gingers HERE.


POMELO (柚子/文旦)

IMG_6681

When I was young, we did not celebrate Moon Cake Festivals with pomelo.

However, in recent years, it seemed that it is very common that pomelo became one of the festival fruit  during the  Moon Cake Festivals. I checked the internet, pomelo have the syllables as “have kids” (有子)in Mandarin, therefore, having pomelo means that it will bring you luck in conceiving a kid. Well, definitely not for me.

It is my usual way to de-skin my pomelo like what is in the picture to make it easier for my kids to eat. Therefore, all my kids loves to eat pomelo as they do not need to peel the internal white membranes separating the lobes in the fruit. They have been pampered, Unlike me, I never like to eat pomelo when I was young because of the difficulty to peel of the internal white membranes.


GREEN DATES (甜枣)

IMG_6683

This is nothing to do with this festival. I just spotted in the supermarket a few days ago and I really love these green dates. I always called it mini apples. In my humble opinion, it taste like apples and is a one bite size. I am able to finish one box within a day. I don’t know but I do believe it is a very healthy snack, much healthy than any carbohydrates and sugar loaded snacks. Yesterday, it was served together with pomelo after dinner.
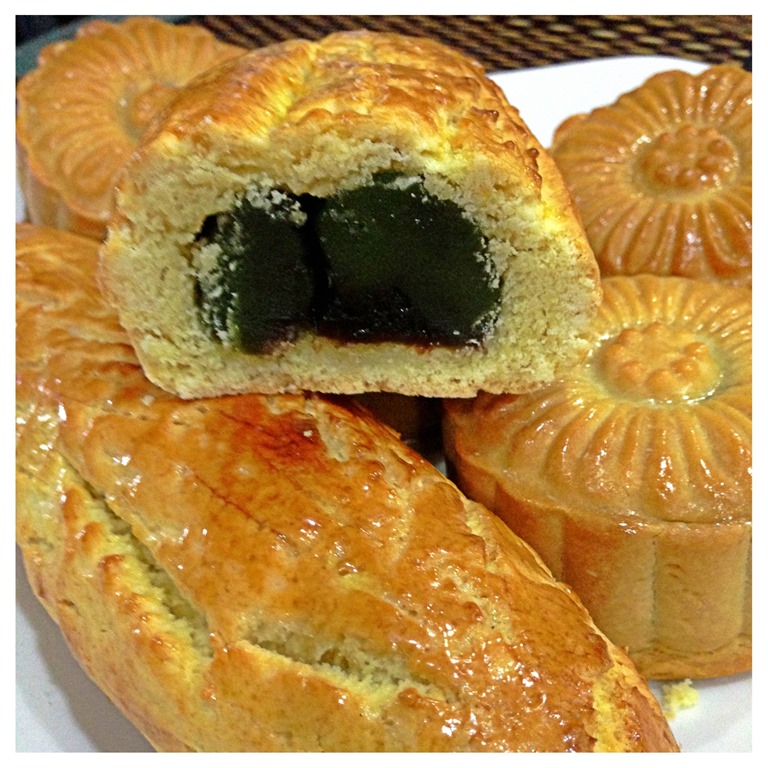
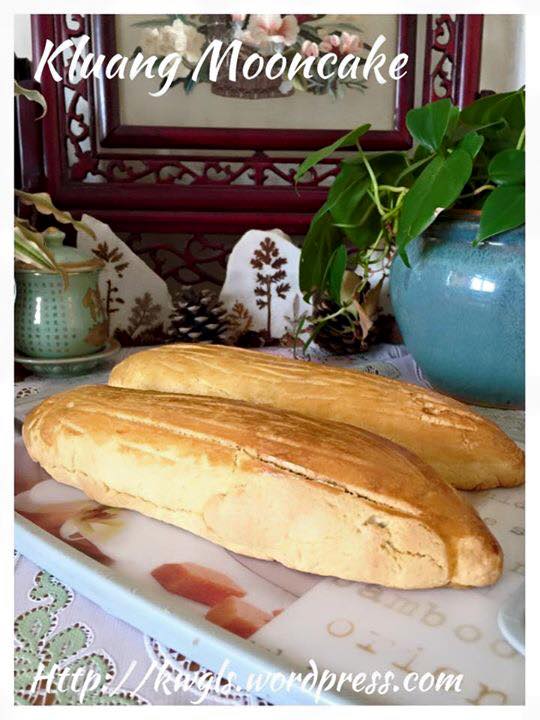

MOONCAKES (月饼)

IMG_6708

I have a few boxes of moon cakes and I have decided to  serve a durian moon cake that my nephew gave me from the international “Three” Seasons Hotel.  However, I am rather disappointed with the moon cakes. Put in bluntly, it is just pure durian flesh wrapped in snow skin. When you eat the moon cakes, it is very soft and just like when one is eating fresh durian (though it don’t taste that fresh any more after so many days).

It was definitely not cheap and my nephew told me even after discount, one small moon cake cost SGD 12. I honestly believed that should I received the moon cake earlier, I will be able to replicate the moon cake  .. and how much is one durian is this season? May be 3 durians for SGD 10?  Well the one below is equally disappointing as they have incorporate orange flavour in the lotus seeds fillings.

IMG_6710

Lastly, I hoped that you like my cooking adventures today and unlike previous festivals, I have cooked something very simple. In other festivals, majority were meat dishes and I managed to locate an old picture in my Facebook to share with you. This was taken by one of my nieces in 2012 to celebrate Chap Goh Me (元宵)during Chinese New Year.

427389_2585942612116_677084321_n

Have a nice day and cheers.

IMG_6692

Can I Have A Moon Cake That Is Not Round? Hmmm.. Try Short Crust Pastry Moon Cake

11885290_10207658698688332_2796177264155540397_n

Chinese Mooncake Festival or Mid Autumn Festival is arriving soon on 19-9-2013 (or Chinese Lunar Calendar August 15) and I think most bloggers will blog about moon cakes. There are many many moon cake recipes in the internet and there is no way for me to blog something that I am rather unfamiliar due to my poor shaping skills of moon cakes .

IMG_4661

This year I have a few attempts to shape the moon cake but not really successful. It cracked terribly and I have told members in my Facebook Group“Food Bloggers and Foodies United” that I am not going to issue a post on moon cake I totally do not have any confidence to share with readers about the making of moon cakes.

The next day after I issued the post, one of my relatives gave us a pack of moon cake from Kluang, Johor Malaysia. In the box, it was written clearly Shanghai Moon Cake, and what shocked me is that the shape is elongated and some called it a mouse shape.

IMG_4724

Sorry for my limited knowledge, I never seen Shanghai moon cake in this shape. I posted in my timeline and asked my friends what is that. Surprisingly a number of friends from Southern Peninsular Malaysia knew about this shop and ever tasted this special moon cake before.

IMG_4597

The next day, I cut it and ate a slice, I felt that the taste was very familiar. It resembles the short crust biscuits with the normal moon cake fillings. Therefore, I told my friends that I wanted to pursue another baking adventure based on what I tasted and I wanted to try to “reproduce” the moon cake that I received.

11916091_10207658698968339_6903056831277868030_n

That morning, there is no body in my house except myself. I just simply pick a short crust pastry recipe and start my adventures. Actually, the short crust pastry resembles the pineapples tart pastry. However, in this illustration, I made a mistake by including sodium bicarbonate (baking soda) in the dough. I shouldn’t need to include this as the fillings will expand when heated and the baking soda make the crack bigger that I do not want to see.

Putting that aside,  I would say that this pastry, or pardon me formally called it “SHORT CRUST PASTRY MOONCAKE” , is definitely worth trying. The soft filling blends extremely well with the melt in the mouth pastry wrapping it. Unlike other moon cake,  it is buttery in flavour and that make me wanted to share with readers this “funny” pastry aims at those who are adventurous to try out new ideas.

IMG_4744

But I have to highlight that, it is just like any pastry, it can’t keep for long. It is best to consume it within two to three days of making it. The wet fillings will make the short crust slightly soggy if you do not consume on time. Well, that is my frankest opinion and I do hope that readers have some confidences on me by baking this short crust pastry moon cake and share with me if it is up to your expectations.


WHAT IS REQUIRED

IMG_4723

  • 80 grams of salted butter, cut into cubes and keep in fridge waiting for later use.

  • 2 eggs lightly beaten

  • 400 grams of self raising flour (sifted)

  • 80 grams of sugar powder

  • 600 grams of moon cake fillings of your choice (in this illustration, I have used both the green tea paste and red bean paste).

IMG_4728


STEPS OF PREPARATION

Pre Preparation

  • Pre-heat the oven to 180 degree.

  • Get ready a baking tray with a piece of baking sheet.

  • Divide the moon cake fillings into 3 portions and roll it into an cylindrical shape of about 6 inches long.

IMG_4560

  • In a big mixing bowl, put in your sifted self raising flour, sugar powder. Add the butter cubes from the fridge. Use finger tips to lightly rub the butter until butter and flour are well mixed resembling crumbs. Rubbing should be light and fast. This resembles the preparation of scones and your can refer HERE.

IMG_4565

  • Make a whole in the centre put in the beaten eggs.

  • Use a fork or a knife to slightly mix the batter. Once the eggs and the flour have form a dough, transfer the dough to a table and knead for 1-2 minutes to ensure it is well mixed.

IMG_4570

  • Divide the dough into 3 portions. In my illustration, my dough weighed about 220 grams per portion.

  • Use a rolling pin to roll the dough in a floured surface into rectangular shape of about 10 inches x 5 inches.

  • Place your moon cake filling on top of the pastry, close the longer ends and roll follow the shape of the fillings.

  • Close the other two ends and ensure the edges are closed.

  • You can reshape to any shape that you want. However, I have opted to use the shape as shown above. Alternative shape is round shape. However, round shape is difficult for serving. So I opted for the oblong shape.

IMG_4747

  • Place the dough in the baking tray. Use a sharp knife to lightly cut lines on top of the dough.

  • Have the first egg wash and send to the oven and bake for 15 minutes.

  • After 15 minutes, take out and have a second egg wash. Baked for another minutes 10 and the moon cake is done.

  • For egg wash, hand beaten 1 egg yolks and add 2 big table spoons of water and 2 drops of oil. Sift and put in a container. Use a brush to lightly brush the dough.

IMG_4749


CONCLUSION

This is another way of serving the moon cake though traditionally, moon cake must be round resemble the moon. Whether this can be called moon cake or other name is up the discretion of the readers.

This moon cake was prepared using short crust pastries and the buttery taste of the pastry is totally different from traditional moon cake but it blends well with the traditional moon cake fillings. It is good to be served as a tea time snack item.

11904098_10207658698808335_6416241774365891405_n

I hope you enjoy my baking adventures for making this special shape moon cake inspired from the famous Kluang moon cake shop in Malaysia.

This recipe was included in Page 15-17 of the “Easy Mooncake Recipes E-book”. For more mooncake recipes, you can have a copy of Easy mooncake recipes  – A step by step guide” that was packed with 20 recipes, 45 pages at a reasonable convenience fee of USD4.00. The recipes covered various recipes from durian mooncake, traditional baked mooncake and also the less common Teochew mooncake . You can purchase by clicking the link above.You can either pay using Pay Pal or Credit card account. Please ensure that you have an PDF reader like Acrobat or iBooks in your mobile phone or iPad if you intended to read it in your ipad or mobile phone. Should there be any problems of purchasing, feel free to contact me at kengls@singnet.com.sg and separate arrangement can be made.

cover-mooncake

Hope you like the post today and do join me in the baking adventures. Bake one for yourself and tell me if it suits your taste buds. Have a nice day and cheers


 IMG_4752IMG_4738

Dates Fruit Cake (黑枣蛋糕)

Processed with Moldiv

INTRODUCTION

This is the 5th cake in a series of my baking adventures utilizing the “one number baking ratio”. Previously I have written about basic pound cake, zebra patterned pound cake, layered pound cake, grapefruit cognac pound cake and this post, I am going to share a simple fruit cake like dates pound cake. It is going to be a short post as most background have been explained in the previous posts.

The taste of this pound cake is very much like the fruit cake. The dates have been soaked in cognac before it is added to the cake. Of course for Muslim readers, you can always soaked in milk or orange juices. Therefore, the cakes is full of dates and cognac fragrance.

Processed with Moldiv

As contrast to the traditional fruit cake, the cake texture will be much softer due to the insistence of using one number baking ratio that include one portion of milk. You can understand one number baking ratio here. In summary, the ratio means flour: egg: sugar: butter: milk (or liquid mixtures) is  1:1:1:1:1:1.

IMG_4052

This time, I have purposely not using the egg separation method! Therefore this recipe is even easier than the previous recipes. It have cut less at least half of the time of preparation.

IMG_4048


WHAT IS REQUIRED

IMG_3957

  • 250 grams of self raising flour (sifted)
  • 250 grams of brown sugar
  • 250 grams of butters
  • 5 eggs or 250 grams of eggs
  • 220 grams of milk (balancing figures subject to the weight of your eggs used)
  • 250 grams of dates (soaked in water or alcohol such as rum)
  • 2 teaspoons of vanilla essence
  • 30 grams of rum/cognac or other alcohol or other liquids
  • Some almond flakes (optional)

Calculation of milk if you are using 5 whole eggs instead of using 250grams of eggs

Milk volume is the balancing figures and subject to the volume of liquid ingredients and size of eggs. In this illustration, my eggs weigh a total of 310 grams. Therefore actual milk used = 500 grams (milk + eggs theoretical volume) – 290 grams (weigh of eggs) – 30 grams (weigh of cognac) = 180 grams.

Alternatively, you can just fixed the eggs volume to be 250 grams therefore, you need not to recalculate the milk volume and purely follow the recipe above.

Processed with Moldiv


STEPS OF PREPARATION

Preparation…

  • Preheat the oven to 180 degree Celsius

  • Lightly grease an 8” x 8” diameter baking tin preferably with a detachable base. (In this illustration, as I want to give some of the cakes to my friends, I have decided to use one 6” x 6” diameter and two small loaf tins therefore cutting time have been cut short considerably).

IMG_3962

  • In a big mixing bowl, add in butter and brown sugar, beat until light and fluffy.

  • Add in vanilla essence and one egg at a time. Beat until eggs are well blend with the beaten butter.

IMG_3967

  • Add in the soaked dates and mixed at low speed until the dates are well mix with the butter batter.

IMG_3972

  • Take out the mixing bowl and fold in 1/3 of the flours followed by 1/3 of the milk and 1/3 of the cognac. Repeat for the other 2/3 portion. 

  • Pour into the light greased baking tin  and baked in the oven at 180 degree Celsius from the first 30 minutes.

  • Reduce the temperature to 150 degree Celsius and bake for another 15 minutes or until the top turn yellowish brown and until a skewer comes out clean.
  • Transfer it to a wire rack and let it cool for at least 1 hour before cutting the cake. It is best to let it rest overnight if time permits.

Note that the above baking time is for an 8”  x 8” baking tin. If you are using 6” x 6” and 2 loaf tins, you will have to bake at 180 degree for the first 20 minutes and reduce the temperature to 150 degree Celsius and bake for another 15 minutes.

Processed with Moldiv


CONCLUSION

This is a very short post by applying the one number baking ratio to the dates fruit cakes. The cakes are definitely moister than traditional fruit cakes. It is definitely a cake worth trying. One number baking ratio can definitely be extend to the baking of more cakes and next in the list will be cup cake or muffins..It is late and really tired after baking 3 products and rushing out 3 posts today. 

IMG_4051

 Hope you like the post today and have a nice day ahead.

Processed with Moldiv


Processed with Moldiv

One Number Baking Ratio Adventures Continues… Grapefruit Cognac Pound Cake With Grapefruit Posset…

IMG_3502

INTRODUCTION

One number baking ratio adventures continues and gradually extends to other pastry. I have explained in this post about how I want to apply this ratio to cup cakes, muffins, fruit cakes, layered cakes and other pound cakes. The main objective is to further testify this ratio and giving assurance that this easy to remember simple ratio will beneficial lazy people like me. Very briefly, Guaishushu believes that egg : flour : sugar : butter : milk (or other liquids) can be 1 : 1 : 1 : 1 : 1, hence called it “one number baking ratio”.  You may also be interested in the following posts based on principle of one number baking ratio:

Today, he is going to twist a little bit to become a fruity pound cake and served with grapefruit posset – a traditional Western drink/dessert.

IMG_3505


ONE NUMBER BAKING RATIO VS FRENCH’S QUATRE à QUATRE

As one reader pointed out that the ratios that I am using is basically the “quatre à quatre” ratio used in French cake making and I am basically just reinventing the wheels and revert back to the traditional ratios.

I tends to agree  with this and in fact, I am ignorant about the above ratios before the reader pointed out. I have to thank him for his knowledgeable input.

It is really a coincidence that all the while I am fond of using one number and it would be ideal if it applies to all cakes. I have written in the reply to the reader: I do not think that I am brilliant enough to create a good theory as cooking is just my passion! However, if you analyse in details,“quatre à quatre” ratio differs from Guaishushu’s “one number baking ratio” in that there is a portion of milk (or other liquids) which I insisted to be included in this ratio. So, Guaishushu is just promoting this modified traditional ratios instead of remembering different ratios for different ingredients and for different cakes.

IMG_3507


WHY THIS CAKE?

Grapefruit again? Yes, though Guaishushu just issued a post on Grapefruit Chiffon Cake – Grapefruit Chiffon with Grapefruit Citrus Glaze,… Ever Try This?, however, as grapefruit is very cheap in Singapore this month, I can’t help but to grab another 5 large and juicy grapefruits for SGD2.85 and I am thinking of preparing some other cakes with this fruit. While thinking of what cake to bake, i realized that I have a cognac sitting in my kitchen shelf for many years that I have never used it because I am allergic to alcohol. In fact, when I tried to open it, the cork on the bottle have broken (too dry) and I have to sift the alcohol and transfer to another small bottles.

This cake is rather simple to make and again it is based on Guaishushu’s one number baking ratio. To make is slightly different, I have substituted some portion of milk with grapefruit juices and  addition of some grapefruit peels. With the aim of differentiating this cake with other cakes, I have made the cake slightly pinkish and of course all these colouring are optional.

Note that the recipe applies equally well to an orange cake. Just substitute grapefruits with oranges.

IMG_3487


SELECTION OF GRAPEFRUITS AND PREPARATION OF GRAPEFRUIT PEELS

I will take this opportunity to share with readers about the selection of grapefruits that are juicy after many years of observation!

IMG_3519

The grapefruits on the left were smooth with lights reflection. As it is smooth, it implied that the air holes in the skin are very small and therefore moisture loss will be less than the grapefruit on the right. As contrast to grapefruit on the left, grapefruit on the right appeared to have more holes and if you touch it, you will find some unevenness on the surface. More moisture will be lost and at times, it will feel a bit like a sponge when you squeeze it. Therefore, when one buy a grapefruit, just ensure that it is smooth and full when you squeeze it.

Preparing The Grapefruit Peels

IMG_3517

I am peeling the grapefruit using the above peeler. I just peel in the S shape and a nice pattern will evolve. Try not to peel too deep as the white spongy skin can be rather bitter. Make sure the grapefruits or oranges was thoroughly wash before it the peeling begins. Cut into small strips and chopped fine before adding to the batter as required below.


WHAT IS REQUIRED

IMG_3511 

  • 250 grams of white sugar (divided into 100 grams for beating of egg whites and 150 grams for beating of egg yolks)

  • 250 grams of self raising flours (sifted)

  • about 250 grams of egg white and egg yolks (about 5 eggs separated into egg yolks and egg whites) (Note below for calculation)

IMG_3512

  • 150 grams of milks (Note below for calculation) – Balancing

  • 100 grams of grapefruit juice (Note below for calculation) – Fixed

  • 150 gram of grapefruit peels

  • 5 tablespoons of rum or any other alcoholic drinks (cognac, whisky or others) – Optional

  • 2 teaspoons of cream of tartar (optional)

Note: Calculation of liquid required

In accordance to one number baking ratio – eggs plus milk should be equal to 500 grams.

Today, my eggs yolks and egg whites worked out to be  298 grams, therefore, the balancing of milk used is 500 grams (total milk + eggs) less 100 grams (grapefruit juice) less 298 grams (egg yolks + egg whites) =  102 grams of milk (actual usage after considering egg size)


STEPS OF PREPARATION

The steps of preparation will involve:

  • Beating of egg whites , creaming of butters, mixing of flours and folding of egg whites

  • Making of pinky patterns (optional)

  • Baking

  • Making the grapefruit posset (optional)

IMG_3532


Preparation…

  • Preheat the oven to 180 degree Celsius


Beating of egg whites , creaming of butters, mixing of flours and folding of egg whites

IMG_3513

  • In a clean, grease free mixing bowl, add egg whites, cream of tartar and sugar. Beat using the machine whisk to whisk the egg whites until firm peak. Spoon the filling into a clean bowl and set aside for later use.

  • Change your whisk to a K beater, place your remaining 150 g sugar and butter, beat until light and creamy.

IMG_3514

  • Add in the grapefruit peels and eggs yolks and use slow speed to “mix” until well mixed. Eggs yolk should be added one by one and scrap the bottom of the bowl to ensure no unmixed egg yolk settled at the bottom of the mixing bowl.

  • Add in 1/3 of the sifted flours, add in 1/3 of milk and 1/3 of the grapefruit juice, used slow speed to mix together. Repeat for the other 2/3 portion. Off the machine and bring out the mixing bowl.

  • Once well mixed, fold in the egg white swiftly and lightly until the batter are smooth.


Making of pinky patterns (optional)…

IMG_3515

  • Take out about 1/4 of the of the batter and add 2 drops of red colouring (optional). Mix well.

  • In the greased cake tin (note that I have also slightly floured it but this is optional), start with 4 big tablespoons of the beige batter. Add 2 tablespoons of pink batter on top of the beige batters. Shake it slightly so that the batter spread over a wider surface. Add another 3 tablespoons of beige batter on top of the pink batters follow by 1 tablespoon of pink batter on top of the beige batter. Do the same for the next step using 2 tablespoons and finally one tablespoon until all the batter have finished. In the event you still have left over, just create another pattern with the batter that you have!


Baking….

IMG_3516

  • Shake the baking tin slightly and baked at 180 degree Celsius from the first 30 minutes.

  • Reduce the temperature to 150 degree Celsius and bake for another 15 minutes or until the top turn yellowish brown and until a skewer comes out clean.

  • Transfer it to a wire rack and let it cool for at least 1 hour before cutting the cake. It is best to let it rest overnight if time permits.

IMG_3520


Making of Grapefruit Posset

IMG_3528

WHAT IS REQUIRED

  • 120 grams of white sugar

  • 1.5 cups of cream

  • 150 grams of grapefruit

Note: Most posset will called for double thick cream, however, since I wanted it to use as some form of toppings, I will use normal cream for whipping. As such, the curdling will not be less strong and easier to pour.


STEPS OF PREPARATOIN

  • In a sauce pan, place the cream and sugar.

 IMG_3529

  • Cooked under low heat and bring to boil and let it boil slowly for 2-3 minutes.

  • Off the heat and add in the grapefruit juice. Chilled for at least 3 hours or overnight.

  • Pour on top of the cake and let it drip naturally.

Note that whether you posset will successfully curdled will very much depends on the acidity of your grapefruit. If your grapefruit is sour, it will curdle easily. If it can’t curdle, add in few drops of fresh lemon juice. The use of normal cream and grapefruit juice will produce a posset that are slightly runny which is easier for you to pour on top of the cakes.

IMG_3531


CONCLUSION

A simple cake to make using one number baking ratio. However, the twist to add in grapefruit peels and cognac transformed it into a cake that is full of fruity and cognac fragrance. While posset is generally served with biscuits, the modified grapefruit posset goes well with this cake and will heighten and wake up one’s palate especially  with a cup of Earl Grey tea!

Hope you like this cake and have a nice day. Cheers

IMG_3530

I am submitting this post to Little Thumbs Up “Eggs” event organized by organized by Bake for Happy Kids, my little favourite DIY and hosted by (Baby Sumo of Eat Your Heart Out). You can link your egg recipes here.

I am also submitting this to #recipeoftheweek and Marvelous Monday and Welcome to all My Bloggy Friends

   newmarvelousmondays-button 8646468202_0880f459d1

One Number Ratio Baking Adventures – Layered Pound Cake ………

IMG_3196

This is a post with no recipe. This is Guaishushu’s baking adventures.

As mentioned in Guaishushu’s zebra pattern pound cake, Guaishushu don’t like to follow recipes and remember numbers. Therefore, Guaishushu is constantly experimenting his 1 number pound cake ratio theory, that is 1 egg : 1 butter : 1 flour : 1 sugar : 1 milk (hereinafter refer to as “One number Ratio”) and today, he applied this to the famous Indonesian Layered Cake (Kek Lapis). However, as he is in the experimenting stage, he did not care much about the details on the additions of spices, control of temperature and etc.

He assured that he will publish a full post with detailed recipe and illustrations.

IMG_3198

The origins of Indonesian layered cakes is believed to be the Baumkuchen/Tree cake, an authentic cake in Germany and Holland. However, due to the Dutch colonization of Indonesia, the Dutch had modified the traditional version by incorporation of local spices. Therefore, the Indonesian layered cake is called the lapis legit (spiced layered cake) whereby a spice mix were added to the batters.

Based on Guaishushu’s One number cake ratio pound cake as mentioned in this post, Guaishushu believed that “one number ratio” can apply to cup cakes, fruit cakes and other cakes such as layered cake. Of course, the cakes could not be called baumkuchen but it is just  a “layered pound cake” baking using total different ingredients ratio..

IMG_3195

The taste of the cake is similar with the pound cake but the texture is difference, slightly denser. Putting the legit spice mix, it will taste like the Indonesia Kek Lapis Legit.

The difference with the original texture of pound cake  is because of the differences in the method of making the layered cake though ratio is the same. The constant layering of the cakes will make it dense. In addition, the temperature used is higher to make the layered cake therefore becoming drier. With slight tuning of the oven temperature, timing of layering, the cake can be as beautiful and as delicious as with other common Indonesian layered cakes.

While most common layered cakes will required about 10-30 eggs, this cake only uses 5 eggs. In addition, some recipes uses 500g butter whereas this is the pound cake that uses 250g of butter only. That could also resulted a cake that is denser and less moist than other layered cakes.


  IMG_3201

Just give readers a glimpse of how to bake a layer cake, you will have to use top heat for baking. Put a few tablespoons of batter each time until the top layer turns brownish. Continue until all the batters finished.

IMG_3200


Well, that is Guaishushu’s experimentation with the making of layered pound cake. Do making of layered cake have  any short cut? Can the “one number ratio” applicable to a layered cake? Guaishushu believes that the answer is yes!


Guaishushu will continue to experiment more recipes using this “one number ratio” and this layered cake will be further modified and tested before the recipe is published.


Have a nice day and cheers.


IMG_3197

What I cooked today (家常便饭系列)- 11-8-2013

IMG_2647.JPG (2)

On 7 August 2013, white rice served with :

1.      Braised Bitter Gourd With Chinese Mustard                                                 苦瓜焖苦瓜

2.     Salted Turnip Omelette                                                                                    菜脯蛋饼

3.     Vegetarian Winter Melon Soup                                                                       素冬瓜汤

First of all, I have to be frank that I will be a vegetarian (by religion) for a period of about 1.5 months and being the only member in the family, I am pretty easy going with my meals. Since my relatives are in my house, they can cook what they like and I usually give them the free hand so that I can concentrate on my other food posts.

However, when I have things to share, I will post here and there summarizing what I have made the last few days. As mentioned before, short recipes will be captured in Guaishushu’s Facebook Page, therefore, I will let you know the dishes published and if you are interested, you can go there for some pictorial illustration. Liking the Page (not the individual posts) will ensure that you will be briefed of all future recipes when Guaishushu issue a pictorial illustration.


Salted Turnip Omelette (菜脯蛋饼)

IMG_2639

This is a very common Chinese household dish especially for the Hokkien and the Teochew dialects. It is basically preserved turnips (either sweet or salty) fried with eggs. When I was young, we used to have this dish with white porridge as its very tasty. Previously, this dish was considered as a commoner’s dish because eggs and preserved turnip or radish are two of the cheapest cooking ingredients. It is tasty and a slice of  egg omelette with a bowl of white rice or porridge can be a meal for the poorer families. However, time have changed, this traditional dish has become so well known that it started to appear in the restaurant menu especially Minan/Hokkien/Taiwan restaurant and Teochew porridge restaurant. Preparation is simple and you may want refer here for detail pictorial illustration.


Braised Bitter Gourd with Chinese Mustard (苦菜焖苦瓜)  

IMG_2640

This is a vegetable dish “invented” by myself many years ago. Initially, it was just bitter gourd and subsequently, as per my wife’s request, Chinese mustard was added. Both Chinese mustard and bitter gourd were very bitter and if you are a bitter taste lover, you will like it definitely. At times, I have added a can of canned button mushrooms and my kids will eat together with us. This is one way of letting them getting used to the taste of bitter gourd and Chinese mustard.

Both these vegetables were beneficial to the body as per Traditional Chinese Medicine, these are “cooling” vegetables that will help to release the “heat” on your body. For those who are not familiar with TCM, body that have too much “heat “ will have lots of symptoms that can range from loss of voice, acnes in your face, sore throat etc. and you have to have food that are “cooling” in nature to balance your Yin and Yang.

My mother in law is very particular about vegetable combination in a meal and she will casually remarked “we have some “heat” prone vegetable today and today we shall have some cooling vegetables.. So under her, her vegetable choices will take into consideration this factor plus “colour” of the vegetable (green vs. white vs. colourful), leafy vs beans….. Most of time, I “failed” her test under her supervision but I am learning from her gradually as this takes time!


Vegetarian Winter Melon Soup (素冬瓜汤)

IMG_2648

Nothing much to say about this dish as it is just another version of winter melon soup without pork ribs. As there is no meat broth, I have use more sweet dates and add in some vegetarian bean curd sheets. My boy did not complain about no meat and my girls, who is soup fanatic, will definitely say nice especially winter melon is one of her favourites.


Banana Cake (香蕉蛋糕)

Beside the savoury dishes, my baking adventures continue. I have made a banana cake using two ripe bananas. Taste is fabulous and texture is superb (soft and moist). Uniqueness about this cake is that it is prepared using a food processor rather than the normal mixer. No creaming of butter, just mixed and blend, a batter will come out that give a delicious butter cake. Cake preparation timing is less than 20 minutes. This is a comfort food that is suitable for those who want a simple way of cake making.

IMG_2587


In between these few days, I have prepared many cakes and savory dishes and among them were:

Oven baked honey tempeh and Sweet and Spicy Tempeh


Vegetable Fritters or Bakwan Sayuran

IMG_2447


Grapefruit Chiffon Cake with Grapefruit Citrus Glaze

IMG_2518.JPG (2)


Bubur Cha Cha (Sweet Soup) 

IMG_2450


Hope you like the post today. Cheers

IMG_2590


What I cooked today (家常便饭系列)- 31-7-2013

IMG_1689.JPG (2) 

On 31 July 2013, white rice served with

1 Indonesian Ginger Chicken 印尼姜鸡
2 Japanese Fried Ginger Chicken 日本炸姜鸡
3 Blanched White Stem Pak Choy with Japanese Salad Dressing 日式沙拉酱奶白
4 Bok Choy Meat and Fish Ball Soup 贸白菜肉丸鱼丸汤

Today, this menu was a rather unusual combination with two ginger chicken dishes called Indonesian Ginger Chicken and Japanese Fried Ginger Chicken. One of the my blogger friends from http://eatapieceofcake.blogspot.hk have posted this Indonesian Ginger Chicken Recipe into a Facebook Group that I have recently created called Food Bloggers and Foodies United.

The picture in her post looks  really nice and she explicitly highlighted that only 4 ingredients were needed (ginger, garlic, honey and dark soya sauce). Based on these 4 ingredients, I have no doubt that it will taste nice because all the ingredients are common ingredients used in Chinese cooking and I am especially fond of ginger. I also noted that these ingredients were almost the same as Japanese  style fried chicken where chicken were marinated in ginger juices. Therefore I have decided to marinate the chickens together using ginger juices. After one hour, I took some marinated chicken out for Japanese fried chicken whereas for the portion remaining, I added the required honey and dark soya sauce.  I baked for about an hour. I did not let the juice dries up because I knew my kids would like to have some gravy to go with the rice which is sweet and aromatic. That was the reasons why what I cooked is different from the original blogger’s picture.

IMG_1683.JPG (2)

For the Japanese ginger chicken portion, instead of adding the dark soya sauce, I have added some Japanese light soya sauces and deep fried it. After I fried it, I drip soe honey on top of the fried chicken and served with shredded pineapple. Fried chicken is a bit oily and shredded pineapple will have the effects of negating the oiliness of the dish. Slice cucumber is another good way of garnishing.

IMG_1687.JPG (2)

The verdict of these two ginger chickens  competition : the Indonesian Ginger Chicken dish won because it was softer and go with sweet sauce. This was expected because of the kids’ taste buds. However, they were complaining a bit spicy because of the ginger sauce.

For the blanched vegetables, i have resorted to the use of Japanese salad dressings and sprinkled with fried shallots. This whole bottle of dressing were given by my neighbour who complained that she don’t know how to use it after she brought it. It is a nice dressing in fact and goes relatively well with the white stem pak choi.

IMG_1680.JPG (2)

Well, that is my cooking adventures to day and the submission of this report will consider that my daily kitchen duties as complete. Ha ha

Yes, before I end my post, I am thinking of cooking something with these combinations tomorrow. Can you guess what noodle dish is it?

IMG_1666

Have a nice day ahead and cheers.


IMG_1688