My First Attempt On Frosting My Cupcake–Red Velvet Cupcake With White Chocolate Frosting

IMG_30891

INTRODUCTION

My relatives, once have a red velvet birthday cake is asking me if i know how to make red velvet cupcakes. I told her it shouldn’t be a problem since it is a chocolate flavoured cupcake but with the reddish brown daring colour.

IMG_31361

Yesterday, I have decided to bake these cupcakes. Frankly speaking, I baked 2 batches of the cupcakes. For the first batch that I baked, I did not like the colour and shape because I have added baking powder and reluctant to add in more cocoa powder to darken the colour.

IMG_30141

For the second batch, the colour is better but shape still rose more than desired. I am reluctant to change my recipe as I know my recipe will yield moist and soft cupcakes that I like. Since I am baking using my one number baking ratio beliefs, the volumes of liquids (including eggs) used is higher than other recipes. Because of more eggs used (particularly the egg white which itself is a leavener), the cakes will rise taller than cakes that used less eggs. Therefore, for the second batch, I have to cut off part of the tops. I have amended the recipe to use plain flour instead of self raising flour for cupcakes purposes.

IMG_31241

It will definitely be interesting to read a bit more about red velvet cake from Wikipedia:

Red velvet cake is a cake with either a dark red, bright red or red-brown colour. It’s traditionally prepared as a layer cake topped with cream cheese or cooked roux icing. The reddish colour is achieved by adding beetroot or red food colouring. Before more alkaline “Dutch processed” cocoa was widely available, the red colour would have been more pronounced.” Common ingredients include buttermilk, butter, cocoa, and flour for the cake, beetroot or red food colouring for the colour. (Source: http://en.wikipedia.org/wiki/Red_velvet_cake)

IMG_31411

I have to admit that I am rather uncomfortable when I am adding the colouring. However, as it is a trend of baking red velvet cakes in recent years, as a blogger, I can’t possibly ignored this trend or important bake at all. At least my blog should have one. Traditionally, beet root was used for the colouring, however, in recent years, most bakers have used permitted food colouring instead of the natural colour. If you do not like the colouring, well, you can omit the colouring and become just chocolate cupcakes.

IMG_31021

Cupcakes are too simple to serve on its own. As an Asian, I do not really mind having cupcakes without any frosting at all. However, I have decided to prepare the less common white chocolate buttercream frosting and share with readers.  The cupcakes and the frosting are both not overly sweet  and a bite of the creamy white chocolate frosting will bring you to another level of enjoyment. This cupcake is definitely designed for chocolate lovers. In addition, it is a simple “mix and bake” cupcake.

IMG_31121


WHAT IS REQUIRED

Servings :  12 cupcakes

IMG_2979

Red Velvet Cupcakes:

  • 2 eggs (about 110-120 grams)
  • 120 grams of plain flour
  • 120 grams of castor sugar
  • 120 grams of butter
  • 70 grams of white chocolate (melted)
  • 50 grams of buttermilk or fresh milk (if you use fresh milk, you have to use lemon juice or white vinegar)
  • 1 teaspoon of lemon juice or white vinegar (only if you used fresh milk instead of buttermilk)
  • 2 tablespoons of cocoa powder
  • 2 teaspoons of permitted red colouring (or more until you reached your desired colour)

IMG_3018

White Chocolate Frostings:

  • 120 grams of unsalted butter at room temperature
  • 240 grams of sugar powder
  • 80 grams of white chocolate , melted at room temperature
  • 1/8 cup of heavy cream
  • Pinches of salt
  • 1/2 teaspoon of vanilla essence

Others – Not in picture

  • Wilton piping nozzle – 2D
  • Large piping bag
  • 12 cupcakes cups
  • 1 muffin tray for holding the cupcakes
  • Sugar sprinkles (optional)

IMG_31301


STEPS OF PREPARATION

IMG_2984

  • Melt the butter in microwave for 1 minute and set aside.

  • Add the vinegar or lemon juice to the fresh milk and slightly stir it. This is only applicable if you are using fresh milk. Omit this step if you are using buttermilk.

  • Melt the white chocolate in microwave for 1 minute and set aside.

  • Put the cupcakes cup in the muffin tray

velvet collage11

  • Sift the flour and cocoa powder into a big bowl. Add sugar and use a spoon to make a well in the centre.

  • In another bowl, put eggs and melted butter. Use a balloon whisk to whisk until well mixed. Add in white chocolate and whisk until well mixed. Add in the red permitted food colouring followed by milk and mix well.

Velvet collage21

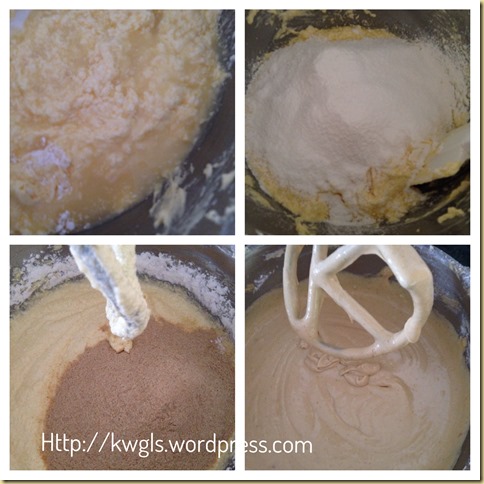
  • Put the red coloured liquid mixture into the dry ingredients (sugar, cocoa powder and plain flour). Use the balloon whisk to mix well. Scoop the batter into the cupcake cups in the muffin trays. Fill the cupcake cups with 2/3 full. If your batter is more, you should increase number of cups used.

velvet collage 31

  • Baked in the oven for 15-20 minutes or when the skewer inserted comes out clean. Transfer the cupcakes to the rack and cool completely before proceed to the frosting.

IMG_30271


White Chocolate Frosting

IMG_3033

  • Melt the white chocolate in the microwave for one minute and set aside at room temperature for cooling.

  • Get ready your preferred nozzle, I have used Wilton 2D nozzle to create a big rose liked swirl.

  • Get ready a container that can hold the piping bag. I have used Chinese New Year cookies container.

IMG_3081

  • Cream you butter at medium speed (about 1-2 minutes) until smooth and pale. Change to low speed and gradually add in your icing sugar spoon by spoon until the sugar are added. Quickly add in the melted white chocolate and revert back to medium speed for 2 minutes until the icing is smooth, creamy and combined. Add in the cream, vanilla essence and pinches of salt and beat for additional 1 minute until combined. At times, room temperature do have effect on the frosting prepared. If your frosting is too dry, add ONE TEASPOON of cream gradually. If it is too runny, add ONE TABLESPOON of icing sugar at a time to improve the consistency. However, some judgements are needed. You may wish to chill it before piping (as mentioned below).

IMG_3087

  • Transfer your icing to the piping bag.  If your icing is too runny, you can put your piping bag in the fridge for 2-3 minutes until your desired icing consistency. Either start from the centre or from the edge of the cupcake, pipe the icing in the circular pattern until the top of the cupcake is covered. Sprinkle with coloured sugar or candy beads if desired. Well, any left over icing can be used for saltine crackers if you like it or keep in an air tight container in the fridge until the next frosting.

IMG_31181

  • In Singapore’s hot weather, you may wish to chill it if you do not consume it immediately. Keep in the refrigerator until 10 minutes before serving. Best serve as a snack with a cup of coffee or tea.

IMG_31061


CONCLUSION

This is a simple recipe using mix and bake and with some white chocolate frosting. In my humble opinion, the taste is superb, textures are soft and moist. The frosting are just right to go with the cake. However, if you do not like permitted food colouring, do ignore it and make it into chocolate cupcakes and I am sure you will concur with me that it is equally delicious if you do not prefer to have any frosting.

Hope you like the post today. Cheers and have a nice day.

IMG_31381


For more recipes, you can refer to my RECIPE INDEX here and you can follow me at PINTEREST or visit this blog’s FACEBOOK PAGE .  

group-board-picture7222222222222222


If you are a Pinterest user and you are interested to have more recipes, you can join or follow this Pinterest Board set up by me  where there are more than 400 recipes worldwide and pinned by various bloggers: FOOD BLOGGERS AND FOODIES UNITED PINTEREST BOARD


Four-Seasons-JPG29622223222232223222

For Four Seasons Blog Hop #28 (Nov 20) where I am the Co-host, please join us for the party where you can get a lot of the family related posts. Please click the above logo to enter your post.

IMG_31201


Four Seasons Blog Hop #28 (Nov 27 2013)

Four Seasons Blog Hop - Easy Life Meal & Party PlanningWelcome to the Four Seasons Blog Hop


A party where we can celebrate the greatness that each season brings to our lives.

So Let’s Get This Party Started!!Let's Get this Party Started Share your  food creations, gardening, clever projects, tablescapes, decorations, party themes, and inspirational knowledge … Ok, you get the point.  Join us every Thursday (opens Wednesday evening at 6:00 pm). Please stay for awhile and show some love to the guests, join us in the fun and grab a button. Four Seasons Blog Button

 
We will share your posts in a variety of ways on Pinterest, Twitter, Facebook and Google Plus.  We will also have features of the week! Be sure to follow our Four Seasons Board on Pinterest!

By participating in this linky party, you agree to have your posts shared on social media and Pinterest and to receive email and Google notifications for reminders about the party. If you don’t want to receive notifications, please let us know.

FEATURED

Powered by Linky Tools

CLICK HERE

to enter your link and view this Linky Tools list…


For more recipes, you can refer to my updated RECIPE INDEX  here and you can follow me at PINTEREST or visit this blog’s FACEBOOK PAGE .
 

Capture1422222

If you are a Interest user and you are interested to have more recipes, you can join or follow this Pinterest Board set up by me  where there are more than 250 recipes worldwide and pinned by various bloggers: FOOD BLOGGERS AND FOODIES UNITED PINTEREST BOARD

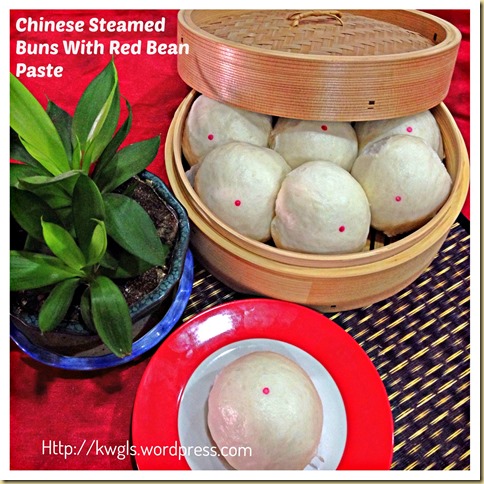
A Humble Traditional Chinese Steamed Bun – Chinese Steamed Buns With Red Bean Paste

IMG_29541

INTRODUCTION

This is one of the basic steamed bun recipe with a humble filling of red bean paste. When I was young, it was one of the cheapest steamed buns as compared to the barbecue pork or meat steamed buns. I have decided to complete my kitchen adventures by baking some Chinese traditional steamed buns, starting from these plain looking yet delicious bun.

IMG_29591

I am not 100% satisfied with my buns as the skin were not as smooth as desired while the texture and taste were okay. I knew what was the culprit, the paper I used for the steaming.

IMG_29161

In one of my trips to a bakery shop, I was requesting for some paper for Chinese steamed cakes and the seller gave me some assuring me that was the paper used for steaming purposes. I never doubt it until yesterday prior to the steaming. When I put my very first nicely shaped and proofed dough in the steamer, I discovered that the paper were not water proof, therefore, I have to change the paper for the proofed dough. That was a disaster. The dough was so soft and I had to be extremely careful to remove the paper that stuck to the bottom of the dough and replaced it with another piece of my normal baking paper. That handling process may have caused some unevenness in the skin of the buns. Other than this, the steamed buns were satisfactory and my wife have commented that the skins of the steamed buns “were not bad, nice”!

IMG_29481

Since it is  a basic bun, you will have a lot of variations to suit your taste buds be it the filling or the ratio of filling to the dough. It is really nice to have some hot steaming homemade buns.

IMG_29651


WHAT IS REQUIRED

Servings : Make 12 steamed buns

IMG_2885

Dry Ingredients (A)

  • 550 grams of pao flour or Hong Kong flour or low protein flour
  • 100 grams of corn starch
  • 100 grams of castor sugar
  • Pinches of salt
  • 1/2 teaspoon of baking powder
  • 10 grams of instant dry yeast

Wet Ingredients (B)

  • 300 grams of lukewarm water
  • 30 grams of vegetable shortening, melted, cool and set aside

Fillings and others

  • 500 grams of red bean paste (ready made)
  • 12 pieces of waterproof parchment paper cut into square size of about 6cm x 6 cm

You can substitute the fillings with lotus seeds or any other fillings that you prefer.

IMG_29321


STEPS OF PREPARATION

Servings : Make 12 steamed buns

PicMonkey Collage11

  • Put all dry ingredients (A) in a whisking bowl. Use a spoon to stir the dry ingredients and make a well in the centre. Add in the lukewarm water.  Use the same spoon to roughly stir it until it form a sticky dough. Use the machine dough hook to knead the dough for 10 minutes at medium speed. Add in the melted vegetable shortening, beat at high speed for another 15-20 minutes or until the dough leaves the side of the whisking bowl. If the dough is too wet for the kneading, add 1-2 tablespoon of flour to continue. You can also do this manually if you don’t prefer to use the machine kneading.

  • In a flat surface, dust with some flour, transfer the dough to the flat surface and knead for 3-5 minutes until the dough does not stick to your hand. Shape it into a ball, put it in a bowl. Cover with a wet towel or clingy wrap and let it prove for 30 minutes (or double in size whenever is earlier.

PicMonkey Collage21

  • While waiting for the dough to have its first proofing, divide the dough into 12 equal portions (about 41.6 grams). Shape it into a ball and set aside.

  • Cut your paper into 6cm x 6cm for placing the steamed buns. I prefer to use the knife to cut rather than to use the scissors.

IMG_2907

  • After the first proofing, take out the dough, knead in a lightly floured surface for 1-2 minutes. Divide the dough into 12 equal portions. Mine is approximately 85 grams each. Shape the dough into rough shape. If prefer, you can roughly use a rolling pin to flatten the dough but that is not necessary, you can just use you palm to flatten the dough ball. Put a dough in your hand and on the top of the dough, put one ball of read bean paste.

IMG_2912

  • Wrap the dough around the red bean paste and seal off the edges. Slightly roll it into a round ball. Put the sealing end on top of the square baking paper. Put the dough in a steamer. Leave space of about 1.5cm between the dough for expansion. Proof the dough for another 30 minutes.

IMG_2917

  • After second proofing, get ready a steamer with some water. Bring to boil. The water should not be too much until it had a chance of touching the base of the steamed buns when steaming. It should not be too little as you may need to add water during the steaming. Therefore, some own judgement is needed. If prefer, you can lightly greased the cover with some oil to prevent water condensation. But that is optional.

IMG_29671

  • When the water boils, steamed the buns under high heat (throughout the entire process) for about 15 minutes. After 15 minutes, off the heat and let the buns sit in the steamer (without opening the lids) for at least 5-10 minutes before you formally transfer the buns out of the steamer. Put the buns in a rack for cooling. (Note that the bottom of the steamer plate may have water condensation and therefore it is important that you transfer the buns in an airy place for cooling.

  • Best served as  a snack or a breakfast items. Traditionally, Chinese like to have steamed buns with a cup of soya bean milk.

IMG_29461


 CONCLUSION

This is one of the most basic steamed buns. From this recipe, it can be extended to other common dim sum steamed buns such as Char Siew (barbecue pork) buns. In my country, buns with lotus seed paste or red bean paste are usually shaped round and meat buns are shaped differently. In my next attempt, I will share the preparation of Char Siu buns or chicken or pork buns. Recipe will be slightly differently but methods of preparation are almost the same.

IMG_29711

Before I end the post, remember that you  can substitute with other fillings and as for the size, depending on your preference, you can make it into a smaller bun. If you think the ratio of fillings : dough of 1:2 is too low for your liking, do increase the ratio to say 1.5 : 2. Hope you like the post today. Cheers and have  nice day.

IMG_29441


For Chinese New Year related cookies, snack and steamed cake recipes, you can have a copy of Easy Chinese New Year Recipes – A step by step guide” that was packed with 30 recipes, 60 pages at a reasonable convenience fee of USD3.50. The recipes covered various recipes from auspicious radish cake to nian gao to traditional kuih bangkit to trendy London almond cookies. Of course not forgetting both type of pineapple tarts. You can purchase by clicking the link above. You can either pay using Pay Pal or Credit card account. Please ensure that you have an PDF reader like Acrobat or iBooks in your mobile phone or iPad if you intended to read it in your ipad or mobile phone. Should there be any problems of purchasing, feel free to contact me at kengls@singnet.com.sg and separate arrangement can be made.

coverlow-final2


IMG_29611


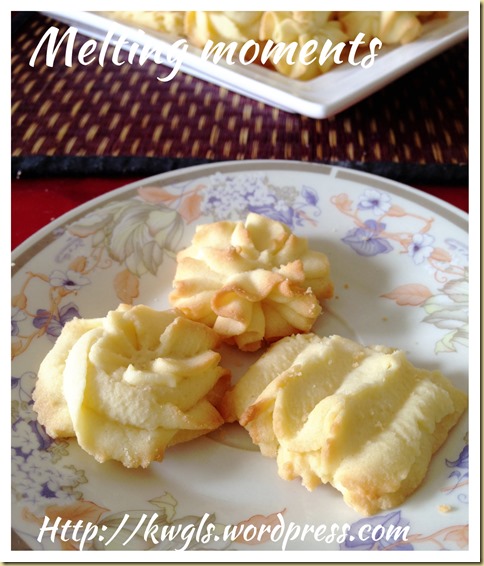
Traditional Cookies That Bring Fond Memories– Melting Moments

IMG_4414

UPDATED POST ON 26-11-2014

Uploaded a new recipe -recipe 2 with only 4 ingredients of which potatoes starch can be substituted with plain flour. Easy to pipe too.

Processed with MOLDIV

Using Recipe 2

UPDATED POST ON 29-12-2013

I have not promote this post because the picture is rather blur. Therefore, today, I have decided to prepare some for picture taking purposes.

Processed with MOLDIV

Using Recipe 2


INTRODUCTION

This will be a relatively short post on MELTING MOMENTS. This is not a new cookie but a cookie that bring fond memories. In the 1970’s and 1980’s, there are not many cookies choices and this is one of the simple cookie that was served during festivals such as Chinese New Year and Hari Raya.

IMG_4406

It was not surprising that these cookies were served because the ingredients, preparation and baking methods were rather simple. Then, Malaysia economies just picking up and gradually introduced to Western cookies. Most people will not have an conventional oven and these cookies can be prepared even using an ovenette,  mini oven or toaster. Hand creaming was used as opposed to the current machine whisking. The ingredients then were only flour, sugar and butter. As times went by, the ingredients have started to include corn flour to better the texture of the cookie and shape have also change with more and more piping nozzles.

Processed with MOLDIV

Using Recipe 2

Frankly speaking, I am unsure what is the name of this cookie.  I knew people are calling it melting moments, but if you Google the internet, the cookie “melting moments” come in all shapes and decorations. The only common characteristic after analysing the ingredients of various recipes is that there are   flour, sugar and butter as the 3 main ingredients. As for flour, some have used  a mixture of corn flour and some even use custard powder.

IMG_4404

This recipe is a modified recipe, I have substituted part of the butter with ghee. I have briefly explained ghee, a type of clarified butter in my Indian Short Bread, Nan Khatai post. Any cookies made with ghee will definitely be more aromatic than those made with butter or margarine due to its slightly higher fat content. The trade off is that the cookies can become shapeless as the ghee melts (have modified the recipe to let it stay in shape).  Though the picture in this post may not be that appealing, I can assure you that the taste is superb.

IMG_4410

To create some visual effect and give a fresh feel from its traditional look, I have used Wilton 2D nozzle to pipe the dual colour batters and but this is optional.

IMG_28031


WHAT IS REQUIRED

IMG_2791

  • 180 grams of plain flour
  • 80 grams of potatoes starch
  • 60 grams of icing sugar
  • 100 grams of butter
  • 80 grams of ghee (optional – can substitute with butter)
  • 1 teaspoon of vanilla essence
  • 1 egg
  • Some pink/red permitted food colouring (optional)

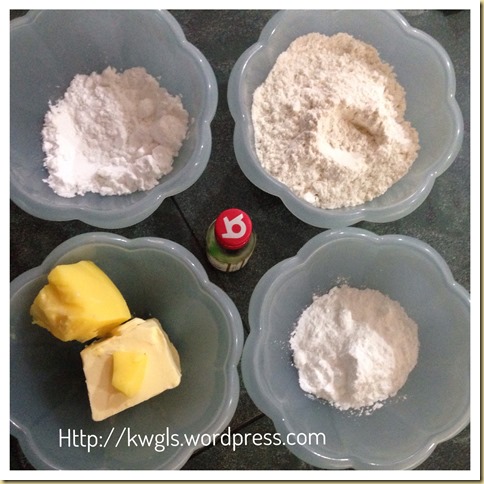
Recipe 2

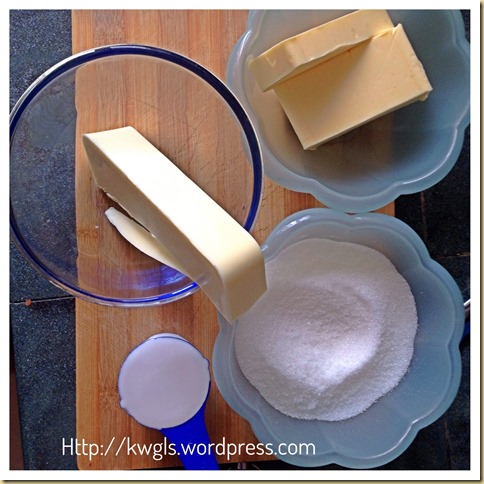
  • 100 grams of butter 
  • 100 grams of plain flour
  • 25 grams of potatoes starch (substitute with plain flour)
  • 25 grams of icing sugar 


IMG_4402


STEPS OF PREPARATION

  • Preheat the oven to 165 degree Celsius and line 2 baking trays with parchment paper

IMG_2796

  • Cream the butter and sugar until light and fluffy. Add in the eggs and vanilla essence , beat until well incorporated. Sift in the potatoes starch and plain flour, either use the machine at low speed or use a spatula to stir until well mixed.

IMG_2801

  • Take out half of the batter set aside. For the other half, add a few drops of the red/pink colouring. Stir until well mixed. In a piping bag fitted with nozzle 1M or 2D (Wilton categorization), transfer the pink and beige batter into the piping bag.

IMG_2806

  • Pipe the batter into the baking sheets in the pattern of a big swirl. Bake in the oven for about 10 minutes. Let it rest in the baking tray for 5 minutes before transfer to the rack for cooling. Store in an air tight container.
Processed with MOLDIV

Using Recipe 2


CONCLUSION

Substitute part of the butter with ghee will help to enhance the buttery aroma of the cookies. Do give it a try and let me know if it meet your expectations.

IMG_4412

Hope you like the post today. Cheers.

IMG_4398


IMG_4416

Another Profiteroles Bake – Christmas Croquembouche (圣诞泡芙塔)

IMG_1877

UPDATED POST ON 21-11-2014

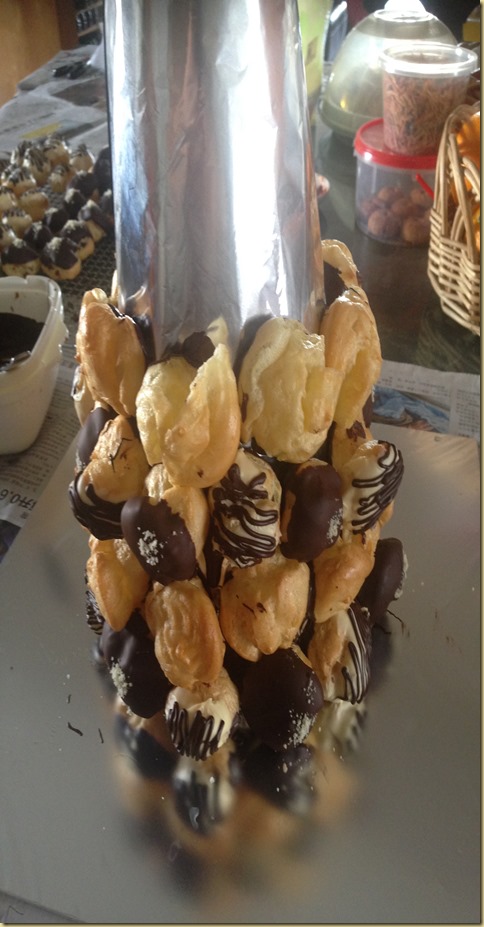
Last year’s croquembouche was done late at night and it was quite a disaster and this year, I have decided to prepare another croquembouche for this purpose.. This croquembouche is rather tall. 2 feet high with about 100 profiteroles. It is the full recipe of 4 eggs as stated in this post. There is no change in the recipe but I have change the method of assembly and assembly of the profiteroles.

IMG_1869

  • Build a cone support as the centre. I use some white paper, roll it like a cone and cut off the bottom. I wrapped with aluminium foil and in the centre, I place a jar of the same diameter such that it is stable.

IMG_1842

  • No caramel sugar were prepared this time. Instead, I used the melted chocolate to stick to the cone. Assembly starts from the bottom and gradually went up to the top.

IMG_1843

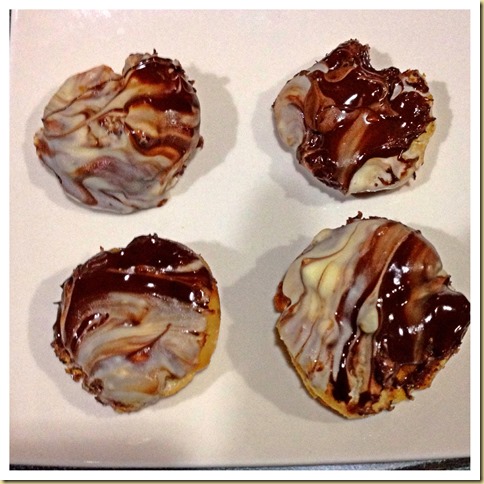
  • For the profiteroles, I have prepare 3 types – original, one is coated with white chocolate with some dark chocolate stripes and the last one is dark chocolate coated and sprinkled with some baked almond meal. To make the chocolate coating, one of the easiest way is to melt the chocolate in microwave for 30 seconds to 1 minutes. You can also melt it over stoves using water bath method.

IMG_1871

  • No fillings were done this time as I do not forsee we are able to finish the profiteroles . In addition, I do not want my kids to have too much cream loaded bakes. The plain profiteroles with the chocolate coating is nice on its own.

IMG_1873

Re-prepare this is to let readers aware that croquembouche is possible to be prepared at home without much expertise required. It cost a bomb because it is slightly laborious. It took me about 2.5 hours from baking to finishing the whole croquembouche . Of course, a bit of planning is required. Most of the time is wasted in waiting for the chocolate to dry up. Why not try to prepare this for the coming Christmas dinner..It will be a centrepiece of the dinner.

IMG_26261 First attempt ugly croquembouche

INTRODUCTION

The name Croquembouche sounds so jargon and technical. However, it is nothing more than a piling of profiteroles (puffs) in a 3 dimensional cone shape. It is  a French term and the pastries are usually served and in important occasions, parties and gatherings.

IMG_1859

Per Wikipedia,

A croquembouche or croque-en-bouche is a French dessert consisting of choux pastry balls piled into a cone and bound with threads of toffee. In Italy and France, is often served at weddings, baptisms, and first communions. The name comes from the French phrase croque en bouche ‘(something that) crunches in the mouth. A croquembouche is composed of profiteroles (choux pastry balls) piled into a cone and bound with threads of toffee. It may also be decorated with sugared almonds, chocolate, flowers, or ribbons. Sometimes it is covered in macaroons or ganache.

 IMG_1875

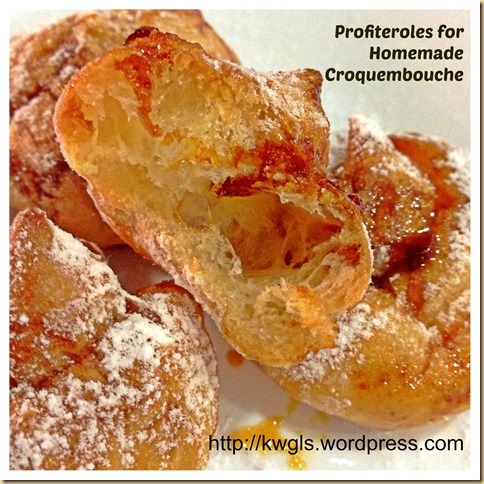
The basic pastry is choux pastry and the puffs or profiteroles can be decorated in many ways. It can be caramelized, dip in chocolates and/or ganaches, macaroons, fondant icings and etc. Depending on the type of exterior decorating agents used, the interior of the puff can be plain or piped with custards, whipped creams or fruit flavour whipped creams. It can be as elaborated as you want it to be. In Singapore, a 28cm (diameter) x 37cm (height) fully decorated with colourful and beautiful icing croquembouche can cost as much as SGD400-500. For a party of 30-40 persons, it will cost about SGD10 per persons for the pastry.

IMG_26801

For purposes of this illustration, I have prepare the croquembouche in the shape of a Christmas tree since Christmas is approaching. Utilizing 4 eggs, I have managed to prepare at least 70-80 profiteroles with about 1 gram per profiterole. This batch of profiteroles is a rather satisfactory batch with solid crusts and hollow internally. However, I did not do any elaborated decoration to the choux pastry as I am sure we are unable to finish and impossible to give all to friends unless it is in a party setting. I also did not pipe in any custard or creams for the same reasons. However,  I have taken a few (about 10 of them to coat with white and dark chocolate for purposes of picture taking..

IMG_26141

The making of choux pastry is exactly the same as the recipe for Chocolate Éclairs’.  As for the toffee, my toffee is not perfect and slightly too dark as I am using a type of pan with capsule base and the toffee continue to get “cooked” despite I off the heat when it is just light brownish in colour. Therefore, readers are reminded not to use any pan with capsule base for this purpose.

IMG_1851


WHAT IS REQUIRED

Servings : about 70-80 profiteroles

 IMG_2572

Choux Pastry

  • 4 eggs (please disregard one egg in the above picture)
  • 125 grams of unsalted butter
  • 125 grams of plain flour
  • 250 grams of water

For toffee

  • 300 grams of white sugar
  • 150 grams of water

IMG_1853


STEPS OF PREPARATION

  • Pre-heat oven to the hot 200 degree Celsius.

  • Line 2 baking trays with parchment paper or lightly grease the baking tray.

IMG_2577

  • In a sauce pan, place water and butter. Bring to boil. Take away the sauce pan and add in flour. Stir until well mix. Put it back to the stove and continue stirring until the dough leaves the side of the pan and forms a ball.

 collage11

  • Transfer to the whisking bowl of a stand mixer. Beat the dough for about 30 seconds to release the heat. Add in one egg at a time and continue to whisk until the egg are well mixed. Repeat the same for the other 3 eggs.  Do not add the eggs too quickly, otherwise, your dough will be very runny. If it is too runny, beat for several minutes or until thickened again. The end result of the dough should be glossy but not runny.

Collage21

  • Transfer the dough to a large piping bag fitted with 1.5 cm plain nozzle. Pipe the dough in a 1.5 cm diameter balls leaving rooms for expansions. Bake at 200 degree Celsius for 10-15 minutes and reduce the oven temperature to 175 degree Celsius for another 10 minutes or until golden and firm.  Do not open the door during the first 15 minutes as it may deflates the puff when temperature changes and you do not need to open the door when you reduce the temperature.

IMG_25901


  • Once ready, take out from the oven and use a toothpick to poke a small hole on both sides of the éclairs to let the trapped moisture to escape. Cool completely on a wire rack .

IMG_26201

Preparing the Toffee

IMG_2596

  • Put the sugar and water in a pan. Stir over low heat without boiling until dissolved. Simmer over low heat without stirring until the toffee is light golden brown. Note that I have used a pan with capsule base. Even though I off the fire like is seen in the picture, however, the syrup or toffee continues to cook and by the time I used it about 15 minutes later, it become rather dark coloured.  Therefore,  it is advisable that readers do not use this type of pan for preparing the toffee.

IMG_2601

  • Note that if you want the puff to have fillings like custard or whipped cream or you want to coat your puff with fondant icing, chocolates etc., you have to pipe and/or decorate it before you continue with the next step. I have purposely coat a few of the puffs with white and dark chocolate for this illustration purposes.

IMG_2789

  • Have a serving plate and place a piece of baking paper in shape of serving plate. Begin with the larger puffs, dip the base in the toffee and place in the baking paper in a circular shape.

Collage3

  • Gradually build up into a cone shape with the smaller ones at the top. If you prefer, you can decorate the puff tree by drizzle the leftover toffee in a circular pattern on the puff trees.  Let it dry and decorate with your Christmas ornaments if prefer.

IMG_1861

CONCLUSION

Readers can use your creativity to decorate your very own croquembouche. Be it exterior or the interior. Remember, for this illustration, I am using the basic decorations in order to avoid wastage, feel free to pipe in custard, durian cream, whipped cream and etc. if you have adequate guest. If you want to impress your guests, after piping, decorated every puffs with beautiful fondant icing or chocolate patterns before you assemble the croquembouche. It sure will impress your guests. Before I end the post, you can always use the same pastry for making of durian puffs, custard puffs etc. without assembly into the shape of a croquembouche. Hope you like the post today.  Cheers and have a nice day.

IMG_27861


 IMG_1863


  • For more recipes, you can refer to my RECIPE INDEX (updated as at 20 November 2014)  here and you can follow me at PINTEREST or visit the blog’s FACEBOOK PAGE to keep abreast of my future posts.  


IMG_1857


Is there any relationship between Dragon in a boat and a Peranakan Women?….The process of making Nonya Chang revisited…(Part II)

  IMG_43351

Dragon Boat activities are basically carried out during the Chinese Rice Dumpling Festivals (Duan Wu Jie (端午节)in Mandarin)and during these festival, rice dumpling were prepared for offering to the famous ancient Chinese Poet, Qu Yuan (屈原). Though the origin of rice dumpling is from China, however, overseas Chinese have incorporated each countries local elements into their version of rice dumpling. A peranakan lady is also called a nonya and their cooking blends both Chinese traditional and localized Malay elements. This post will detailed the process of preparing the Nonya version Chinese Rice Dumpling (hereinafter refer to as “Chang” or “Nonya Chang”).


This is Part II of the Nonya Chang series and will provide a simplified method of preparing the Chang. Part I of the series talk about the history of Chang and Nonya Chang, the reasons why less and less Chang prepared at home and the reasons why Chang command such a high premium. You can read it HERE.

The process of preparing the Chang will involve the following processes:

1. Cleaning of leaves;

2. Preparation of rice;

3. Preparation of fillings;

4. Wrapping of Chang;

5. Steaming of the Chang

The recipe below is a rather simple recipe that both my wife and myself likes. I have been using this recipe for more than 5 years. Both my wife and myself do not like other ingredients in the commercial Chang  like chestnuts, dried shrimps etc.. and in our first attempt, we agreed that we shall only have 3 main ingredients, pork, mushrooms and candied winter melons and we have been using the same ingredients since then. Therefore, this is a very good starting basic recipe for Nonya Chang.


WHAT IS REQUIRED

IMG_4176

The table below summarizes the ingredients required for making about 30 Chang from 1.2 kg of rice or about 40g of uncooked rice per Chang.

Column one shows the ingredients or material required. Second column shows the measurement in box. I have purposely used the box as a measurement  unit as it is easier for me to measure and can keep my material systematically. I have also included the weight equivalent that I measured during the process for your reference. But my recommendation is to USE THE BOX MEASUREMENT AS IT IS QUITE ACCURATE.

Another way of measuring based on the variable measurement, weight measurements and my experiences are in the following ratios:

RICE (2) : MEAT (2) : MUSHROOM (1) : CANDIED MELON (1)  


Ingredients

Variable measurement

Weight measurement

Diced pork belly (五花肉丁) (a) 1 box* 600g
Minced pork belly (五花肉碎) (a) 1 box 400g
Mushrooms (香菇) (b) 1 box 415g
Candied Winter Melon (冬瓜条) (c) 1 box 480g
Glutinous Rice (糯米) (d) 2 box (about 8 cups of rice) 1200g
Coriander powder (芫茜) (e)  2 bags of 25g each 50g
White pepper(白胡椒) (f) 2 bags of 15g each 30g
Five spice powder (五香粉)(f) 2 bags of 5g each 1og
Chopped garlic & shallot (蒜泥及小葱头碎) (g) 0.5 box (divide into 2 equal portions) 300g
White sugar, dark soya sauce, light soya sauce, salt (白糖,酱清,酱油,盐) (h) to taste
Cooking oil (食用油)(i) 0.5-1 cups
Bamboo Leaves (竹叶) (j) 100 leaves
Reed strings or cotton strings (草绳) (k) 5o strings
Pandanus leaves(香兰叶) (l) 20 leaves
Butterfly pea flower (蝴蝶豆) (m) 10 flowers

NOTES:

IMG_4433

(a) Pork Belly Meat

Traditionally, the pork were being boiled in the water and after cooked, it was manually diced into about o.5 cm cube. However, in order to save time, I have used a mixture of minced pork and diced pork that were sold in the market.

(b) Mushrooms

Instead of dicing the mushrooms into cubes, I have buy the cut mushrooms, soaked it and use a blender to process the mushrooms into small bitable chunks. I know older generations are very particular about the dicing of mushrooms into cubes but for me it is acceptable because all the ingredients will be cut into very small pieces.

(c) Winter melons

This will also be diced into small cubes of 0,5 cm. Usually, the size of meat, mushrooms and winter melons are of the same size. These I have manual diced it instead of using food processor because if winter melons are too small, when cooked, you will not be able to “find “ it when you bite the fillings.

(d) Glutinous rice

Meat to uncooked glutinous rice ratio should be 1:1. This may sound a bit unbelievable because rice will expand when cooked whereas meat will shrink in volume when cooked. The shrunk volume will be made good by volume of mushrooms and winter melons.

   IMG_4434 

(e)  Coriander powder (divided into 2 packets)

Coriander powder IS A MUST in Nonya Chang. It is this ingredients that make Nonya Chang its unique flavour.

(f) Five spice powder and white pepper powder (divided into 2 packets)

These two items are rather optional. It is traditional that we put the white pepper powders but for five spice powders, just a bit (to your taste) will do. Five spice powders is the usually used in the other Bak Chang, it should not be too much until it over “shadows” the aroma of coriander powder.

(g) Chopped Garlic and Onion (divided into 2 portions)

IMG_4173

This again is optional but for my recipe, we used lots of chopped garlics and onions. It is my personal opinion that both the rice and fillings should have the fragrance of garlics and shallots. Just chopped it using a food processor.  

(h)  White Sugar, Dark Soya Sauce, light Soya Sauce, Salt (h)

IMG_4437

Most recipes in the net will give you minimal seasonings and all these seasonings are OPTIONAL and should be adjusted accordingly to suit your families palates. One thing that I have to highlight is that seasonings are important to ensure your rice and fillings are tasty. In additions, if you are boiling the Chang instead of steaming the Chang, even more seasonings are needed as the water will dilute your rice and fillings. You will not want to prepare something that is tasteless and only you know exactly the taste for your family.

(i) Cooking Oil (divide into 2 portions)

These oils will be needed to fry the rice and the fillings. You can adjust the oil quantity accordingly. Depending on the type of meat you are using, if it is pork belly, after you fried for a while, fats will be converted to oil and you only need oil just enough to fried the garlics and shallots. Any excess oil can be drained off before you wrap the Chang.  

(j) Bamboo leaves

IMG_4438

You can either use  the fresh bamboo leaves or the dried bamboo leaves. However, it is difficult to get big size bamboo leaves nowadays. You will need to prepare at least 2 times the number of Chang to be wrapped plus another 10% for spoilages. E.g, using my recipe above, since I am making 40 Chang, I will need 40 x 2 = 80 leaves plus another 20 leaves set aside for reserve use.

You have to clean and soak the dry leaves in water for at least about 1 hours or until you feel the leaves are soft and easy to be twisted in any shape. If you want it to be faster, you can used hot water. Alternatively, just soak it overnight.

Traditionally, Nonya Chang uses the big Pandanus leaves for the wrapping and it is one of the things that differentiate it with other Chang. Even in Kuching, Sarawak, people still uses these Pandanus leaves. However, in Singapore, it is very hard to get hold of these leaves and one leaf will cost you about SGD1 which can be cut into 3 pieces for the wrapping.

IMG_4374pic courtesy of www.sgkopi.com

It is hard to find the images for big Pandanus leaves. I have managed to get hold of some pictures from www.sgkopi.com to share with readers. If we are using Pandanus leaves to wrap the Chang, more works are required. Firstly, you have to cut the leaves into the sizes that you like. It will be followed by dethroning the leaves and you have to peel off certain veins such that the leaves are softer. It will then be washed and “blanched” in the hot water to soften the leaves.

So, in order to save time, the big bamboo leaves imported from China is still preferred.

(k) Strings

Since I managed to get hold of the reed strings or straw strings, I preferred to use them. The reasons no other than preserving the traditions. If you can’t, just use cotton strings (as used in the cross stitch or knitting of table cloths or dish cloths) or nylon strings. If you are a newbie , I would advise to USE THE COTTON STRINGS as it is the easiest to tie and reed string will break. as for the nylon strings, you have to make it thinner and it is not advisable to boil under high heat.

IMG_4367

Note that the 1st picture is using Pandanus leaf plus a bamboo leaf and uses nylon strings; the string used in the second picture is using a cotton string and the 3rd picture is my Chang wrapped using Bamboo Leaves and reed strings.

(l) Pandanus leaves

As it is hard to get the big Pandanus leaves, I have used some small Pandanus leaves which was cut into small pieces for uses in the cooking of rice and can be recycled by wrapping inside the Chang.

(m) Butterfly Pea Flower (optional)

The butterfly pea flower shall be used for the coloring and it is optional. As far as I know, besides coloring the rice into blue or indigo, the flower do not have any other purposes in the cooking. If you plan to use this, soaked the flowers in hot water for 1-2 hours, let the color diffuse into the water and use these water to soak the rice before cooking. In my demonstration, I did not use these flowers.

IMG_4440

These are the pea flowers that I just pluck this morning and after submerging into the water for an hour, the colour of the water become bluish. After one hour of soaking the rice, the rice is slightly bluish. As I have only used 4 flowers for demonstration purposes, therefore the colour is slightly lighter. If you insist to have blue colour but do not have any pea flowers, then, use blue colouring.


STEPS OF PREPEARATION

Cleaning of leaves and strings

  • Clean the leaves using a new sponge and wipe the leaves. Soak the leaves in hour for 1-2 hours. Use hot water if you want the leaves to be soften faster.

IMG_4105


Preparation of Glutinous Rice

If you looked at the recipes in the net, they are likely to advise you to soak the uncooked rice over night or at least a few hours. However, as this is the short cut method, I have steamed the Chang instead of the boiling the Chang. I will cooked the rice and therefore no soaking of uncooked rice is required.

IMG_4175      

  • Wash your rice with clean water and sieved it when done.
  • If you want to use the pea flower, you will have to soak the rice in advance the let the blue colour penetrate into the rice.

IMG_4180

  • In a big frying pan, pour in some oil and put half of the chopped garlics and shallots. Stir fry over medium fire until the fragrance begins to spread in the kitchen;
  • Add in half of the coriander powder, white pepper and five spice powder to the mixture and continue frying until the garlics and shallots start to turn brownish. This is pretty fast and you have to carefully monitor it, otherwise, it will get burnt.

IMG_4181

  • Add in the glutinous rice and fried until well mixed (not cooked and it should be quite fast). Add in seasonings and take a few uncooked rice to taste.
  • I have to remind again that you should be rather heavy handed with your seasonings, otherwise, the rice will be  tasteless.
  • Cut the Pandanus leaves into small pieces and throw into the uncooked rice.  Transfer half to your rice cooker. (Half of the rice is about 4 cups which is just nice for my rice cooker. However, if your rice cooker can cook 10-12 cups of rice, you can just put all the uncooked rice and cooked it once)
  • Add water (about 1 cup of uncooked rice with 1 cup of water). Stir it to mix well. (Glutinous rice is sticky and when you fried it, your seasonings may be stick just one part of the rice. Therefore, this step is required to ensure all seasonings are evenly spread to the rice).
  • Select “glutinous rice” function in the rice cooker and it will takes about 45 minutes to 1 hour to cook. Occasionally stir the rice to see if the bottom of the rice is burnt, if yes, stir it to prevent further damage;
  • After about an hour, the rice is cooked. Transfer to a big container, set aside and let it cool before the wrapping starts.
  • If you are unsure about the water needed, add less water first, Then add more water when you find that it is not cooked or start to get burnt. It is ok to have a bit of rice uncooked because you will continue to cook them when you steam the Chang later on.

  • Try to take a small spoon and scope some to taste. If you find that it is not tasty enough, add more seasonings at this stage to salvage your rice. But use liquid seasonings rather than solid seasonings. E.g. use light soya sauce instead of using salt at this stage.


Preparation of fillings  

IMG_4358

  • In a big frying pan, pour in some more oil and put the other half of the chopped garlics and shallots. Stir fry over medium fire until the fragrance begins to spread in the kitchen;
  • Add in the older half of the coriander powder, white pepper and five spice powder to the mixture and continue frying until the garlics and shallots start to turn brownish.  
  • Add in the chopped mushrooms and fried a few minutes over medium until you can smell the fragrance of the mushrooms. Add in the diced pork belly and fried until say 50% cooked. It is not necessary to be fully cooked because the frying will continues.

IMG_4359

  • Add in the minced meat and fried to say about 70% cooked. Note that the minced meat was not added together with the diced pork belly because minced meat is easier to cook.
  • I preferred to add in the seasonings along long the process because I want the fillings’ colour to be dark brownish. The earlier you put it your dark soya sauce, the easier your meat will become darker;
  • Add in the diced candied winter melons. Mixed well and add in sugar and other condiments.
  • Remember that the fillings is quite a lot and you have to be heavy handed with your seasoning.
  • Off the heat when all the fillings are well mixed and the colour is even. Not need to be extremely concern whether the fillings is well cooked. Any uncooked fillings will be cooked again during the steaming process.

IMG_4360

  • By now you should note your filling is quite oily. Get ready a container, place two spoons on the bottom and put another bowl upside down on top of the spoons. Transfer the fried fillings to the box and let it cool before you wrap the Chang.
  • The main purpose of this step is to let the oil dripped down to the bottom so that your fillings on top will not be greasy. You can then throw the oil away. This is the traditional method that my mum used to do. However, you can try just to sieve it and let the oil dripped out.


Before wrapping the Chang, let’s recap what you should have in the table.

IMG_4464

Wrapping of Chang

The following pictures was taken by my daughter as I only have two hands cannot capture the image. So it may not be that clear.

IMG_4465

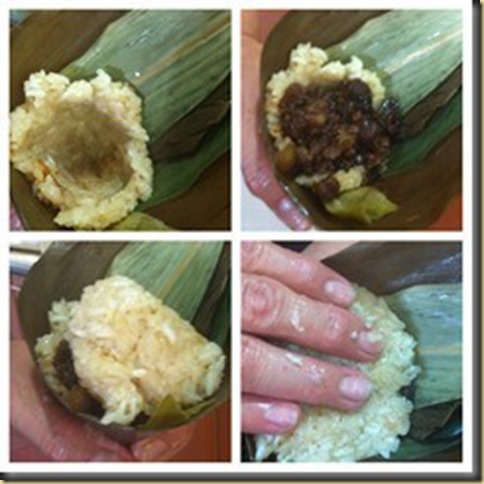
  • Well, since you are using cooked rice, that makes your life easier, you can shape the Chang first.
  • On a cutting board, roll the Chang into a long roll, divided it into about 60 g each and shaped it into a ball.

img_4460_thumb

  • Take two bamboo leaves and make it in a shape of a cone.
  • Take one ball and try to make a hole in the middle. If you find that it is sticky, just dip your finger into some clean water and pat it on the glutinous rice.
  • Take a spoon and scope some fillings to fill the cavity;
  • Take another ball and flattened it and cover the fillings. If you want to add Pandanus leaves, add it now;
  • Put some water in your hand and press the rice downwards until you feel that there are no air between the rice and the fillings.

IMG_4462

  • Press the tail of the bamboo leaves to cover the top portion and shape the tail like a swallow tail;
  • Twist it side wards to follow the shapes of the Chang. By now, your Chang should be in triangular shape and you should be able to hold the Chang with one hand.

IMG_4178

  • Take a string and looped around the Chang tie using a live knot.
  • If you find that Chang are not really  in the shape you want, try to adjust it now.  Loosen the string or adjust the bamboo leaves to shape it to the desired shape.
  • After wrapping, check that there are no holes resulted from rough handling and there are small areas that are not covered with the leaves. These are “loopholes” that will create problems for you. If you boiled it , the rice will flow out (not all of course) and all the seasonings will be diluted with the water. It will also become sticky. JUST ENSURE THAT THERE ARE NO HOLES IN THE CHANG.
  • If you are newbie, don’t be greedy. Wrap a smaller Chang first, smaller is easier to wrap.

I hope that you can understand what I have described above and I have a YouTube video below to show you how to make the Chang at Zhong Zi- How to wrap Chinese sticky glutinous rice dumpling. Note that this video is sourced from YouTube and courtesy of Ms Brenda Chiew.

How to wrap Chineses Sticky Glutinous Rice Dumpling


If you are still not confident to wrap the Chang, why not try this:

IMG_4384

I  press my Chang in the shape of a bowl and steamed it. If you are not particular about the shape, you can still taste the Chang. 


Steaming the Chang 

  • Steam the Chang for about 10-15 minutes to let the glutinous rice to take shape. Note that unlike the traditional method where you will need to boil the rice which shall take at least 2-3 hours.
  • Your Chang will be ready and serve it when cool such that the glutinous rice will not be overly sticky.

IMG_4466


If you look at the Chang that I have prepared, you will note that the rice stick to each other meaning the rice is very soft. This will be better for those that have gastro intestinal problems.

The light greenish colour at one of the corner is the green tea bean paste that I have added since I have some at home. There are a lot of Teo-Chew adding “Oni” or “芋泥” (a type of yam paste) to the Chang and the taste is awesome.


CONCLUSIONS

This post has taken me 2 days to write and its getting longer. I may have a supplementary short post to highlight to you some tips on making the Chang. Once again, I have to stress again and again that my way of writing food preparation series is not really asking you to follow exactly my recipe. I would shared with you my steps in a simplified manners. I hope that readers can via my post, learn some thing, incorporate some of my steps for your convenience and create your own versions.

I hoped that readers can try the method as mentioned in this post to make your own Chang and clear some misconceptions of Chang making. This method have several advantages:

1. Considerably shortened the preparation time.

  • Using the rice cooker to cook the rice and steaming the Chang will at least saved 4-5 hours of preparation time;
  • The usage of food processors to process your garlic, shallots, mushrooms  and meat will save at least another 2-3 hours;
  • The usage of box measurement will cut short your measuring time.

2. Using cooked rice instead of raw rice will increase your chances of success.

  • Cooked rice is easy to wrap into your desired shape and it will not leak out from the leaves. Tying the cooked rice Chang will be much easier than the raw rice Chang as it is softer.
  • Usage of cotton strings will also help to ensure the Chang can be tied and no hole in it.
  • Usage of bamboo leaves instead of traditional big Pandanus leaves will also shortened the process of cleaning the leaves and easier to wrap;  

Take your first step to make some Chang for your family today. Whatever the output will be, your family will appreciate your thoughts and giving all the supports you required. Cheers.


For more recipes, you can refer to my RECIPE INDEX  here and you can follow me at PINTEREST or visit this blog’s FACEBOOK PAGE .
 

Capture14222[2]

If you are a Interest user and you are interested to have more recipes, you can join or follow this Pinterest Board set up by me  where there are more than 250 recipes worldwide and pinned by various bloggers: FOOD BLOGGERS AND FOODIES UNITED PINTEREST BOARD

img_4466_thumb1

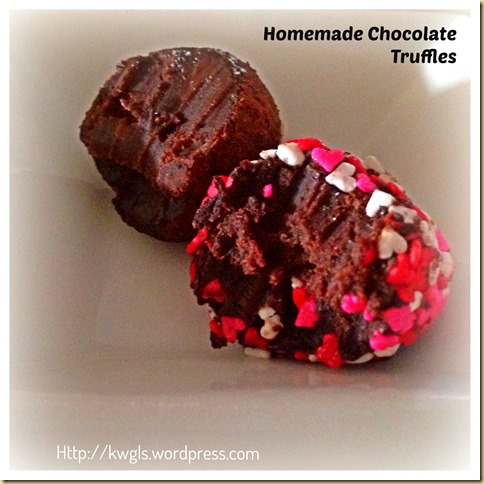
Chocolate Truffles As A Christmas Gift…. Chocolate Truffles

IMG_1533

Updated post on 17-11-2014

Decided to take some new picture for this post and prepare Baileys almond truffles.. Preparing this is definitely not difficult but a bit messier. Any attempt with melted chocolate is messy as  I would say. Just remember to use hot water to wash your utensils.

IMG_1546

For this batch, instead of coating all with cocoa powder, I have decided to coat some with melted chocolate. There is no big deal for this. Just have some cooking chocolate, microwave in the microwaveable bowl for 30 seconds. Take out your cold truffles, roll against the melted chocolate and it can dry rather fast at room temperature.  Melt some white chocolate in microwave, transfer to a piping bag, cut a small hole and pipe the white chocolate with your desired pattern on the chocolate coated truffles…

IMG_1539


IMG_22681

INTRODUCTION

When I am writing my “Homemade Macadamia Chocolate” post yesterday, it reminded me that I have some leftover chocolate that I want to use it to make some Chocolate Truffles. Oh, my waist line is expanding uncontrollably since I started blogging half a year ago despite I gave away so many bakes and sweets.. Ha-ha. However, I still can’t stop exploring recipes that I think are interesting to share with readers.

IMG_22821

It may not be common in this part of the world to home make chocolate truffles, however, you may heard of the world famous chocolate truffles such as Godiva, Lindt’s Lindor Truffles, Chocmod Truffles, Carnat Belgium Truffles etc… As usual, let’s learn together about this famous sweets from Wikipedia:

“A chocolate truffle is a type of chocolate confectionery, traditionally made with a chocolate ganache centre coated in chocolate, icing sugar, cocoa powder or chopped toasted nuts (typically hazelnuts, almonds or coconut), usually in a spherical, conical, or curved shape. Other fillings may replace the ganache: cream, melted chocolate, caramel, nuts, almonds, berries, or other assorted sweet fruits, nougat, fudge, or toffee, mint,chocolate chips, marshmallow, and, popularly, liqueur.” (Source: http://en.wikipedia.org/wiki/Chocolate_truffle)

IMG_22801

Making chocolate truffles, depending what you want, is definitely not difficult and ingredients are simple. However, as with all other bake items deal with chocolate, it is MESSY. What I am sharing is a simple version of chocolate truffles. Traditional truffles were coated with cocoa powder, resembling those real truffles (a type of very expensive mushroom) grow in the forest, squeezing itself out of the dust and dead leaves in the forest.

IMG_23091

In fact, it came across my mind to get some 24 carat gold leaves to sprinkle or put on the truffles, however, the costs are just too high for my blogging purposes. It costs SGD102 for 25 edible 24 carat gold leaves. I shelved the idea of having gold leaves…Taking pictures for these brown chocolate floury balls were extremely difficult. After half an hour of taking the pictures, I felt that the picture are “ugly” and I decide to coat the truffles with additional dark chocolates, another messy attempt. Well it looks better than the chocolate mouldy balls but is still a brown ball.

IMG_1544

I then decided to use the leftover melted chocolate to coated with some beautiful candy beads (if there is such a word) and came out with my 3rd version, candy beads coated chocolate truffles. I could still have many alternatives if I want to, to coat with chopped nuts, shelf chocolates, desiccated coconuts and etc.… But I think that is adequate to share with readers about the process of home making some chocolate truffles. Well, images are still less than satisfactory.

IMG_22701


WHAT IS REQUIRED

Recipe adapted from: Chocolate Truffles

IMG_22481

  • 250 grams of compound dark chocolate
  • 1/2 cup of normal whipping cream or heavy whipping cream
  • 30 grams of unsalted butter, at room temperature
  • 2 tablespoons of hard liquor such as brandy, whisky, Bailey, Tia Maria etc.. ( I have used Bailey) – not in picture

For coating, either or all (Not in picture)

  • 3 tablespoons of cocoa powder with 3 tablespoons of icing sugar
  • 50 grams of compound dark chocolate, melted in microwave for 1-2 minutes.
  • Adequate of candy beads (of your choice) for coating

IMG_22761


STEPS OF PREPARATION

IMG_2253

  • Melt the chocolate in the microwavable bowl for 1-1.5 minutes (depending on your microwave). Stir it until smooth. When the melted chocolate is still hot, add in the butter and normal cream. Stir using a spatula or balloon whisk until smooth. You have to be fast in your action because it can solidify rather easily.

IMG_2258

  • Transfer it into a piping bag, pipe it into a plate or baking tray with baking paper. Chill the chocolate in the refrigerator for 30 minutes. Well, the timing is rather subjective. As long as there is a shape and you can easily take out from the parchment paper, it is consider as okay for the next step.

  • There is no picture for the following steps as my hand is full of chocolate but it is not hard to visualize the procedures.

IMG_22891

  • Before you take the truffles out of the refrigerator, get ready a bowl or some container and put your ingredients for coating (cocoa powder + icing sugar, or melted dark chocolate, or candy beads).

IMG_22641

  • Take the piped chocolate out from the refrigerator, use your hands to roll into a ball. It will still be a bit sticky. However, if it is too sticky, put it back to the refrigerator and wait for another 10-20 minutes. Otherwise, put some of the coating in your hand and continue rolling. Remember, as it is a ganache (meaning chocolate plus cream and butter), it will not turn hard like pure chocolate. Immediately after you rolled, just coat the truffle with the cocoa powder/candy beads in the bowl. As for dark chocolate coating, just drop the balls into the melted chocolates and take it out using a fork and let the excess chocolate the drip through the fork.

IMG_22911

  • Remember that it is common that after your rolling, your hands will be full of soft chocolate which is rather messy. Don’t stain your cloth and drip all over the place. You can consider using a glove if you want to. When you clean your utensils, splash some hot water to your utensils before you wash with detergent.

IMG_1537

  • Pack in nice boxes for guests or serve as desserts after dinner. If you are adventurous enough, you can try to add fillings like waffles, coconut fillings, nuts and change the flavour to strawberry, coffee and etc..

IMG_23131


CONCLUSION

Another idea for your Christmas gifts. Remember, anything deal with chocolate is messy but I believed your guest will you impressed by your hard work. Yes, before I end, just one word of advise, prepare this to give it to your dearest ones, otherwise, I am not responsible for your expanding waist lines.. Ha-ha

IMG_1535

Cheers and have a nice day.

IMG_23191


  • For more recipes, you can refer to my RECIPE INDEX (updated as at 15 October 2014)  here and you can follow me at PINTEREST or visit the blog’s FACEBOOK PAGE to keep abreast of my future posts.  

IMG_23071

“Homemade” Macadamia Chocolates Are Definitely A Presentable Gift..

IMG_14771

INTRODUCTION

I have prepared these chocolates for my kids to bring back to hometown and gave to relatives as hand gifts. Not long after they arrived, my relative called and “ordered” another few more boxes of these macadamia chocolates. She is schedule to have a business visit to Singapore on early December and to save her trouble of finding the suitable presents, she had decided to order these homemade macadamia chocolates as hand gifts for her colleagues.

IMG_14411

What is so great about these chocolates, I have to be frank that there is nothing that great. It is just a bit of hard work of remoulding the chocolates and making it unique  and presentable as gifts. Preparation is definitely not difficult. It is the thoughts that counts. What I am sharing now is not really a recipe but some way of re-moulding the chocolate which in my humble opinion, make it presentable as hand gifts particularly during Christmas. Don’t forget, variations are many and packaging is of utmost importance.. Frankly speaking, I am not really satisfied with the packaging that I have as I am short of time to source the type of packaging that I want.

IMG_14601


WHAT IS REQUIRED

This is not really a recipe, variations are many and very much depends on individual taste buds. Therefore no detail quantity will be listed here.

IMG_1427

  • Some dark compound chocolate
  • Some white chocolate
  • Some nuts of your choice (I use chopped macadamia nuts because my chocolate mould is too small to accommodate whole nuts).
  • Chocolate mould.

IMG_14641


STEPS OF PREPARATION

IMG_1434

  • Heat the chocolates in the microwave oven for about 1-1.5 minutes. The timing very much depends on the temperature of the chocolate (from fridge vs. at room temperature) and power of your microwave oven. Stir slightly to ensure all are melted and become smooth.

  • Put the chocolates into two piping bags (one for dark chocolate and one for white chocolate). Cut  a hole at the tip of the piping bag and pipe the chocolates to in your desired pattern. It can be half white and half dark chocolate, or top is white chocolate and the bottom is dark chocolate. In between the chocolates, add some nuts of your choice.

IMG_14661

  • Chill the chocolate in the refrigerator for about 5 minutes and de mould the chocolate. How to de-mould will very much depends on the types of mould you have. As mine is very thin plastic mould, the de-moulding is extremely easy by bending the plastic mould.

IMG_14491


CONCLUSION

Another gift ideas for your Christmas. Trust me, it is not the chocolate that counts. It is the thought and hard works that the recipient will appreciate. Don’t forget a presentable packaging. That will definitely your simple homemade chocolate into a classy and elegant gift.

Hope you like the post today. Cheers and have a nice day.

IMG_14451


For more recipes, you can refer to my RECIPE INDEX  here and you can follow me at PINTEREST or visit this blog’s FACEBOOK PAGE .
 

Capture14222


If you are a Interest user and you are interested to have more recipes, you can join or follow this Pinterest Board set up by me  where there are more than 250 recipes worldwide and pinned by various bloggers: FOOD BLOGGERS AND FOODIES UNITED PINTEREST BOARD

Four-Seasons-JPG29622223222232223222

For Four Seasons Blog Hop #27 (Nov 21) where I am the Co-host, please join us for the party where you can get a lot of the family related posts. Please click the above logo to enter your post.

IMG_14511

Four Seasons Blog Hop #27

Welcome to the Four Seasons Blog Hop

A party where we can celebrate the greatness that each season brings to our lives.

So Let’s Get This Party Started!!Let's Get this Party Started Share your  food creations, gardening, clever projects, tablescapes, decorations, party themes, and inspirational knowledge … Ok, you get the point.  Join us every Thursday (opens Wednesday evening at 6:00 pm). Please stay for awhile and show some love to the guests, join us in the fun and grab a button. Four Seasons Blog Button

 
We will share your posts in a variety of ways on Pinterest, Twitter, Facebook and Google Plus.  We will also have features of the week! Be sure to follow our Four Seasons Board on Pinterest!

By participating in this linky party, you agree to have your posts shared on social media and Pinterest and to receive email and Google notifications for reminders about the party. If you don’t want to receive notifications, please let us know.

FEATURED

Powered by Linky Tools

Click here to enter your link and view this Linky Tools list…

Not A Lapis Legit But A Rich Dense Lapis–Lapis Horlicks (Horlicks Layered Cake)

IMG_2468
UPDATED POST ON 1-12-2014
 
When readers are reading this recipe, they will think that the cake will be very sweet. Today, I have decided to try a version which is less sugar, less butter and less eggs.
IMG_2462
 
My verdict is I still prefer the original recipe or recipe 1. But for those who are health conscious, you can always try recipe 2 (highlighted in red) and the cake is slightly drier, less dense and definitely not sweet.
 
IMG_2466


IMG_21751


 INTRODUCTION

I came from Sarawak and Sarawak is famous for its layered cake or kek lapis. A Google about Sarawak Kek Lapis will give you all sorts of impressive kek lapis in terms of designs and colour. Kek Lapis is rather new in Sarawak and introduced by the Indonesians in late 1980’s. However, within these 30 over years, the kek lapis industry in Sarawak has transformed significantly. 

IMG_21561

Wikipedia even have an article on Sarawak kek lapis and it was written that:

“Kek Lapis Sarawak is a layered cake, traditionally served in Sarawak, Malaysia on special occasions. In the Malay language, they are known as Kek Lapis Sarawak, Kek Lapis Modern Sarawak, Kek Sarawak or Kek Lapis. They are often baked for religious or cultural celebrations such as Eid ul-Fitr,Christmas, Deepavali, birthdays and weddings. People in Malaysia practice an open house on festival day. A unique feature of Sarawak’s open houses is the modern layered cakes. Modern Sarawakian layered cakes were introduced to the people of Sarawak from Indonesia officially around 1988.The Indonesian version has been known since the Dutch colonial era; its most famous varieties are the Lapis Legit, a spice-flavoured multi layered cake, and Lapis Surabaya. In 2011, the history of Sarawak layered cakes once again change by a new generation (Sarawakian) of innovative natural layer cakes evangelist named Kek Lapis Qalas Qalas. By introducing modern design and traditional layer, coupled with new flavours which inspired from home-made inspiration, each layer is tastefully interlaced with various natural flavours in between the original recipe, modern taste and knowledge from their ancestor.” (Source: http://en.wikipedia.org/wiki/Kek_Lapis_Sarawak)

Besides the appearance, home made kek lapis have a lot of other flavours. Other than the lapis legit (original layered cake) and the common one like prune and cheese kek lapis, there are very innovative flavours like chocolate peppermint, almond milk, strawberry, fresh yam flavoured, cheese flavoured, hawthorn candy layered cake etc. etc. etc.… So in the last 30 years, we have been exposed to various types of kek lapis and during Chinese New Years,  it is very common that a  household have 4-5 types of kek lapis to serve its visiting guests.

IMG_21831

The recipes of Sarawak lapis are many and varies in terms of number of eggs/egg yolks used, method of preparation (egg separation method vs. creaming, steaming vs. baking), flavours and etc.

IMG_2464

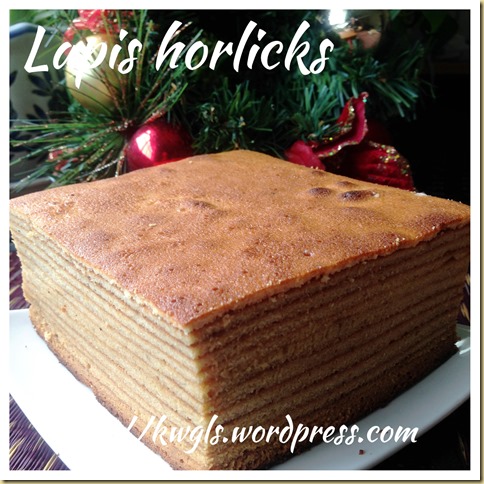
Though I have many recipes with me, however, I am reluctant to take a step to prepare them due to its large quantity of egg yolks needed. I continue searching and I stumbled across this Horlicks lapis that uses only 10 whole eggs. Immediately when I saw the word Horlicks, it caught my attention. Horlicks lapis is definitely not new to me. In fact, my favourite lapis is Coffee Horlicks flavour where one layer is Horlicks and another layer is coffee flavoured. For those who are not familiar with Horlicks, it is a type of breakfast malt drinks. You can substitute with cocoa powder if you prefer.

IMG_21201

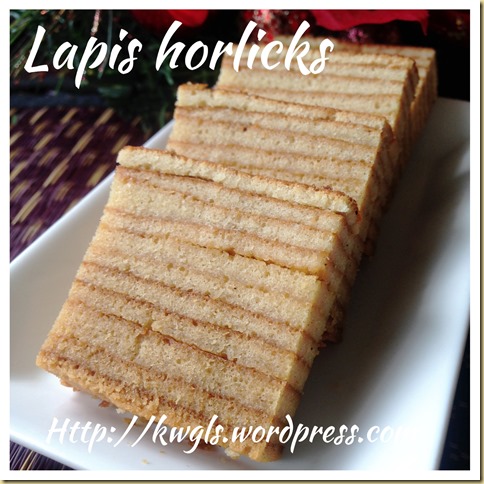
Well, for those who are new to Sarawak lapis, the texture of this lapis is slightly different from the light fluffy type of lapis. It is rich, dense, soft and moist. It is not difficult to “visualize” the texture if you analysed the ingredients. One can of condensed milk in any cake will make it dense. Don’t worry, it is not overly sweet as less sugar have been used. It flows down the throat and it is extremely creamy and buttery. The beauty of this lapis is it uses 10 whole eggs as compared to those that uses 20 egg yolks and ovalette.

IMG_21921

IMG_2470


WHAT IS REQUIRED

Recipe adapted from : Kek Lapis Horlicks

IMG_2082

Recipe 1 (original version)

  • 240 grams of plain flour
  • 200 grams of Horlicks
  • 180 grams of castor sugar or brown sugar (sugar reduced)
  • 385 grams of butter
  • 10 whole eggs
  • 1 can of condensed milk (about 380-400 gram)

Recipe 2 (healthier version)

  • 200 grams of plain flour
  • 200 grams of Horlicks
  • 100 grams of castor sugar or brown sugar (sugar reduced)
  • 350 grams of butter
  • 8 whole eggs
  • 1 can of condensed milk (about 380-400 gram)

Others

  • A ladle
  • One fondant icing smoother

IMG_21671


STEPS OF PREPARATION

  • Preheat the oven to 200 degree Celsius.

  • Grease a 9” x 9” square tin.

IMG_2087

  • Cream the butter and sugar until light and pale. Add in one egg at a time and ensure that the egg and butter mixture are well mixed.

IMG_2092

  • Add in the condensed milk, use the machines to slightly stir it. Sift in flour and Horlicks and stir until well mixed.

IMG_2094

IMG_2099

  • Heat the greased baking tin for about 1 minutes and turn the oven to top grill mode. Put 2 ladles of batter in the tin and ensure that it is equally distributed in the tin. Bake for 5-6 minutes until the surface start to turn brownish. Take out and use the fondant icing smoother to roughly press again the cake (to ensure that it is flat). If you note of some bubbling, use a toothpick to poke the hole and let the trapped air escape.

IMG_2103

  • Put another 2 ladles of batter, bake until brown and press it slightly. Repeat the same procedures until all the batters are finished. After all the batter have finished, for the last layer, reduce the oven to 160 degree Celsius and resume to the “top heat and bottom heat” mode, bake for additional 10-15 minutes. Cooled completely before cutting. Keep in refrigerator for up to at least 2 weeks.

IMG_2107

IMG_21811


CONCLUSION

If you like moist dense cake, this lapis is for you. It is not difficult to make but a bit laborious. However, the hard work is worth the wait. I will possibly share another  post on the traditional lapis legit where egg separation method are used for the preparation. You can then see that the texture of the cake will be slightly different.

IMG_21891

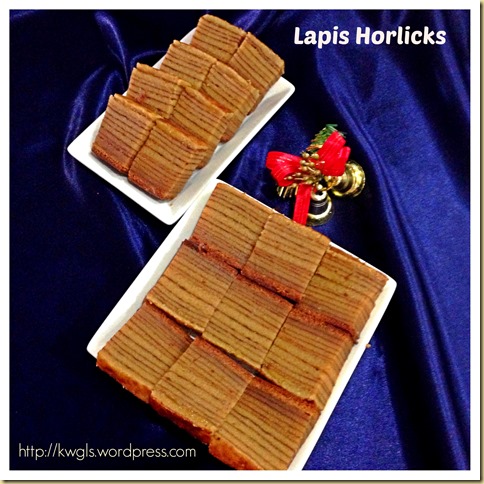
It brought fond memories when I cut and ate the cake. I have been cutting this type of cakes for donkey years during the first day of Chinese New Year. Putting them in nice serving plate waiting to serve visiting guests. This cake is also a celebration cake during Christmas in Sarawak. May be you want to try making one to serve your guest?

IMG_2460

Hope you like the post today. Cheers and have a nice day.

IMG_21281

IMG_2472


IMG_21871