What I cooked today (家常便饭系列)- 30-6-2013

IMG_5875

On 30 June, 2013

White rice served with:

30-Jun Watercress Pork Rib Soup  西洋菜排骨汤
30-Jun Braised Chicken Wings 酱鸡翅
30-Jun Grilled Sanma (Pacific Saury) with lemon  柠檬烤秋刀鱼
30-Jun Chinese Water Spinach fried with fermented beans 蕹菜炒豆瓣酱

The last two days were full of functions and no home cooking were done. Today, I have done my weekly marketing. You will start to see perishable vegetables will start appearing in the beginning of the week. Usually, watercress  and Chinese water spinach was cooked in the day of purchase .

Recently, Singapore wet market was flooded with “Japanese Restaurant” fish and today, i was surprised to see thawed pacific saury (sanma). The price is rather competitive and 4 fishes (8 pieces of about 4-5 inches long) cost about SGD 4 averaging out is SGD1 per fish which is even cheaper than the black promfret.

Today, my wife fried the Chinese spinach (kangkong). As she like her dish spicy, she had prepared two plates, one with chilli and another plate fried with Chinese fermented beans. THE PRICE IS INCREDIBLY LOW TODAY. 1 BUNDLE ONLY COST SGD 20 cents but must purchase in a pack of 5. We cooked 3 packs and gave the other 2 packs to my neighbours. Do you concur with me that the price of food items are relatively cheaper than in Malaysia (but of course without any currency conversion).

This type of post may appeared dull if you looked at it on a daily basis. However, if you read on a weekly basis, you will start to see patterns that may be useful for those who want some dish rotation ideas..Cheers and have a nice day!

Burnt, Hot, Spicy– I am running away!!!– Understanding Chilli Pepper and Making Of Chilli Sauce

IMG_5863

I am not running away, in fact, I like chilli peppers. The spicier the merrier.

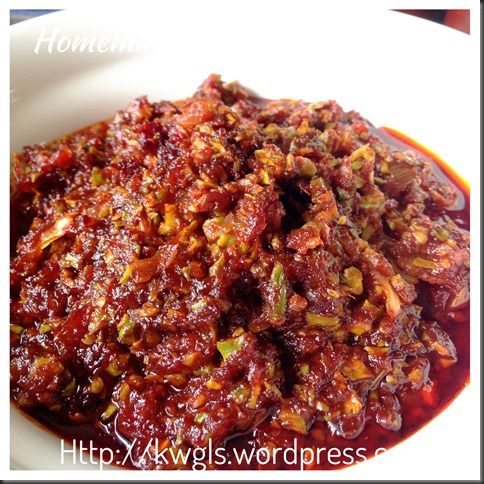
I like to make my own chilli sauce, I will find the spiciest chilli I can for the making of my chilli sauce. I have to make my chilli sauce at least 3-4 times a year making and average out using about 1 kg of chilli each time. I usually prepare my chilli sauce in its base form. Thereafter, I used it for a dip or for cooking. When I do not have appetite to take my meals or when the meals is not tastier, yucky, one scope of my chilli sauce will help me to finish the entire meals.

IMG_2634

This post will have 3 sections.

  • Section 1 – types of chilli that you can get in Singapore and Malaysia, and its spiciness.
  • Section 2 – my simple way of making the chilli sauce 
  • Section 3 – what will happen if you have a chilli burn!

IMG_2635


SECTION 1 – CHOOSING THE CHILLI

It is rather common to hear that people (particularly man)  comparing how well they can take the spiciness of a food. They will use the ability to take spiciness of a food as a measurement of “manliness”. However, pardon me, with no adequate knowledge on the objective measurement of the spiciness of chilli that they are eating, such argument usually ended up with boosting oneself without letting go individual own stands.

Chilli’s or pepper’s spiciness, in fact can be measured by  Scoville Heat Unit (“SHU”) that in turn measured by the capsaicin in a given species of the chilli. Lets learn some fundamentals of chillies as extracted from www.artofmanliness.com.

“Peppers, often known for their heat, or spiciness, are ranked according to the Scoville Scale. The Scoville Scale, created by Wilbur Scoville in the early 20th century, measures the amount of capsaicin in a given species of pepper. Capsaicin is the chemical within peppers that makes them spicy. The Scoville Heat Units (or SHU) of a pepper represent the number of times the capsaicin within the pepper would have to be diluted before it would be undetectable. For example, you would have to dilute the capsaicin found in your average jalapeno 2500 times before it would seemingly have no spiciness at all, giving it a SHU rating of 2500”  Http://www.artofmanliness.com/

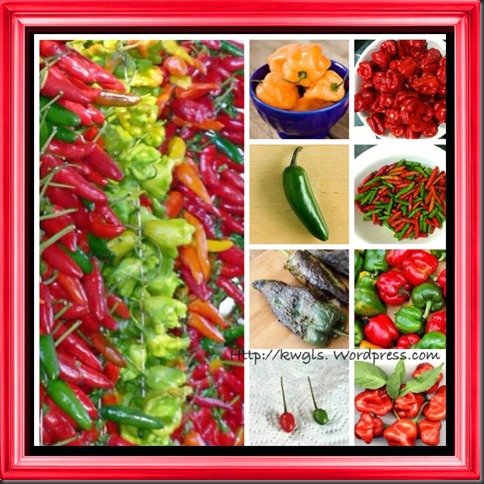
The picture below will show you various types of chilli and its spiciness.


Source : http://chilibloggen.se/category/chili.html


So, from the above picture, the common chilli that was commonly consumed in Malaysia and Singapore were summarized below:

Bell Pepper/Capsicum/Red Pepper SHU = 0
Cayenne Pepper/Red Chilli SHU = 60,000
Thai Chilli/Bird Eye Chilli /Chilli Padi SHU = 150,000
Habanero/Red Savina SHU = 350,000

The spiciest chilli is called the Trinidad Scorpion Moruga Blend,  endemic to the district of Moruga in Trinidad and Tobago, is currently the world’s hottest chilli pepper cultivated. According to the New Mexico State University, the Trinidad Scorpion Moruga Blend ranks as high as 2,009,231 SHU on the Scoville scale, making it the hottest chilli pepper in the world to date. Paul Bosland, a chilli pepper expert and director of the Institute, said that, “You take a bite. It doesn’t seem so bad, and then it builds and it builds and it builds. So it is quite nasty.


Source: http://en.wikipedia.org/wiki/Trinidad_Moruga_Scorpion 


SECTION 2 – MAKING THE CHILLI SAUCE

I usually prepare this chilli sauce in its base forms with minimal condiments or seasonings. Vinegar and some salt is used to preserve the chilli and prevent it from turning bad.

I have added different condiments with the base chilli sauce so that it can be used for dips for different dishes or for frying dishes. For example:

Chicken Rice Chilli Base chilli sauce + ginger + calamansi skin + garlic + seasonings
Popiah Chilli Nothing added
Sambal Belachan for frying Chinese water cress etc. Shrimp Paste (Belachan) or small prawns or anchovies + lemon grass + shallots
Dips for fish Kalamansi + sliced garlic + dark/light soya sauce
Fried rice Nothing added
Roast pork Base chilli sauce + sugar + garlic, ginger + fermented bean curd
Braised duck (Teochew) Chopped garlic + white vinegar


WHAT IS REQUIRED

IMG_5815

  •  Some chilli of your liking and tolerance : I have brought these 3 types of chilli from Kuching, Sarawak when I walked by the wet market in Kuching. I was extremely happy to find some Habanero chilli (SHU: 350,000 units) and I have bought all the stock that the stall owner had. These Habanero chilli are rather difficult to buy and it is more costly than the other types of chilli.  The other two types of chilli are Thai Chilli or Bird Eye Chilli (Chilli Padi in Malay Language) (SHU:150,000 units) and some rather common Cayenne pepper (SHU:60,000 units).
  • White Vinegar – adequate to cover the volume of blended chilli. White vinegar serves as a preservative in this recipe. As the blended chilli is not cooked, in order to avoid the chilli paste from turning bad, white vinegar is used.
  • Salt – to taste and its role is also act as a preservative agent.

 IMG_8366


PREPARATION STEPS

The steps are rather simple and basic. But one important point to note is that ALL INGREDIENTS, PREPARATION EQUIPMENT AND CONTAINERS MUST BE CLEAN. If possible, sterile your container with hot water but make sure that it is dry before you place the chilli sauce in it. This is to prevent the growing of bacteria in your uncooked chilli sauce.

IMG_5833

  • Wash all chilli and if possible, dry it under the sun. Otherwise, pat dry using a dry cloth. 
  • Place all dry chilli into a food processor and processed it until the smallest chunks possible.
  • Note: If your blender is able to cut the chilli until the size that you want, you can by pass the use of food processor. Food processor is used here because Habanero chilli is quite big and it take quite it a while to cut it small, therefore, I opt to use a food processor and transfer into the cut chilli into the blender.

IMG_5835

  • Transfer the chilli chunks into a clean blender. Add some salt and white vinegar. The amount of white vinegar shall be at least adequate to cover the chilli chunks.
  • Blend at high speed until fine.
  • Carefully scope out the chilli sauce and place in a clean sterilized container . Add more vinegar if desired. Wait for the chilli to cool until room temperature, close the lid and keep in the fridge. (Note: when you grind the chilli, the temperature will increase, therefore, in order to avoid any unwanted water vapour in your chilli sauce, it is best that you let them cool until room temperature before you store them.)

IMG_2665

If you do not want the chilli to be that spicy, you can tone down the spiciness by de-seeding the chilli. You will need to cut open the chilli and take away all the seeds before you proceed to the grinding. However, do be careful not to touch the chilli seeds as it can be rather difficult to get rid of the chilli heat. So, it is advisable to use a glove before you proceed with the cutting.

This chilli sauce can be stored for at least half a year. But you have to make sure that every time you scoop out the chilli sauce, a clean dry spoon is used. Otherwise, the dirty spoon will introduce bacteria to the container and it will spoilt the chilli sauce.

IMG_2657


Preparing Base chilli from dry chillies

IMG_8348

At times, you may not be able to get hold of lots of fresh chillies or when chillies are not in the season and become costly, I have used the dried chillies to prepare the sauce. The preparation is slightly different but the taste is not the same as fresh chilli sauce. But the colour of the chilli sauce will be more attractive. For this version, I usually cooked with the chilli sauce so that it can be kept longer.

PicMonkey Collage1

  • Soak the chilli until soft (about 30 minutes). Use a food processor to blend the chilli until as fine as you can. For food processor, it is impossible to blend the chilli seeds, therefore, you will need to transfer the blended chilli to a blender. Add water just adequate to cover the chilli.

IMG_8326

  • Blend the chilli until the seeds are well blended. In a pot with a few tablespoon of cooking oil, stir fry the chilli sauce under medium heat.

IMG_8332

  • Stir fry until oil starts to sip out of the chilli paste, it become dry and aroma of cooked chilli starts to permeates the house. Add sugar and salt to taste. Off heat, transfer to sterilized container for cooling. Cool completely at room temperature before store in fridge.

IMG_8352

Notes:

  • Variations of this chilli sauce are many. However, I like my chilli sauce to be as basic as possible. In the process of stir frying, you can add in the following ingredients to make it become chilli sauce for nasi lemak or etc. : shallots, garlics, lemon grass, shrimp paste (belachan), buah keras. All this should be blend well and stir fry together with the base chilli sauce. If you want it to be even spicier, you can add some chilli padi .

IMG_2637

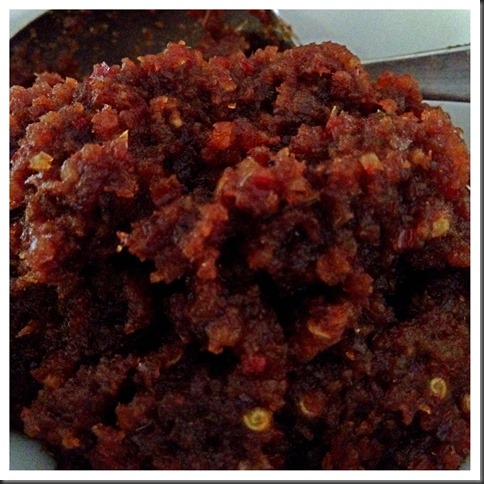
  • Uses of this chilli sauce: Can be used for stir frying kangkong or even petai as follow, cooking curry, as a dip (put belachan and calamansi), diluted with vinegar to go with Kuih Chap or oyster omelette etc.. Curry cooked with this chilli sauce will be beautifully coloured.
IMG_2667

  •  For dipping purposes: Just have a tablespoon of vinegar or lime juice, add additional salt or light soya sauce, shallot oil and it will be good as a dip for fried fish and etc.

IMG_8362

I have used the base chilli to stir fry with some petai. Put some cooking oil, sauté onions, belachan and baby shrimps until fragrance, add petai and followed by 2-3 tablespoons of this homemade chilli sauce, add additional seasonings and the sambal petai is ready.

IMG_8364


SECTION 3 – TAKING CARE OF YOUR HANDS   

It may be unfair for me to share with you how to make chilli sauce without sharing with you how to take care of you hand.

In my previous attempt to make chilli sauce,  I have a very bad experience whereby my hand was “burn” for one whole night by the chilli residue while I was washing the blender and food processor. That day, as I was out of time, I have forgot to wear a glove or “plastic bag” when I washed the food processor. To make the matter worse, I use the same sponge to clean the other dishes for dinner. Almost immediately, my whole palm was feeling extremely hot and when I accidentally scratched my face, my face got the hot feeling too. I have used many methods but none was able to stop the heat immediately. It really make me panic as I never have such an encounter before. As I am extremely tired that night, I just cut a stem of aloe vera and applied to the “injured part”, and that make my hand felt slightly better. I fell asleep when I was waiting for the heat to subside and when I woke up, the hand is getting normal again.

So, be careful with your hands. In the internet, there are many ways of reducing the heat arising from touching the chilli (or more specifically, capsaicin) and I have selected 5 ways for your consideration. Some methods can be applied if you accidentally ate some extremely hot chilli and the heat remained in your mouth:

  • Wash your hand using cold milk  – Milk have a protein called casein which is a natural “enemy” to capsaicin. The colder the milk, the better it is. This however, can be a wastage as you will constantly need to wash with new milks when the effect is less. Therefore, quite a lot of milks will be required. However, if you accidentally eat something spicy, this is a good way to reduce the chilli burn in your mouth. My kids can testify this, haha!!
  • Wash your hand with hard liquor or any other types of alcohol. Capsaicin do not dissolve in water but dissolve in alcohol. Drink some alcohol may help with the burning sensation in your mouth.
  • Rub your hand with salt and slightly some water. The salt will scrap away the capsaicin that is in your hand. Alternatively, sugar can also be used. Finish off with a rinse of milk and soap.
  • Wash your hand with oil. Capsaicin also dissolve in vegetable oil beside alcohol and casein.
  • Wash your hand with vinegar (or some form of acidic solutions) and soaps.

IMG_8350


CONCLUSIONS

  • Bird eye chilli is not the spiciest chilli as what most Malaysian and Singaporean thought. The spiciest chilli now on Guinness World of Records is in Trinidad called Trinidad Scorpion Moruga Blend. It is about 13 times spicier than the Chilli padi and 33 times spicier than the normal cayenne chilli that we used for our normal cooking.
  • Making chilli sauce is not difficult. It is advisable to make chilli sauce in its very basic form. Add relevant seasonings and condiments for different type of dishes. This will save your time in preparing different chilli for different dish.
  • There is no one fixed way of getting rids of chilli burn in your skin or your mouth. The above 5 methods are common solvents (milk, vinegar, alcohol, sugar, oil)  for the active ingredients in chilli, capsaicin. Dealing with chilli have to be careful, wear gloves if possible. Washing of utensils used in the preparation of chilli sauce have to be extra careful. Capsaicin vapour will rush out when water was flush to the equipment. You may start to cough or your tears may flow when capsaicin reach your eyes and throats. Therefore, washing have be careful using slow water avoid touching the capsaicin.
  • To reduce the spiciness of the chilli, de-seeding will help.

Lastly, thanks for reading this interesting cooking ingredient commonly found in Malaysia and Singapore.

IMG_8360

Hope you LIKE the post today. Cheers and have a nice day.

IMG_8354


  • For more recipes, you can refer to my RECIPE INDEX (updated as at 8 June 2014)  here and you can follow me at PINTEREST or visit the blog’s FACEBOOK PAGE to keep abreast of my future posts.  
IMG_8358


Simple, Tasty, Elegant …Chilled Ferrero Rocher Oreo Ice Cream Cheese Cake

IMG_57991 

INTRODUCTION

I like to simplify my recipe. When I cooked or when I baked, i usually think of bachelor who are kitchen phobia and who do not like to cook. With this in mind, I always modify my recipe to the extent that it is simplest possible.

This is a modified traditional recipe for cheese cake. Instead of using cream, ice-cream was used. No gelatine were used to keep the cheese cake in shape, Therefore this chilled cake is suitable for those that are out of time and wanted an equally delicious presentable cheesecake.


WHAT IS REQUIRED

IMG_5758

  • 350 g of any sweet or plain biscuits
  • You can use biscuits of any type and I have used 3 types of biscuits (inclusive of oreo biscuits) and some Ferrero Roche chocolates.  It is advisable to have some sweetened biscuits as it will make the base tastier and there is no need to add additional sugar. Search you kitchen for some biscuits that have been with you for a while and use these instead of throwing it away..smile.

IMG_5759

  • 2 blocks of 250 g cream cheese at room temperature
  • 150 grams of sweetened beverage creamer or condensed milk
  • 200 g of unsalted butter
  • 100 g of Oreo ice cream – melted at room temperature (can change to any flavour that you like)
  • 100 g of chocolate ice cream – melted at room temperature

IMG_5790

  • A 8” diameter spring-form tin – This is a special non stick baking tin with a spring on the side. It is not a must but if you have the tin, it will make your life much easier especially when you detach the cheesecake from the tin. Otherwise, try to use a baking tin whereby you can detach the bottom as in the third picture. If you wanted to cut your cheese cake into small finger sizes, you can use a detachable square tin, which is easier to cut and maximize your “recovery rates”.

STEPS OF PREPARATION


Getting Ready the biscuit crust

IMG_5761

  • Melt the butter either directly over small heat or using a microwave oven and heat for 1 minutes. Set aside for later use.
  • Grease a round 20cm (8 inch) spring-form tin with melted butter and line the base and side with baking paper.
  • IF YOU ARE USING A NON STICK SPRING-FORM BAKING TIN as in this illustration, there is no need to grease and line with baking paper. This illustration have by pass this step. Otherwise, you have to do the greasing and lining This step is important to ensure that when you open your “fragile” cheese cake, it would not break the size or base.
  • Finely crushed all the biscuits and chocolates using a food processor until very fine. If you do not have or do not wish to use a food processor, place them in a sealed plastic bag and crush them with something heavy like a rolling spin.
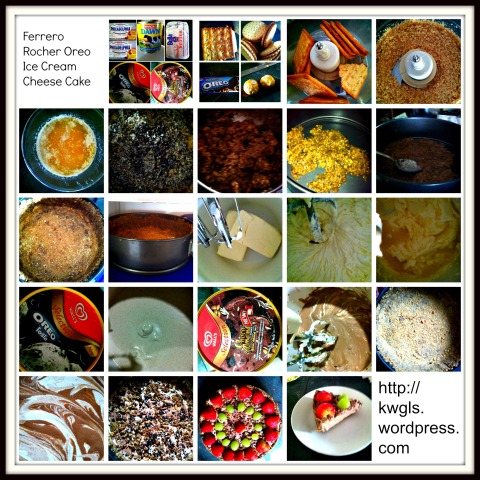
  • In the above illustration, the second picture is the plain crushed plain biscuits and the third picture is after additions of crushed  Oreo biscuits and Ferrero Rocher chocolates.

IMG_5791

  • Transfer to the bowl , add melted butter, stir until the biscuit crumbs are moist.
  • Press firmly over the base and up the side of the tin to create an even shell.
  • Refrigerate for about 20 minutes or until firm.
  • This biscuit crust is a rich and aromatic crust after the addition of Oreo biscuits and most important of all, Ferrero Rocher chocolates and it blends well with the cheesy fillings.

Making the fillings..

IMG_5765

  • Beat the softened cream cheese in a bowl for about 3 minutes, or until smooth.
  • Add in the condensed milk and continued to beat for another 1 minutes or until smooth.

IMG_5793

  • Separate the beaten cream cheese into two portions. Leave one portion in the mixing bowl.
  • Add the melted Oreo ice cream to the portion in the mixing bowl, beat for another one minute or until smooth. Set aside for later use.

IMG_5794

  • Place the other portion of beaten cream cheese in the bowl.
  • Add the melted chocolate ice cream, beat for one minutes or until smooth and the color is consistent. You have to scope up the cream cheese stick to the bottom of the mixing bowl and ensure there were no cream cheese left in mixing bowl.

IMG_5795

  • Pour both portions into the tin and dust with some crushed Ferrero Rocher and Oreo biscuit.
  • Chilled overnight decorate with fruits or extra cream.
  • Best serve directly from the fridge.

IMG_5796


VARIATIONS

There are many variations to this recipe. Do consider the following variations to suit your own taste buds. This recipe had used chocolate based flavour putting together Ferrero Rocher and Oreo Biscuit. However, you can always use other flavour like strawberry ice cream with strawberry flavoured biscuits, coconut ice cream with plain biscuit based (added shredded coconuts), Mocha ice cream with coffee flavoured biscuits etc. … Or you can just used plain biscuits using vanilla ice creams.

As this is an ice cream based cheesecake, therefore, the texture will be slightly soft but very creamy. If you like a firmer texture like the type that you seen in the pastry shops, you can add some gelatine to the batter.

To add gelatine, put about 3 tablespoons of plain water/lemon juice/orange juice, sprinkle some gelatine powder in an even layer over the surface and leave to go spongy. Bring a large pan filled with water to the boil, then remove from heat. Carefully lower the gelatine bowl into the water (at least halfway up the side of the bowl) then stir until the gelatine has dissolved. When the cream cheese batter is ready, fold in these melted gelatine to the mixture.


CONCLUSONS

  • This is a chilled cheesecake and no baking is required.
  • The replacement of normal cream in the making of cheesecake with ice creams make the cheese cake more aromatic.
  • It is a fusion of normal ice cream cake and traditional cheesecake that provides a cheesy yet creamy taste.
  • The recipe is fully flexible and you can easily tailor to the type of flavor that you preferred.
  • At the right temperature, it is very easy for you cut into your desired size. It is good to serve as a small house gathering snack.

Hope you like it and make a step towards making the cake. It is nothing difficult to make. Kitchen phobia bachelors, make this cake to surprise your loved ones.  Cheers

IMG_5798

PicMonkey Collage11

What I cooked today (家常便饭系列)- 27-6-2013

IMG_5662

First of all, I would like to apologize to all readers concerning about this series. As my kids was on holidays until yesterday, both my wife  usually do not cook and even if we cooked, the dish will be extremely simple. The rationale of home cooking is for my 2 kids aged 7 and 9. It is a challenge for me to make them love home cooked food and provide them foods with adequate nutrition. As long as the kids were with me, this series shall continue.

White rice served with:

1. Sweet and sour homemade fishballs 酸甜手工鱼球
2. Tower gourd fried with glass noodles 白莆炒粉丝
3. Fried chicken thigh 炸鸡腿
4. Cabbage beancurd skin pork rib soup 包菜豆皮排骨汤
5. Braised chicken breast and potato with terriyaki sauce 日式土豆焖鸡胸

Only when I compiled  the photo, I noted that the color of the pictures are rather monotonous. Compared to other days, you will note that i did not have any green leafy vegetable that make the dish not colourful. I have not start my marketing as yet and I intend to cook all the left over “stock” in my fridge and cooking shelf and start the cycle again. So all the things I cooked are items that can keep for a relatively long time such as cabbage, potatoes, tower gourd…

The dish today are rather common, all have ever cooked last month. I have deep fried chicken thigh and fish balls today. Deep frying is not a common method in our cooking, however, when there is a dish that involved deep frying, I will also take this opportunity to cook another other deep frying dish as well. The main reason is to save the time of heating up the oil.

Today’s fish ball is hand made from Batang fish. The fish had been with me for quite a while, I have decided to debone the fish meat and make it into fish balls.

Lastly, thanks of reading and you will want to see the individual picture of each dish, you can go to my Pinterest website here.  Over there, you will see all dishes i cooked categorized into meat, vegetable, tofu, meat and etc

Need A Drink To Repair Your Vocal Cord? Hawthorn Ume Is The Tea For You!

IMG_53351

Are you talking continuously over a period of time? Are you concerned about your cholesterol level? Do you feel greasy after a meal? Do you need something to quench your thirst after shopping? Are you looking for some weight reduction aids?  Is your family concerned about your hypertension? Well besides Rosella Tea in my earlier post, this HAWTHORN UME TEA the right drink for you!


UNDERSTANDING UME  (WU MEI used interchangeably)

To Chinese, maybe the English name of this tea sound so alien to you. Hawthorn sounds so westernized and yet Ume sounds so Japanese. However, if translated into Chinese, it is just the well known Sanzha Wu Mei Cha (“山楂乌梅茶“)which was usually served in Chinese restaurants.

The main ingredient today is Prunus Mume or sour plum and to complement the taste, hawthorn was added since both fruits have some common medicinal values.

Prunus Mume is the national flower of Taiwan and you can learn more about Prunus Mume  from my post for HERE. In Japanese it is called Ume.  Its smoked version is called the Wu Mei and shall be used interchangeably with Ume.

IMG_5341

For those readers in South East Asian Countries, we may not be familiar with Wu Mei in its raw form but hopefully this picture compilation will give you a better understanding.  The first and second pictures are the prunus mume tree and its flowers. The third picture showed the fruits that are commonly available in the supermarket. After the fruit is dried, it become the Suan Mei(酸梅) and if smoked, it becomes Wu Mei (乌梅).

Accordingly to Wikipedia, Prunus Mume’s nutritional benefits are as follows:

Prunus mume is a common fruit in Asia and used in traditional Chinese medicine. It has long been used as a traditional drug and healthy food in East Asian countries. A recent study has indicated that Prunus mume extract is a potential candidate for developing an oral antimicrobial agent to control or prevent dental diseases associated with several oral pathogenic bacteria.Recent studies have also shown that Prunus mume extract may inhibit Helicobacter pylori, associated with gastritis and gastric ulcers.Experiments on rats suggest that P. mume extract administered during endurance exercise training may enhance the oxidative capacity of exercising skeletal muscle, and may induce the muscle to prefer fatty acids for its fuel use rather than amino acids or carbohydrates, thus assisting endurance

(Source: http://en.wikipedia.org/wiki/Prunus_mume)

For my readers who are Chinese speaking, I have specifically included this excerpt. Note that the Chinese and English versions are not the same as they are from the different source.

乌梅是青梅经过加工后的中药材之一,其性温,味酸涩,有生津、止渴、敛肺、涩肠安蛔虫功效,可治疗肺虚久咳,口干烦渴,痢疾,慢性腹泻,胆道蛔虫等病症。五月中旬,当梅果约八成熟时(果色由青绿转青黄色)即可采摘,将采摘的青梅按大、小分开,均匀地分别放入备好的焙炕中,用木炭作燃料,先以60℃左右的温度烘烤1小时,再以50℃左右的微火烘烤24小时,然后取出并小心翻动,以不翻破果皮为妥。放置一天后再置于炕中仍以50℃左右的微火烘烤24小时,直至梅果肉起皱缩,呈棕褐色为止。要使乌梅成品乌黑,可将已烘干的乌梅堆放3-5天,颜色就会逐渐转黑,也可在火中加入少量油松柴,使烘烤产生的黑烟起到熏黑作用。值得注意的是,当用炉火焙烤时,不宜用煤作燃料,以免燃烧过程中产生的有害气体污染产品。

(Source:http://baike.baidu.com/view/143367.htm)

IMG_50111


UNDERSTANDING HAWTHORN

IMG_5347

Hawthorn in Chinese is called Sanzha (山楂). It is a shrub prevailing in the northern hemisphere‘s temperate regions. The fruits are bright red and Chinese makes it into a snack called tanghulu (糖葫芦) and a type of candy that was exported to South East Asian countries called Shan Za Candy or (山楂饼)

Hawthorn is a type of plant used in traditional herbalism. It is believed to be useful for treating cardiac insufficiency. The plant parts used medicinally are usually sprigs with both leaves and flowers, or alternatively the fruit. Several species of hawthorn have both traditional and modern medicinal uses. It is a good source of antioxidant phytochemicals,especially extracts of hawthorn leaves with flowers.


UME TEA DEFINED

According to Wikipedia:

In mainland China and Taiwan, suanmeitang (酸梅湯; sour plum juice) is made from smoked plums, called wumei (烏梅). The plum juice is extracted by boiling smoked plums in water and sweetened with sugar to make suanmeitang. It ranges from light pinkish-orange to purplish black in color and often has a smoky and slightly salty taste. It is traditionally flavored with sweet Osman thus flowers, and is enjoyed chilled, usually in summer. The juice produced in Japan and Korea, made from green plums, tastes sweet and tangy, and is considered a refreshing drink, also often enjoyed in the summer.


WHY THIS DRINK?

One of my sister in law is a teacher and need continuous hours of talking. She likes to prepare the Wu Mei tea to soothe her throats. In one of my trips back to Kuching, she taught me how to prepare the drink.

As it is a bit sour, I have modified the original recipe with the inclusion of licorice and dried hawthorns.

The benefits of drinking this tea are that hawthorn can help to prevent cardiovascular disease by expanding the blood vessels and improve coronary blood flows. It helps to lower the blood pressure and cholesterol. It also has the effect of stimulating the central nervous system and a good diuretic agent. Both hawthorn and Wu Mei  are full of antioxidants that have anti aging properties. In addition, hawthorn has the ability to control phlegm production, inhibit bacterial growth in our body and assist in the treatment of diarrhea.  Wu Mei, on the other hand,  have the ability to soothe the throat, improve appetite and remove fatigue.

CAUTION:

As hawthorn is a natural diuretic, people with kidney problems should only drink in moderations.

In addition, people who have too much stomach acidity or gastric problems such as acid refluxes should also be careful on the amount of intake. It is best to have the drink only after a meal.


WHAT IS REQUIRED

Ume (about 20 pieces), dried Hawthorns (about 30 pieces) white rock sugar or brown rock sugar or white granulated sugar (250g), licorice (3-5 long pieces but is optional), water.


PREPARATION STEPS

IMG_5349

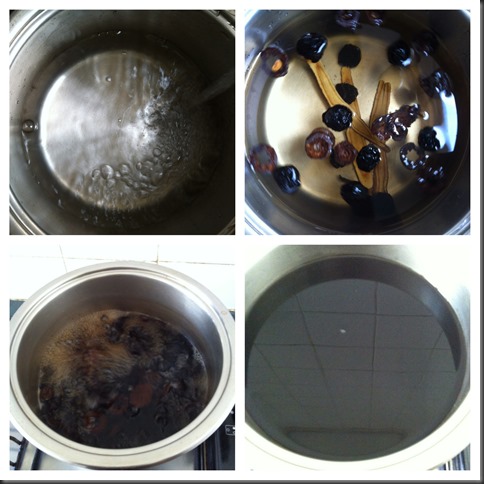
  • Wash the Wu Mei and dried hawthorn. Boil these together with the licorice (甘草)in a medium to big pot of water for about 20-30 minutes or until the both the Wu Mei and dried hawthorn is soft. Note that licorice is added to lower down the acidity of the drink. For those who are not familiar with this drink, you will find that it is extremely sour like freshly squeezed lime juice and adding some pieces of licorice will help to make the drinks more palatable.
  • Add in rock sugar and boiled for another 5 minutes. Off the heat and let the Wu Mei and hawthorn to soak in the tea for another 30 minutes,. Sieved and serve hot or cold. If you found that the tea is too concentrated, you can keep the concentrated juices and add in water when preparing the drink.
  • You can keep the cooked Wu Mei and de-flesh it, smashed and add to your drink to enhance the smoky fragrance. Alternatively, you can just keep these Wu Mei as snacks as its taste is very much like sour plum.

 IMG_53501

SERVING

  • This drink can be served hot or cold but as it is a thirst quencher, most people prefer to add ice to the drink.
  • I have made the excess drink into ice stick and I just loved to have a stick after dinner or lunch. It is very refreshing and it really helps to get rid of the greasiness in your mouth and aids in digestion. 

CONCLUSIONS

The benefits of Wu Mei are many. In an article titled “Fructus Pruni Mume (Wu Mei) – An Ongoing Fascination”, it was stated that Wu Mei had the following medicinal value in the treatment of :

  • Chronic Hepatitis B
  • Irritable Bowel Syndromes
  • Insomnia
  • Profuse Sweating
  • Psoriasis
  • Gestational diabetes
  • Laryngeal polyps
  • Pulmonary distention coughing & panting

Its ability to satiate thirsts make it an excellent choice of cold drinks in the tropics and it is good to your vocal cord if you need long continuous hours of talking. However, cautions have to be careful if you have gastrointestinal problems and kidney problems where consumptions have to be moderate and it is  better to consult a doctor prior to the long term consumptions of this drink.

Thanks for reading and if you are interested in having another home made drinks, you can refer to my drink series on Chrysanthemum Teas, Rhoeo Tricolor Teas and Rosella Teas.

Where is my cake? I Can’t See!–Famous Sarawak Midnight Cake (Cake Seri kaya Sarawak) revisited..

IMG_5216

INTRODUCTION

Sarawak  is one of the states in Malaysia located in the island of Borneo. It has many unique cuisines and one of the rather unique pastries is the Sarawak Midnight Cake as mentioned in this post and another one more famous cake is the Sarawak layered cake or Kek Lapis Sarawak that looks below.

  Sarawak Layered cake: pic courtesy of http://senai.olx.com.my/

This post is concerned about Sarawak Midnight Cake or more well known locally as Seri kaya Sarawak Cake (hereinafter referred to as “Seri kaya Sarawak). Note that kaya is also known as coconut jam made using coconut milk, eggs and sugars.

Seri kaya Sarawak has lots of names. It is synonymous with “Black Cake” (Kek hitam), “Sarawak Black Forest Cake”, “Belachan Cake” ( a type of shrimp paste) or the more Americanized name of “Sarawak Midnight Cake!” 

So from the name Seri kaya, Midnight Cake, Belachan Cake what can we say about the cake? As can be inferred from its names, the cake has Kaya (coconut egg jam) with a belachan shape (and color) and it’s DARK in color. Recipes are calling to use various coloring agents to darken the cake be it artificial coloring, chocolate molasses, Sarawak black palm sugars, chocolate paste and even unconventional dark soya sauce. 

The uniqueness of this cake is that it is a moist, rich and dense steamed cake. 


WHY THIS CAKE

While I was writing some thing about Sarawak Cuisines in the Authentic Sarawak Food and History Page, Seri kaya Sarawak is one of the cakes that I have mentioned. After writing the post, I really felt the urge to make the cake since I have not tasted this cake for more than 15 years at least. 

When I was in Kuching,Sarawak, during Chinese New Year, one relative used to give us this cake and during Hari Raya time (a Muslim festival whereby we do house visit), whenever I visited my Malay friends, I will always look out for this cake. I usually can’t stop eating the cake because it is just so yummy.. Looking at the picture of the cakes made me drooling and therefore I have decided to bake my own cake.

Food bloggers some time called this cake “secretive cake” and most of them do not willing to provide a recipe to the cake, They just bake the cake and show to the readers. Even if you can get hold of some recipes, the recipes that you  have collected can be very different for each recipe. Be it the ratio, types of ingredients used, preparation method, everyone will claimed theirs  were the best.

For me, too many recipes is equivalent to no recipe. I have decided to create my own cake based on my memoirs on the texture of the cake and aroma of the cake. I have analyzed various recipes and come out with this recipe that I want to share with readers today.

This is a rather simple recipe by passing a number of traditional methods of baking and skipped some unimportant ingredients usually used by other recipes. The output is at least 90%-95% similar to the cakes that I have tasted many years ago. (Note: this cake has a very distinct taste and it should be a moist, dense cake with fragrance of Horlicks (chocolate malt) and Milo).


WHAT YOU NEED

Most of the ingredients that was used are the breakfast beverages items.

IMG_5219

  • 125 g of Milo
  • 125 g of Ovaltine Malt Drinks – Most recipe called for Horlicks but I have substituted this with Ovaltine Malt drinks as the price is at least 50% cheaper but the taste is quite indifferent;
  • 125g of  condensed milk or sweetened creamer
  • 250g of Kaya (coconut egg jam)

IMG_5315

  • 125 gram of brown sugar
  • 250 gram of eggs (about 4-5)
  • 250 gram of unsalted butter – melted
  • 2.5 table spoons of chocolate emulco
  • 250 gram of plain flour (not in the picture above)


Do you see any trend in the measurements of the above recipe? The recipe can be summarized again in the following ratio.

Brown sugar+Condensed milk : Milo + Ovaltine :Plain Flour : Coconut Jam = 250g : 250g : 250g : 250g = 1  :   1   :  1  :   1

The picture below summary all the ingredients

IMG_5317


STEPS OF PREPARATION

These steps of preparation are rather unconventional. Conventional method will advise the use of creaming method (meaning beating of sugar and butter). The creaming step is mainly used if you want a fluffier and lighter cake.

However, as this cake is supposed to be moist and DENSE, therefore, I do not use the creaming method. I have used the mixer purely for mixing purposes. In all the steps, just ensure that the mixer is at low speed and as long as the ingredients are well mixed, just put another ingredient in. Well mixed basically means that the color are consistent. This mixing method will saves you a lot of time as compared to the creaming method.

If you do not have a mixer, you can mix it manually and it shouldn’t be very difficult as most ingredients are liquid and has lot of moisture content.

IMG_5318

  • In a mixing bowl, put the brown sugar, condensed milk and melted butter together. Beat at low to medium speed;  It will take the most 1-2 minutes and look like the batter in pic 3.
  • Add in the cracked eggs and continue beating at the same speed until well mixed.

IMG_5319

  • Add in the coconut jam (kaya) and continue to beat at same speed for 1 minutes.
  • Note that I have used the Nonya Kaya which is greenish in color. However, you can also use other types of kaya such as gula melaka kaya (dark brownish) or Hainanese kaya (orange to light brownish).
  • Add in the Milo and Ovaltine (chocolate malt and can use Horlicks as well) and continue to beat for another 1 minutes or until color consistency is reached.

IMG_5320

  • After adding Ovaltine and Milo, you will note that the color start to turn brownish. As Ovaltine and Milo will coagulate and takes a while to dissolve, you just have to ensure that there are no more lumps in the mixture.
  • Sieve the plain flour into the mixture and continue to mix until color consistency is reached.
  • Plain flour shall be used and not the cake flour or self raising flour and no baking powder or baking soda is needed. THIS IS A DENSE CAKE and therefore, you do not want your cakes to be too fluffy.

IMG_5321

  • After it is ready, add in 2 table spoons of chocolate emulco (alternative chocolate paste, black palm sugar, brown color agent) and beat until the there is no more lumps and color is consistent. It takes another 1-2 minutes.
  • If you use black palm sugar, there is no need to use brown sugar. Volume will be 150g black palm sugar.

IMG_5322

  • Get ready a 6 inch square tin, grease the sides and bottom, dust with wheat flour.
  • Greasing can be done with any fats such as cooking oil etc. I have used the wrapper for the butter to grease the sides. Alternatively, you can just use the left over melted butter in your bowl to grease the side. This is something not usually presented in the recipe books but I have purposely put it here to share with readers since it is a good practice to “conserve” world resources, joking.

IMG_5323

  • Get ready a steamer and bring the water to boil. As this cake is very dense, therefore, it need a few hours of steaming. That steaming process can be rather long reaching 2-3 hours and if it an 8 inch tin, may need 4-5 hours.
  • Pour your batter into the baking tin and cover with aluminum foil. This is to avoid the condensation of water vapors dripping into the cake batter making it hard to get cooked.
  • When the water boiled, put in the cake tin and steaming over medium to high heat for 3-4 hours.
  • Note that how long it takes to cook will depend on lots of factors including the size of baking tins you used (a big baking tin with a shallower batter will be faster to get cooked than a smaller tin), the environment (in an enclosed environment it will be easier to get cooked than in a well ventilated area).
  • As a guideline, after 2 hours of steaming, you can slightly lift up the aluminum foil and see if the batter was set. Set means when you push, the batter wouldn’t move. Usually, the middle part is the part that takes longer to cook.
  • Whatever you do for this process, you have to be careful to minimize the heat loss, otherwise it will take time to get enough heat for the cake to rise again and some may not be able to rise as the cake structure had been destroyed.
  • If there is not enough water, just boil some hot water and pour inside the steamer carefully. You may need to replenish the water 2-3 times.


IMG_5324

  • The cake is cooked when it looks like the first picture. To counter ensure that it is cooked, use some stick to pierce down the batter and see if anything sticky in your stick. If none, the cake is ready.
  • Let it rest for say 30 minutes and transfer to your cake rake if you want. Note that when it is hot, the cake structure can be very fragile, cooling will gel backed the structure . So, any handling have to be done gently.
  • The 1st picture showed the cake just come out from the steamer. After about 1.5 hour of resting, I dusted with some Ovaltine and Milo (optional) powder. You can see from the cross section of the cake that it is very moist and dense.
  • Cutting the cakes into the desired size, serve with or without sauce.

Serving Suggestions

IMG_5329

  • Picture one is serving without any sauce.
  • Picture two to four is serving with evaporated milk and some dusted with Ovaltine and Milo powder. Fresh milk can also be used.
  • In picture four, I have decided to turn it into some form of wet dessert soaking in milk. As the texture is very soft, you can actually turn it into any shape with it. Trust me, it wouldn’t compromise the original taste. The original taste is very strong and this will smoothen out the strong cocoa and chocolate malt flavor.

CONCLUSION

  • This is a super rich and dense cake. You can treat it as another form of chocolate mud cake or American midnight fudge cake. Taking a bite is resembling like having a scope of butter, coconut jam, chocolate malt, condense milk all at once which is extremely smooth and with the nice aromatic smell of breakfast beverages.
  • The origin of this cake is still unknown but it is unique that all the main ingredients are related to the breakfast items such as Milo, Horlicks, condensed milks and coconut jams used for toast. Could this be influenced by the British during the British colonization of Sarawak before 1945’s? Only coconut jam and black palm sugar is quite local and all other ingredients are most imported or originated from European countries. 
  • The Western version of fudge cake or midnight cake requires chocolates, using the creaming method and utilizing the oven for baking. As oven is a luxury in traditional Sarawak, steaming method was used instead. Imported chocolate will cost a bomb and therefore these were substituted by breakfast beverages. Does it sound logical? Otherwise, how can an isolated island with so much diverse culture can come out with such a rich and nice cake like the desserts in Western countries? Let me know your opinion.
  • Like Sarawak Laksa paste, too secretive a recipe and too many versions of a recipe will equivalent to no recipe. I have simplified the ratio and the preparation method with no compromise in the texture and taste of my cakes.

I hoped for those who never try this cake before, please try to make one and you will never regret it. Hope that you enjoy the  post and happy reading. Cheers


Blanching Vegetables in Chinese Cooking – 利用汆烫准备可口的中式的”菜”肴


IMG_5073

INTRODUCTION

Traditional Chinese cooking don’t usually use the blanching method for cooking its vegetables. Usually, they stir fried with oil in a hot wok or frying pan. 

My mum will usually take out a frying pan, put in some oil, stir fry the garlic or shallots until golden brown, throw in the vegetables, add seasonings, stir fried for another 1-2 minutes and scope in the plate for serving. That is rather traditional and applicable to almost all types of vegetables. The disadvantages of using oil for stir flying vegetables are that the vegetable’s will lose its color and some vitamins will lose in this process.

In most restaurants, realizing that the color of the vegetables will turn less appealing and that the texture will be compromised, the chef will usually blanched the vegetable before stir frying the vegetables. This will  cut short the stir frying time so as to preserve its greenish appearance and some of the vitamins.

In this post, I will share with you the various combinations that you can prepare your vegetable dish using the water blanching method without stir frying but the dishes are equally tasty. 


WHY THIS POST

My son, aged 7 have a slightly high body mass index and was requested by the school authority to participate in the weight reduction program. Knowing that the school is concerning about his weight issue, I have decided to alter my methods of cooking and one of which is by blanching the vegetables instead of stir frying the vegetables. The first meal (blanched kailan with oyster sauce)  was well received by my family members and the whole plate of vegetables were being snatched by my son, daughter and wife within 5 minutes of putting in the table. Seeing such a good response from the family members, I have decided to explore more vegetables and with as many types of dressing as possible..In the next 9 meals that I prepared, I have created different dressings with different vegetables and to my delight, they don’t really notice the difference and my son have requested for more vegetables..


BLANCHING METHOD DEFINED..

According to http://chinesefood.about.com,

“Blanching is a process whereby the food is briefly plunged in boiling water for a moment. Sometimes it is then immediately transferred to ice water to stop the cooking process. This technique is commonly used with Chinese vegetables prior to stir-frying. The goal is to bring out the color and flavor of the vegetable without overcooking.source: (http://chinesefood.about.com/od/glossary/g/blanch.htm)”


BLANCHING OF CHRYSANTHEMUM GREEN ILLUSTRATED

In this post, I will share with readers one vegetable dish that I have prepared for my dinner today – Chrysanthemum green with Chinese black vinegar dressing (春菊拌浙醋)。Measurements were intentionally omitted as it is just vegetables plus seasonings all of which can be adjusted to individual tastes.

Chrysanthemum green is a type of vegetables that are quite common in Korean, Japanese , Taiwanese and Cantonese Cuisines. It can be eaten raw but the stems can be slightly tough. It can be stir fried, blanched or cooked in soup or appeared as a garnish in some Chinese dishes like Taiwanese oyster pancake.


WHAT YOU NEED

IMG_5076

  • Some chrysanthemum greens (you can chopped the stems into smaller pieces)
  • Some cherry tomatoes
  • Some sesame seeds, fried onion for garnishing
  • Some light soya sauce, black vinegar or lime juice, sesame oils (onion oil), salt, sugar


STEPS OF PREPARATION

IMG_5079

  • Wash the vegetables and set aside. As this preparation only deal with blanching, you may wish to soak the vegetables in the water for a longer while to clear all unseen particles and chemicals..
  • Take out a container or salad bowl and put in your condiments. In the above picture, I have included some shredded chili, fried onions, Chinese black vinegar, salt, pepper and sesame oil.
  • In a frying pan, put in some water. Add in pinches of salt (as you can see the white patch next to the red color patch) and a few drops of onion oil (cooking oil also can be used). This feel drop of oils are very important to preserve the color of your blanched vegetables and to keep the juices in the vegetables.
  • When the water is boiling, throw in the chrysanthemum green and let it boiled for about 3 minutes.


IMG_5080

  • Add in the cherry tomatoes and blanched for another 1-2 minutes.
  • Sieve the blanched vegetables and transfer to the salad bowl or the mixing container. Note that I have by passed the step of blanching the vegetable in some ice water as the dish will be served immediately after it is prepared. However, if you prefer, you can dip the blanched vegetable in ice water of about 1 minutes to preserve its crunchiness (not necessary depending on type of vegetables) and color.
  • Stir until well mix and transfer to another plate. Sprinkle with sesame seed and best served hot with rice.

The dish is simple and as chrysanthemum greens are a bit tough, you can blanch it longer and cut into smaller pieces. This dish is full of vitamins and the Chinese black vinegar dressing is just like the French dressing in French cuisines. Of course there are oriental elements such as sesame oil and black vinegar that make it taste like Chinese cuisines. Should I have lime (kalamansi with me), I will use it instead of black vinegar. It is fully flexible be it type of dressings, toppings and vegetables.


VARIATIONS

For the sake of oil less cooking, there are many Chinese vegetable dishes which can use the blanching method instead of traditional stir frying method.

Blanching method of Chinese vegetable dishes like the Western cuisine’s salad preparation is a matter of finding the right combination of vegetables and dressings. Chinese are less prone to eating the vegetables freshly picked (raw), therefore in order to promote healthier eating habitat with minimal amount of fats possible, an intermediary step is to blanch the vegetables .

The following table shows different types of Chinese vegetables that I have ever cooked using the blanching method and different dressings used. Both the list of vegetables and dressings are endless and are open to all types of combinations depending on the chef’s creativities.

Vegetables Meat  (protein)
Kailan
Minced pork
Pak Choy Meat slices/strips
Choy Sim Chicken breast
Broccoli Prawns
White Stem Pak Choy Shredded chickens
Chrysanthemum Greens Pork /chicken floss
Capsicum Baby Shrimps
Celery

Anchovies
Tomatoes Egg omelet strips
etc., etc., etc.  (endless) etc., etc., etc.  (endless)
   
Something to bite Seasonings
Sesame seeds Black Vinegar
crunched nuts Lime/kalamansi juice
Japanese rice seasoning sprinkle Mayonnaise+Tomato sauce (‘000 island)
Macadamia Salt
Chopped chili Sugar
Chopped fresh garlic MSG (if you preferred)
Fried garlics or shallots Onion Oil
Pine seeds Pepper
Dry mushrooms stripes Belachan (shrimp paste)
Shredded century eggs Oyster sauce
etc., etc., etc.  (endless) etc., etc., etc.  (endless)

SAMPLE DISHES

The pictures below are some of the dishes that I have prepared for my family as detailed in “what I have cooked today series”. The preparation are basically the same, blanching and mixed. You can also see more in the linked – PINTEREST BOARD-VEGETABLE DISHES HERE

Blanched mix vegetables with prawns (杂菜虾球)


Blanched Baby Kailan with Oyster Sauce (

耗油小芥兰)

Blanched White Stem Pak Choy with anchovies (

小银鱼白菜)

Blanched Broccoli with Minced Pork (

肉碎西兰花)


Blanch Tri-color Capsicum with Chicken Breast (

三色柿子椒拌鸡柳)

Blanched baby Pak Choy with minced pork (

肉碎拌小奶白)

Pak Choi with Oyster Sauce (

耗油上海青)

Blanched Chye Sim with meat floss (菜心拌肉松)


CONCLUSIONS

In traditional Chinese cooking, blanching of vegetables is generally not common. The exposure of Western Cuisines have made me come out with this fusion which I believed will be acceptable by both Asians and non-Asians. Without stir frying, the vegetables can be equally tasty.

While this resembles salad in western cuisines’ term but it have elements of oriental cooking due to the type of condiments used. It will definitely healthier because fats intake will be limited and more vitamins will be retain in the vegetable resulting from shorter cooking time. It will also eliminate the fear of eating raw vegetables which is supposed to be even more nutritious.

My favorite dressing is a type of dip for my fried fish (light soya sauce + chili + lime juice + shredded garlics + bit of sugar). For me , it blends equally well when I used it for my blanched vegetables. I like to prepare this if I want to lose weight and of course this is an acquired taste. You can invent your own dressing and you will be surprised that how well received blanched vegetables are if the dressings are right!

Why don’t you try my favorite dressing and let me know what you think?

Bachelor’s Tomyam Noodles–Quick And Nice…

IMG_4987

INTRODUCTION

I am struggling whether I should post this simple noodle preparation. It is just that simple and up to your own creativities. I am thinking, will putting up this post insult my reader’s intelligence? Will it qualify as a professional blog post? Is this consider as an recipe? Well, after struggling for 10 minutes, I have decided to post this dish to gauge what is my reader’s reactions. Due to this impromptu decision, therefore, unlike other post, some pictures were not available.

This is a super fast dish that I cooked for myself today.  From cooking to eating to cleaning, it took me less than half an hour.  It is ideal for those who just want a simple, quick and nutritious meal.


WHY THIS DISH

I am alone by myself at home and I don’t feel like cooking for myself. Usually,  I would just eat the breakfast leftover items for lunch. But I have been eating breakfasts as lunches for the last 3 days and my body tells me that I need something that don’t taste like “breakfast”.

Cooking a dish for myself is never a problem, I just search my kitchen cabinet and my refrigerator and see what I have at home. As my kids were away on holiday and we will not be cooking these few days, therefore, my perishable stocks were very limited and this is what I found, a packet of Tom yam instant noodles.

IMG_4991 - Copy

As I have never fancy any instant noodles, this packet of instant noodles is not attractive to me at all especially if it is plain (meaning water plus instant noodles). But suddenly, it come across my mind and asked myself, why not cook myself some Tom Yam noodles. So I take out a pot and cooked my superfast Tom Yam noodles.


WHAT YOU NEED

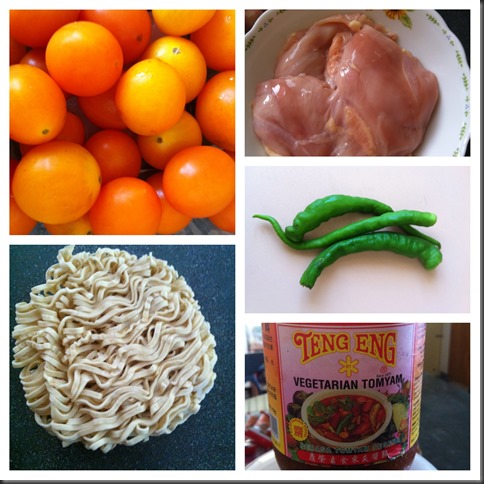
IMG_4990

As far as I am concerned, there is nothing that you can’t put it. I usually cooked based on what I have especially the side vegetables. What I used this time:

  • One pieces or dry egg noodles – this is exactly the same as your instant noodles except it is slightly firmer;
  • Some cherry tomatoes – supposingly to be eaten as fruits but since I have some in the fridge, I just dump it in.
  • Some chicken breast meat (optional) cut into small chunks – I had this in the fridge for quite a while and since I will not be cooking for the these 2 weeks, I have to “get rid” of it. But frankly speaking, it taste better with some meaty flavor;
  • Few pieces of chili (optional) – These chili were specially flown from China given by one of my guest who stay in Guangxi China. It is supposingly very spicy but for me, it is slightly more spicy than the red chili but not as spicy as chili padi.
  • Tom Yam paste – It is good to keep some ready made tom yam paste at home for making quick soups, fried noodles and etc. My wife have bought this vegetarian tom yam paste which I don’t think there is much differences. The only difference in ingredients that I can think off is the shallots and garlics since Buddhist vegetarian were not allowed to consume any shallots and garlics.

STEPS OF PERPARTION

I have no picture to show as this post was rather impromptu and only decided half way when I was cooking. In fact, it is such a simple dish that there are only 2-3 steps and further elaboration will “insult” my reader’s intelligence. If you really can’t understand what I am trying to say, just imagine you are cooking some instant noodles in a pot.

  • Take out a pot and pour in some plain water. Put a few table spoon of tom yam paste (depending on taste) and bring to boil. Throw in other ingredients in these orders – meat, chili, tomato, egg noodles. 

  • As I am using chicken breast and cut into small chunks, it is rather quick to cook. The smaller your meat is, the easier it is to cook! You can use some sweet potato flour or corn flour to slightly cover your meat before you put them in the pot. The role of these flours is to keep the juice inside the meat and also make its texture smoother. For me, as I want it to be quick, I have not perform this step, I just put my meat in without adding any corn flour.
  • Boil for 1-2 minutes until your noodles have soften.
  • I prefer to rest it for a while until the noodles absorbed all the soup and this will make it tastier and softer.
  • Variations – There are many variations that you can have. You may want to add some eggs. or sausages. some cabbage, red carrots, celery, etc. and the lists are endless. These are all up to your imaginations and creativities.

FINAL OUTPUT

IMG_4988

In the picture, does it look appetizing to you?

To make it look better you can consider using mushrooms for black color, red chili for red color, baby corns for yellow color and carrot for orange color.

Compare to the 1st picture and the last picture, you can see that noodles is softer as it had absorbed the gravy.

Taste wise, if you want it more sour, you can squeeze some lime juice. For me that is just nice. It is essentially tom yam cooked with chicken stock and if you like tom yam, this is a suitable meal for you!


CONCLUSIONS

  • Not all foods need to be elaborately prepared before it is considered as tasty. Simple meal like this is ideal for those who are kitchen phobia or short of time to prepare a nutritious meal;
  • It is nutritious because the ingredients that were used are simple (like my post on Nasi Aruk here) but packed with proteins and vitamins. Tom yam paste itself is full of herbs and spices that is beneficial to the body.
  • It is healthier because no oil and further seasonings were used. IT IS DEFINITELY HEALTHIER THAN INSTANT NOODLE AS NO MSG WAS USED。When you ate plain instant noodles, most people will craved for stronger flavor as the taste is very monotonous and you need seasonings to make your palate “happy”. With slight additions of meat and vegetables, your attention will gear towards your meats and vegetables. The soups will have some meaty flavor and you don’t feel the need to add any more seasonings. Is it not healthier?
  • It is fast to prepare, full flexibility and you can substitute any ingredients with what you have at home.

Because it is so flexible, it essentially means there is no recipe. So, do you like this type of simple dish or you think reading my post is wasting your precious time?

I treasure your feedback and let me know how you feel about it.

Happy reading and cheers.


I have recently open a Facebook community page ‘AUTHENTIC SARAWAK FOOD AND HISTORY” and I hoped you can support the page by visiting the page. If you find the page benefits you in some way, please give it a “LIKE”.

The page is intended to become a center of collection of unique Sarawak Cuisines. For those who don’t know where is Sarawak, Sarawak is one of states belong to Malaysia and in the Island of Borneo. It is famous of its eco-tourism and multi racial society. Its unique cuisine are cuisines like Sarawak Laksa, Kolo mee and scarce vegetables such as jungle fern shoot, hairy eggplant etc. PLEASE COME  AND UNDERSTAND MORE ABOUT SARAWAK CUISINES HERE.


IMG_4708     IMG_3838   


IMG_4988

Thousand apologies.  I have to put this picture here due to technical error. Otherwise it will mess up my Tumblr. accounts posting and my Facebook posting.

I May be Simple and Common But I Am Breathlessly Beautiful…(PART 2)

A 3 hour trips to the Garden by the Bay Singapore uncover many beautiful yet common flowers.

Part I of this post is the common roadside flowers whereas Part II of the post the photo taken in a section of the garden where almost flowers nearby are white in color.


PART 2 – THE WHITE “KNIGHTS”


IMG_4897

“Be like the flower, turn your faces to the sun.” – Kahlil Gibran


 IMG_4898

“Where flowers bloom so does hope” – Lady Bird Johnson


IMG_4899

“Flowers are restful to look at. They have neither emotions nor conflicts.” – Sigmund Freud


IMG_4900

Friends are flowers in the garden of life” – Proverb


IMG_4901

“The flower which is single need not envy the thorns that are numerous.” – Rabindranath Tagore


IMG_4902

“Just living is not enough. One mus have sunshine freedom, and a little flower”


IMG_4903

“The flower that smells the sweetest is shy and lowly” – William Wordsworth


Thanks for appreciating these simple monotone flower with me ! I just love the way they are. White is simple, white is purity and definitely white is nobly. Cheers.

I May be Simple and Common But I Am Breathlessly Beautiful…(PART I)

A 3 hour trips to the Garden by the Bay Singapore uncover many beautiful yet common flowers.

Part I of this post is the common roadside flowers whereas Part II of the post the photo taken in a section of the garden where almost flowers nearby are white in color.


PART 1 – COMMONER’S FLOWER  

IMG_4827

I may be common, but I am not ugly.

IMG_4821

I choose to be hairy but you chose to be neat…

IMG_4803

We chose to group together but you chose to keep a distance away

 IMG_4780

I am simple, I am elegant…… I am common……. but I am happy..

IMG_4788          

We may be small…. but we chose to work as a group…… 

IMG_4793

You chose red, I chose yellow and he chose purple….and he ….and he … and he chose all colors..

IMG_4798             

I have my shape, you have your color. We chose what we want.

 IMG_4814 

We want to be adored, we want to be loved. and most important of all, we want to get our babies born.

IMG_4808

Be it purple, be it white, be it red and be in pink, we may be common but we are beautiful. 

WE ARE SIMPLE YET ELEGANT..